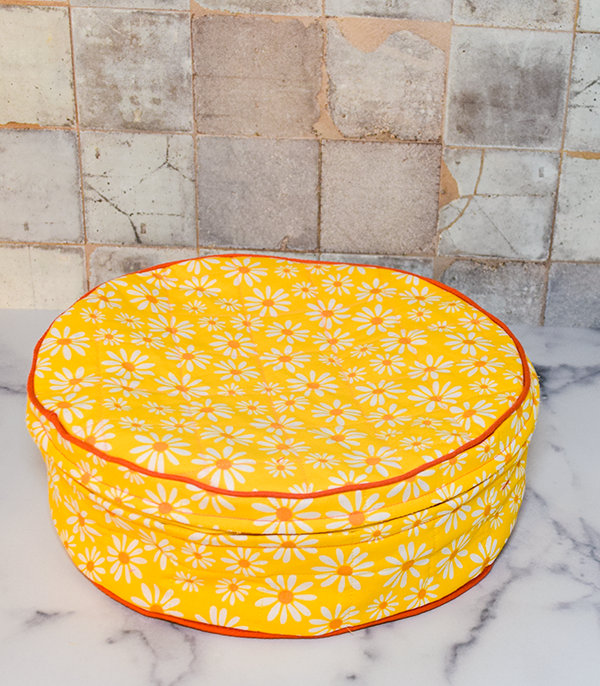
I have a lot of China that I have accumulated over the years. They are stored in thin plastic china holders but they are falling apart. I decided that I needed a better way to store my china so I created my own version of the holders I was using. These quilted china holders are pretty easy to make even though they have a zipper. They can be made any size that you like depending on your own plates and bowls. I hope you enjoy this sewing project. If you would like more home decor projects head over to my home decor page.
Note: This post contains affiliate links that if you click on them and make a purchase I will receive a small commission at no extra cost to you. As an Amazon Associate I earn from qualifying purchases.
What you will Need: How to Make Quilted China Holders
- Outer fabric — the amount depends on how many and the size you are making
- Quilt batting
- Zipper — I used continuous zippers because my holders were different sizes
- Contrast fabric for piping or premade piping
- Craft or pattern paper
- Sewing machine
- Basic sewing supplies
Step 1: Measure the Fabrics
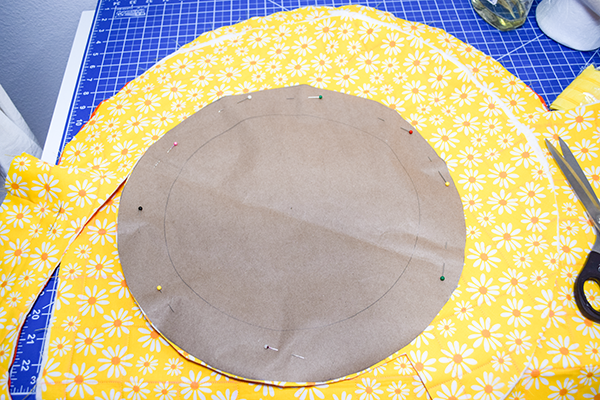
The best way to measure the fabrics for this project is to draw the circumference of the plate that you wish to store and add 1 inch. My plates come in three sizes and I have bowls as well. Next you will need the sides of the holder. Draw a rectangle that is 2 inches longer than the final circumference of the plates and 2 1/2″ higher than all the plates stacked. Finally add 2 inches to all of the measurements to accommodate the quilting. Use these pattern pieces for cutting after quilting.

Trace the plate
Step 2: Cut the Fabrics
Cut four pieces for the top and bottom, two pieces for the sides. Cut batting pieces for the top, bottom and side that are 3 inches larger than each.

Cut the fabrics
Step 3: Sandwich the pieces
Place a piece of quilt batting between the top pieces, the bottom pieces and the side.

Sandwich the fabrics
Step 4: Quilt the Sandwiches
I drew lines in one direction on each of the quilt sandwiches and then drew lines in the opposite direction to create a crosshatch effect. Stitch on those lines to quilt each piece.

Mark the grid

Quilt the fabrics
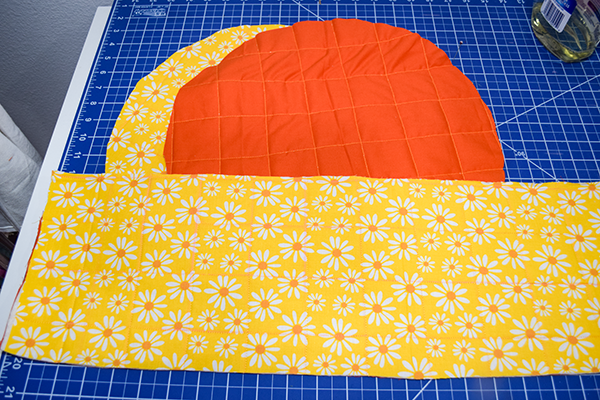
Step 5: Cut out the Pieces
Using the pattern pieces you created in step one cut the quilted pieces to size.
Step 6: Create the piping
You can use premade piping or create your own by wrapping cording with 1 1/2″ wide bias binding strips that are 4 inches longer than the circumference of the plate times two. I actually used premade piping for my project.
Step 7: Stitch the PipinG
Stitch the piping to the top and bottom quilted circles. When the piping ends meet cut out a bit of the cording and fold under the raw edges on one side. Insert the other end into the folded end to create a smooth finish.

Add the piping

Fold under the piping ends
Step 8: create the Zipper placket
First cut a zipper that measures 2 inches longer than half of the circumference. Next, cut a 2 inch strip from the side piece. Place the side and the piece you just cut right sides together and pin or clip. Measure 3 inches from one short edge and make a mark. Make a second mark where the other end of the zipper stops. Stitch the two pieces together using 1/2″ seam allowance until you reach the first mark. Once you meet the first mark change the stitch length on your machine to the longest setting or basting stitch. Continue stitching to the second mark. Once you reach the second mark return the stitch length to your standard length and finish stitching to the end.

Cut the zipper

Cut 2″ from the long edge of the side piece
Step 9: Add the Zipper
Press the entire seam open. Hand baste the zipper to the piece you just stitched where the basting stitches are located. Remove the machine basting and stay stitch the zipper.


Baste the zipper

Remove the basting stitches
Step 10: Stitch the Holder
With right sides together stitch the side piece at the short ends. Clip the long raw edges without clipping through the stitching. Stitch the bottom to the side close to the piping. Make sure the zipper is open then repeat for the top. Once the top and bottom have been added you are finished with your quilted china holder.

Stitch the side short ends

Add the bottom

Stitched bottom
I hope you enjoyed this simple sewing project. For more sewing and crafting projects subscribe to our newsletter and receive access to our free Printable library.
If you would like video tutorials of some of Sew Very Crafty's most popular posts subscribe to our free YouTube channel here.