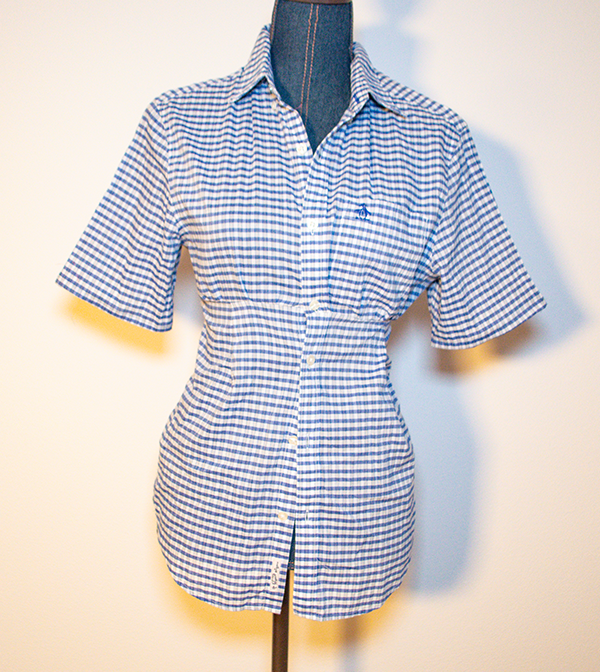
Once again I found this really cute up cycled top on YouTube. Cindy Lieu was the creator of this up cycled project. It was so simple I just had to share it with you. I had an extra men's shirt on hand and decided to use that but you can use one of your own shirts to create this project. Honestly, it is really simple and comes out so cute. I hope you like it.
What you will Need: How to Upcycle a Cute women's top
- 1 old women's blouse
- Pair of Sewing shears
- Standard sewing supplies
Step 1: Measure the Blouse
Measure from your shoulders to just under your bust. Transfer this measurement to the blouse and make a mark. Add a 1/2″ seam allowance and draw a line across the Blouse.

Step 2: Cut the Blouse
Cut the blouse through both layers along the line you just drew.

Step 3: Stitch a basting stitch
Using a hand stitch or a long basting stitch on your machine stitch all the way around the bottom of the top of the shirt.

Step 4: Create the Gathers
Pull the basting stitch to create gathers so that the top fits snuggly under the breast. You can do this while wearing the shirt for a better fit. Press the gathers and stitch across them with a straight stitch.

Step 5: Create the Darts
On the back of the blouse you will notice that there is a lot of excess fabric. To solve this issue you will be making two symmetrical Darts. To do this, put the blouse back on. Pull the back fabric together so that the blouse fits well. Pin the fabric together and remove the blouse. Measure the length of the excess fabric and divide that measurement by two. Create two darts.


Step 6: Add Darts to the Bottom
You will now add two pleats to the bottom of the bottom half. To do this, line up the side seams. You will notice the extra fabric. Create two darts the same way you did for the top. Make sure the darts on the bottom lineup with the darts on the top. You will now see that there is excess fabric on the sides of the bottom. Divide the excess fabric in half on each side and create another pair of darts to make sure that everything lines up.


Step 7: Stitch the top and bottom together
Place the top and bottom right sides together. Stitch them together using a 1/2″ seam allowance using a straight stitch. If your machine has an overlocking stitch sew it along the straight stitch to avoid fraying. You can use a zig zag stitch if you like.

Stitch 7: Shorten the sleeves
Decide how long you would like the sleeves to be. Add a half inch seam allowance to this length and cut the sleeves to that length. Double fold the raw edges to create a hem and stitch all the way around. Once the sleeves have been hemmed you are finished with the latest up cycled women's blouse.


I hope you enjoyed this simple blouse upcycle project. For more sewing and crafting projects subscribe to our free newsletter and receive access to our free Printables library.
Subscribe to our Free YouTube Channel!
Join our Sew Very Crafty Fans Facebook group
If you want to ask questions and share your projects join our Facebook group here. The community will help to achieve your sewing and crafting dreams.