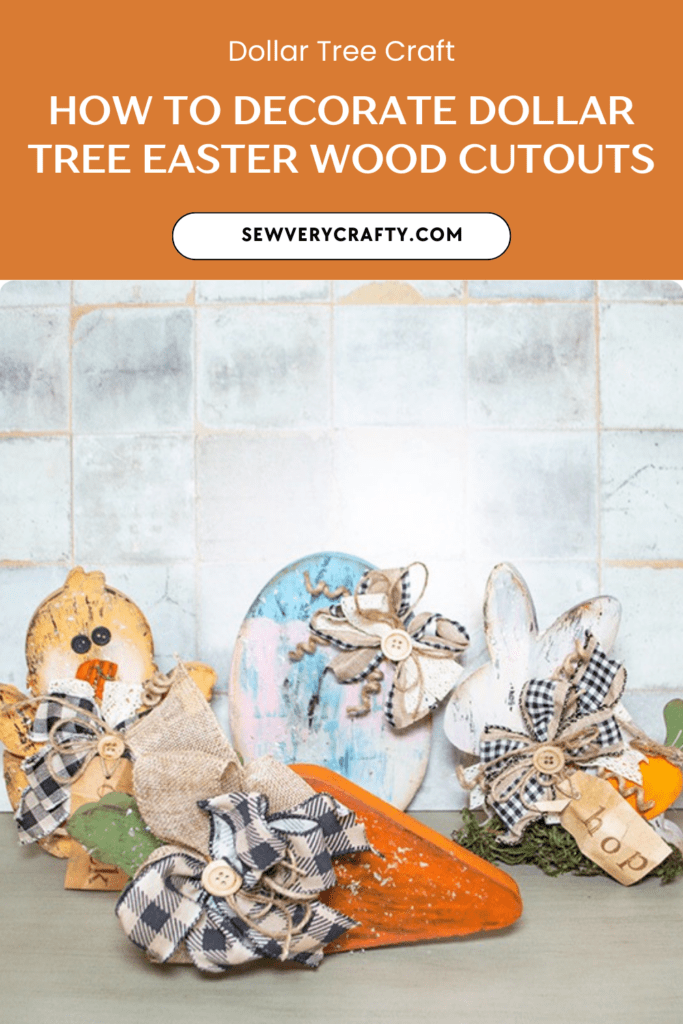
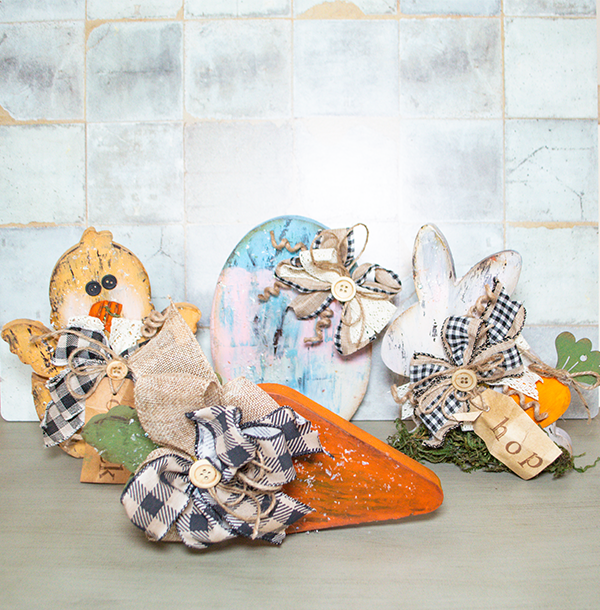
Dollar Tree usually has these Easter cutouts every year. This year I decided to decorate these cutouts in a shabby chic kind of look for added home decor. I got this idea from Little Jumbled Market on Facebook. These are a super simple craft project that came out really cute. I was really surprised how they came out and I hope you do too. If you would like more Dollar Tree Crafts head over to my Dollar Tree page. For more holiday sewing and crafting projects check out my Holiday Project Vault.
Note: This post contains affiliate links that if you click on them and make a purchase I will receive a small commission at no extra cost to you. As an Amazon Associate I earn from qualifying purchases.
What you will Need: How to Decorate Dollar Tree Wood Cutouts
- Dollar Tree Easter Cutouts
- Chalk or acrylic paint in various colors
- Clear wax
- Brown wax
- Distress Oxide
- Mod Podge
- White Glitter
- Small buttons
- Fabric strips or ribbon for the bows
- Wired Jute
- Dollar Tree wood carrots
- Twine
- Paper tags
- Dollar Tree moss
- Small triangle of cardboard
- Hot Glue
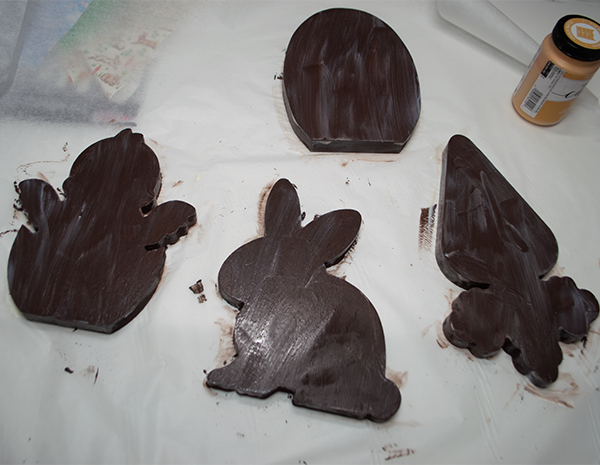
Step 1: Paint the Cutouts Brown
Regardless of the cutout paint them brown. I painted each of the cutouts brown on the front back and sides. Let the paint dry completely.
Paint 2: Cover the Cutouts in Clear Wax
Once the brown paint is dry cover the cutouts with clear wax. Let the wax dry.
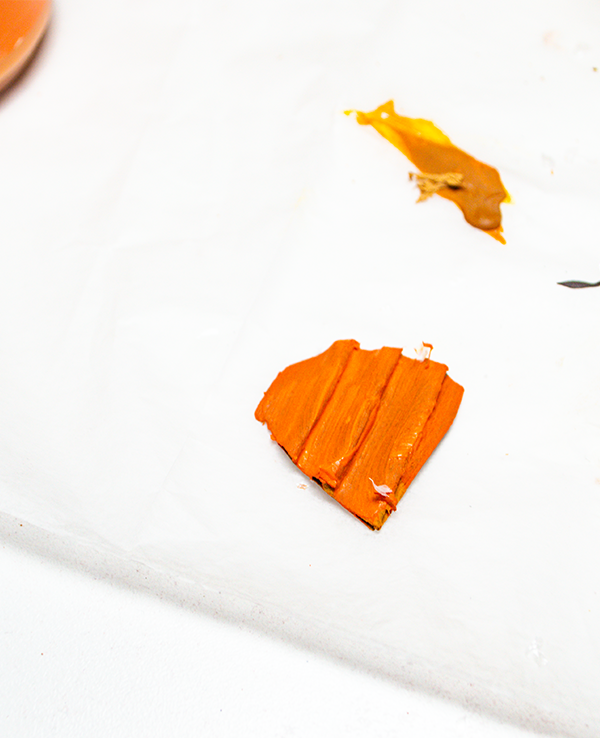
Step 3: Paint the Cutouts
You can do all of the cutouts or just a few. Determine which ones you would like to do and decide the paint colors you would like to use. You can see from the photos the colors that I chose.
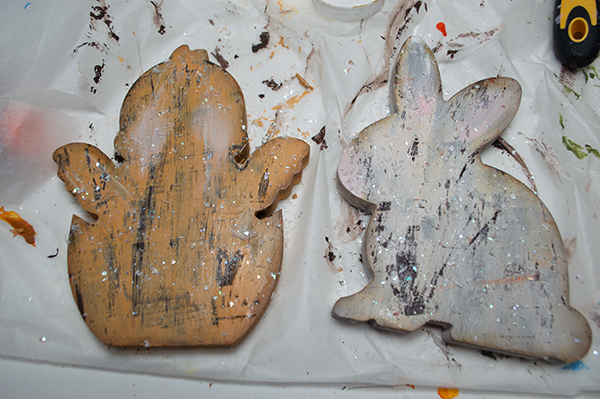
Paint 4: Scrape off Some of the Paint
I let the paint dry almost completely then I used a scraper to scrape off some of the paint to reveal the brown paint below.
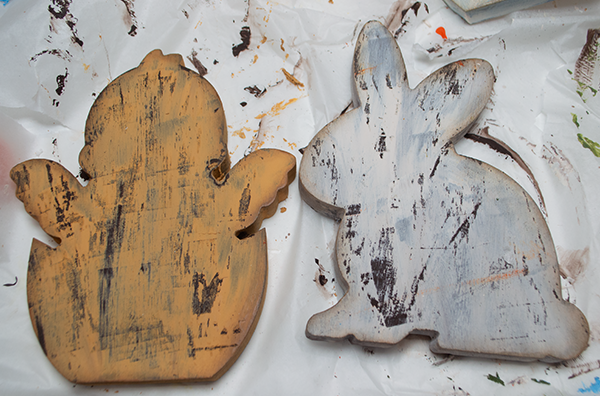
Step 5: Age the Edges
I used distress oxide to age the edges of the cutouts. Walnut stain distress oxide was used on each of the cutouts.

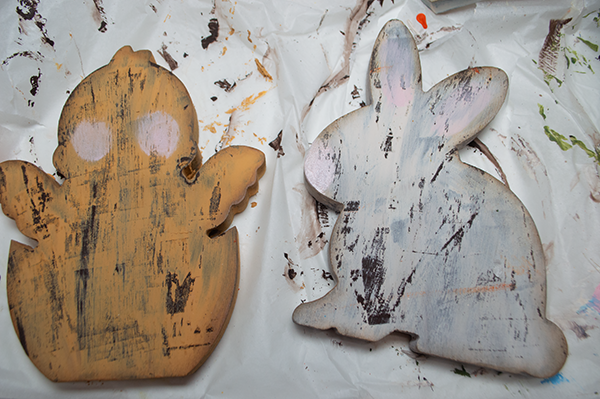
Step 6: Add Pink to the Cutouts
For the Chick and the bunny I added some pink Distress Oxide. I used a round brush to add pink to the cheeks of the chick and the center of the ears and the nose of the bunny to embellish the cutouts.
Step 7: Add the Faux Snow
Cover each of the cutouts with a light coating of ModPodge. Sprinkle some faux snow over the ModPodge. Use the faux snow sparingly.
Step 8: Paint the Cardboard
Cut a small triangular piece of cardboard. Strip off the top layer to revel the corrugated layer beneath. Paint the triangle orange. Once the paint is dry highlight the ridges using the walnut stain distress oxide.
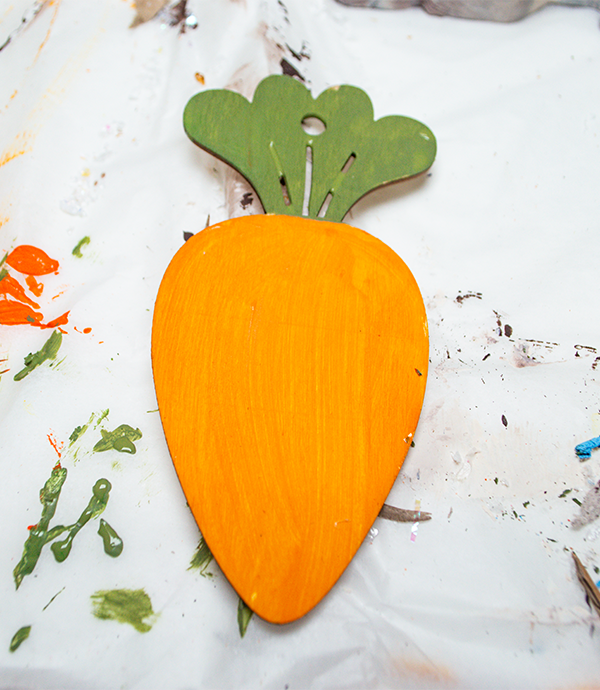
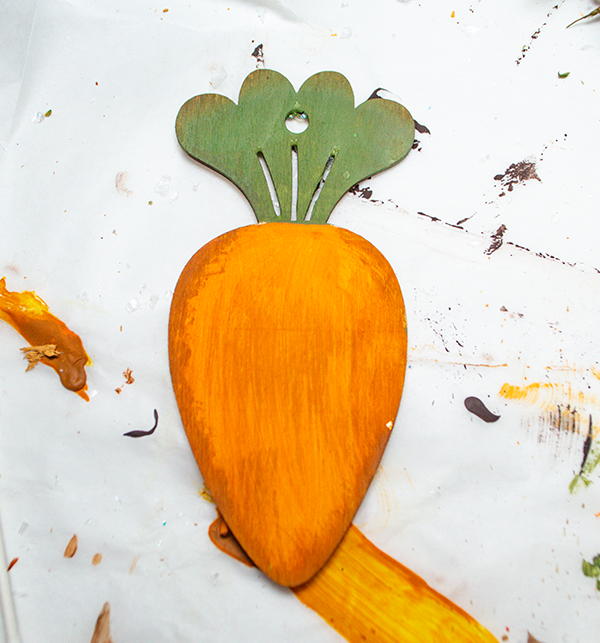
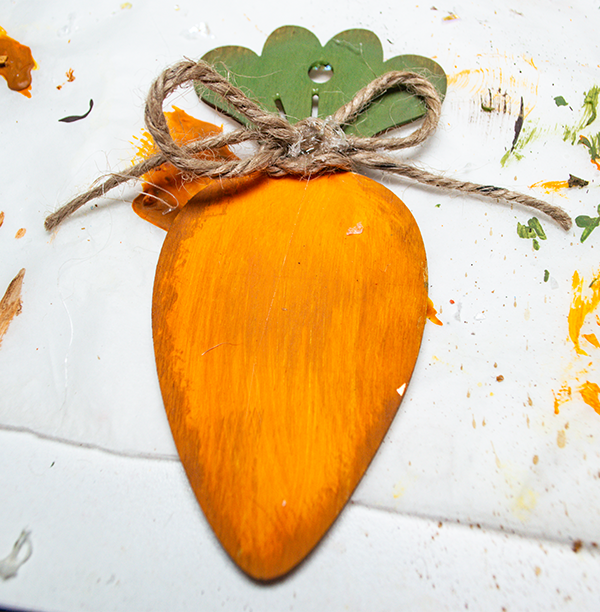
Step 9: Paint the Carrots
I used two Dollar Tree Carrots as embellishments. Paint the bottom orange and the top green. Age the carrots using the distress oxide. I aged around the edges and a bit in the middle.
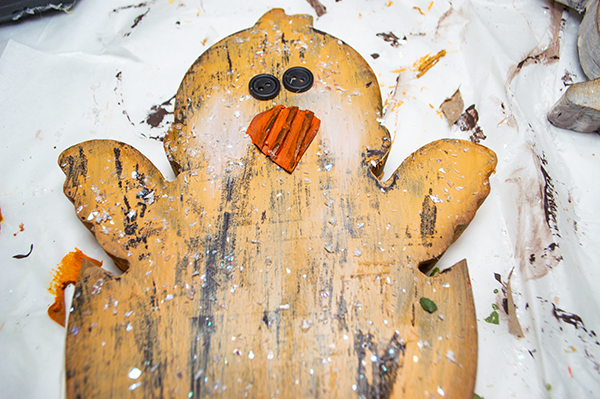
Step 10: Add the Chick's Eyes and BeAk
Place the eyes and beak onto the chick's face using hot glue.
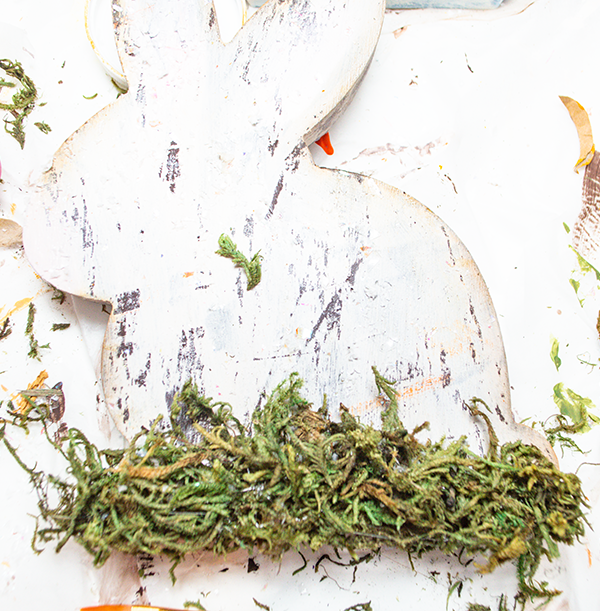
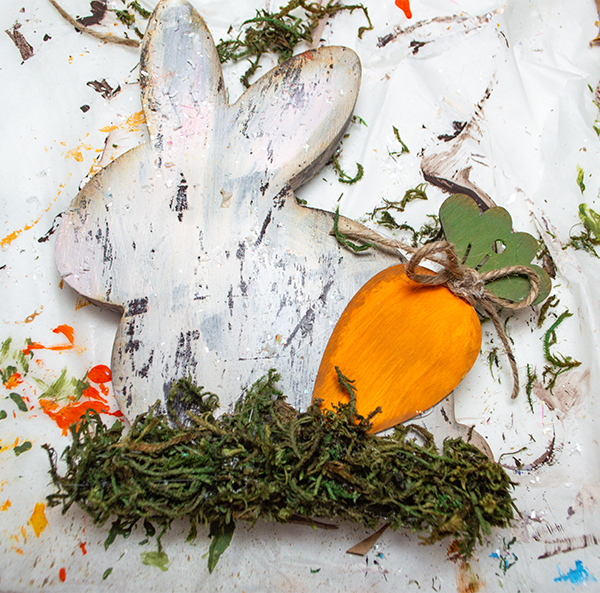
Step 11: Add the Moss and Carrots
Using hot glue add some moss to the bottom of the bunny. Then, add the carrots to embellish the bunny further.
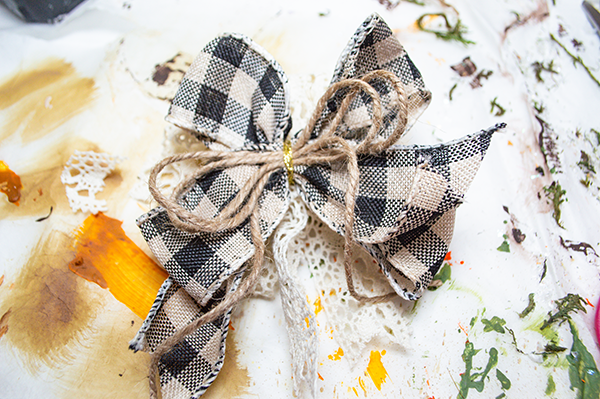
Step 12: Create the Bows
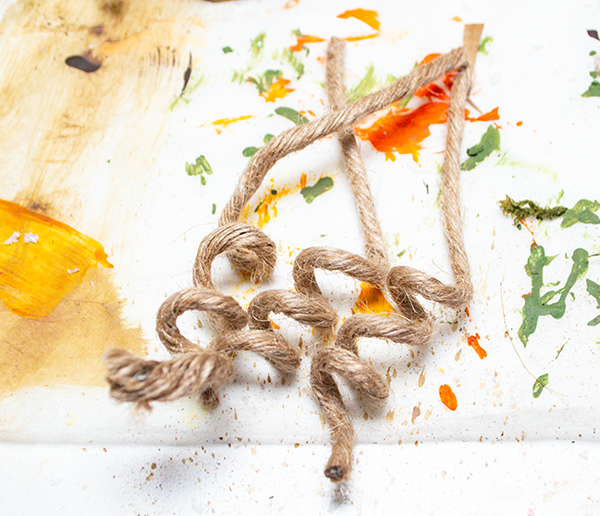
I used a combination of fabric strips, ribbon, twine and wired jute to create the bows. Each of the bows are a bit different. You can use anything you like for your bows. I also chose to use a Bowdabra. If you struggle with making nice bows head over to Southern Charm Wreaths and take their bow making course. I started each bow with some lace ribbon and then added Fabric strips and twine. Layer these items in your Bowdabra to make a small but full bow. Manipulate the bow so it is pleasing to you. Hot glue bows to the cutouts. Once the bows are added, wrap some of the wired jute around a pen but keeping a long tail. Hot glue the jute underneath the bows. Add buttons to the centers of the bows.


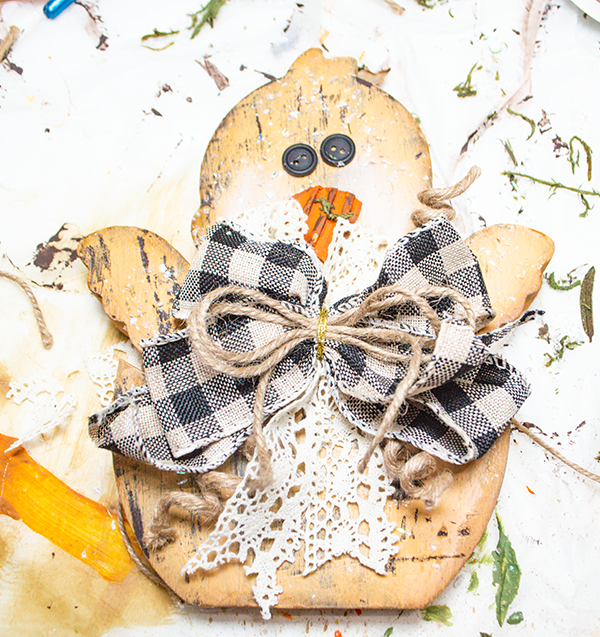
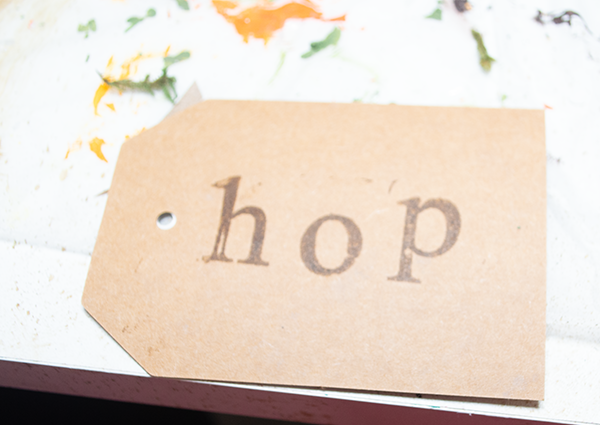
Step 13: Create the Tags
I have had these tags for ever. I started by stamping words onto the tags. Once that was done, I aged the tags using the distress oxide. After that, I crumpled the tags to really give them an aged look. Add twine to the tags and wrap them around the buttons of the bow so they are hanging down a bit. Once you have added the tags you have finished decorating your Dollar Tree Easter cutouts.

I hope you enjoyed this simple Dollar Tree Easter craft. If you would like more sewing and crafting projects subscribe to our free newsletter and receive your free Dollar Tree Holiday eBook.
Subscribe to our Free YouTube Channel!
Join our Sew Very Crafty Fans Facebook group
If you want to ask questions and share your projects join our Facebook group here. The community will help to achieve your sewing and crafting dreams.