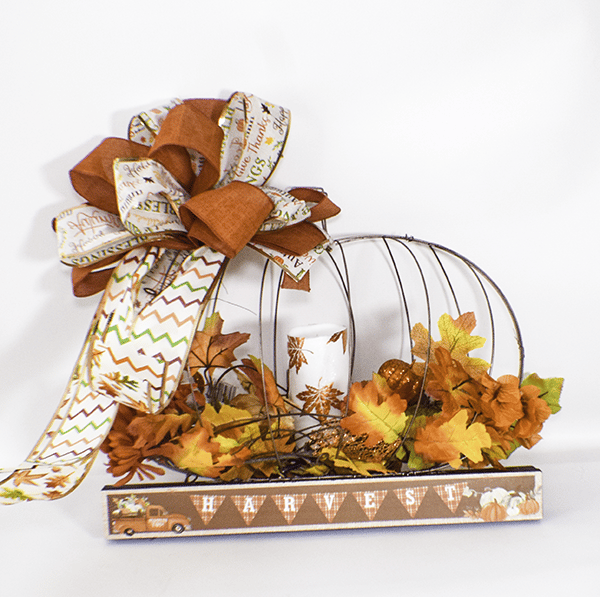
I am always looking for fun Dollar Tree Crafts, especially around the holidays. This year I thought I would need a pretty centerpiece for my thanksgiving table. What better way than to make one of these Dollar tree pumpkin wreath centerpieces. This is a fun Dollar Tree craft that is beautiful too. if you would like more Dollar Tree crafts check out my others here.
I went to Dollar Tree and got everything that I needed for this project except the spray paint. You could go elsewhere for some of these items but they are only $1.25 at Dollar Tree. The one thing you may not be able to get elsewhere are the pumpkin wreath forms but you could check online for those.
What you will Need: How to Make a Dollar Tree Pumpkin Wreath Center Piece
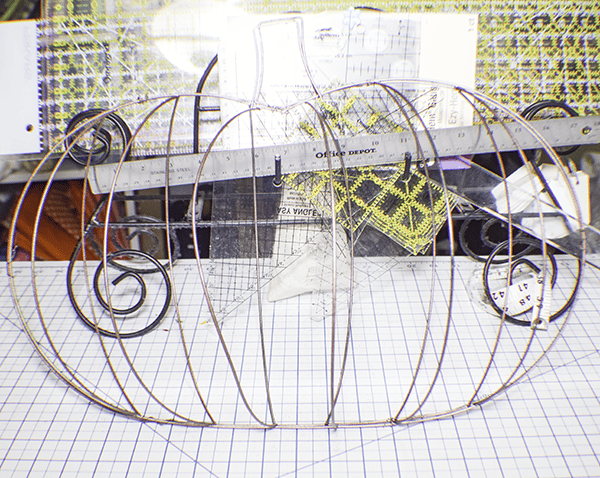
- 2 pumpkin wreath forms
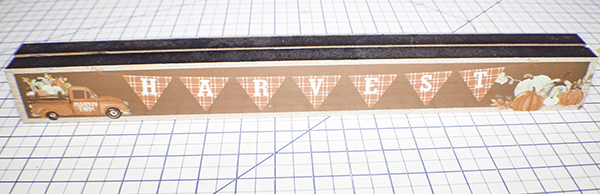
- 2 wooden plaques
- Copper spray paint
- Variety of autumn ribbon
- variety of autumn foliage
- Pillar Candle
- Floral Wire
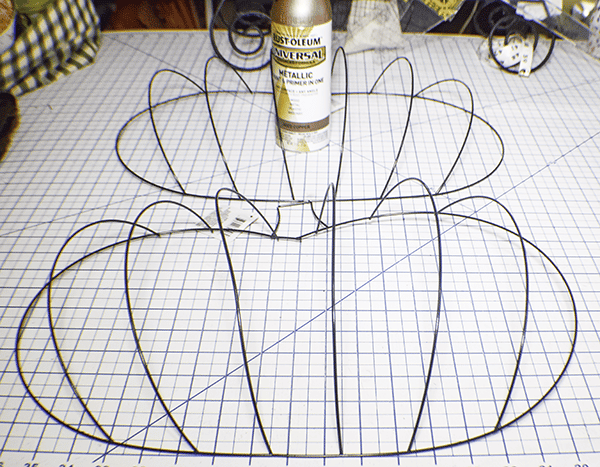
Step 1: Paint the Pumpkin Wreath Forms
Go outside or to a well ventilated area and spray paint the wreath forms a copper color. While you are at it. Spray paint several pieces of floral wire the same color so it won't be noticed in the final centerpiece.
Step 2: Join the Pumpkin Wreath Forms Together
Using the floral wire join the two wreath forms together so that they are facing each other.
Step 3: Hot Glue the Plaques Together
Using your hot glue gun, hot glue the two plaques together .
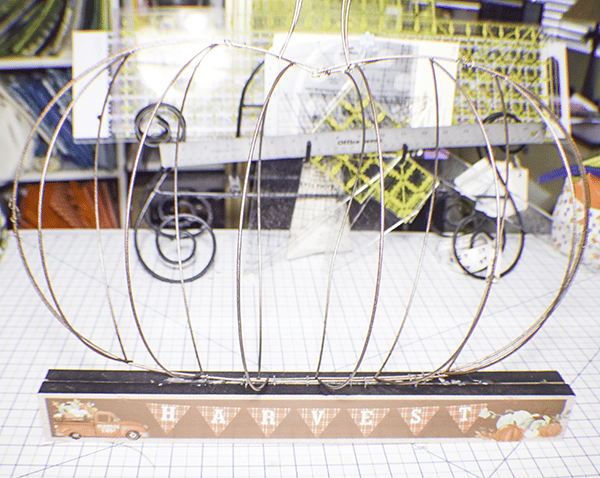
Step 4: Staple the Pumpkin Wreath Forms to the Plaques
There will be a line where the plaques meet. Staple the bottom of the wreath form to the plaques on that center line.
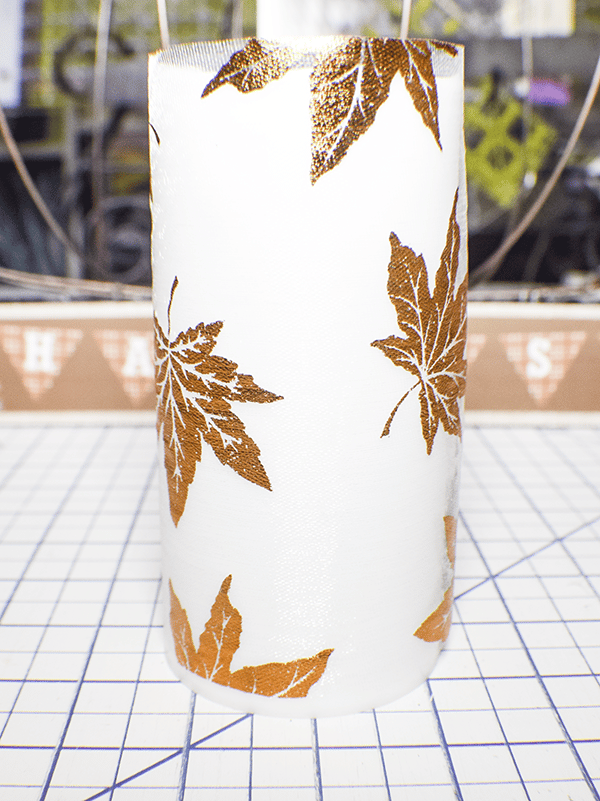
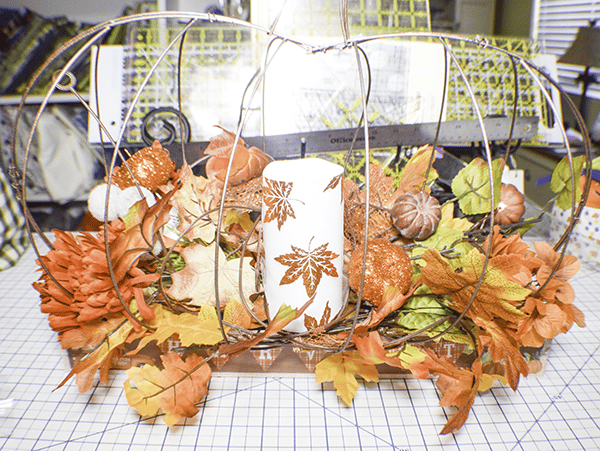
Step 5: Wrap the Candle with Ribbon
I found some clear ribbon with copper leaves on it at Dollar Tree. If you can find that ribbon, wrap the pillar candle with the ribbon and secure with a little hot glue. Place the candle in the center of the wreath forms.
Step 6: Add Fall Foliage
Surround the candle with a variety of fall foliage including leaves, flowers and berries. You can get them all at Dollar Tree of course.
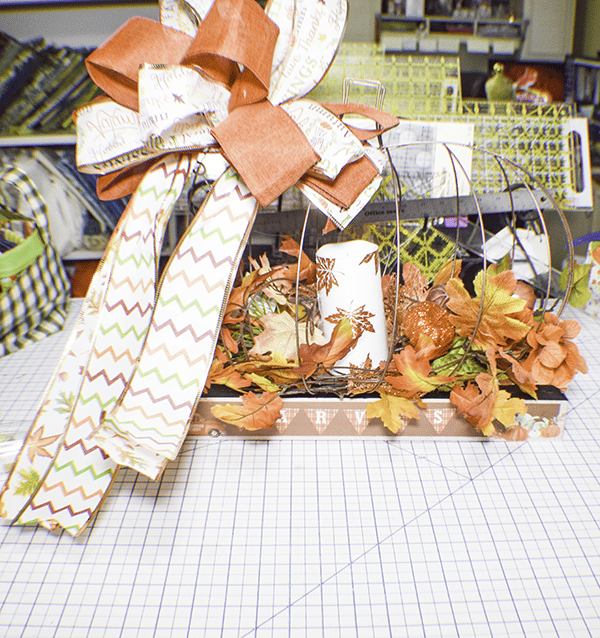
Step 7: Create the Bow
Take a variety of autumn ribbon and put them together. Measure out 12″ fold them back and forth six times. I used two types of ribbon. Find the center and snip the center on each side just a bit using scissors. Take a few 36″ pieces of ribbon and place them on the back of your stack so that they are centered. Place some floral wire around the stack through the slits and tie it around the center very very tight.
Reach into the center of the bow and pull out the ends an push them to the back. Then, Reach inside again and start to pull out the loops one at a time pulling one to the front and one to the back. Alternating the colors and continuing until all of the loops have been pulled apart. Puff up the loops to the way you like them.

Step 8: Add the Bow
Place the bow on the top of the centerpiece and attach it with the floral wire you used to tie the bow together. Add a few leaves to embellish it and you have finished your Dollar Tree Pumpkin Wreath Centerpiece.
I hope you enjoyed this simple Dollar Tree craft. If you would like more sewing and crafting projects subscribe to my newsletter and receive access to my free printables library.
If you would like video tutorials of some of Sew Very Crafty's most popular posts subscribe to our free YouTube channel here.