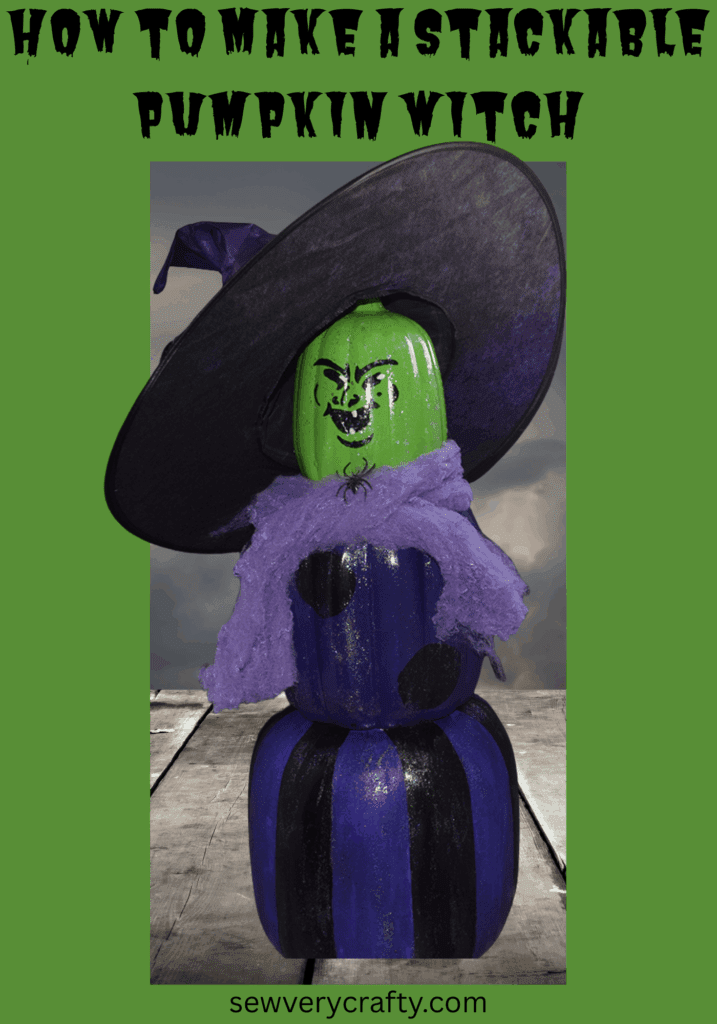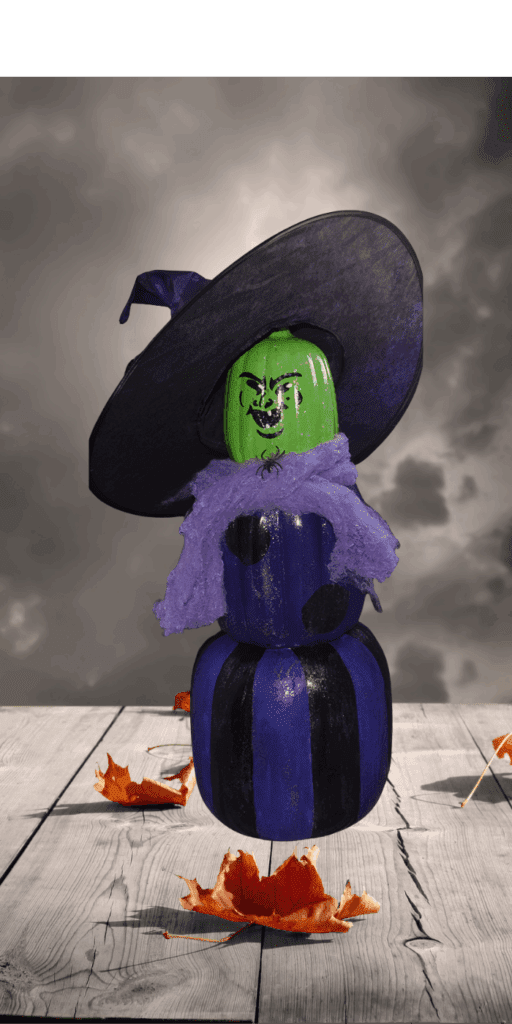
I am so surprised that Halloween is just around the corner. I always have difficulty finding Halloween projects to create. This year I came across a variety of versions of this project so I thought to try it myself. This was a simple craft project to create but I found that the result is all dependent on the colors and the finish. Of course you can make a good witch or a bad witch it is completely up to you. I decided to use the wicked witch of the west as my inspiration for this witch. If you would like more Dollar Tree crafts head over to my Dollar Tree page. For more holiday projects check out my holiday project vault.
Note: This post contains affiliate links that if you click on them and make a purchase I will receive a small commission at no extra cost to you. As an Amazon Associate I earn from qualifying purchases.
What you will Need: How to Make a Dollar Tree Stackable pumpkin witch
- 1 set of Dollar Tree stackable pumpkins
- Green acrylic paint
- Purple acrylic paint
- Black acrylic paint
- Black Opal Glitterific Fine paint
- Clear Glitterific Hologram paint
- Sand Paper
- Purple Dollar Tree Spider Web
- Purple Witch Hat
- Polka Dot Stencil
Step 1: Sand the Pumpkins
In order to get a nice even finish sand the pumpkins throughly to make it easier for the paint to adhere. I used a fine grit sand paper for a nice smooth finish.
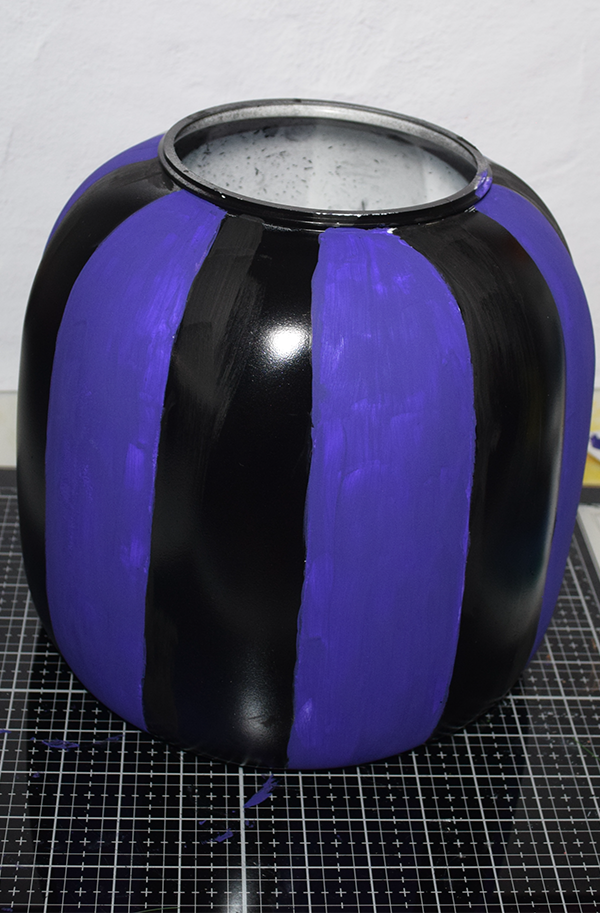
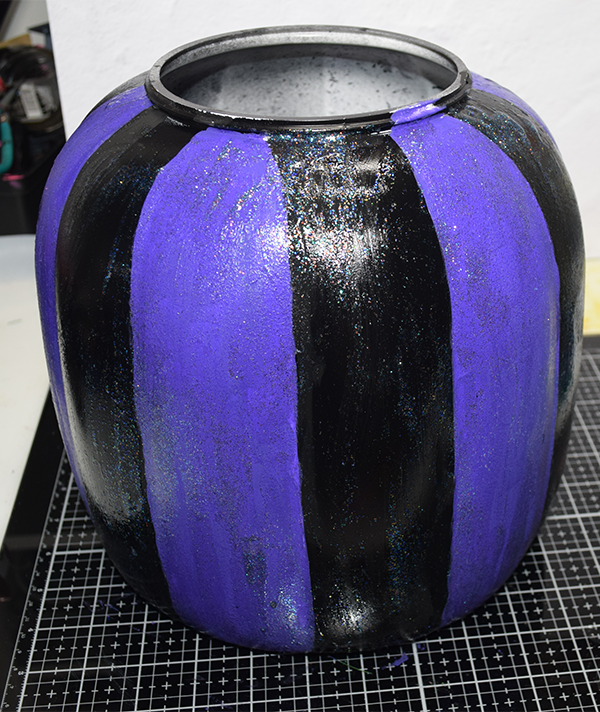
Step 2: Paint the Large Pumpkin
Using the black acrylic paint coat the bottom large pumpkin throughly using nice even strokes. You could use a makeup sponge or a pouncer if you like. Once the paint has dried completely add a second coat. Take the purple and paint evenly spaced stripes over the black. Let dry and apply additional coats as needed. Cover the entire pumpkin with black opal glitterific.
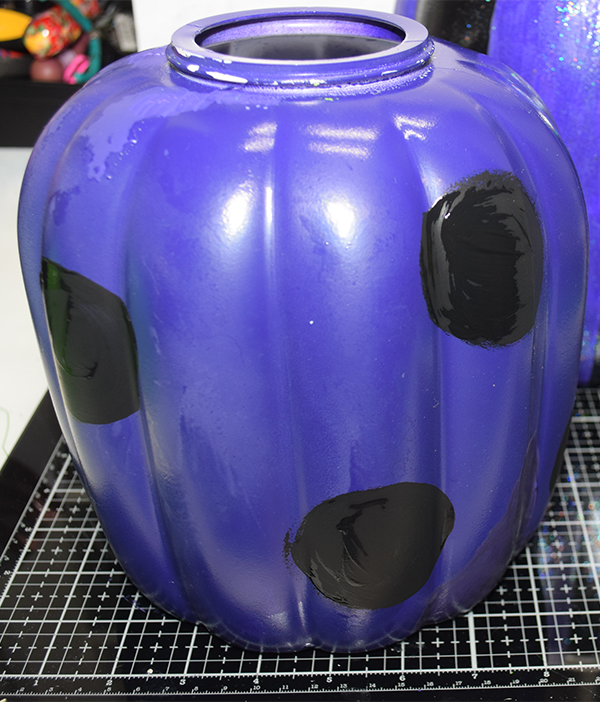
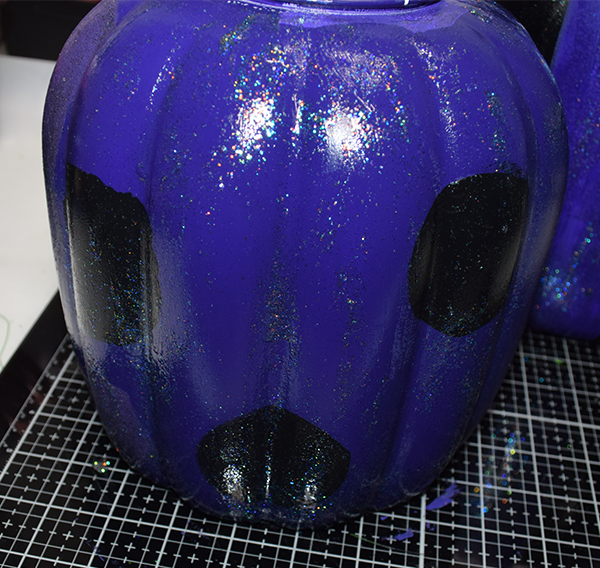
Step 3: Paint the Middle Pumpkin
Paint the middle pumpkin purple letting the paint dry completely between coats. Once the final coat has completely dried add black polka dots all over. For nice round painted polka dots use a round foam pouncer. Cover the entire pumpkin with black opal glitterific.
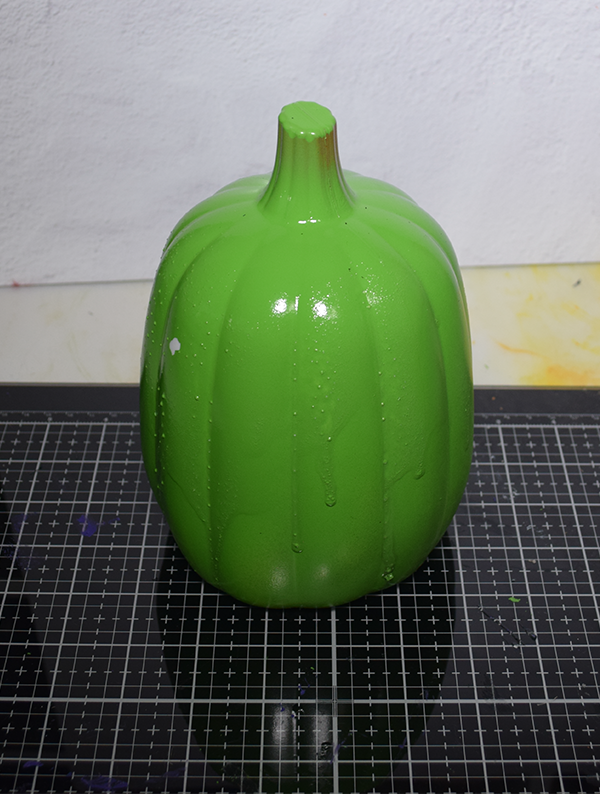
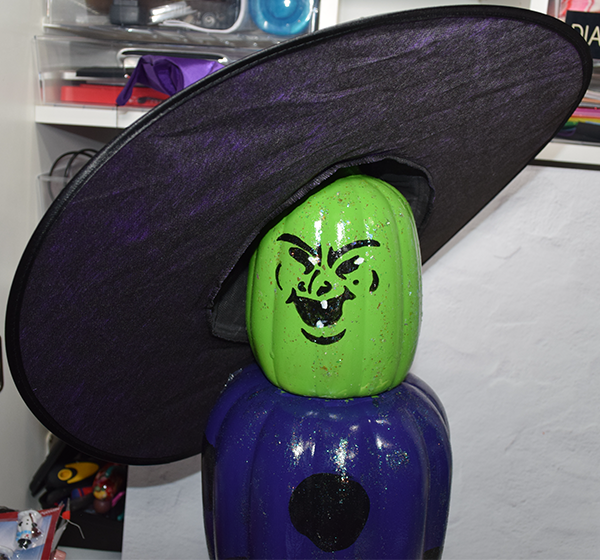
Step 4: Paint the small top pumpkin
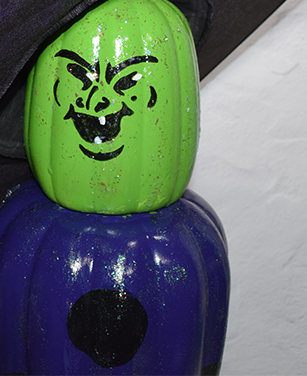
I used a fluorescent green for the small top pumpkin reminiscent of the wicked witch. Paint as many coats as you need making sure to let each coat dry thoroughly before applying the next. TI intentionally allowed the paint to drip for a scarier face. The most difficult part of this project was creating the face. I traced a face to my green pumpkin using tracing paper and painted it with paint pens. Then, I covered it in clear hologram.
Step 5: Add the Witch Hat
I purchased this hat for $5 on sale from Amazon. I added some crumpled up craft paper to fillet out a bit then simply placed it on the top pumpkin at an angle and added some double sided tape to hold it in place.
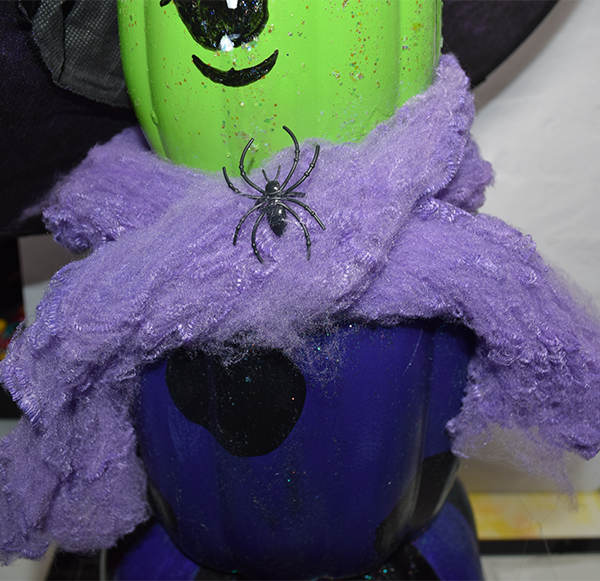
Step 6: Add the Shawl
I used some purple Dollar Tree spider web as the shawl for my witch. Simply cut it to size and wrap it around the shoulders. Use glue or tape to hold it in place. You have now finished your Dollar Tree stackable pumpkin witch.
I hope you enjoyed this simple Halloween project. If you would like more sewing and crafting projects subscribe to our free newsletter and receive your free Dollar Tree Holiday eBook.
If you would like video tutorials of some of Sew Very Crafty's most popular posts subscribe to our for YouTube channel here.
Join our Sew Very Crafty Fans Facebook group
If you want to ask questions and share your projects join our Facebook group here. The community will help to achieve your sewing and crafting dreams.