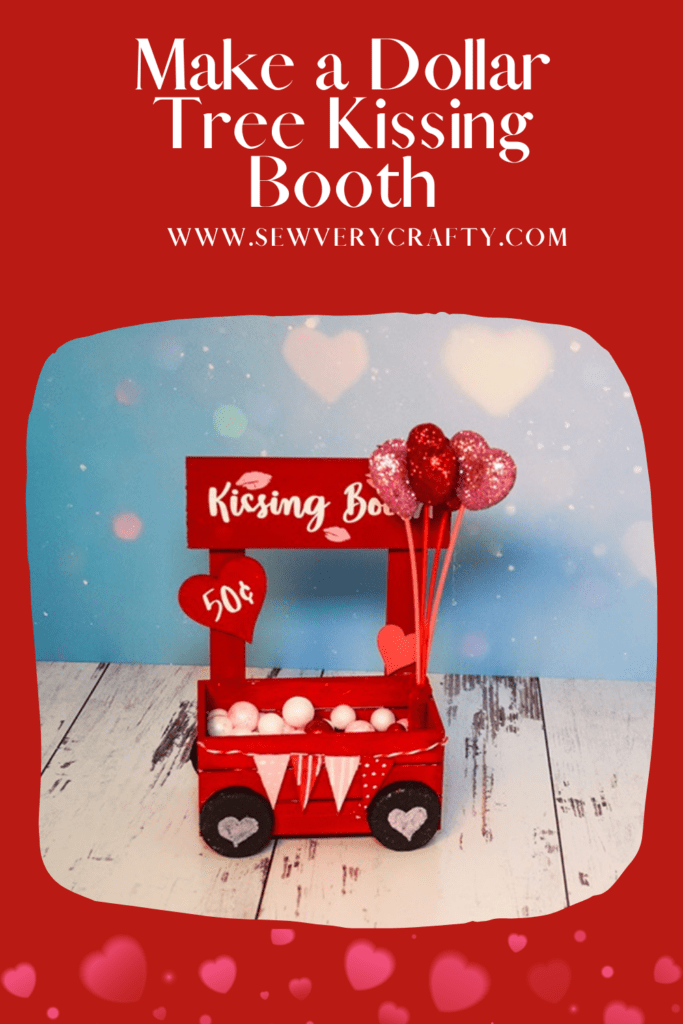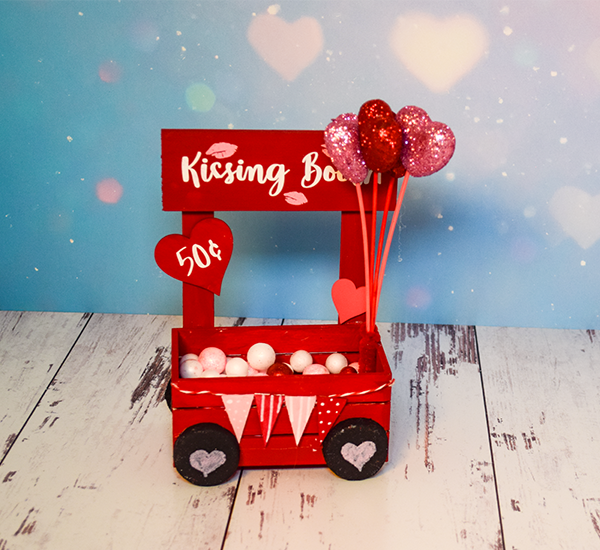
It may seem a bit early but Valentin's day is just around the corner. I saw a version of this for sale at Home Depot so I decided to make it into a Dollar Tree craft. It was surprisingly easy. I try to stock up on Dollar Tree craft supplies throughout the year so I had all of the supplies I needed for this project. I hope you like it. If you do and want more Dollar tree crafts head over to my Dollar Tree page. For more holiday sewing and crafting check out my Holiday Project Vault.
Note: This post contains affiliate links that if you click on them and make a purchase I will receive a small commission at no extra cost to you. As an Amazon Associate I earn from qualifying purchases.
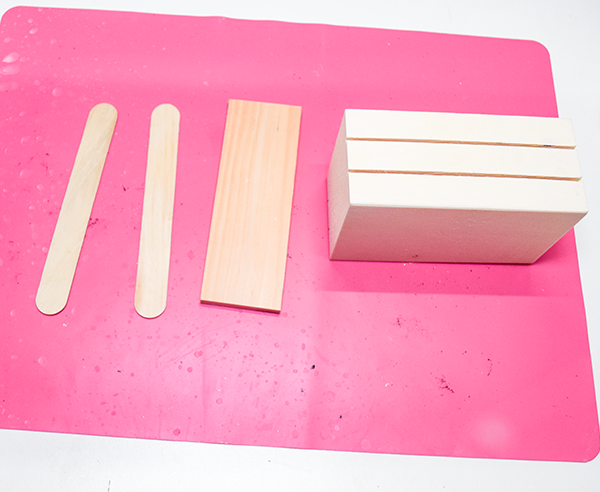
What you will Need: How to Make a Dollar Tree Kissing Booth
- SVG you can get by clicking on this link
- 1 Dollar Tree crate
- 4 craft sticks
- 1 small Dollar Tree wood piece
- Dollar Tree hearts
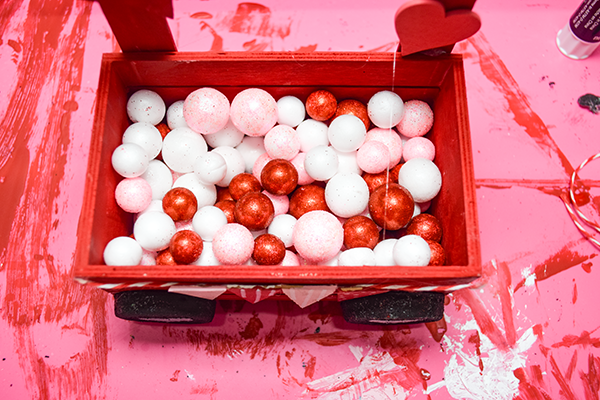
- Styrofoam Christmas candy rounds
- Red acrylic paint
- Black acrylic paint
- Pink acrylic paint
- White acrylic paint pen
- Pink acrylic paint pen
- Wood snips
- Baker's twine
- Styrofoam hearts
- Hot Glue
- Cricut (Optional)
- Permanent Vinyl (Optional)
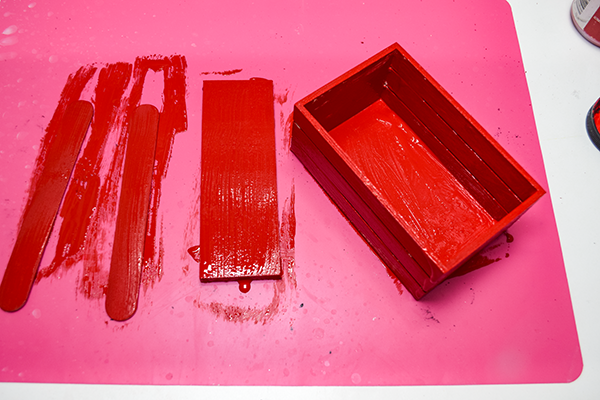
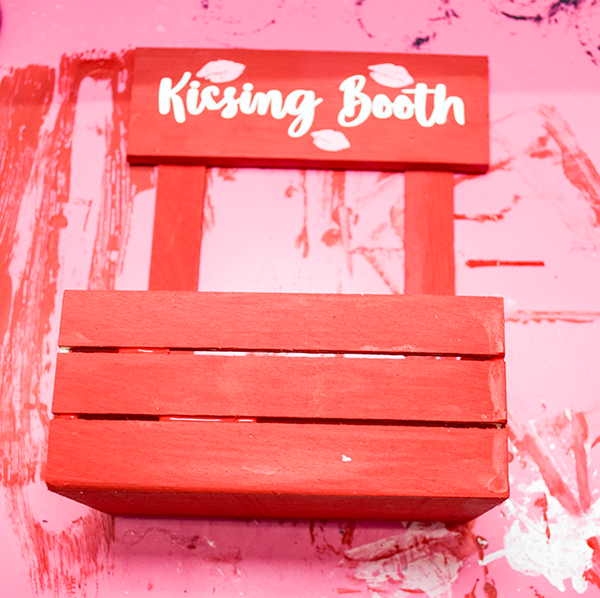
Step 1: Paint the Red
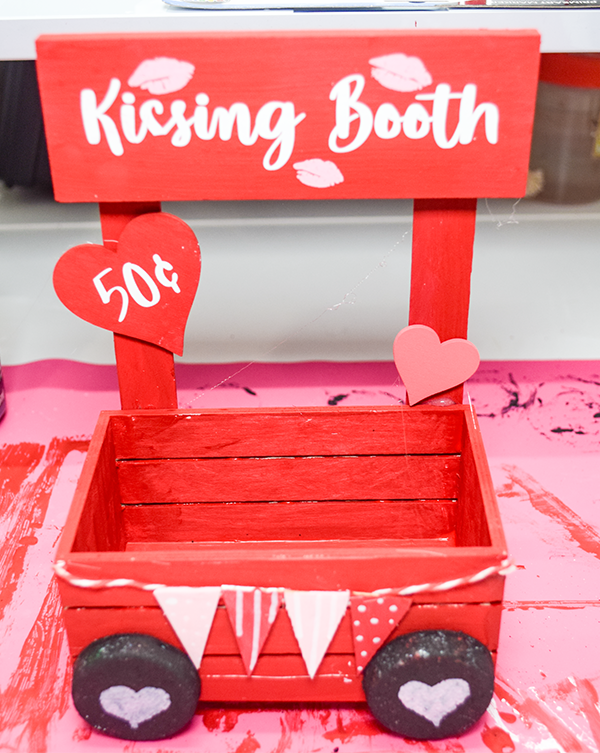
Using the red acrylic paint cover the crate, craft sticks and wood piece. You made need two coats to get complete coverage of these pieces.
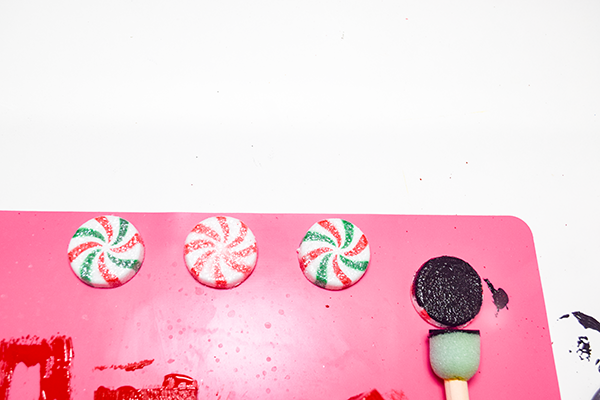
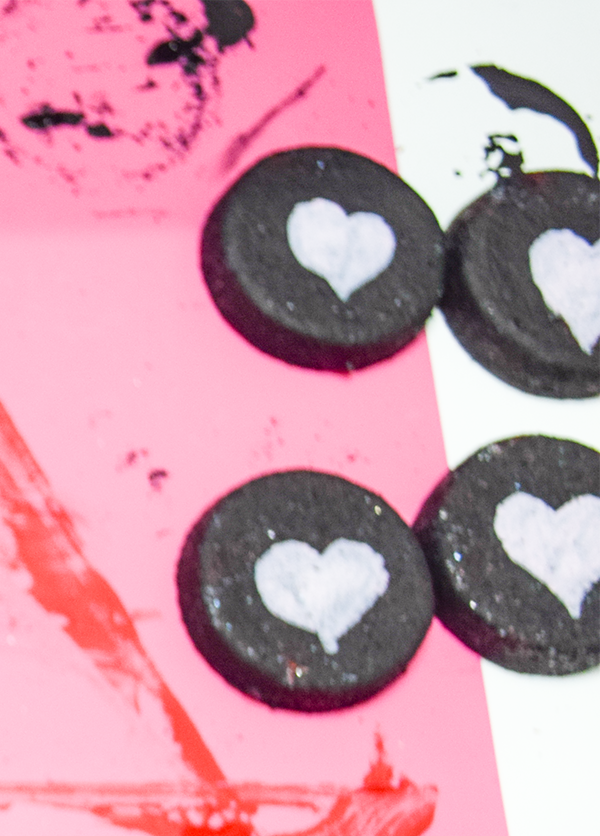
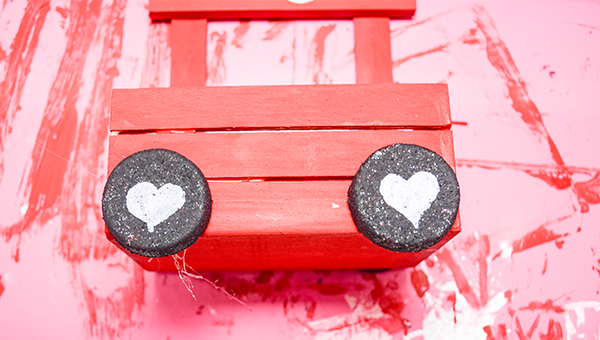
Step 2: Paint the Wheels
Paint all for of the Christmas candy rounds black. Again multiple coats may be necessary. Once the paint has completely dried add a heart to the center using a paint pen.
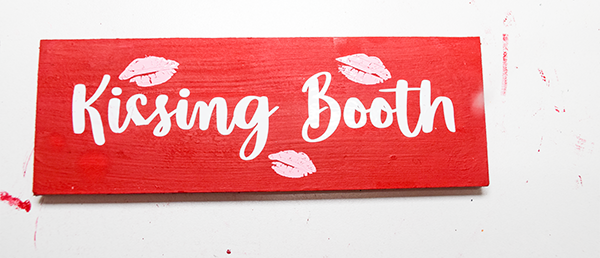
Step 3: Create the Words
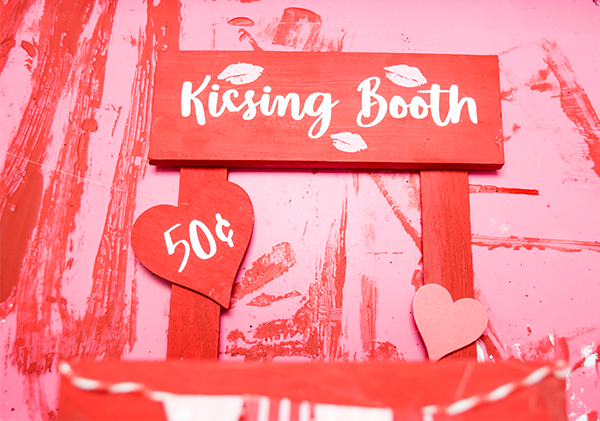
On the wood piece you just painted red, write the words “Kissing Booth” using a white paint pen. You can also use a Cricut. I created a Cricut SVG with the words and some lips on it. It is attached to this post under the “What you will need” section. If you are using your Cricut highlight “kissing booth” and click attach. Highlight the lips only and click attach. Finally, highlight the 50¢ and attach. Cut out the SVG using permanent vinyl and place it on the wood piece. I also created an SVG for the price of the kisses. You can write it on with the paint pen if you like.

Step 4: Paint the Hearts
I used two sized hearts for this project. I painted the first red and white and the second was already painted pink. You can paint them any size you like. Add the price of the kisses to the larger of the two hearts.
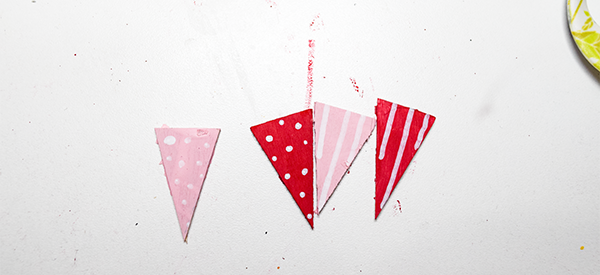
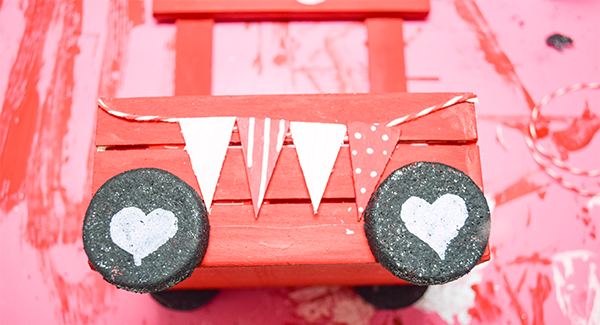
Step 5: Cut the Banner
Use snips to cut out four triangles from the craft sticks to act as the Banner across the front of the Kissing Booth. Paint the triangles any colors you like.
Step 6: Assemble the Kissing Booth
Add the craft sticks to each side of the back of the crate using hot glue. Attach the Kissing Booth sign you created so that it spans across the crate and is glued to the craft sticks using hot glue. Attach the wheels also using hot glue.

Step 7: Attach the Banner
Glue a piece of baker's twine across the front of the crate so that it droops a little bit. Attach the triangles to the baker's twine so that the corners meet. Use hot glue for this.
Step 8: Add the Hearts
Hot glue the larger heart to the center of the left craft stick and the smaller heart to the bottom of the right craft stick.
Step 9: Add the remaining embellishments
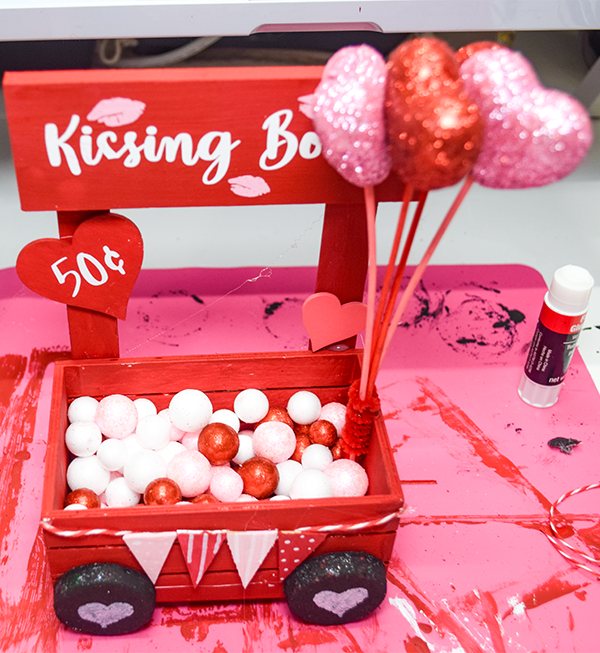
I added some Valentine styrofoam vase fillers to the crate. I then combined four styrofoam hearts on sticks to act as balloons. Insert those heart sticks into the crate. Once that is finished so is your Dollar Tree Valentin's Kissing Booth.
I hope you enjoyed this simple Dollar Tree craft. If you would like more sewing and crafting projects subscribe to our free newsletter and receive your free Dollar tree holiday eBook.
If you would like video tutorials of some of Sew Very Crafty's Most popular posts subscribe to our free YouTube channel here.