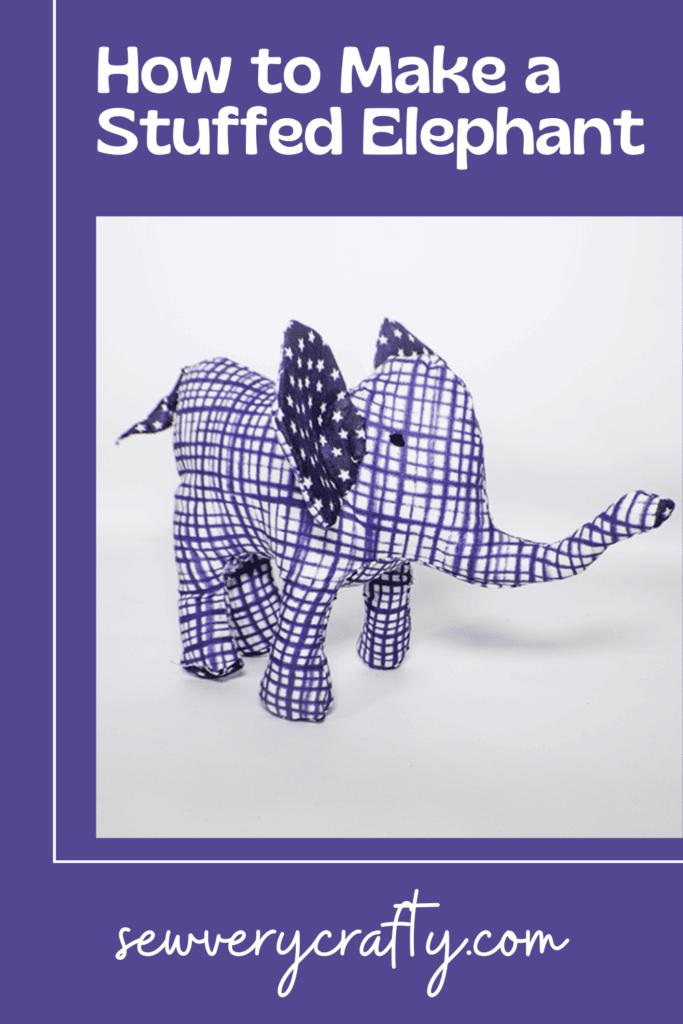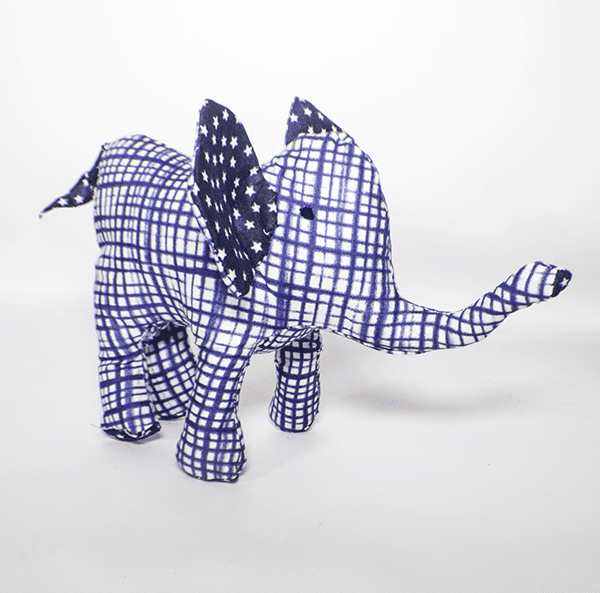
I came across this small stuffed elephant on the Hobby Lobby website and thought to share it with you. It was just so cute that I just had to make it and do the tutorial for you. The pattern is free on Hobby Lobby. It is a fun little elephant to make and requires just basic sewing skills. If you would like more stuffed animal projects check out my cats and dogs here.
I chose two fat quarters and some black fabric for my project. I purchased these on Amazon fabrics but you could head to JOANN Fabric & Craft Stores![]() or
or
What you will Need: How to Make a Small Stuffed Elephant
- Pattern you can get by clicking on this link
- 1/4 yd of body fabric
- Fat quarter of fabric for the ears, nose, feet and tail
- Black embroidery thread for Eyes
- Polyester fiberfill
- Standard sewing supplies
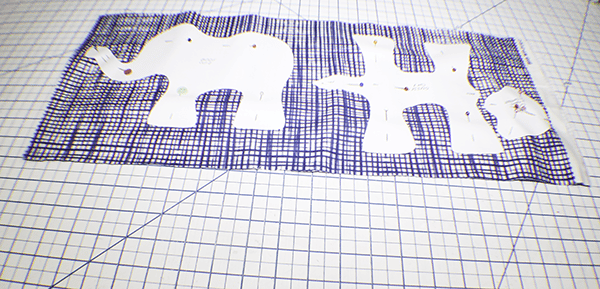
Step 1: Enlarge your Pattern
I felt this pattern was too small for me to really manipulate well so I went to a local Staples and had it enlarged to 150% of the size that it was . It is up to you if you want to do the same.
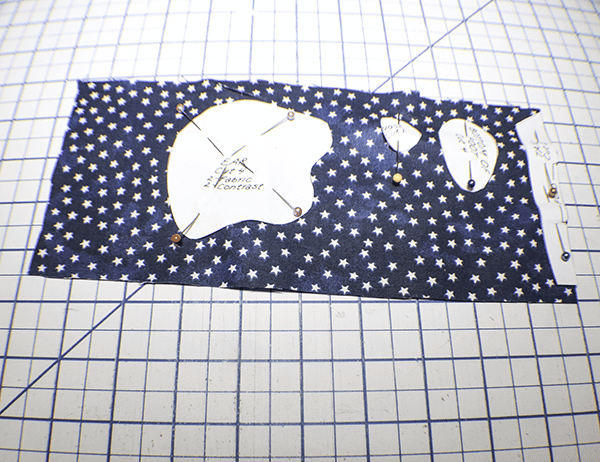
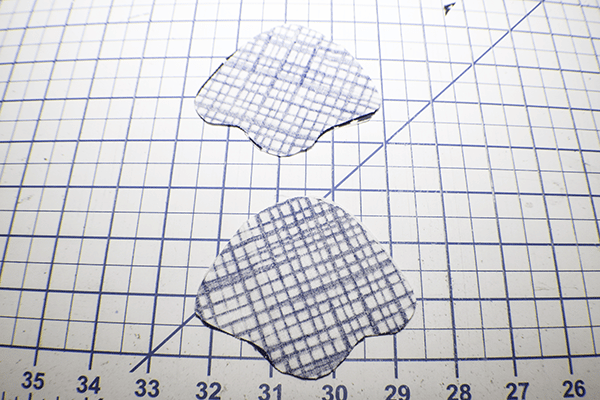
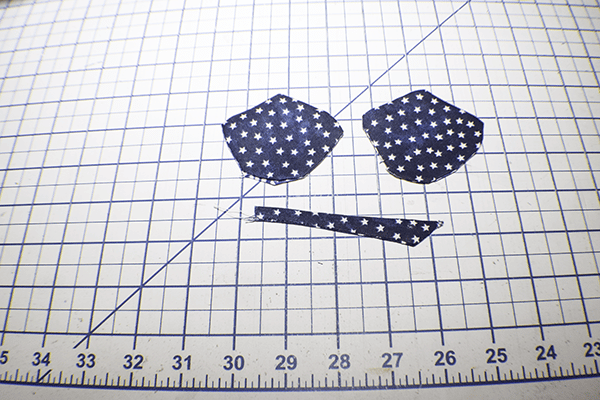
Step 2: Cut your Fabrics
Using the pattern cut the pieces as directed adding a 1/4″ seam allowance. From the main body fabric cut the body, the gusset and two ear pieces. From the accent fabric cut the nose, feet, tail, and two ear pieces.
Step 3 : Stitch the Gusset
With right sides together stitch the gusset to the lower part of the trunk and legs using a 1/4″ seam allowance. I used a 1/4″ seam allowance for this entire project. Leave the feet open. Next stitch the gusset to the stomach and down the front legs and up the back legs and part way up the rear.
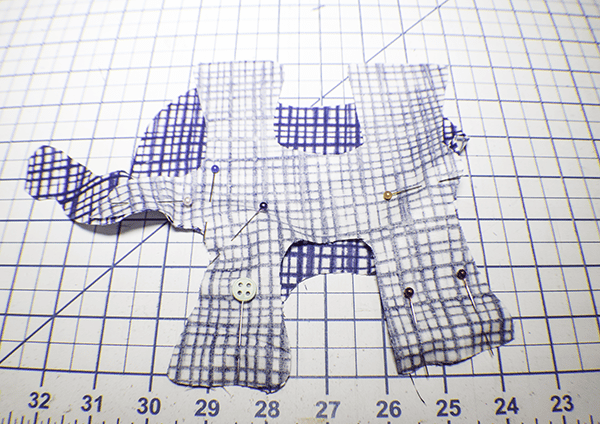
Step 4: Stitch Body Together
With right sides together stitch the body together leaving an opening in the back for turning.

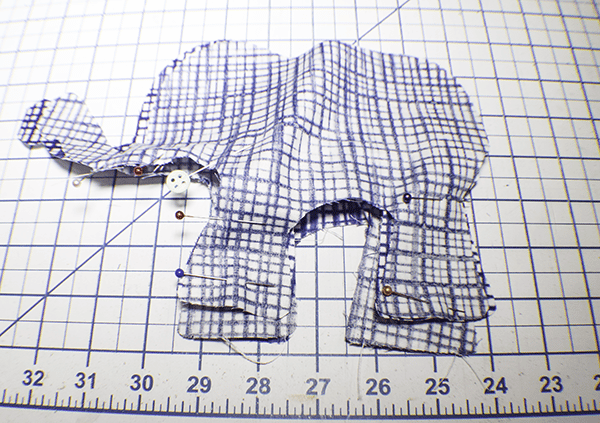
Step 5: Stitch the Nose and Feet
With right sides together sew the nose to the end of the trunk and the feet to the bottom of the legs. Turn right sides out.

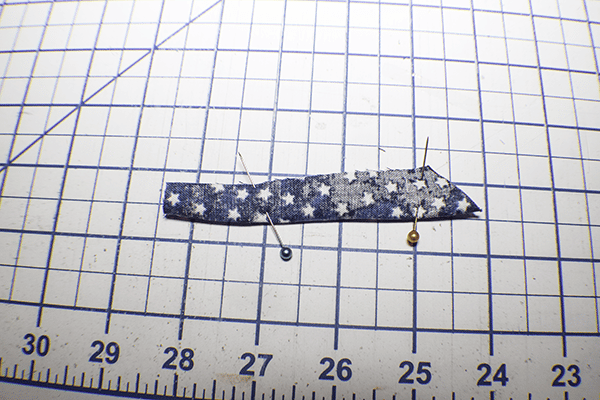
Step 6: Create the Tail
Place the tail right sides together. Stitch the tail down the angled end and the long edge. Clip the corner. Turn the tail and press.
Step 7: Embroider Eye
Using black embroidery thread. Embroider an eye on either side of the head. You can also use buttons or screw eyes.

Step 8: Stuff the Elephant
Stuff the elephant through the opening in the back firmly especially in the legs. Stitch the opening closed using ladder stitch.
Step 9: Fuse the Interfacing
Fuse a piece of Pellon 808 to one piece of each ear following the manufacturer's instructions.

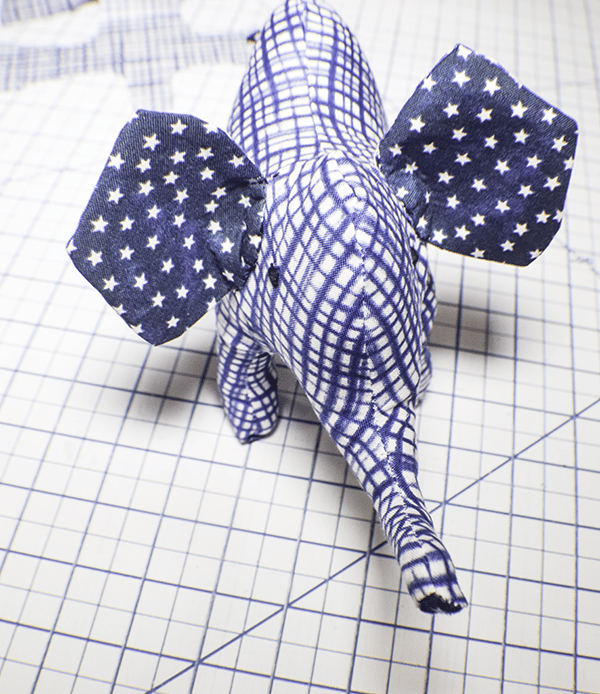
Step 10: Create the Ears
With right sides together place a contrast ear with a body ear and stitch leaving an opening for turning. Turn right sides out. Press and stitch closed using ladder stitch.
Step 11: Add the Ears and Tail
Stitch the ears and tail by hand to the head and rear as shown.
I hope you enjoyed this small stuffed elephant project. if you would like more sewing and crafting projects subscribe to our newsletter and receive access to our free Printables library
If you would like video tutorials of some of sew Very Crafty's most popular posts subscribe to our free YouTube channel here.