I thought this project was perfect for a child's room and imagination. I have always loved to see hot air balloons flying in the New Mexico sky. This simple sewing project is my interpretation of those hot air balloons. Make as many as you like or resize them too. I was really surprised how quickly and easily this project came together. Any child would love to have this hanging in his or her room. Use brightly colored fabrics to really add to the child theme. I hope you enjoy this project. For more children's projects check out my children's patterns.
Note: This post contains affiliate links that if you click on them and make a purchase I will receive a small commission at no extra cost to you. As an Amazon Associate I earn from qualifying purchases.
What you will Need: How to Sew a Hanging Fabric Hot Air Balloon
- Pattern you can get by clicking on this link
- Different colors of fabric for the outer balloon
- 1/2 yd lining fabric
- 1/4 yd fabric for the basket
- Scraps of fabric for the top hanger and the tabs holding the balloon to the basket
- Polyester fiberfill
- 1/2 yd Pellon 808
- 1/2 yd fusible fleece
- Sewing Machine
- Standard sewing supplies
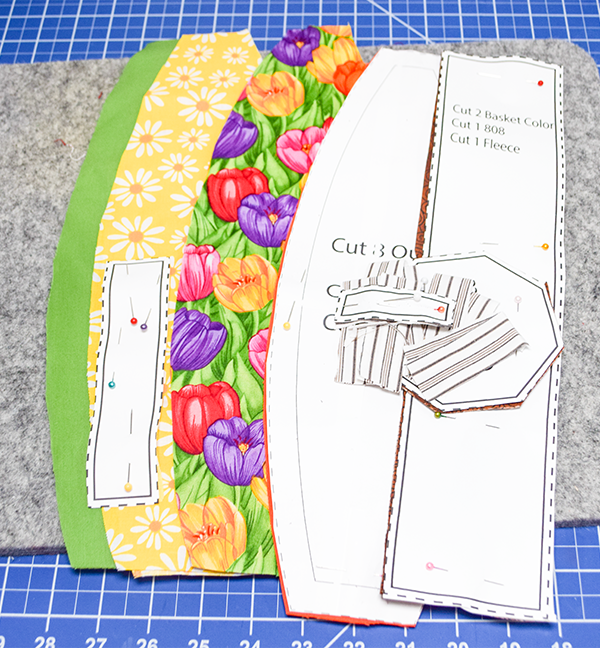
Step 1: Cut out the Pattern
First, tape the pattern together. You can resize the pattern in the print settings if you want to make it smaller or larger. Once the pattern is taped together use the pattern to cut out the fabric pieces.
Step 2: Stitch the Hanger
There is a long hanger piece. Place the two pieces right sides together and stitch along both long edges and one short edge using a 1/4″ seam allowance. Clip the corners. Turn right sides out and press. Topstitch along the three seams. Set aside.


Step 3: Stitch the Basket holders
There are eight tabs that separate the Balloon from the basket. Create the tab pieces by stitching just the long sides. Turn right sides out and press. Topstitch along both long edges.

Step 4: Fuse the Interfacing and Fleece
Using a hot iron and following the manufacturer's instructions fuse the Pellon 808 to the corresponding pattern pieces. Then. Fuse the fleece on top of the 808.


Step 5: Stitch the Basket
Fold the long basket side piece right sides together and stitch the short ends together using a 1/4″ seam allowance. Place one bottom piece right sides together with the long basket side raw edge. Stitch the side to the bottom using a 1/4″ seam allowance. Repeat for the lining but leave an opening in the lining for turning. Place the lining and outer basket right sides together. Insert the side tabs between the layers with one on each side facing down. Stitch around the top. Turn right sides out through the opening. The tabs should be on the outside of the basket.


Step 6: Stitch the Balloon
Fold the hanger in half widthwise and place it on the top of one of the large curved pieces and stitch using a 1/8″ seam allowance. If you have ever stitched a hat, this is a similar process. Attach each of the curved pieces right sides together and stitch them together one at a time using a 1/4″ seam allowance. Stitch all eight pieces. Add a running stitch to the top of the balloon pieces using a strong thread. Gather the top of the balloon making sure that the hanger is on the outside.


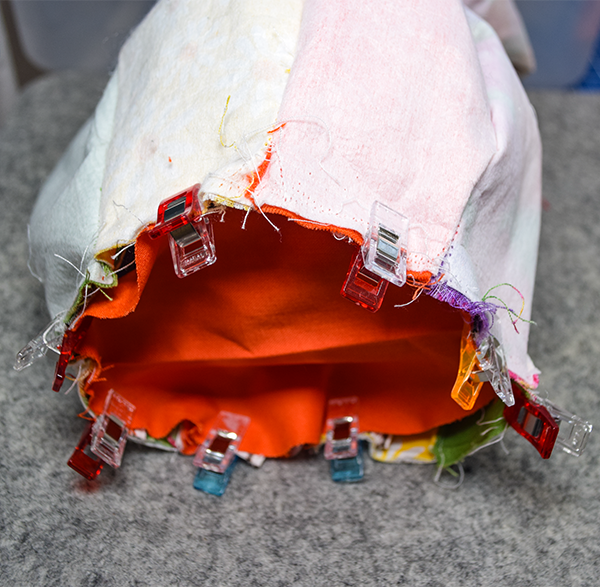
Step 7: Join the Basket
Insert the basket piece into the balloon so that they are right sides together. Keep in wind that the top of the balloon is wrong sides out. Place the basket holders around the balloon raw edges while the basket itself is inside the balloon top.
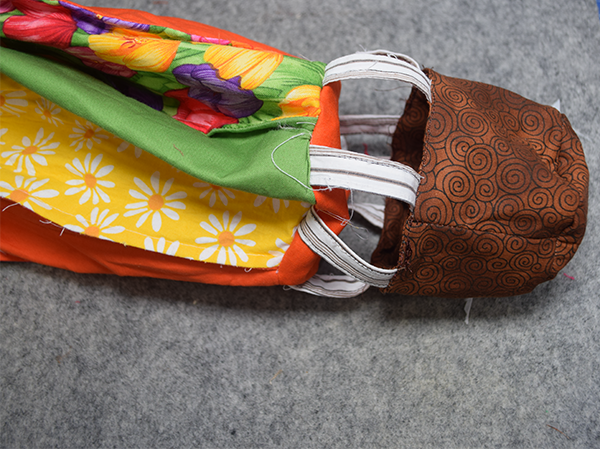
Step 8: Add the Bottom of the Balloon
Place the round bottom piece right sides together with the balloon tops and the holders. Stitch all the way around through all layers leaving an opening for turning. Turn right sides out through the opening. The basket should fall to the bottom with the tabs holding it to the balloon.
Step 9: Finish the Balloon
Stuff the balloon with the fiberfill through the opening you left in the bottom. Close the bottom opening using ladder stitch. You have now finished your Hanging Fabric Hot Air Balloon. Enjoy!!


I hope you enjoyed this fun and colorful child's sewing project. If you would like more sewing and crafting projects subscribe to our free newsletter and receive access to our free printable's library.
If you would like video tutorials of some of Sew Very Crafty's most popular posts subscribe to our free YouTube channel here.