Rustic Thanksgiving Centerpiece
This is an easy and fun rustic Thanksgiving centerpiece I made for my Thanksgiving table this year.
Things you will need:
- 3 tall Mason Jars
- 2 short wide mouth Mason Jars
- 3 autumn acrylic paint colors. I used Brown, Gold and Orange
- Blue painter's tape
- Leaf paper punch
- Frost Spray paint
- Black Chalkboard paint
- 2 Daisy cut Mason Jar lids
- 2 wide mouth Mason Jar hangers/holders
- 2 small candles
- Autumn burlap garland
- 1 piece of wood. I used a wood craft plaque purchased from my local craft store
- Exacto knife
- Glue dots
- Sandpaper
- Fresh autumn flowers
Step 1
Paint each of the large Mason Jars with black chalkboard paint to ensure a chalky finish to the jars. You can also use chalk paint but it is quite a bit more expensive than buying a container of standard black chalkboard paint and covering it with inexpensive acrylic craft paint. You also have a greater selection of colors when using the standard acrylic paint. While you have the chalkboard paint out you should go ahead and paint the piece of wood or the wood plaque that you will be using for the base of your center piece, You should follow the directions and put two coats of paint on both the board and the jars and let them cure over night.
Step 2
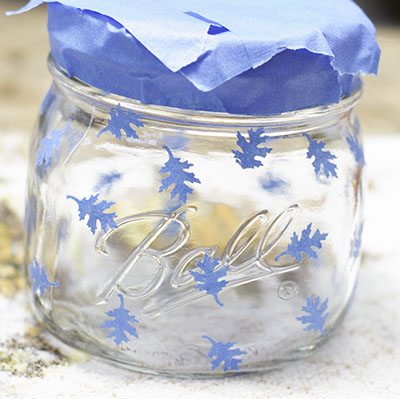
While waiting for the chalkboard paint to dry take your blue painter's tape and wrap it around the threads and cover the top of the short wide mouth mason jars to protect it from the frost spray. Then use your leaf punch to punch out leaves from your painter's tape and place the leaves randomly on your short wide mouth Mason Jars. Once you have completed the leaves, take your two jars to a well ventilated area, preferably outdoors and spray several coats of the frost spray paint onto the jars following the manufacturers instructions. Once the spray has dried remove the leaves using a sharp Exacto knife and remove the rest of the painter's tape. Using glue dots, place the small candles into the short jars. Place the daisy lids on the short jars and screw on the tops. Then add the Mason Jar hangers.
Step 3
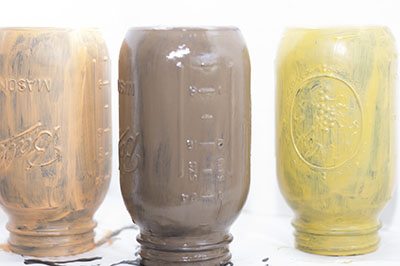
Once the chalkboard paint has cured on the tall Mason Jars, paint each jar with the fall colors you have chosen. I used Brown, Orange and Gold. I used a standard paint brush to give the finish a more rustic feel. You could also use a foam brush if you want a cleaner finish. I painted three coats of each of the colors allowing the paint to dry about 30 minutes between coats. After the paint was thoroughly dried, I took some sandpaper and rubbed off some of the paint to highlight the Ball name.
Step 5
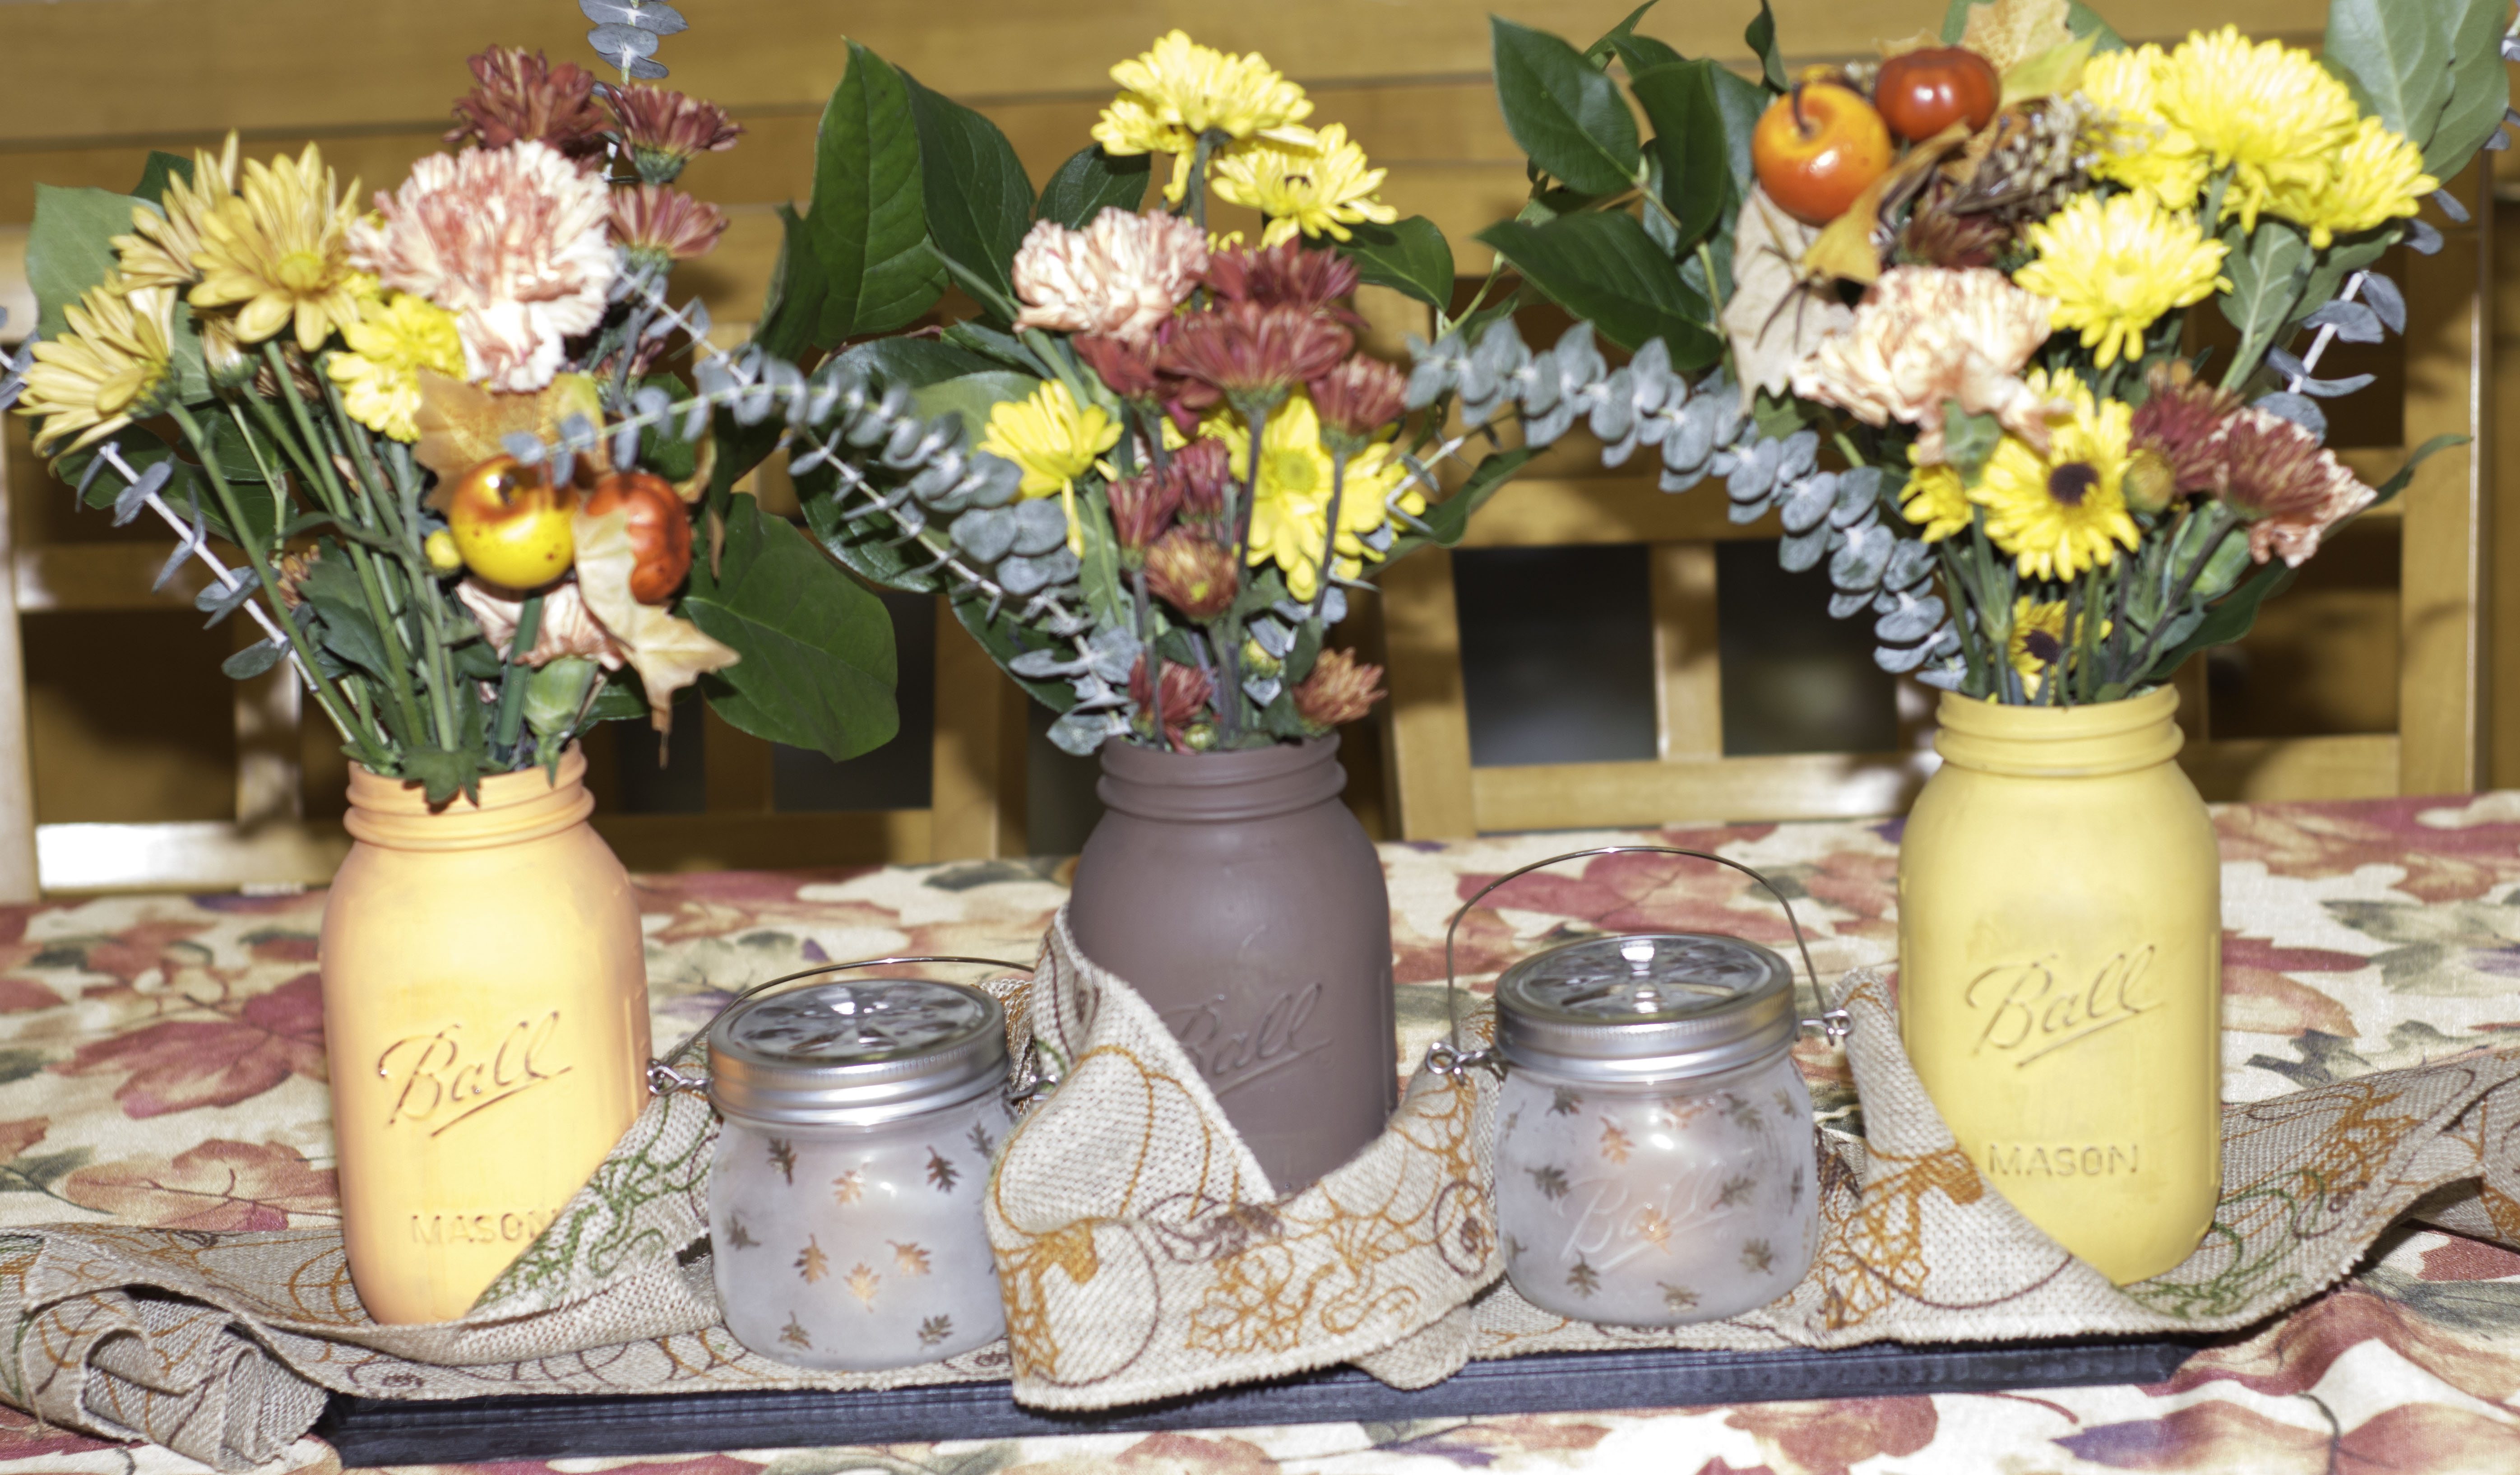
Now that everything is dry, I placed some autumn themed burlap garland on the painted wood piece then I placed all 5 of the Mason Jars onto the board and weaved more of the garland around the jars.
Step 6
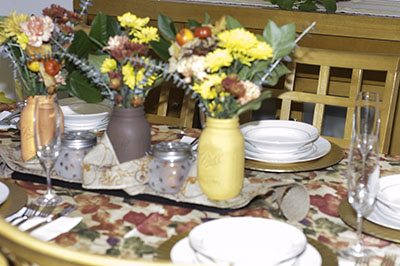
Fill the tall jars with water and insert beautiful autumn colored flowers and greenery to emphasize the Thanksgiving season. Light the candles and enjoy your Thanksgiving. Here is my Thanksgiving table.
This is a very versatile centerpiece. it can be modified for use in many different occasions. You could easily use paint colors for Christmas, July 4, Valentines Day, New Years, or Birthdays. Because the base is painted with chalkboard paint you can write anything on it rather than using garland or fabric. You can also use items other than flowers like cake pops, Heart Candies on a stick, fruit with chocolate sauce in the short jars. There are many different options for making this your own.