
My husband bought some new shirts the other day. I decided to upcycle one of his old shirts into a skirt. There is no pattern needed for this simple sewing project. but take care to follow each step in this sewing tutorial. I don't do a lot of clothes on the site but I do like to up-cycle jeans and things every now and then. This project is a confident beginner sewing project. Just make sure you have a large enough shirt for your size. Fortunately, my husband is a big guy so that helped me. I hope you enjoy this project. If you want more up-cycling projects check out my Up-cycle page.
Note: This post contains affiliate links that if you click on them and make a purchase I will receive a small commission at no extra cost to you. As an Amazon Associate I earn from qualifying purchases.
What you will Need: How to Upcycle a Man's shirt into a Woman's Skirt without a Pattern
Step 1: Cut the Shirt
Start by cutting off the sleeves at the sleeve seam and cut the seam at the shoulders. Remove the collar. Cut down the side seams


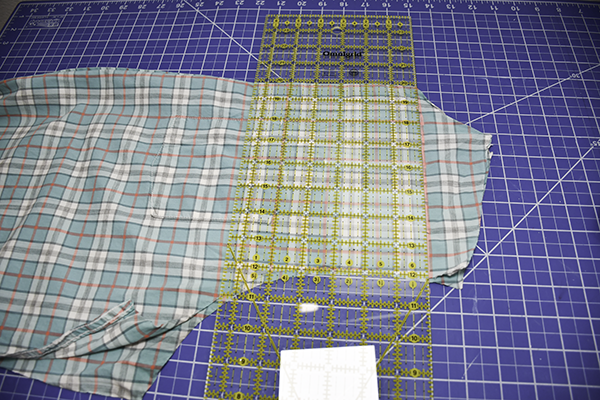
Step 2: Mark the Next Cuts
Fold the front of the shirt in half lengthwise. Using a ruler, draw a straight line directly from the curved neck to the arm holes. Next, Draw a straight line from the first line diagonally down shirt from the arm hole side seam. all the way to the bottom. Finally, draw a straight line along the bottom to cut off the curved edge.

Step 3: Cut the marked lines
Using a sharp pair of scissors cut the shirt along all three of the lines you drew through all layers.


Step 4: Cut the Yoke
The back of men's shirts have a yoke. The yoke tends to be made of two pieces. Cut off the yoke straight across the back through all layers.

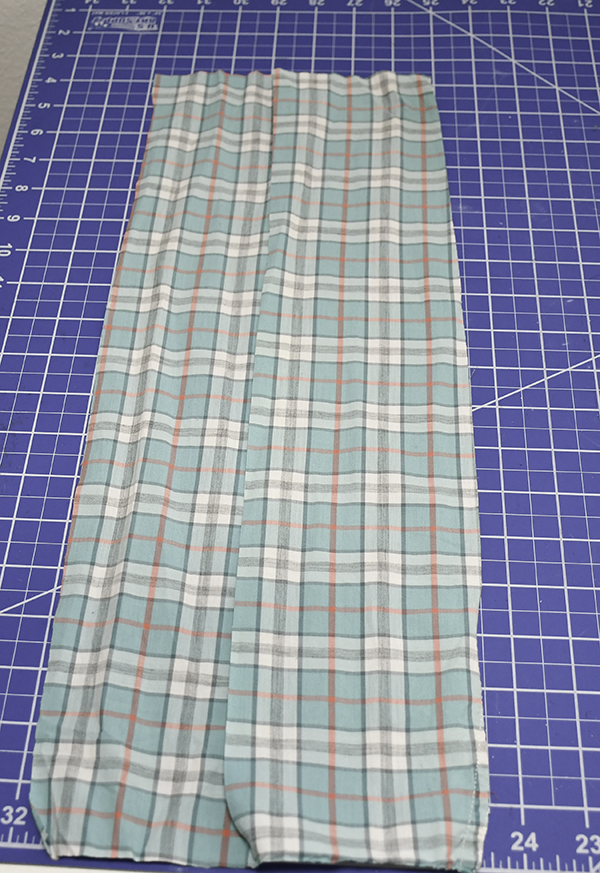
Step 5: Cut the Back
Fold the front and the back in half lengthwise. Place the front on top of the back. Cut the back so that it is even with the front. Make sure that if you are using a striped or plaid fabric that the lines are line up.


Step 6: Add the Darts
Find the center of the front of the skirt and make a mark. Measure 2 3/4″ on either side of the center and make marks. Measure down 3 1/8″ and make another mark. Draw a vertical line from marks. Repeat for the other side. Measure 3/8″ on either side of the first mark and make two additional marks. Repeat for the other side. Draw the dart from the point at the bottom to the marks on either side of the first mark. Draw two additional darts 4 3/8″ from the original center line in the same way you drew the first set of darts.


Step 7: Stitch the Darts
Since the sides of the darts together and pin. Stitch from the top to the skirt to the point of each dart.


Step 8: Stitch the sides
Place the front and back of the skirt right sides together. Stitch the sides using a 1/2″ seam allowance. Zig zag the raw edges to prevent fraying.

Step 8: Hem
Hem the bottom of the skirt.

Step 9: Cut the Sleeves
Start by cutting the cuffs off the sleeves. Cut the long seam and open up the sleeve. Cut a straight line from the bottom of the sleeve to the top cutting off the button placard.


Step 10: Mark the Sleeve
Find the center of the narrower part of the sleeve. Measure 8 5/8″ from the edge you just cut to the other side of the sleeve and mark. Draw a straight line from the top to the bottom on the center mark.

Stop 11: Cut the Sleeve
Cut the sleeve from the top to the bottom along the center line and the 8 5/8″ line.
Step 12: Stitch the sleeve
Place the two pieces you just cut right sides together. Stitch one short edge using a 1/2″ seam allowance.

Step 13: Add the Interfacing
Cut two pieces of Sf101 that measure 2″ x 8″. Fuse the interfacing to the sleeve you just stitched starting at the end of the each side toward the center. Add the interfacing in the same way on both sides of the sleeve piece.

Step 14: Stitch the Sleeve piece to the skirt
Unbutton the front of the skirt.Place the sleeve piece right sides together with the skirt so that it goes from one side of the button panel to the other side. Leave 1/2″ overlap. Fold the sleeve piece lengthwise so that the sleeve piece is right sides together with the skirt. Pin the overlapped short ends. Stitch using a 1/2″ seam allowance. Trim off any excess fabric.


Step 15: Add the Elastic
Take the 15″ piece of elastic and pin it from side seam to side seam. Stitch the short ends to line up with side seams.

Step 16: Finish the waistband
Fold the waistband over to enclose the raw edges. Press. Stitch the waistband through all layers. Take a button from one of the sleeves and add it to the waistband so that it is in line with the other buttons. Add a button hole on the other side also in line with the other button holes. Create two belt loops. Cut a two pieces of the remaining fabric that measure ___” x ___”. Fold the long raw edges to the center and press. Fold in half to enclose the raw edges. Stitch on both sides. Fold the short ends under. Place the belt loops in the center of each side of the button placard and stitch to the skirt on the top and bottom short ends. You have now up-cycled a man's shirt into a woman's skirt without a pattern.


I hope you enjoyed this simple up-cycling project. For more sewing and crafting projects subscribe to our free newsletter and receive access to our free printable library.
Subscribe to our Free YouTube Channel!
Join our Sew Very Crafty Fans Facebook group
If you want to ask questions and share your projects join our Facebook group here. The community will help to achieve your sewing and crafting dreams.


That looks pretty neat! Well done.
Thank you.