
How to Make a Slider Pen Pouch
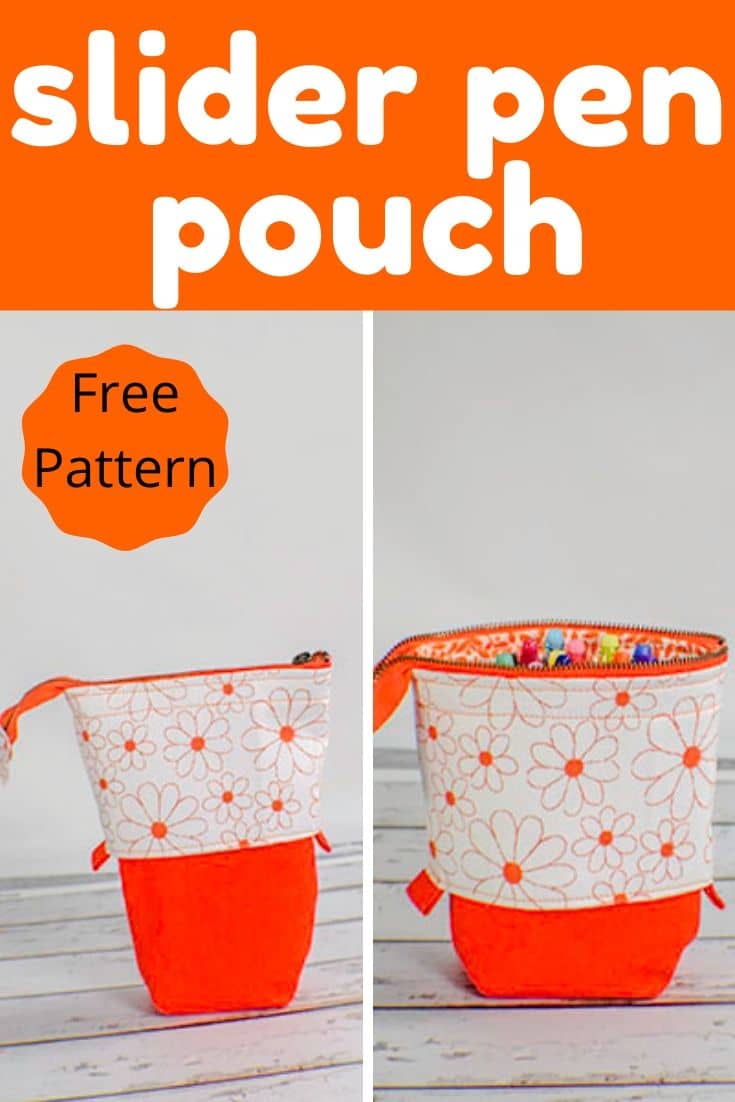
I just got some new Frixion heat erasable pens as a gift. I love these pens for sewing because they are heat erasable. They write on any fabric and iron away. Well, I needed a place to store my new Frixions so I decided on this terrific slider pen pouch. I just love this idea. It is absolutely perfect for storing my pens. It zips up for storage and pulls down to expose all the wonderful colors. How fun is that? Not only is it a practical solution to my pen storage problem it is super simple to make. It seems complicated but it really isn't. This tutorial will walk you step by step how to create this fun slider pen pouch.
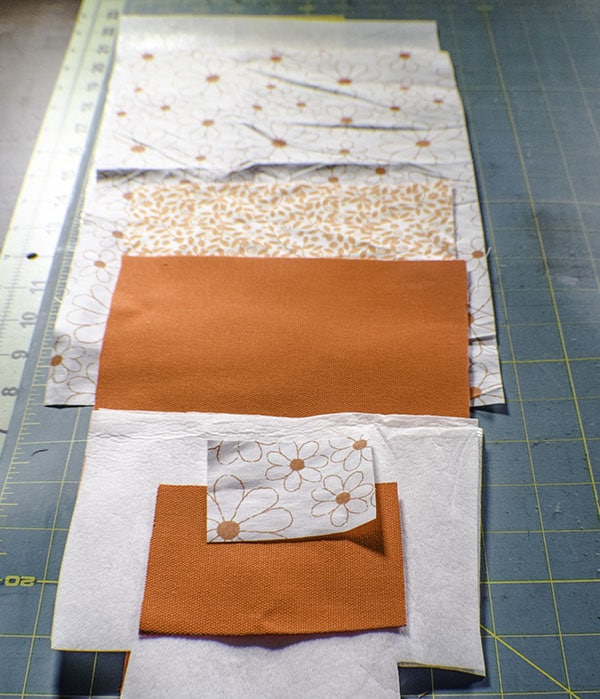
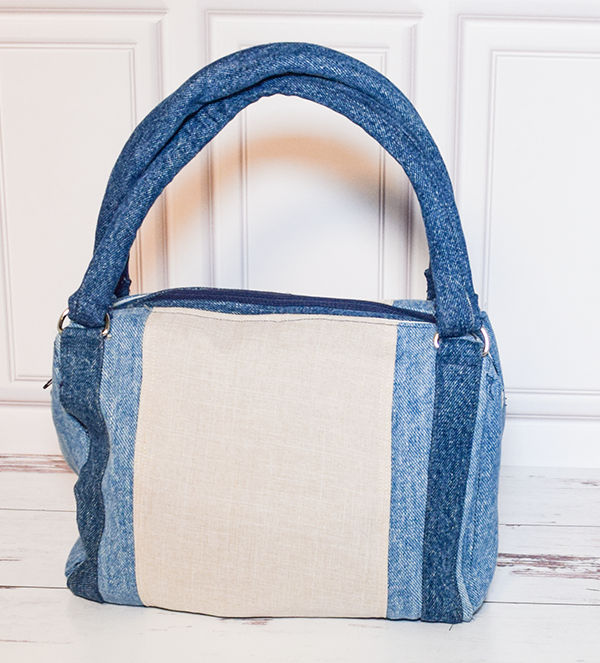
As usual, I used remnants in my stash to create my slider pen pouch. Of course, you can buy Fabrics at your local fabric store or online at Mood Fabrics, Michaels or Amazon for the perfect fabric for your pen pouch. Regardless, get some fun fabrics for your project to make it extra special. You will need three different fabrics for this project. This post contains affiliate links that if you click on them and make a purchase I may receive a small commission at no extra cost to you. As an Amazon Associate I earn from qualifying purchases. ![]()
What you will Need: How to Make a Slider Pen Pouch
- Pattern you can Get Here!
- 1/4 yd Canvas Fabric
- 1/4 yd Lining Fabric
- 1/2 Yd Outer Fabric
- 8″ zipper
- 1/2 yd Pellon 808 Interfacing
- Standard Sewing Supplies
Step 1: Cut Out out your Fabrics
You will have three coordinating fabrics for this project. For the base of the project use the pattern to cut out two pattern pieces from the canvas color that you have selected. I chose a bright orange for my pen pouch. Cut a 4″ x 2 3/4″ rectangle from the canvas as well. Decide on your lining fabric and use the pattern piece to cut out two pieces of the lining. Then select your outer fabric and cut a rectangle that measures 13 1/2″ x 8 3/4″ and a smaller rectangle that measures 2″ x 2 3/4″. I chose a cute white an orange floral print. Cut the interfacing using the bottom of the pattern piece but only to the 6″ line shown on the pattern. Cut another piece of interfacing to measure 13″ x 8 1/2″.
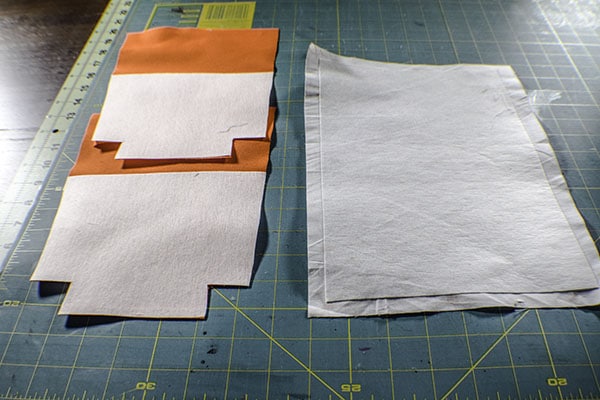
Step 2: Fuse the interfacing
Fuse your interfacing following the manufacturers instructions to the bottom of the canvas pieces and the center of the large outer piece.
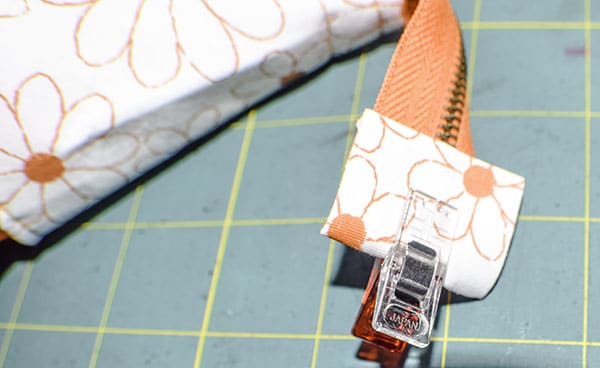
Step 3: Add the zipper
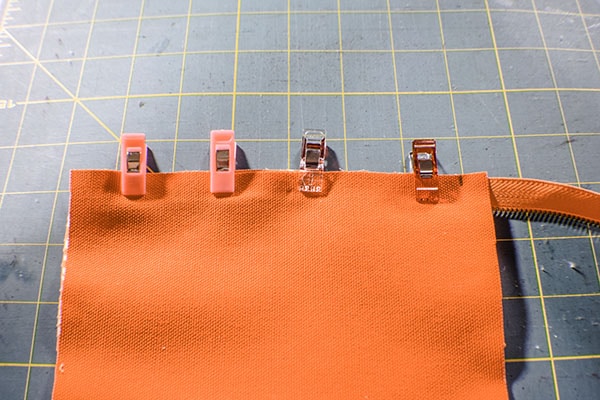
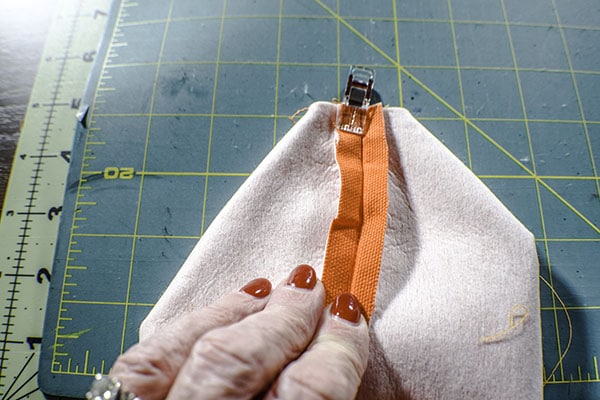
You will notice that the zipper is longer than the top of your pattern pieces. This is correct. Start by placing one of your lining pieces right sides up on your work surface. Place the zipper right sides up on the lining piece so that the beginning of the zipper tape is even with raw edges of the side of the lining. Fold under the end of the zipper tape and clip. Place the canvas piece right sides down on the zipper to make your zipper sandwich. The other end of the zipper should be extended beyond your fabric. Measure in 1″ from the end and make a mark. Sew the zipper from the front raw edge to the mark at the end close to the zipper teeth.
You will notice that I used wonder clips for this project instead of pins. I did this because of the thickness of the canvas fabric. If you don't have wonder clips you can get them in my Amazon shop.
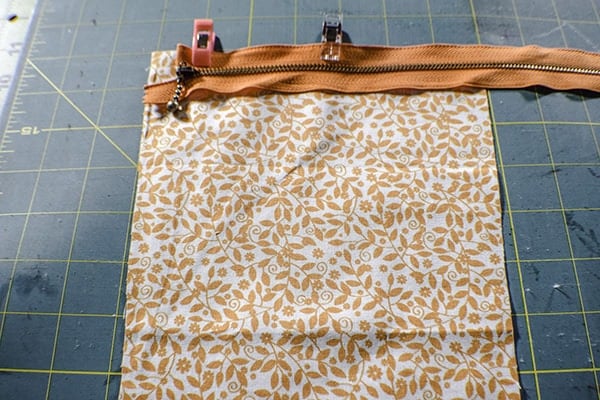
Add the zipper
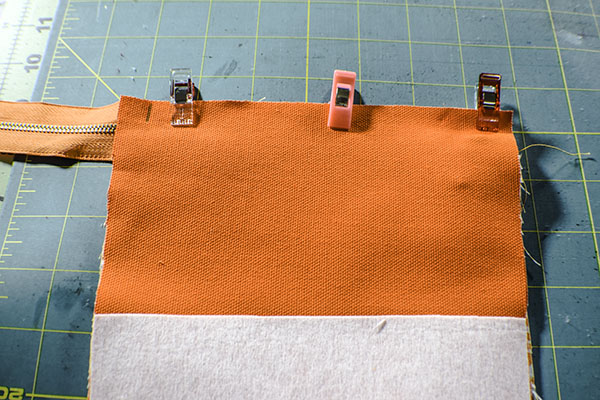
Move the zipper end in between the fabric pieces and stitch the ends of the fabric without stitching the zipper. Repeat for the other side of the zipper.
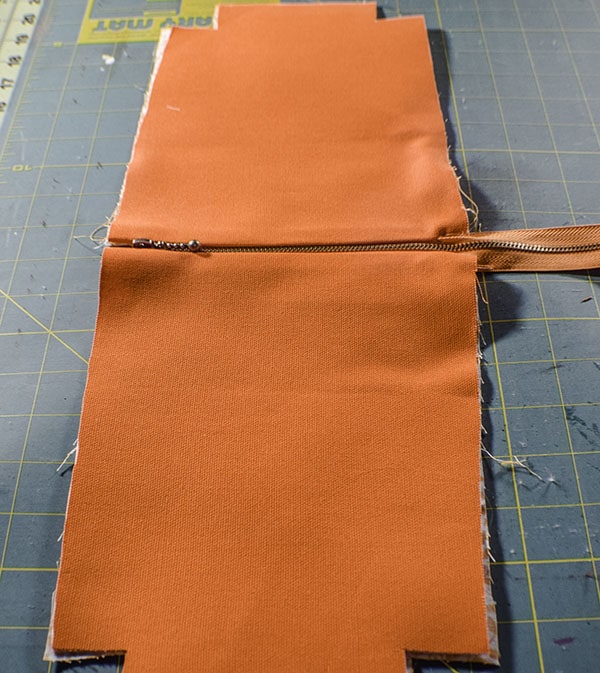
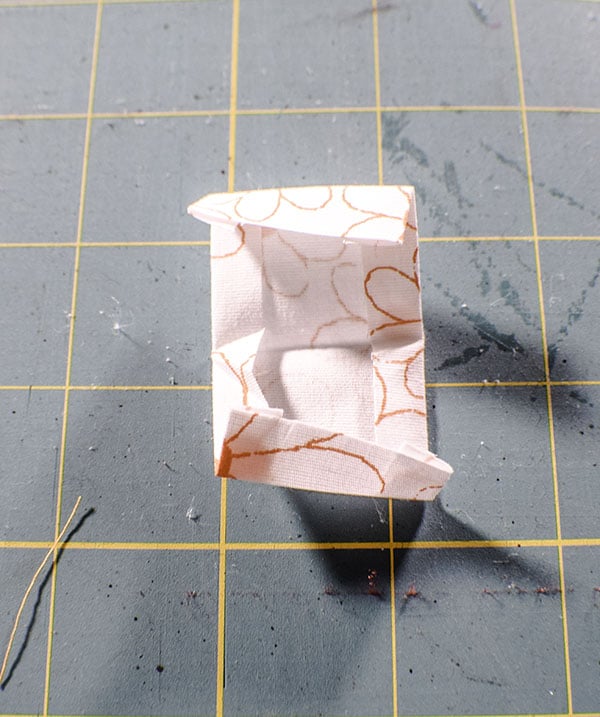
Step 4: Sew the bag together
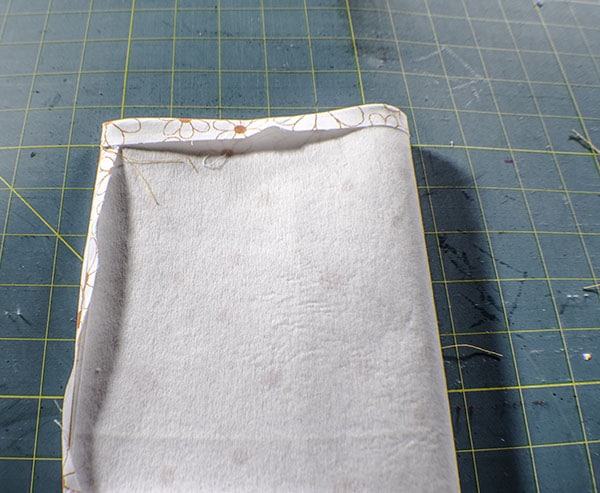
Place the canvas pieces right sides together and the lining pieces right sides together. Stitch the sides and the bottom of both pieces without stitching the zipper and leaving an opening in the lining for turning. Make sure that the zipper is half way open or you will not be able to turn the bag.
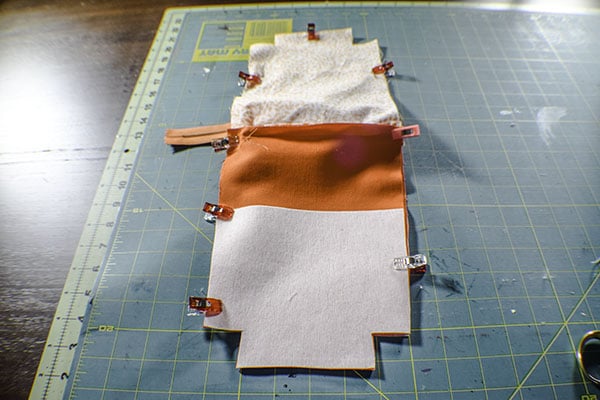
Step 5: Box the corners
You have four corners. Box each corner by pinching the open corners together and stitching along the seam line that you created. Turn the bag right side out through the opening in the lining and in the zipper. Stitch the opening closed using ladder stitch. Push the lining into the canvas bag and press. Top stitch around the top of the bag for a more professional finish.
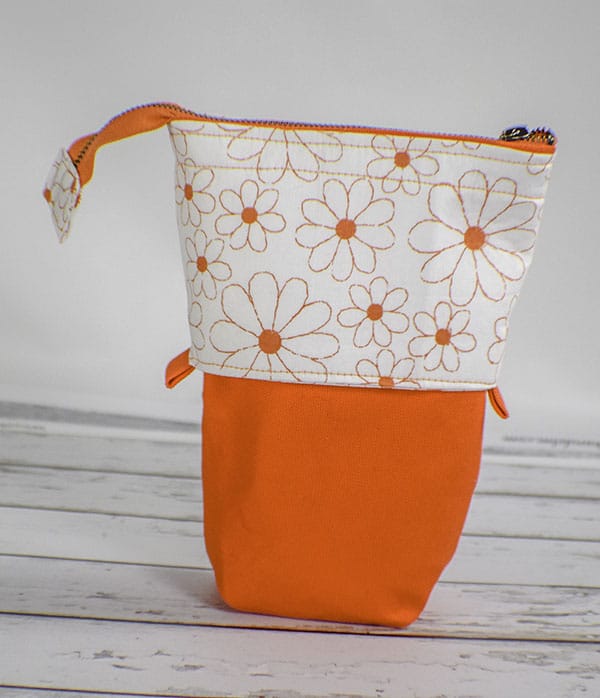
Step 6: Create the outer Piece
Fold the 13 1/2″ x 8 3/4″ piece widthwise and stitch right sides together using a 3/8″ seam allowance. Press the seam open. Press the fabric so that it is even with the interfacing. Fold the entire piece wrong sides together. Take the 4″ x 2 3/4″ piece of canvas and cut it in half widthwise. Fold the raw edges of each piece in toward the center lengthwise. Then fold in half widthwise to make a tab. Place one tab in even with the seam between the two sides and the other tab on the opposite side. Top stitch all the way around the piece.
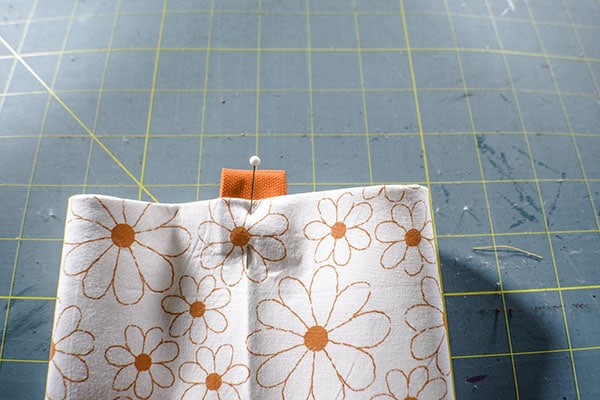
Step 7: add the outer Piece
Place the canvas bag inside the outer piece so that the top edges line up and the tabs are facing down. Top stitch all the way around through all layers. Sew a second line 3/8″ down from the first.
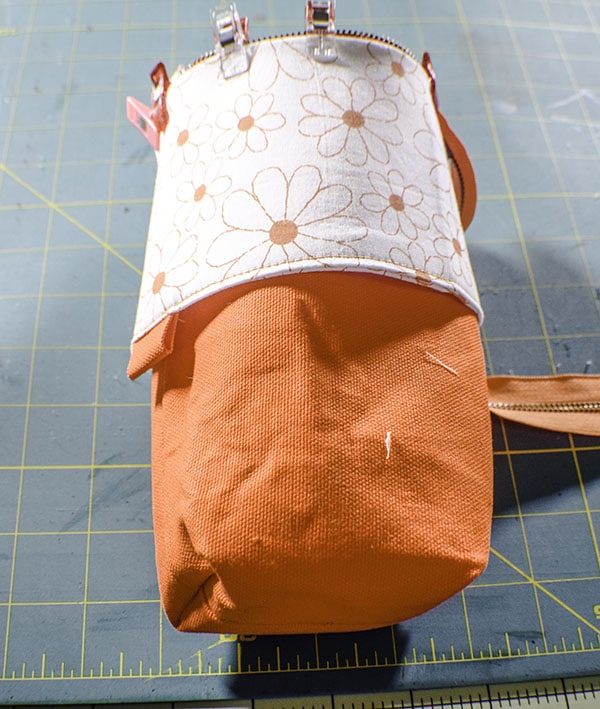
Step 8: Add the zipper tab
Create the zipper tab from the last piece of outer fabric. Fold all of the edges in by 1/4″ then fold the piece in half to form the tab. Place the tab at the end of your zipper and stitch all the way around. You have now finished your slider pen pouch
I hope you enjoyed this fun little project, If you would like more sewing and crafting projects sign up for our news letter and receive your free eBook of 15 handbag patterns and tutorials.
IF YOU WOULD LIKE MORE PEN AND PENCIL CASE TUTORIALS CHECK OUT MY PENCIL CASE TUTORIAL OR MY 3 RING BINDER PENCIL CASE.
If you would like to see a video of this project check out YouTube here.


I was with you until step 6, then everything fell apart. You need more pictures here to clarify what you mean at this crucial step.
Hi, Sorry the instructions weren’t as clear as they should be. You can check out this video to see exactly what I was referring to. https://www.youtube.com/watch?v=FVJt65OYc0M
Adorei ???. Vou fazer ????
Loved this. Made one for my daughter who is at uni! Great instruction too
Thank you.
How many pencils does it hold please?
I don’t really know but it holds quite a few.
Please don’t use the Frixion pens on fabric! They may “erase” with heat, but it is a thermal reactive ink, so a white line will appear when ironed. The website even addresses this now, as do several message boards. I learned the hard way on a vintage cowboy fabric. I use them for writing all kinds of notes on paper, but please don’t use them on fabric unless it will be in the seam allowance.
Thanks for this tip. I almost always use mine in the seam allowance but using another fabric erasable pen would likely be better.
Thank you for the tutorial. The steps are simple and easy to follow. Is there any way to stitch both fabrics together when boxing the corners? The other problem I have is that the lining comes out when sliding the pencil case down, is there any way to fix this?
I do not think there is a way to box the corners together without compromising the structure of the pencil case. I am unsure why you lining keeps coming out when you slide the pouch. I have not had that problem. You could try to hand stitch a few stitches to the bottom of the lining to the bottom of the pencil case to keep the lining in place. Without seeing it I can’t really say. I am sorry that I cannot be more helpful.