Whenever I get new glasses or sunglasses I always get a plain black case. with this beginner sunglasses case you can make it all your own. This is a simple beginner sewing project that anyone with basic sewing skills can make using the free sewing pattern. This is a fun and functional little project that makes for a great gift. The pattern and instructions make this a super simple sewing project to make. Take a few minutes and stitch up one of these beginner sunglasses cases for your sunglasses or eyeglasses. This is a fun one.
I used fabrics that I had on hand that I purchased from Fabric.com and JOANN Fabric & Craft Stores![]() but you could head to onlinefabricstore.net to get exactly what you want for your sunglasses case. I cotton for the outer portions of my case and used faux suede for my lining to prevent scratching. This post contains affiliate links that if you click on them and make a purchase I Amy receive a small commission at no extra cost to you. As an Amazon Associate I earn from qualifying purchases.
but you could head to onlinefabricstore.net to get exactly what you want for your sunglasses case. I cotton for the outer portions of my case and used faux suede for my lining to prevent scratching. This post contains affiliate links that if you click on them and make a purchase I Amy receive a small commission at no extra cost to you. As an Amazon Associate I earn from qualifying purchases.
What you will Need: How to Make a Beginner Sunglasses Case
- Pattern you can get by clicking on this link
- 1/4 yd outer, lining and accent fabric
- 1/4 yd fusible fleece like Pellon 987F
- 1 Magnetic snap
- Standard sewing supplies
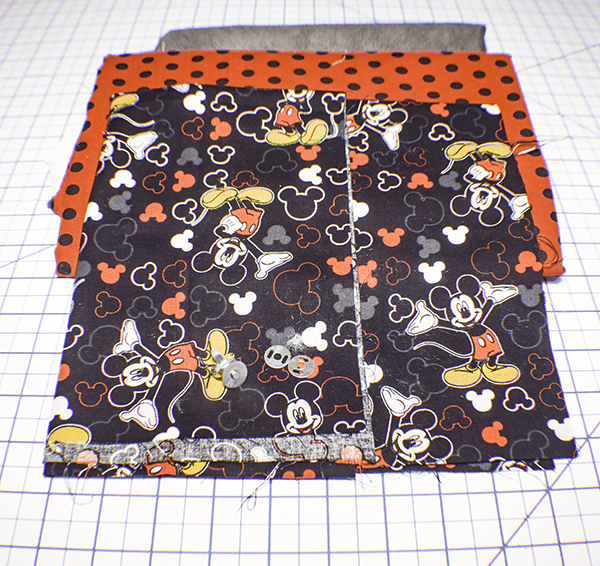
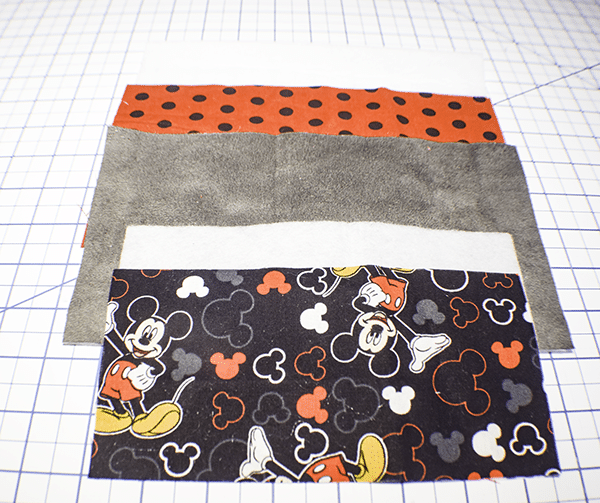
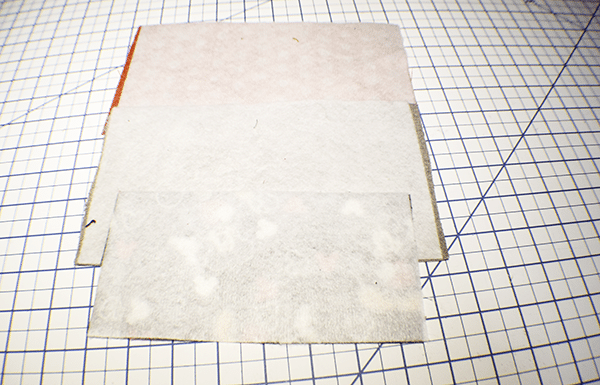
Step 1: Cut your Fabrics
- From the main outer fabric, lining and fleece cut 2 pieces each that measure 9 1/8″ x 5″
- Cut two pieces and fleece from the accent fabric that measures 7 1/2″ x 3 3/4″
Step 2: Fuse the Fleece
Fuse the fleece to the wrong side of the main outer fabric and one of the accent fabric pieces following the manufacturer's instructions.
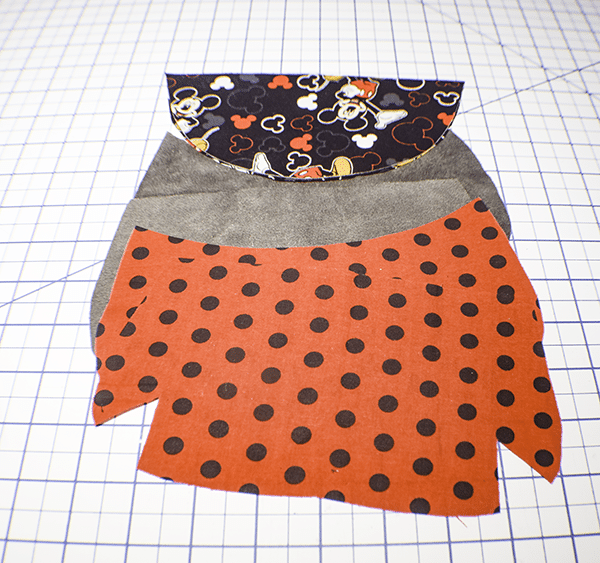
Step 3: Cut your Fabrics using the Pattern Pieces
Using pattern piece A cut a piece of outer and lining fabric including the dart markings. Repeat for pattern piece B. Fold the accent piece in half matching the short ends. Round the corners by cutting from one corner to the other. Cut the other accent piece to match.
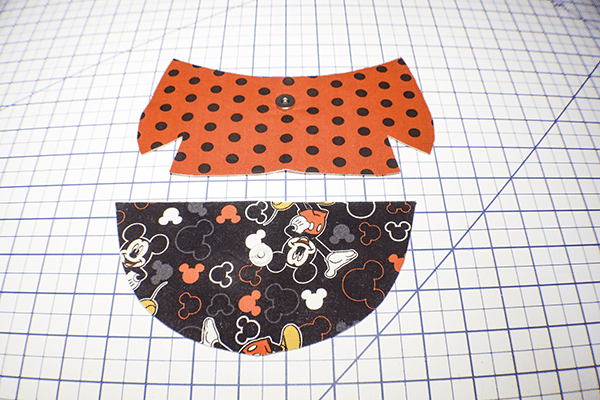
Step 4: Add the Magnetic Snap
Find the center of the accent piece that has the fleece and make a mark 1 1/4″ from the rounded edge in the center. Insert the magnetic snap by placing the grommet on the center mark and then marking the two prong holes. Clip open the prong holes. Place the prongs of one half of the snap through the holes. Then place the grommet on the prongs. Fold the prongs down to secure. Take one of the outer pattern B pieces and measure up 2 3/8″ from the bottom center and place the second half of the magnetic snap in the same way you inserted the first half.
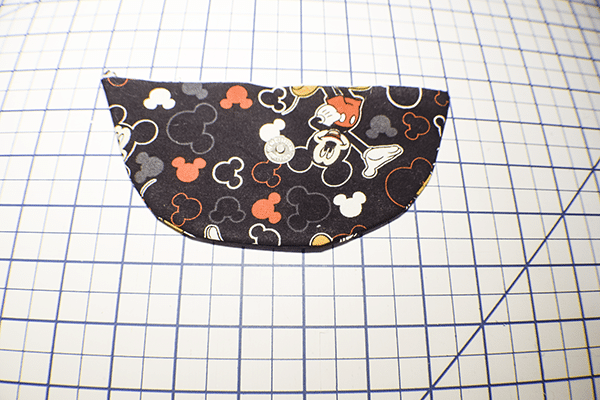
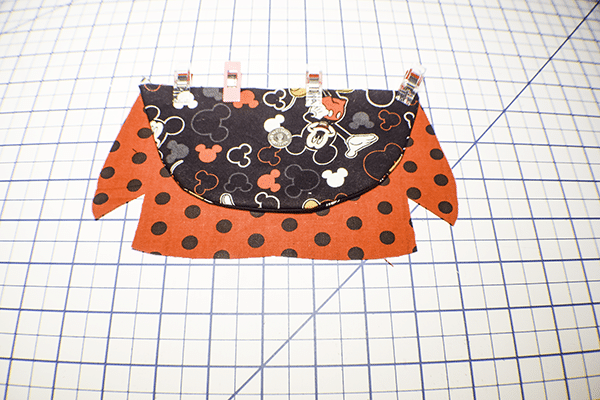
Step 5: Create the Flap
Take the two accent pieces and place them right sides together. Stitch around the sides and bottom using a 3/8″ seam allowance. Turn right sides out and press. Topstitch along the bottom and sides.
Step 6: Attach the Flap
Attach the flap to outer piece A with the snap facing up. Stitch the two pieces together using a 3/8″ seam allowance.
Step 7: Stitch the Darts
Take outer piece A and pinch the dart sides together on each side and pin. Stitch the darts using a 3/8″ seam allowance. Repeat for the Pattern B piece. Pre4ss the darts open.

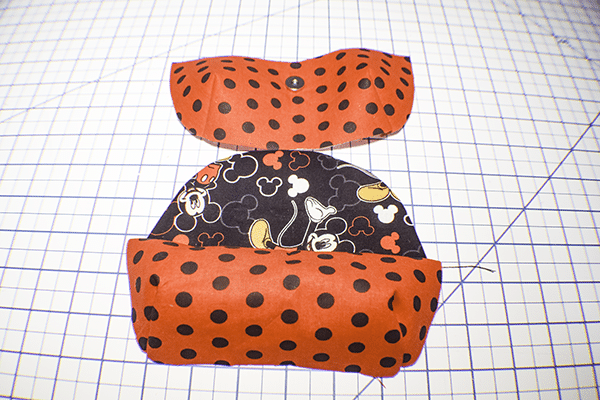
Step 8: Create the Outer Case
Place piece A and piece B right sides together. Stitch along the sides and bottom using a 3/8″ seam allowance. Turn right sides out.
Step 9: Create the Lining
Create the lining in the dame way that you created the outer case. You will stitch the darts on each piece then place the two pieces right sides together. Stitch the two pieces along the sides and bottom but this time leave an opening on the bottom to turn the piece right sides out in the next step.
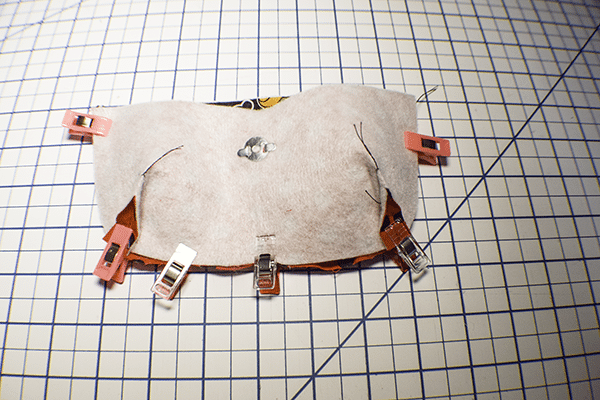
Step 10: Combine the Lining and the Outer Case
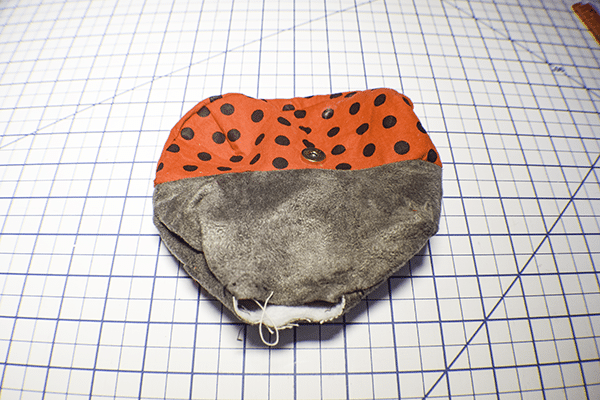
Place the outer case inside the lining case so that they are right sides together making sure that the flap is sandwiched between the two. Stitch all the way around the top of the case.
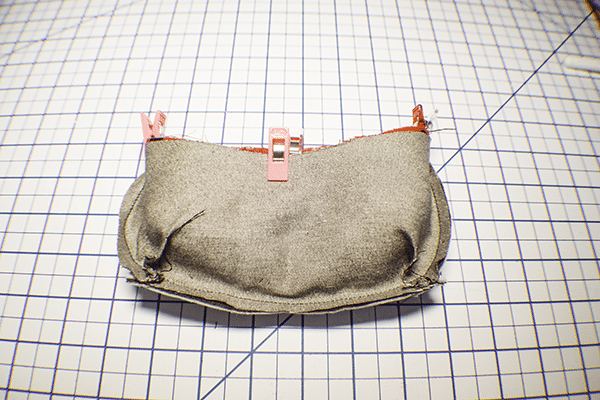
Step 11: Finish the Sunglasses Case
Turn the case right sides out through the opening you left in the lining. Stitch the opening closed using either ladder stitch or your machine. Stuff the lining into the outer case. topstitch all the way around the rim of the case for a more professional look and to secure the lining. You have now finished your beginner sunglasses case.
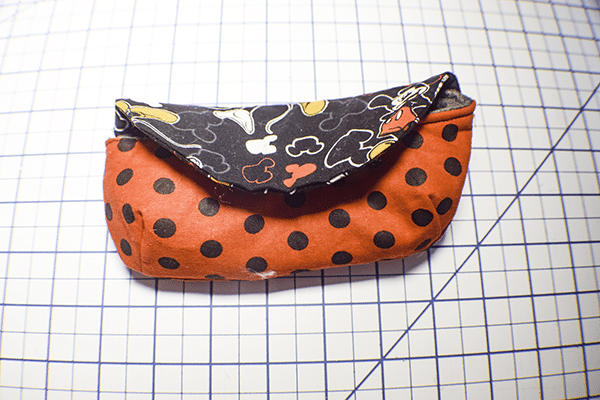
I hope you enjoyed this beginner sunglasses case. If you would like more sewing and crafting projects sign up for our newsletter and receive access to our free printables library.
If you would like video tutorials of some of Sew Very Crafty's most popular posts subscribe to our free YouTube channel here.