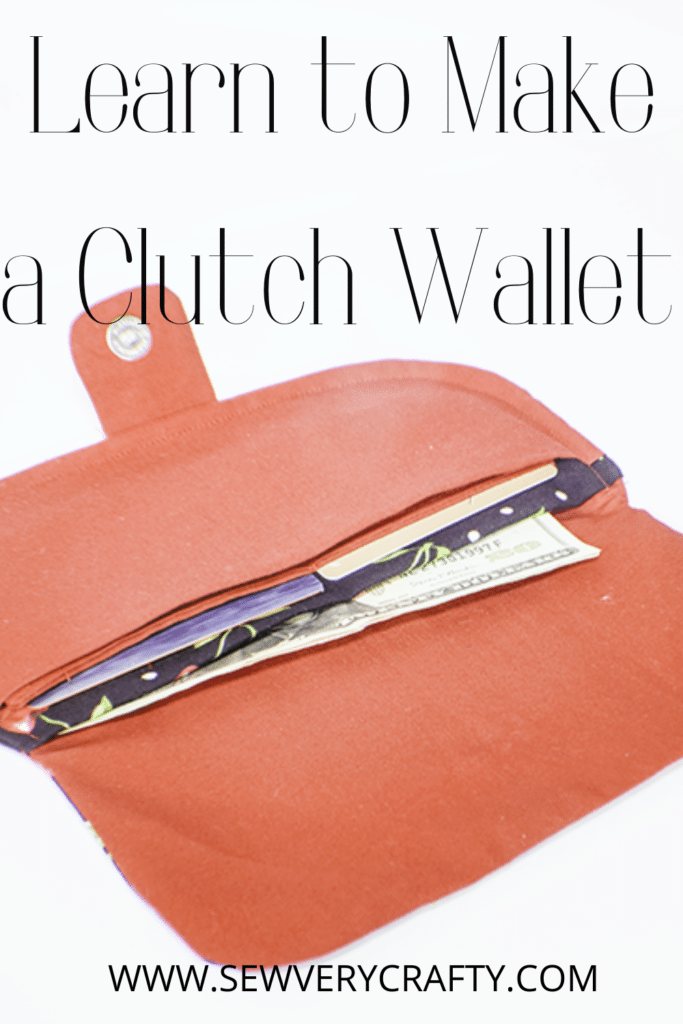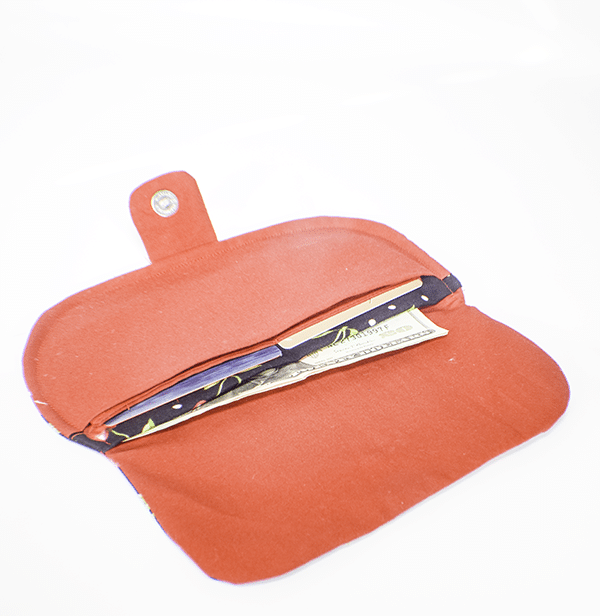
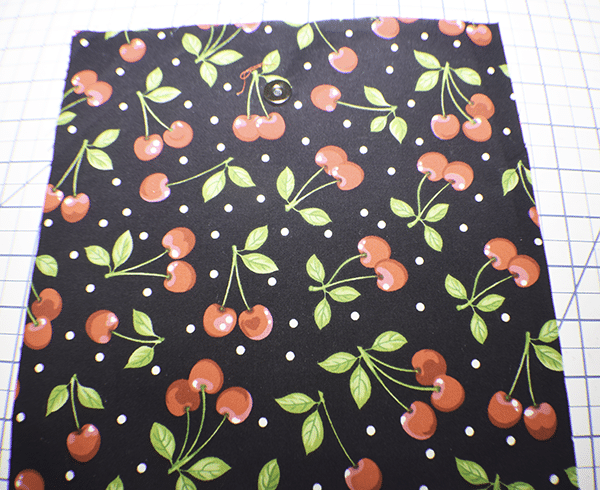
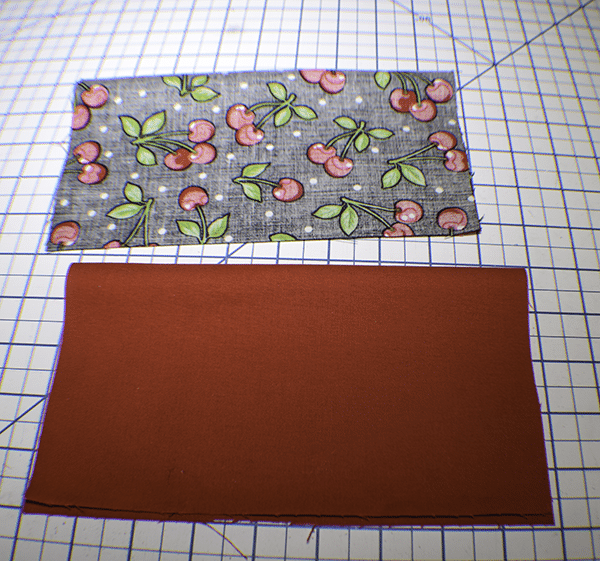
Learn to sew this simple clutch wallet using the free pattern enclosed with this tutorial. This is a simple wallet project that anyone with basic sewing skills can make. I really enjoyed stitching up this wallet and I know that you will too. I used some cherry fabric and Kona cotton for my project. Just use the pattern piece and the accompanying measurements and yours will turn out perfectly. If you want other wallet projects check out my bifold wallet or my passport wallet.
I used remnants that I had purchased at JOANN Fabric & Craft Stores but you could head to ![]() , fabric.com or onlinefabricstore.net to get the perfect fabric for your project. This post contains affiliate links that if you click on them and make a purchase I may receive a small commission at no extra cost to you. as an Amazon Associate I earn from qualifying purchases.
, fabric.com or onlinefabricstore.net to get the perfect fabric for your project. This post contains affiliate links that if you click on them and make a purchase I may receive a small commission at no extra cost to you. as an Amazon Associate I earn from qualifying purchases.
What you will Need: How to Make a Clutch Wallet
- Pattern you can get by clicking on this link
- 1/4 yd outer fabric or patchwork
- 1/4 yd lining fabric and Pellon 808 interfacing
- 1/8 yd Pellon SF 101
- 1 7″ zipper to be shortened.
- 1 Magnetic snap
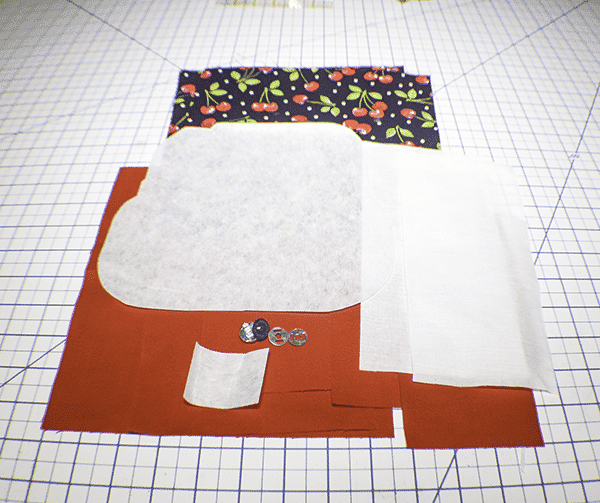
Step 1: Cut Out your Fabrics
- Using the pattern piece cut out the Pellon 808 interfacing.
- Lining Pieces that measure 5 1/2″ x 2 3/8″, 9 1/2″ x 6″, 9 1/2″ x 3 1/2″, 7 7/8″ x 4 3/4″, 9 1/2″ x 8 1/8″, 7 1/2″ x 7 7/8″
- Outer piece or patchwork that measures 9 1/2″ x 8 5/8″, 9 1/2″ x 9 1/2″
- Pellon 808 Interfacing that measures 1 1/2″ x 2 1/8″
- Pellon SF 101 Interfacing that measures 8 6/8″ x 4 1/4″
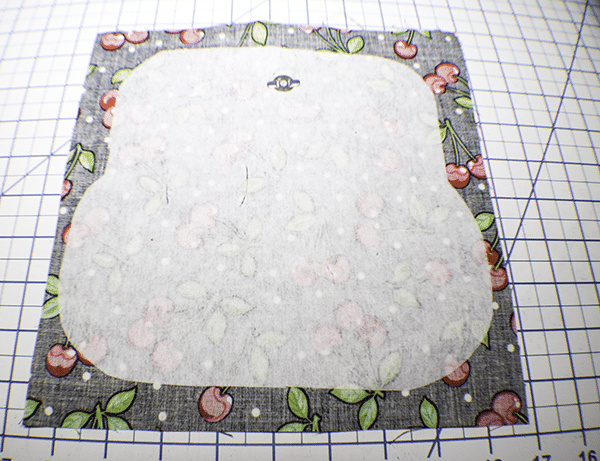
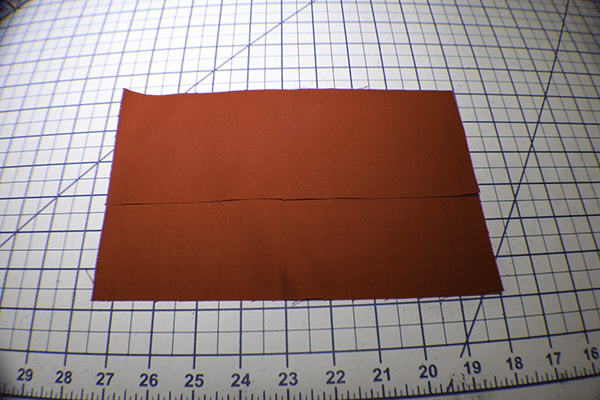
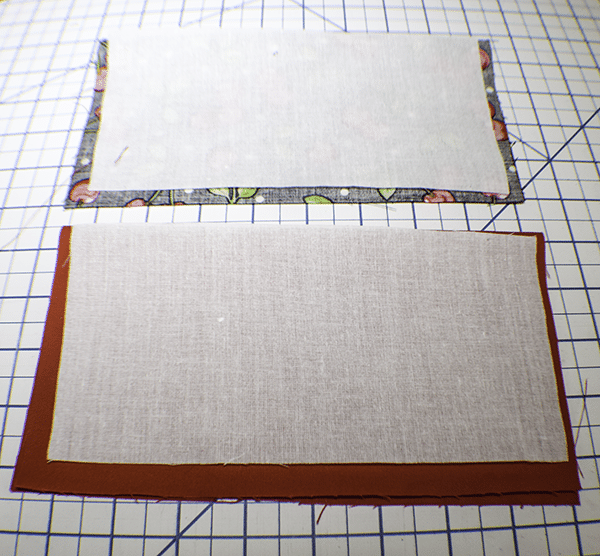
Step 2: Fuse the Interfacing
Fuse the Pellon 808 that you cut from the pattern piece to the main body piece that measures 9 1/2″ x 9 1/2″ following the manufacturer's instructions.

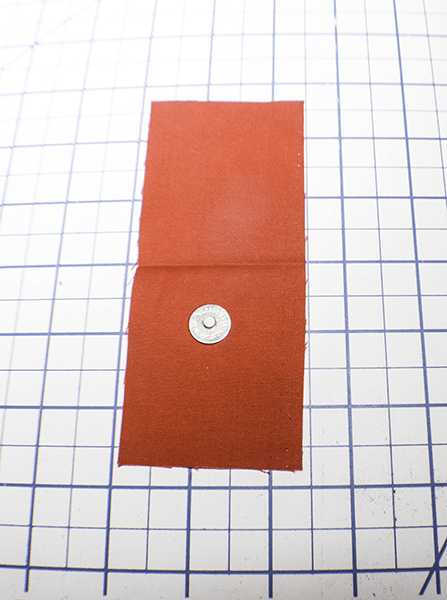
Step 3: Add the Magnetic Snap
Measure 3/4″ from the bottom of the pattern piece and insert half of the magnetic snap.
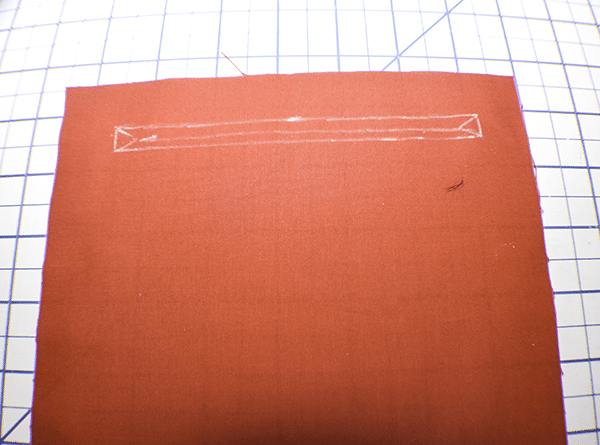
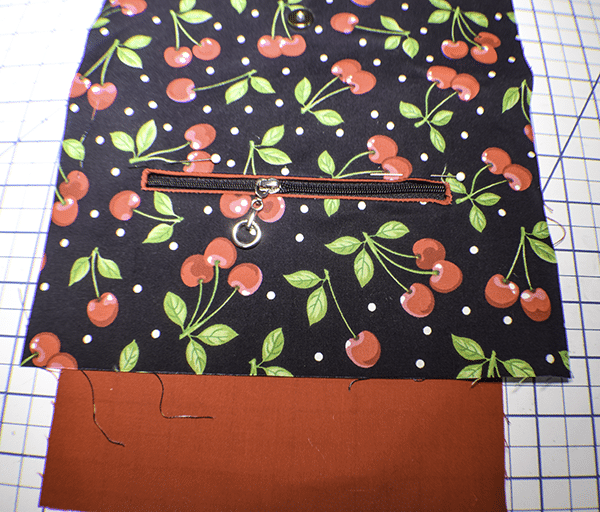
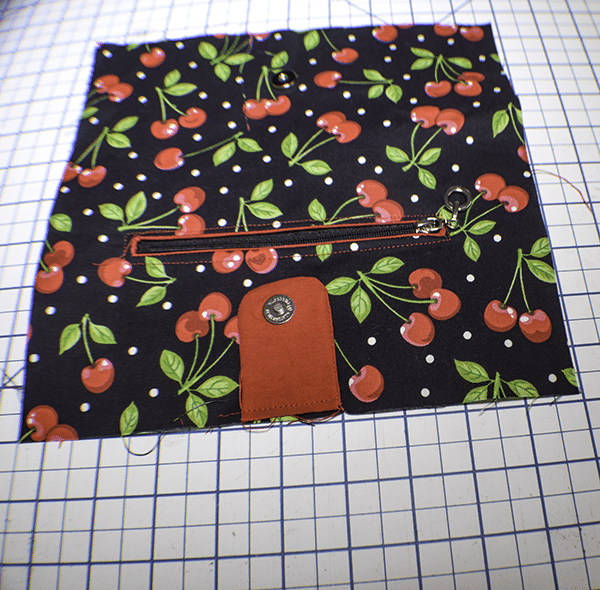
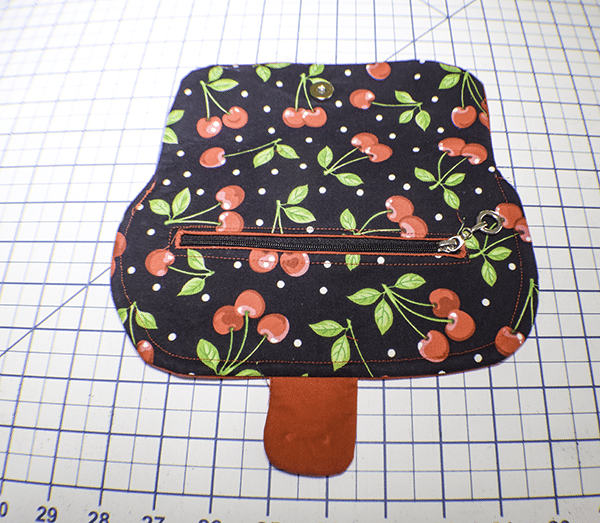
Step 4: Create the Zipper Pocket
Take the lining piece that measures 7 1/2″ x 7 7/8″ and measure down 7/8″ from the top and 7/8″ from each side and ark. Draw a straight line from mark to mark then draw down 3/8″ and across to create a rectangular box. Once you have finished the box draw two small triangles at the end of the box as shown and join them with a straight line.
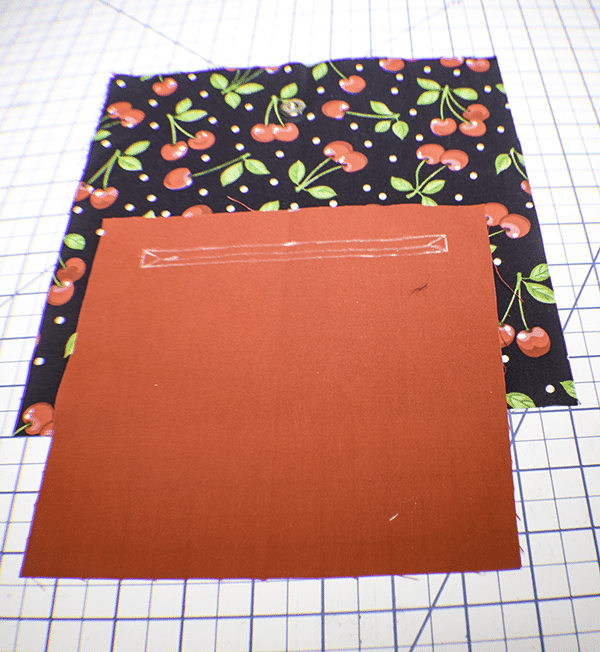
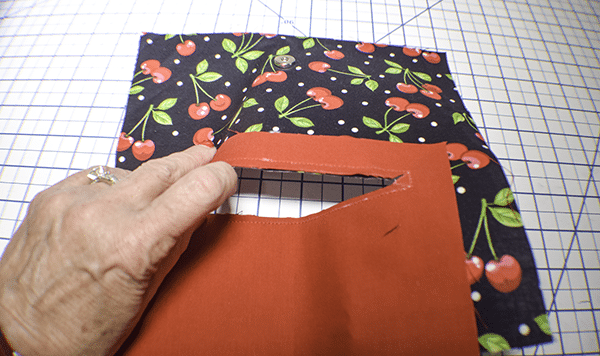
Take the outer piece that you fused the interfacing on and find the center. Measure up from the bottom 4 3/4″ and make a mark. Find the center of the piece you just drew the rectangle on and match the top center with the mark on the outer piece. Make sure that both the rectangle and the outer fabric piece are facing up. Stitch around the box through all layers. Using a pair of scissors cut through the line and the triangle legs in the box through all layers. Push the lining fabric through the opening you just created and press as shown.
Step 5: Add the Zipper
Place the zipper underneath the opening and pin. Stitch the zipper to the opening all the way around the box.
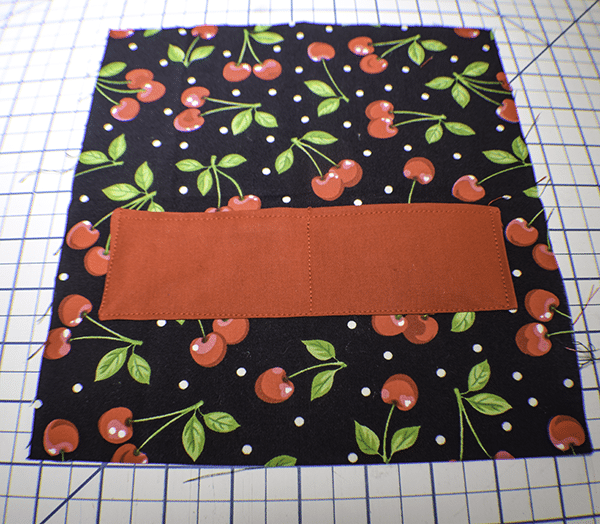
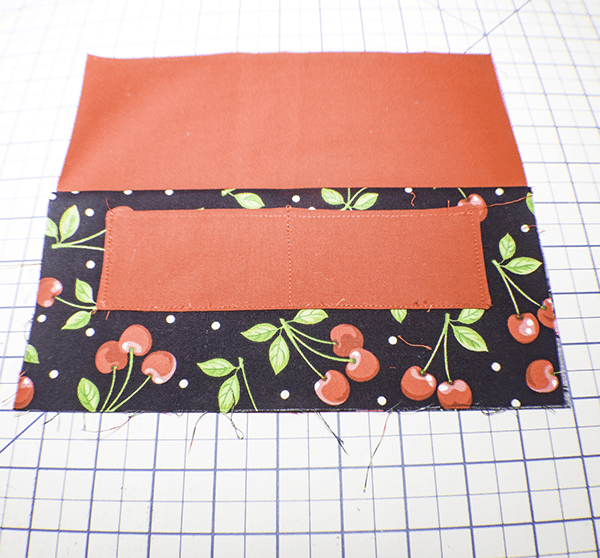
Step 6: Create the Pocket
Turn your project to the wrong side and fold up the lining piece so that the bottom raw edge meets the top raw edge. Stitch the lining sides and top together to form the pocket piece.
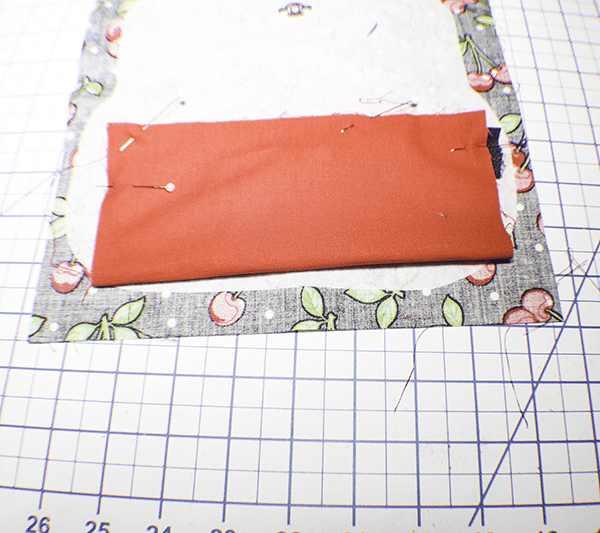
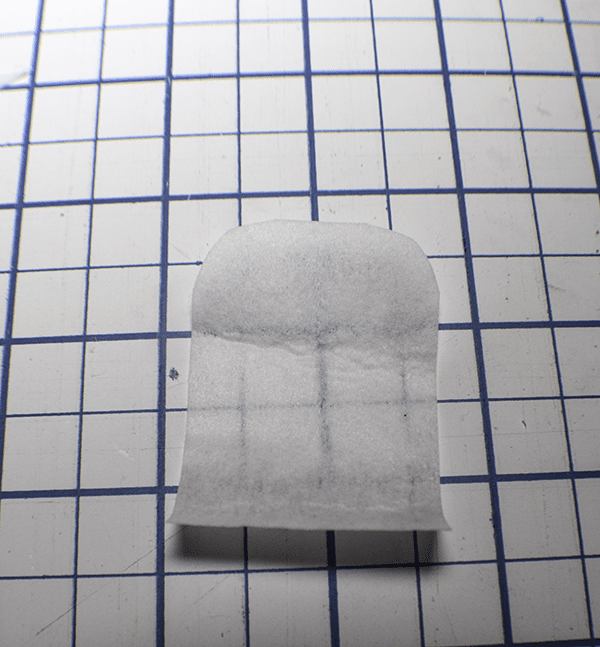
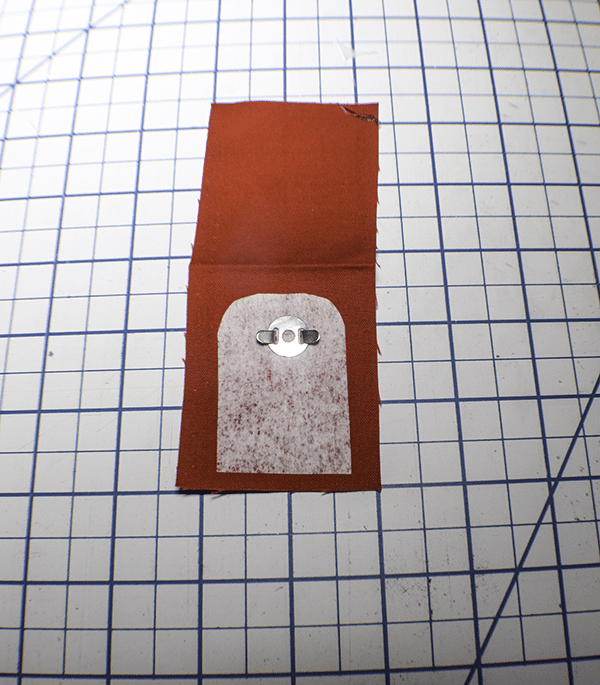
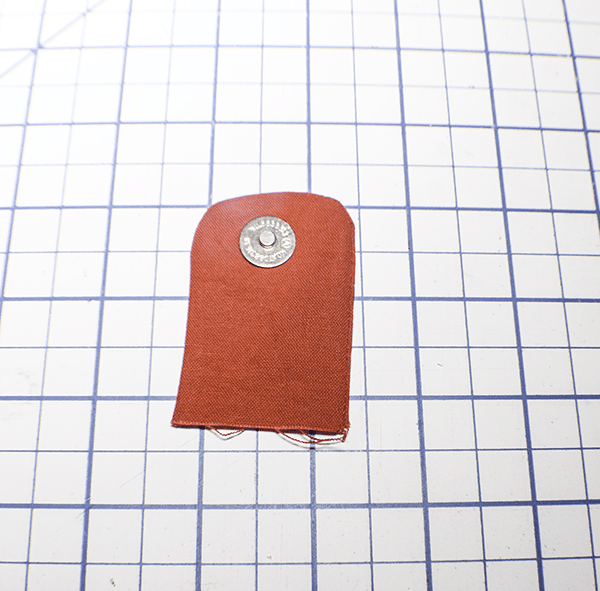
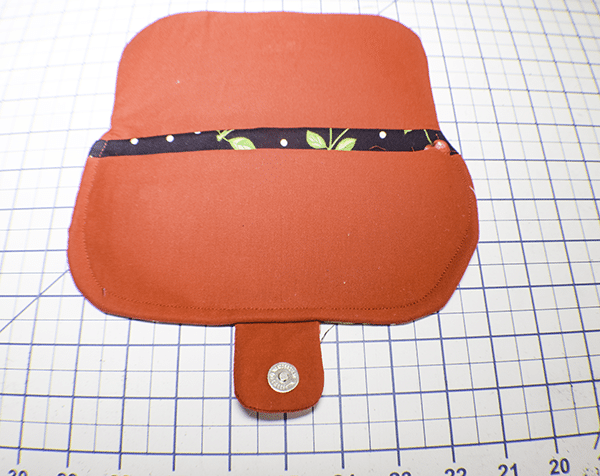
Step 7: Create the Closure
Take the small piece of interfacing and round the corners of one end. Fold the 5 1/2″ x 2 3/8″ lining piece in half widthwise and fuse the rounded piece of interfacing to one half of the lining piece. Add one half of the magnetic snap to the half of the lining with the interfacing about 1/2″ from the top of the interfacing. Fold the lining right sides together and stitch around the interfacing leaving the bottom open. Trim around the seam and turn right sides out. Topstitch and Press.
Step 8: Add the Closure
Find the center of the bottom of the closure and the center of the outer wallet. Place the closure on the bottom of the outer wallet matching the raw edges and with the snap facing up.
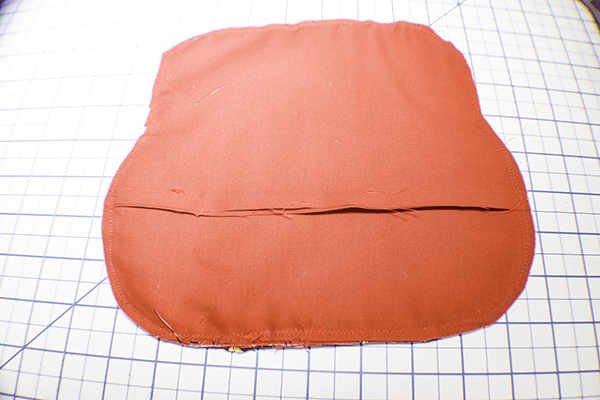
Step 9: Create the Body Lining
Take the 9 1/2 x 6″ and 9 1/2″ x 3 1/2″ lining pieces and place them right sides together. Stitch the two pieces together along the long side but leaving an opening for turning later.
Step 10: Create the Body Interior of the Wallet
Take the outer piece that measures 9 1/2″ x 8 5/8″ and the lining piece that measures 9 1/2″ x 8 1/8″ and fold them in half lengthwise right sides together. Fuse the SF 101 to each piece so that the raw edge meets the fold and is otherwise centered. Fold the lining piece right sides out and press. Take the outer piece and open it up right sides up on your work station. Take the lining piece that measures 7 7/8″ x 4 3/4″ and fold it in half lengthwise. Stitch the sides and part of the bottom leaving an opening in the bottom for turning. Use a 1/ 4″ seam allowance. Clip the corners and turn right sides out and press. Topstitch along the edge with the opening to close up the opening.
Find the center of the lining piece you just stitched and mark. Find the center of the outer piece and mark. Measure down from the top of the outer piece 5″ and place the topstitched edge of the lining piece. Pin. Stitch down the center then around the sides and bottom. Fold the main fabric piece in half.
Step 11: Add the Interior of the Wallet
Place the outer piece you just stitched onto the bottom of the main lining piece over the opening that you created. Take the lining piece you just folded and place it on top of the outer piece and clip. Stitch along the sides and bottom.
Step 12: Add the Main Outer Piece to the Lining Piece
Place the main outer piece to the lining piece and pin. Stitch around the interfacing pattern piece through all layers. Trim off the excess fabric. Turn right sides out through the opening in the lining. Stitch the opening closed using ladder stitch. Turn the wallet right sides out. Topstitch around the bottom of the wallet.

I hope you enjoyed this simple wallet project. If you would like more sewing and crafting projects subscribe to our newsletter and receive your free eBook of 15 handbag patterns and tutorials taken from the blog.
If you would like video tutorials of some of Sew very Crafty's most popular posts subscribe to our free YouTube channel here.