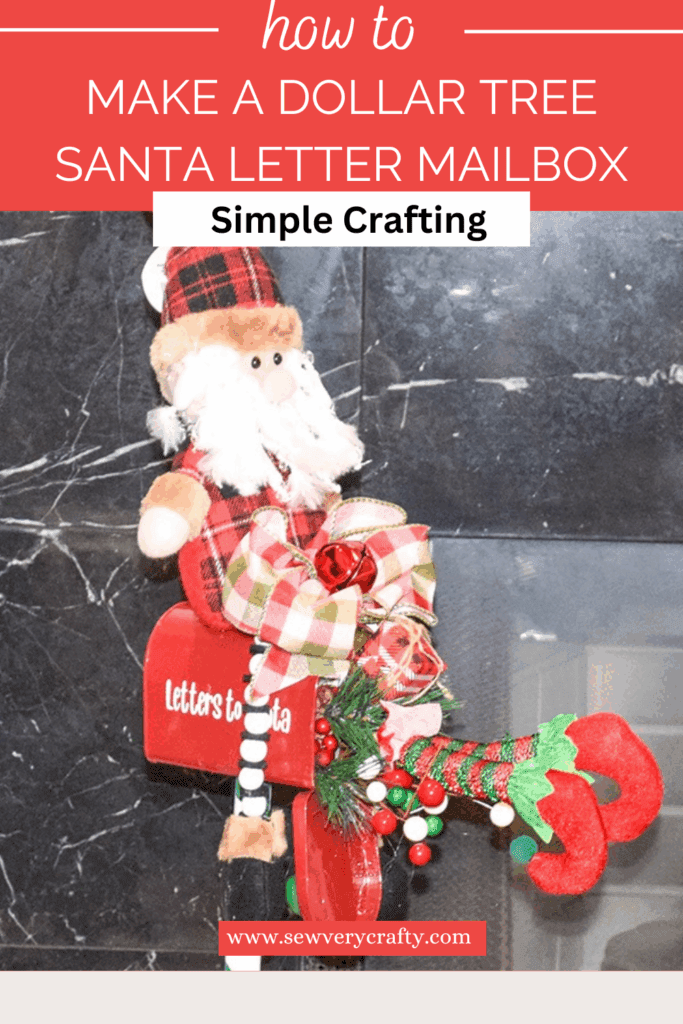
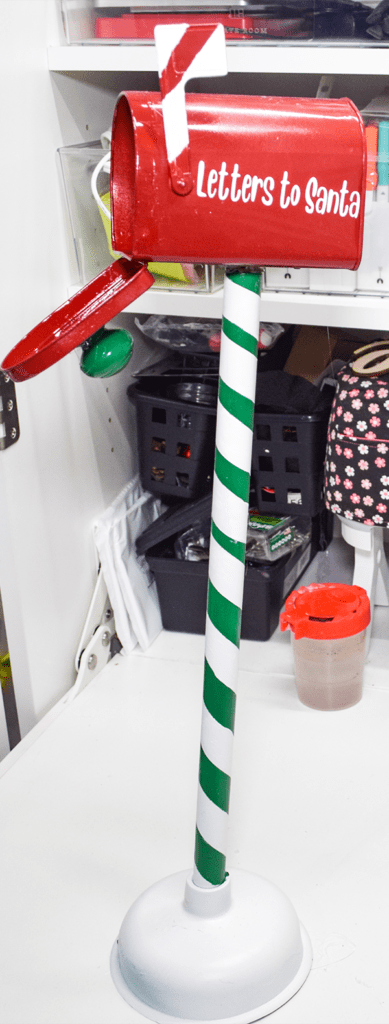
These little Dollar Tree mailboxes are so cute that I just had to create something fun with it. I decided to create a Dollar Tree Christmas Mailbox for my granddaughter when she arrives in two weeks from New Zealand. She is only two but I know she will have a long list for Santa and this mailbox is just her size. There are a lot of ways to decorate this project but this is my version. I hope you and she love it as much as I do. If you would like more Dollar Tree Projects head over to my Dollar Tree page for more. For more holiday sewing and crafting projects check out my holiday project vault.
Note: This post contains affiliate links that if you click on them and make a purchase I will receive a small commission at no extra cost to you. As an Amazon Associate I earn from qualifying purchases.
What you will Need: How to Make a Dollar Tree Christmas Mailbox
- SVG you can get by clicking on this link
- 1 Dollar Tree mini mailbox
- 1 Toilet plunger
- Green spray paint
- Red spray paint
- White spray paint
- Christmas Ribbon
- 1 Dollar Tree Santa
- Elf leg ornament
- Large Jingle bells
- Knob or wood bead
- 1 Dollar Tree Balloon weight
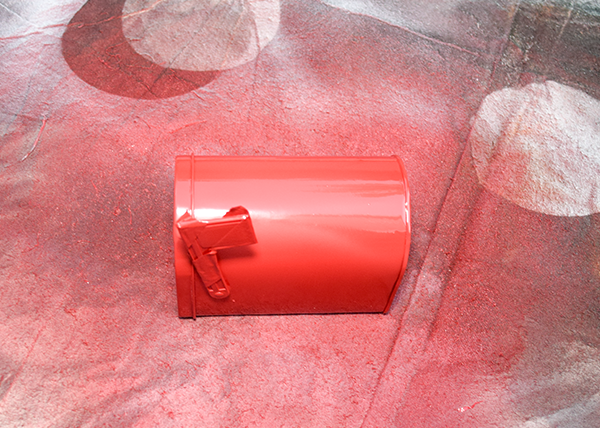
Step 1: Paint the mailbox
I decided to paint my mailbox red. I used spray paint for an overall smooth coverage and a glossy finish. I sprayed the red flag as well so that the colors were the same. Once the red paint was dry I taped off the mailbox and added tape to the flag creating diagonal stripes. I painted the untaped portion white also using spray paint to create a candy cane effect.
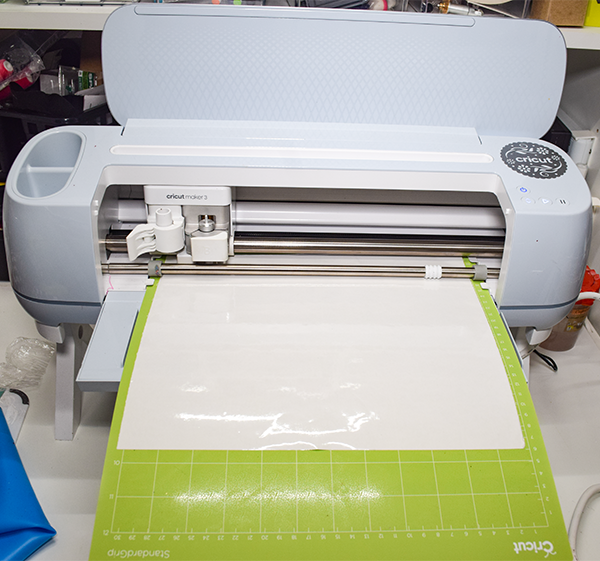
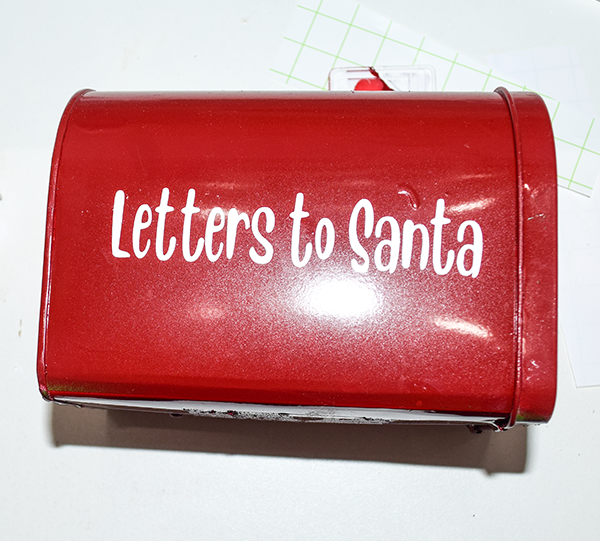
Step 2: Add the Sticker
I used my Cricut and some permanent vinyl and created the mail sticker. Using transfer tape transfer the sticker to the mailbox. You can create two for both sides if you like. If you do not have a Cricut or other cutting machine you can paint your mailbox any way you like.
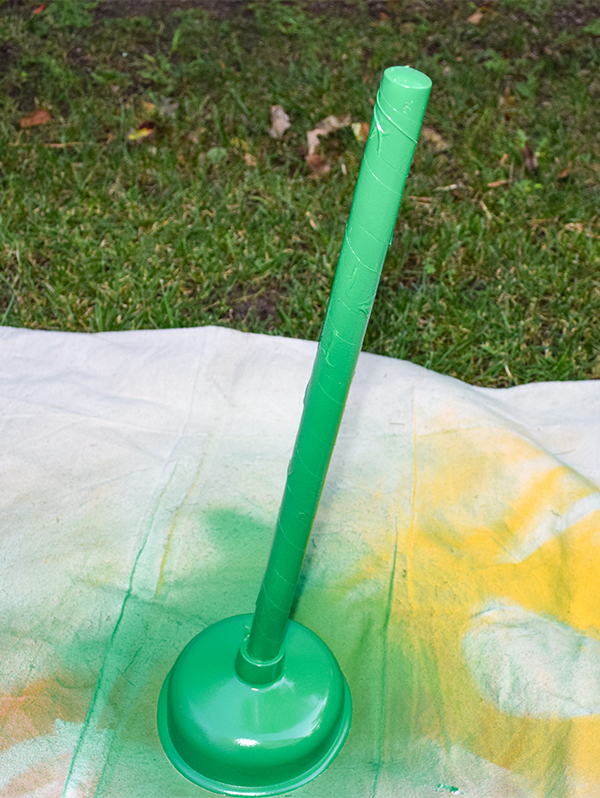
Step 3: Paint the Plunger
Spray paint the entire handle white. Once the paint is completely dry, tape off the plunger handle in diagonal stripes. Spray paint the untaped parts of the handle using the green paint. Let dry.
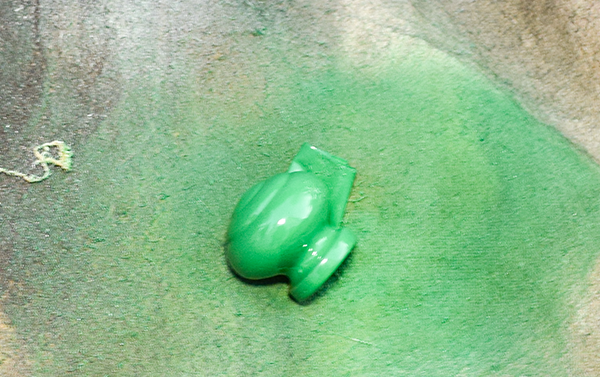
Step 4: Add the Balloon Weight
Purchase a balloon weight from Dollar Tree. Take everything off it so that all that is left is the concrete base. Use e6000 and hot glue to attach the weight to the bottom of the plunger.
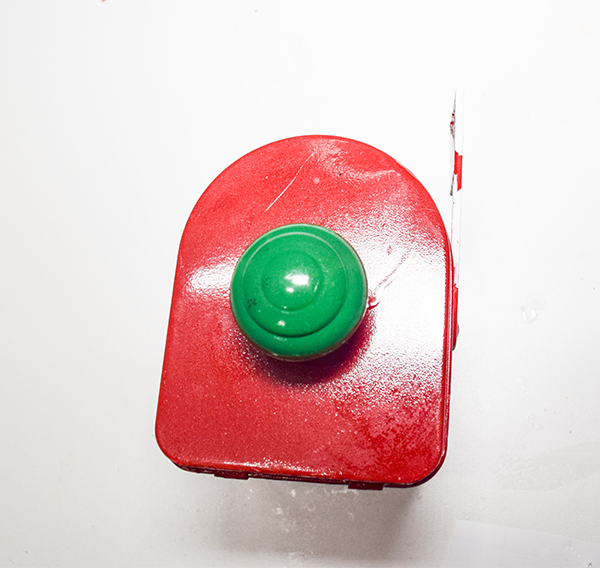
Step 5: Add the Knob
Paint the wood knob any color you like. I painted mine green. Using a combination of e6000 and hot glue add the round wood knob to the center of the front of the mailbox.
Step 6: Attach the mailbox to the Plunger
I have a mini table saw that is great for cutting small wood pieces. I needed to cut of the rounded tip from the plunger handle so that the mailbox would sit properly. Once the tip was cut I centered the mailbox on the plunger handle. Attach the handle to the mailbox using a small screw. Use a stubby screw driver and make sure to create a pilot hole in the handle and the inside of the mailbox. 8
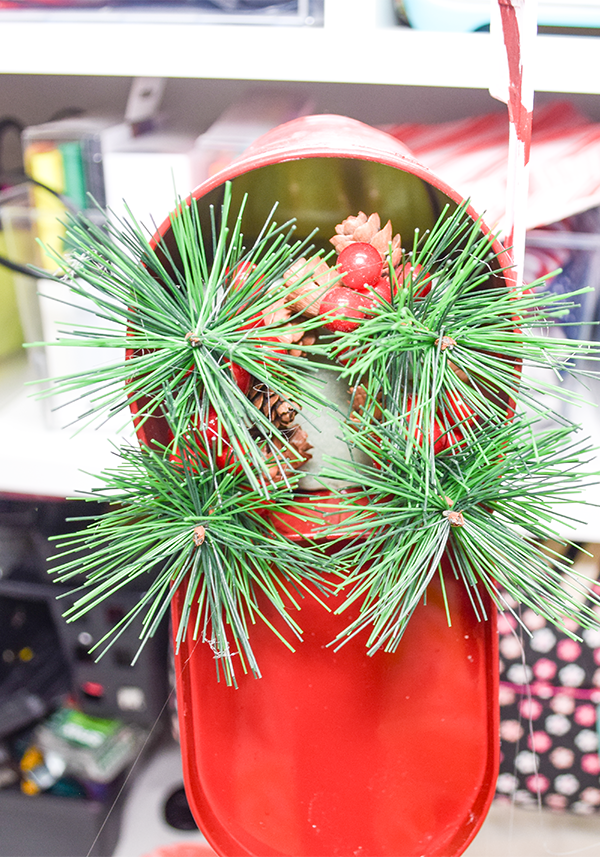
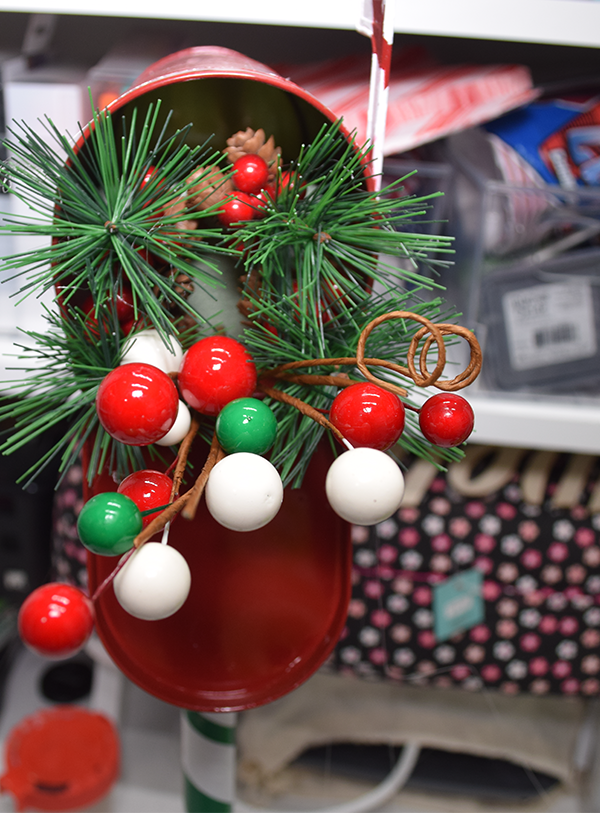
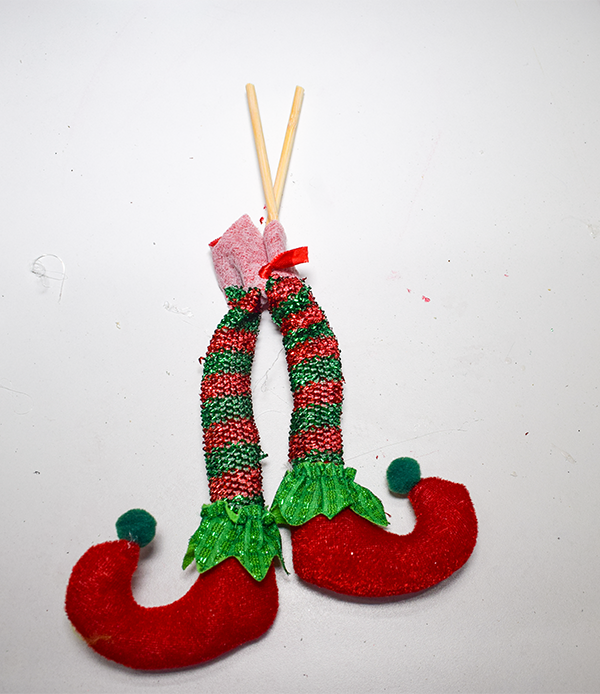
Step 7: Add the Greenery and Legs
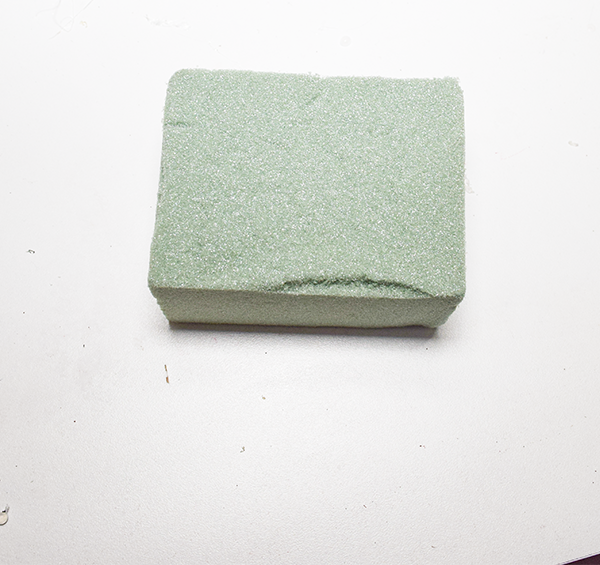
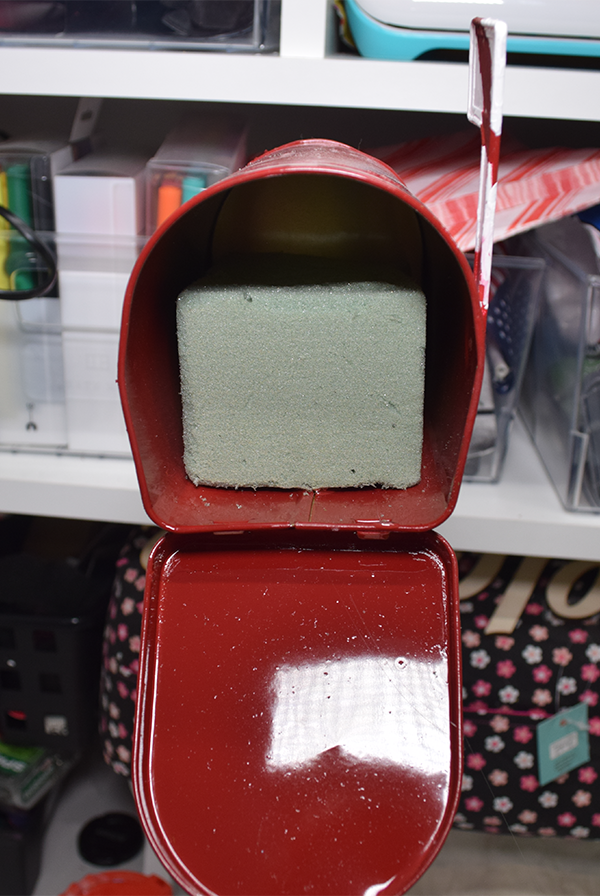
Open the front of the mailbox and insert some floral foam to the back of the mailbox using hot glue. Add some Dollar Tree Christmas greenery. Then add the elf feet. I added some Dollar Tree skewers to my elf legs so that I could insert them into the floral foam.
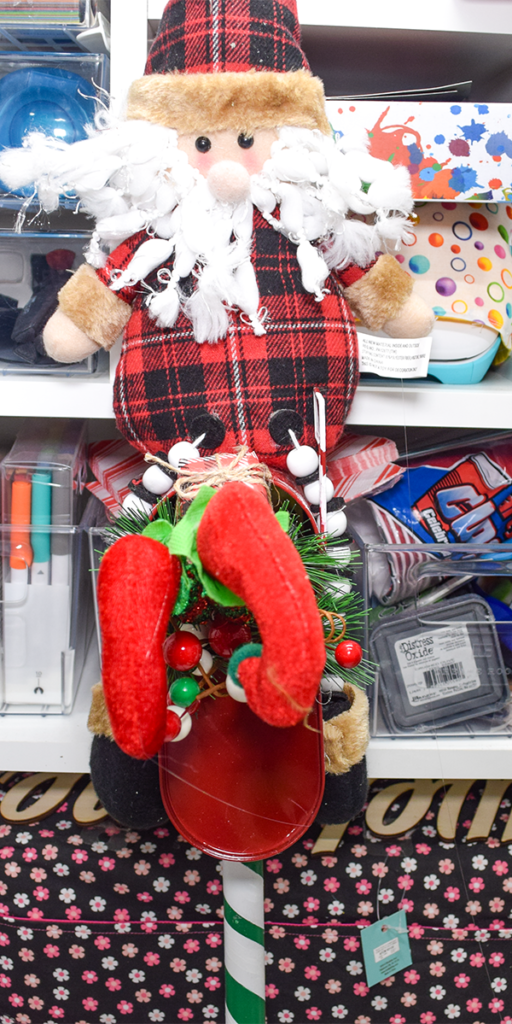
Step 8: Add the Santa Claus
The Santa is weighted so it sits up on its own. Using hot glue and e6000 attach the Santa to the top of the mailbox with its beaded legs hanging down on either side.
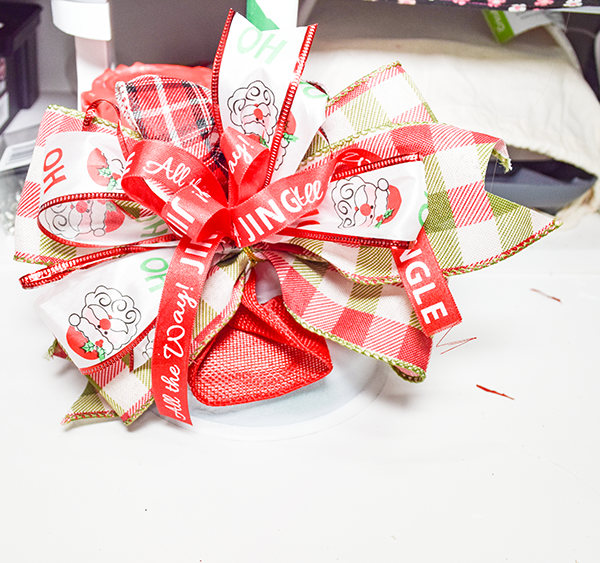
Step 9: Create two Bows
Create two bows using wired Christmas ribbon. If you struggle with making bows head over to Southern Charm Wreaths and take there bow making course by clicking here. Add the first bow to the top of the mailbox in front of the Santa. You can use hot glue for this. Add the second bow to the bottom of the plunger also using hot glue. Add giant jingle bells to the center of each bow. Once the bows have been added you have finished your Dollar Tree Christmas Mailbox.
I hope you enjoyed this simple Dollar Tree craft. For more sewing and crafting projects subscribe to our free Newsletter and receive your free Dollar Tree holiday eBook.
If you would like video tutorials of some of Sew Very Crafty's most popular posts subscribe to our free YouTube channel here.
Join our Sew Very Crafty Fans Facebook group
If you want to ask questions and share your projects join our Facebook group here. The community will help to achieve your sewing and crafting dreams.