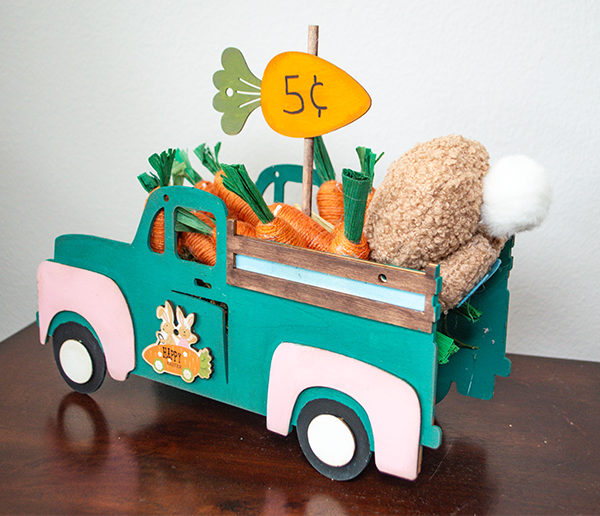
I have had these truck cut outs for a while and never really know what to make from them so I came up with this fun Easter project. This Dollar Tree Truck Carrot Patch is just so cute and makes the perfect Easter home decor piece. This is a beginner crafting project that takes no time to make but with fun results for the secular Easter season. I hope you enjoy this project for more Dollar Tree crafts head over to my Dollar Tree page. For more holiday sewing and crafting projects check out my Holiday Project Vault.

Note: This post contains affiliate links that if you click on them and make a purchase I will receive a small commission at no extra cost to you. As an Amazon Associate I earn from qualifying purchases.
What you will Need: How to Make a Dollar Tree Truck Carrot Patch
- 2 Dollar Tree or other truck cut outs
- 1 Dollar Tree or other wood tray
- Faux carrots
- Wood carrot cutout
- 2″ x 16″ wood plank
- Floral or other foam
- Dollar Tree Bunny Tail
- Moss
- Easter colored paint
- Hot glue
- Heat tool
- Walnut Stain Distress Oxide
- Small easter cutouts for doors
Step 1: Remove the embellishments
The truck cutouts are facing in the same direction. The first thing you need to do is to remove the wood embellishments on one of the trucks. To do this use a heat tool to loosen the glue and gently pry off the pieces. If you get a truck that is just flat you can avoid this step.

Step 2: Paint the Stake Bed Pieces
It is easier to paint the pieces while some of them are off. I decided to use colors that I associate with Easter to paint most of the pieces and the trucks. Start with the truck bed. Use either a stain or brown paint to paint the stakes in the bed. I used some brown paint and a baby wipe to color my stake bed.

Step 3: Paint the Body of the Truck
To paint the body of the truck I decided to use a teal colored chalk paint. Of course you can paint any color you like. I really liked this color as it is reminiscent of Easter. Paint both sides of the body because you will see them both.

Step 4: Paint the Wheel Covers
Paint the wheel covers another Easter color. I chose pink for my wheel covers. I also painted the space between the stakes blue to give the illusion of sky.

Step 5: Paint the Wheels
I chose standard colors for my wheels. The wheels are painted black and the circles inside are painted white. For the wheels I drew a line to keep the wheels round and painted black inside the line and the teal for the body just above it.

Step 6: Age the Trucks
Using the distress oxide and a round brush age the trucks. Add some of the distress oxide to the brush and highlight around all of the edges and a bit in the center. This will ad age and depth to the trucks.

Step 7: Age the small cutouts
The cutouts that I used were purchased at Dollar Tree. I could not find a link for them. If you get unfinished cutouts paint them and add some age in the same way you did the trucks. Hot glue the small cutouts to the trucks.

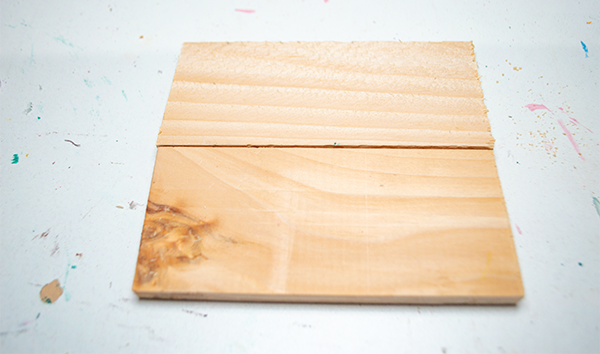
Step 8: Paint the Tray
First, cut the wood strip so that there are two that fit the short ends of the tray. Hot glue the strips to cover the star at each end. Paint the tray any color you like. I painted mine teal to match the truck. Add some age to the trays as you did before.


Step 9: Glue the Tray to the trucks
Place one of the trucks with the right sides down on your work surface. Add some hot glue to one side of the tray and place it in the center of the truck. Add more hot glue to the other side of the tray and place the other truck on top making sure to line up the trucks. Stand the trucks up.

Step 10: Add the foam
Put some hot glue on the bottom of the tray. Add some floral or other foam to the tray.

Step 11: Add the Moss
Put some hot glue on top of the foam. Add some moss on top of the foam. Trim the moss if you need to.

Step 12: Add the Carrots
Hot glue the carrots to the top of the moss.

Step 13: Paint the wood carrot cutout
Using orange and green paint cover the wood carrot cutout on both sides. Age the carrot in the same way you did the trucks and the other cutouts. Add a few dark brown or black lines to show the wrinkles in the carrots. Add 5¢ to the carrot.


Step 14: Add the Dowel
Paint the dowel using the same brown paint or stain you used for the stake beds. Hot glue the dowel to the side of the carrot without the writing. Cut down the dowel if you need to. Add the dowel and carrot to the foam through the carrots.


Step 15: Add the Bunny Tail
Place the bunny tail in the back of the truck by sticking the stem into the foam. Cut down the stem if you need to get the bunny tail snuggly in the back. Once the bunny tail has been added you have finished your Dollar Tree truck carrot patch.

I hope you enjoyed this simple Easter craft. If you would like more sewing and crafting projects subscribe to our free newsletter and receive your free Dollar Tree Holiday eBook.
If you would like video tutorials of some of Sew Very Crafty's most popular posts subscribe to our free YouTube channel here.