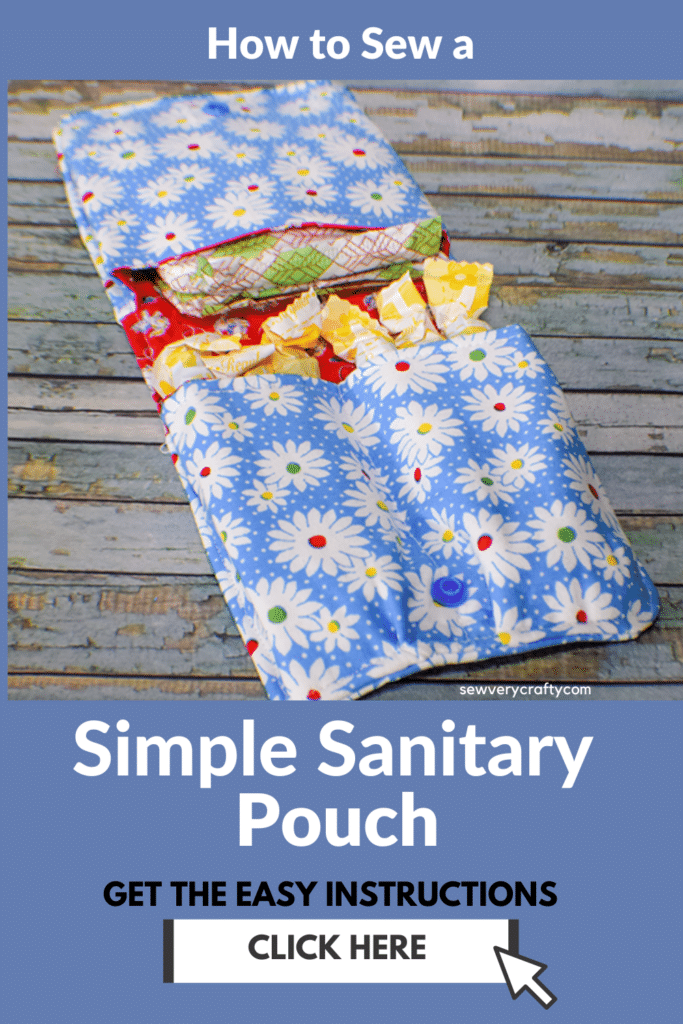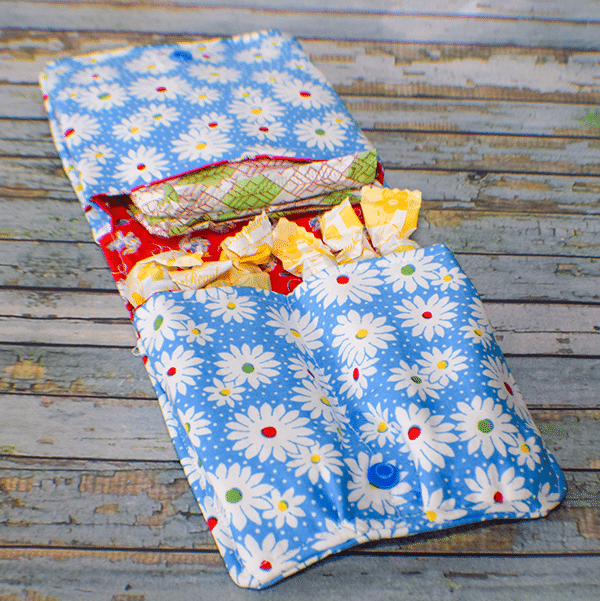
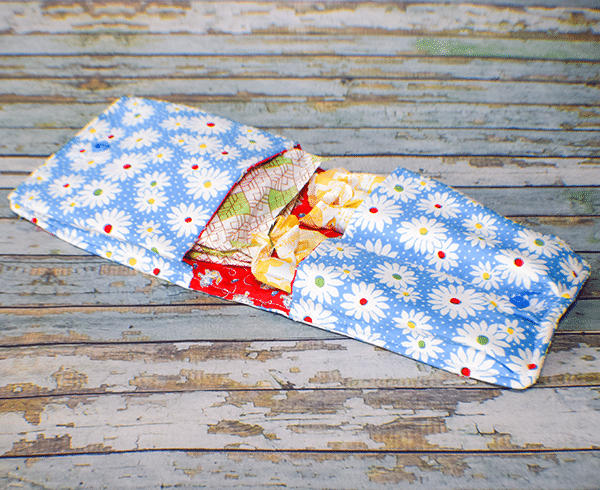
I have been wanting to make this project for a while now. It took some time to create this sanitary product pouch but here it is. The pattern is free and the tutorial is simple. This is a beginner sewing project that anyone with basic sewing skills can make in no time. This simple sewing project makes a great gift and is perfect for everyday and travel. If you would like more travel patterns check out my travel post here.
chose basic cotton for my project along with some fusible fleece that I purchased at JOANN Fabric & Craft Stores![]() online and picked up in store. You could head to Amazon Fabrics or
online and picked up in store. You could head to Amazon Fabrics or
If you would like a video tutorial of this project head over to YouTube and check out my video. While you are there subscribe to my free YouTube channel.

What you will Need: How to Sew a Sanitary Pouch
- 1/4 yd outer and lining fabric
- 1/4 yd fusible fleece like Pellon SF987F
- 1 Kam Snap
Step 1: Cut your Sanitary Pouch Fabrics
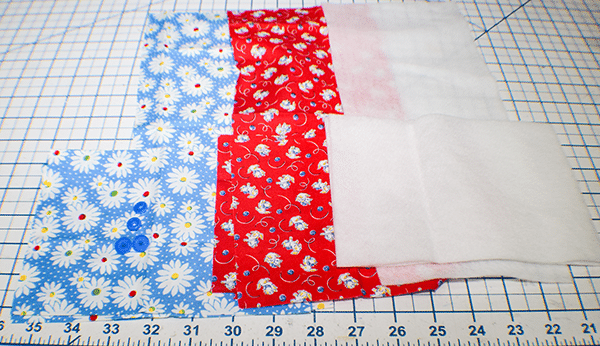
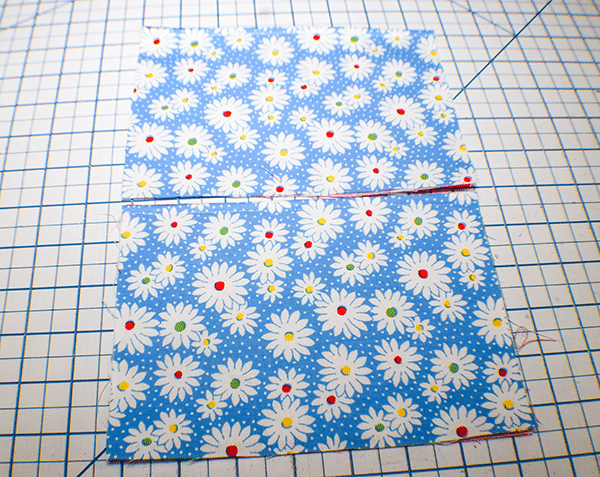
To make this project you only need a few rectangles of fabric and fleece. Here are the measurements. For the main holder cut one piece each of the outer fabric, lining fabric and fleece that measure 13″ x 5 1/2″ . There are two pocket pieces, one for the tampons and one for the pads. Cut them the same size. You will need two outer, lining and fleece pieces that measure 7 1/8″ x 5 1/8″.
Step 2: Fuse the Fleece
Fuse the fleece pieces to each of the outer pieces of fabric. That includes the main piece and the pocket pieces.

Step 3: Stitch the Pockets
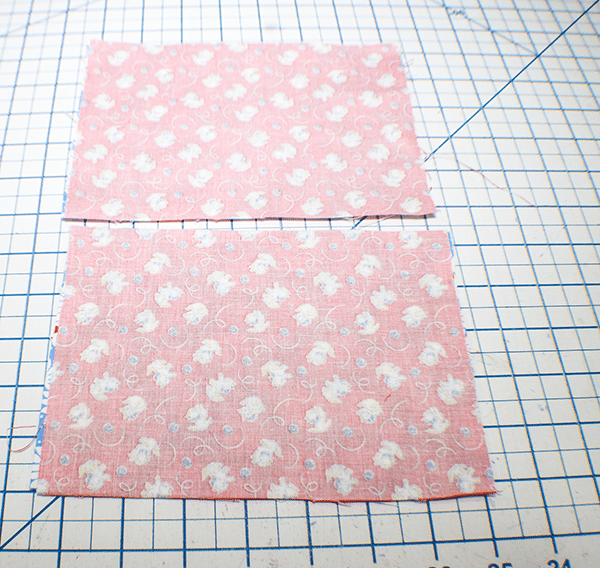
Place the outer and lining pieces right sides together so that the 7 1/2 ” side is on the top. Stitch the pieces together using a 1/4″ seam allowance. Fold them right sides out and press. Topstitch along the seam. Do this for both of the pocket pieces.
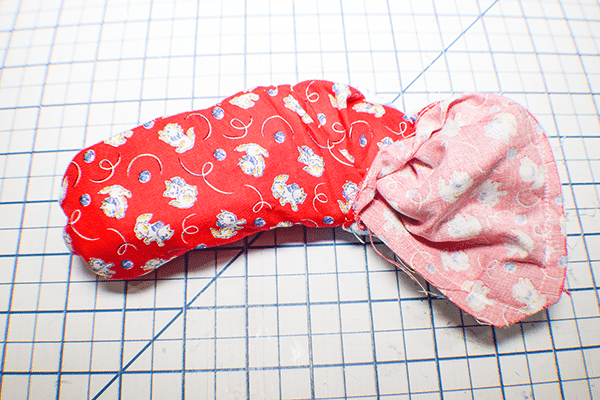
Step 4: Create the Pad Pocket
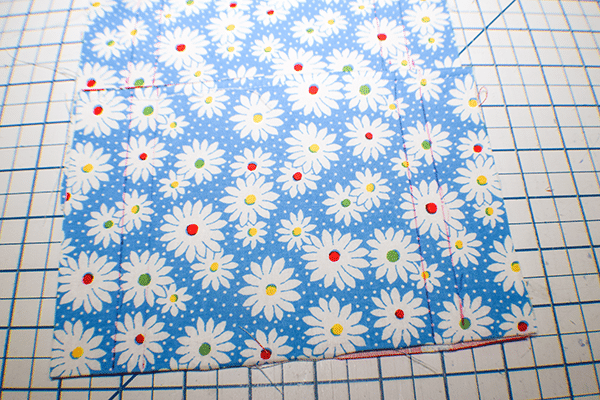
Take the pad pocket piece and draw a line along the 5 1/2″ side that is 1″ from the raw edges. Then measure 1/2″ from that line and draw another one. Repeat for the other side. Fold the pocket piece along the 1/2 ” line and then fold back to create a pleat. Do the same for the other side. Stitch along the bottom using a 1/8″ seam allowance.
Step 5: Add Half of the KAM SNAP
Add one half of the Kam Snap to the front of the pocket piece 1 1/4″ from the bottom so that it is facing up.
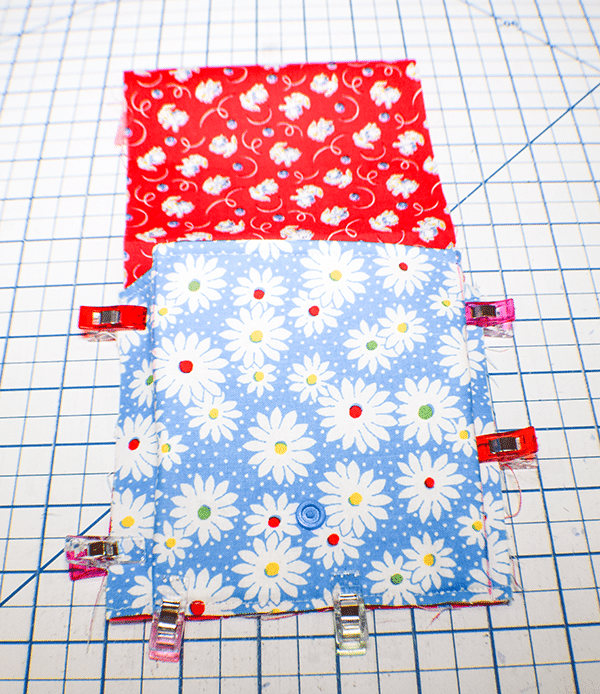
Step 6: Pin the Pad Pocket
Place the pad pocket on one end of the right side of the main lining piece matching the bottom and side raw edges. Pin or clip.
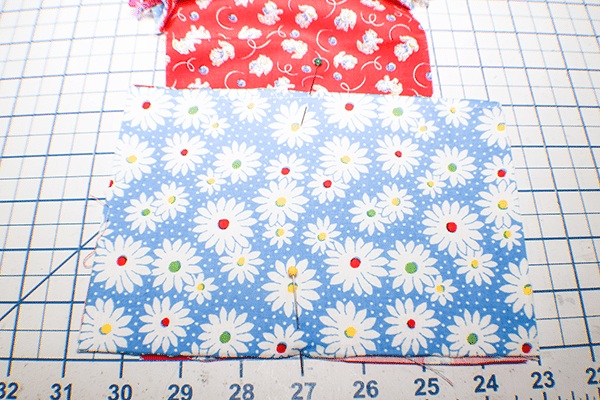
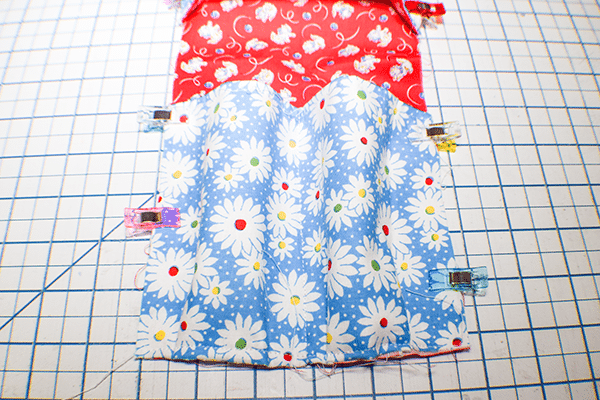
Step 7: Create the Tampon Pocket
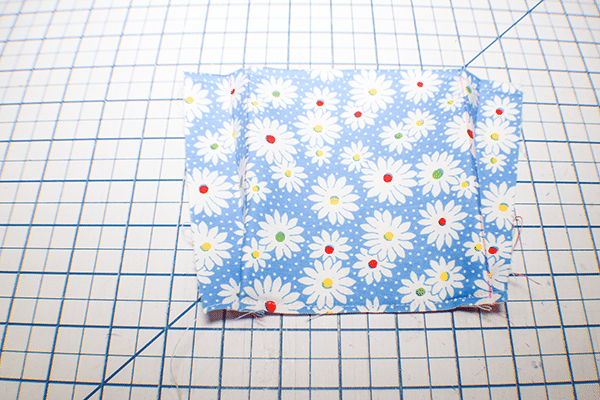
Find the center of the pocket piece and the center of the bottom of the main lining piece. Place the pocket piece onto the lining piece and stitch down the center joint the two pieces. Create two pleats on each side of the stitched line. Do this by just pinching down on either side of the center and clip or pin. Stitch along the bottom.
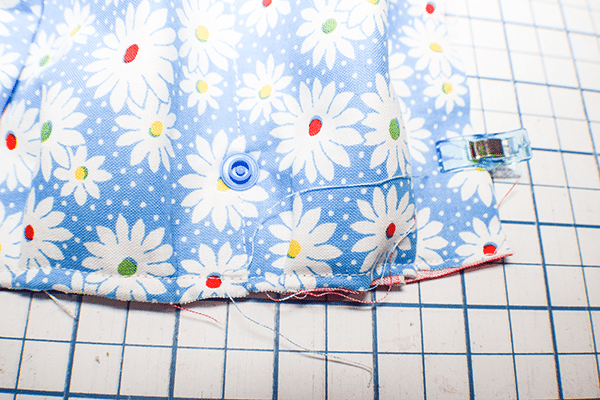
Step 8: Add the Second Half of the Kam Snap
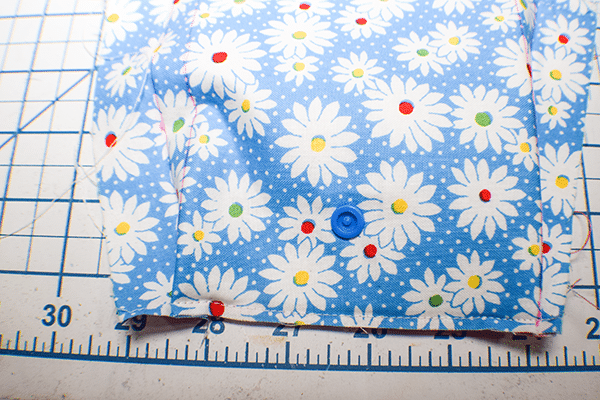
Place the second half of the Kam Snap onto the bottom of the tampon pocket 1 1/4″ from the bottom so that it is facing toward the inside of the pocket piece. .
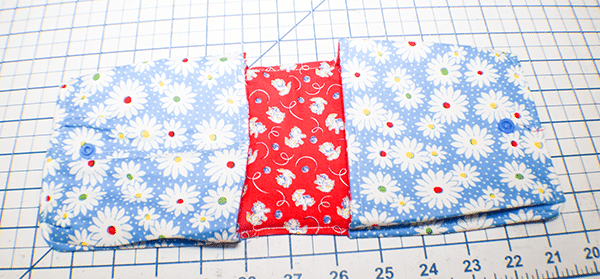
Step 9: Add the Main Outer Piece
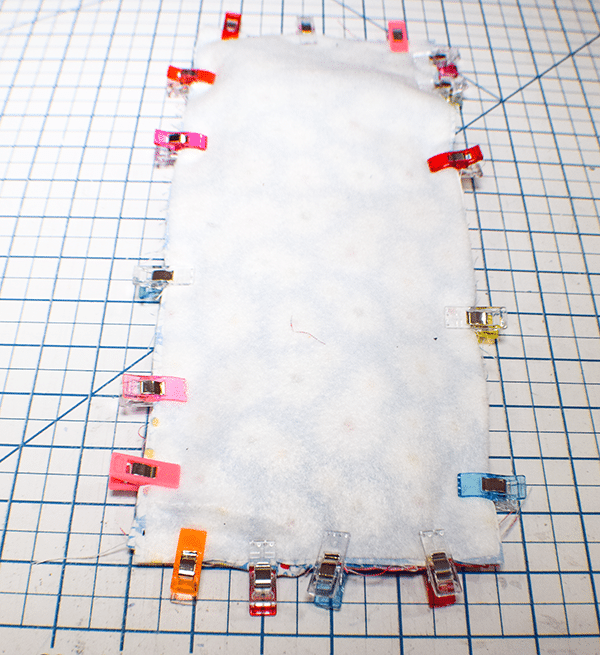
Place the main outer piece right sides together with the lining piece with the pockets. Pin. Stitch all the way around the piece using a 1/4″ seam allowance leaving an opening on one side for turning. Clip the corners.
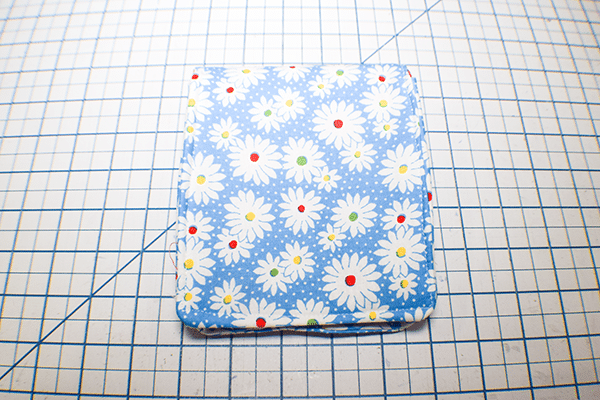
Step 10: Turn the Sanitary Pouch Right Sides Out
Turn the entire piece right sids out through the opening you left in the side. Poke out the corners and press. Topstitch all the way around using a 1/8″ seam allowance and closing the opening as you go. You have now finished your sanitary product pouch.
I hope you enjoyed this simple sanitary pouch project. If you would like more sewing and crafting tutorials subscribe to my free newsletter and receive your free eBook of 15 handbag patterns and tutorials taken from the blog.
If you would like video tutorials of some of Sew Very Crafty's most popular posts subscribe to our free YouTube channel here.