
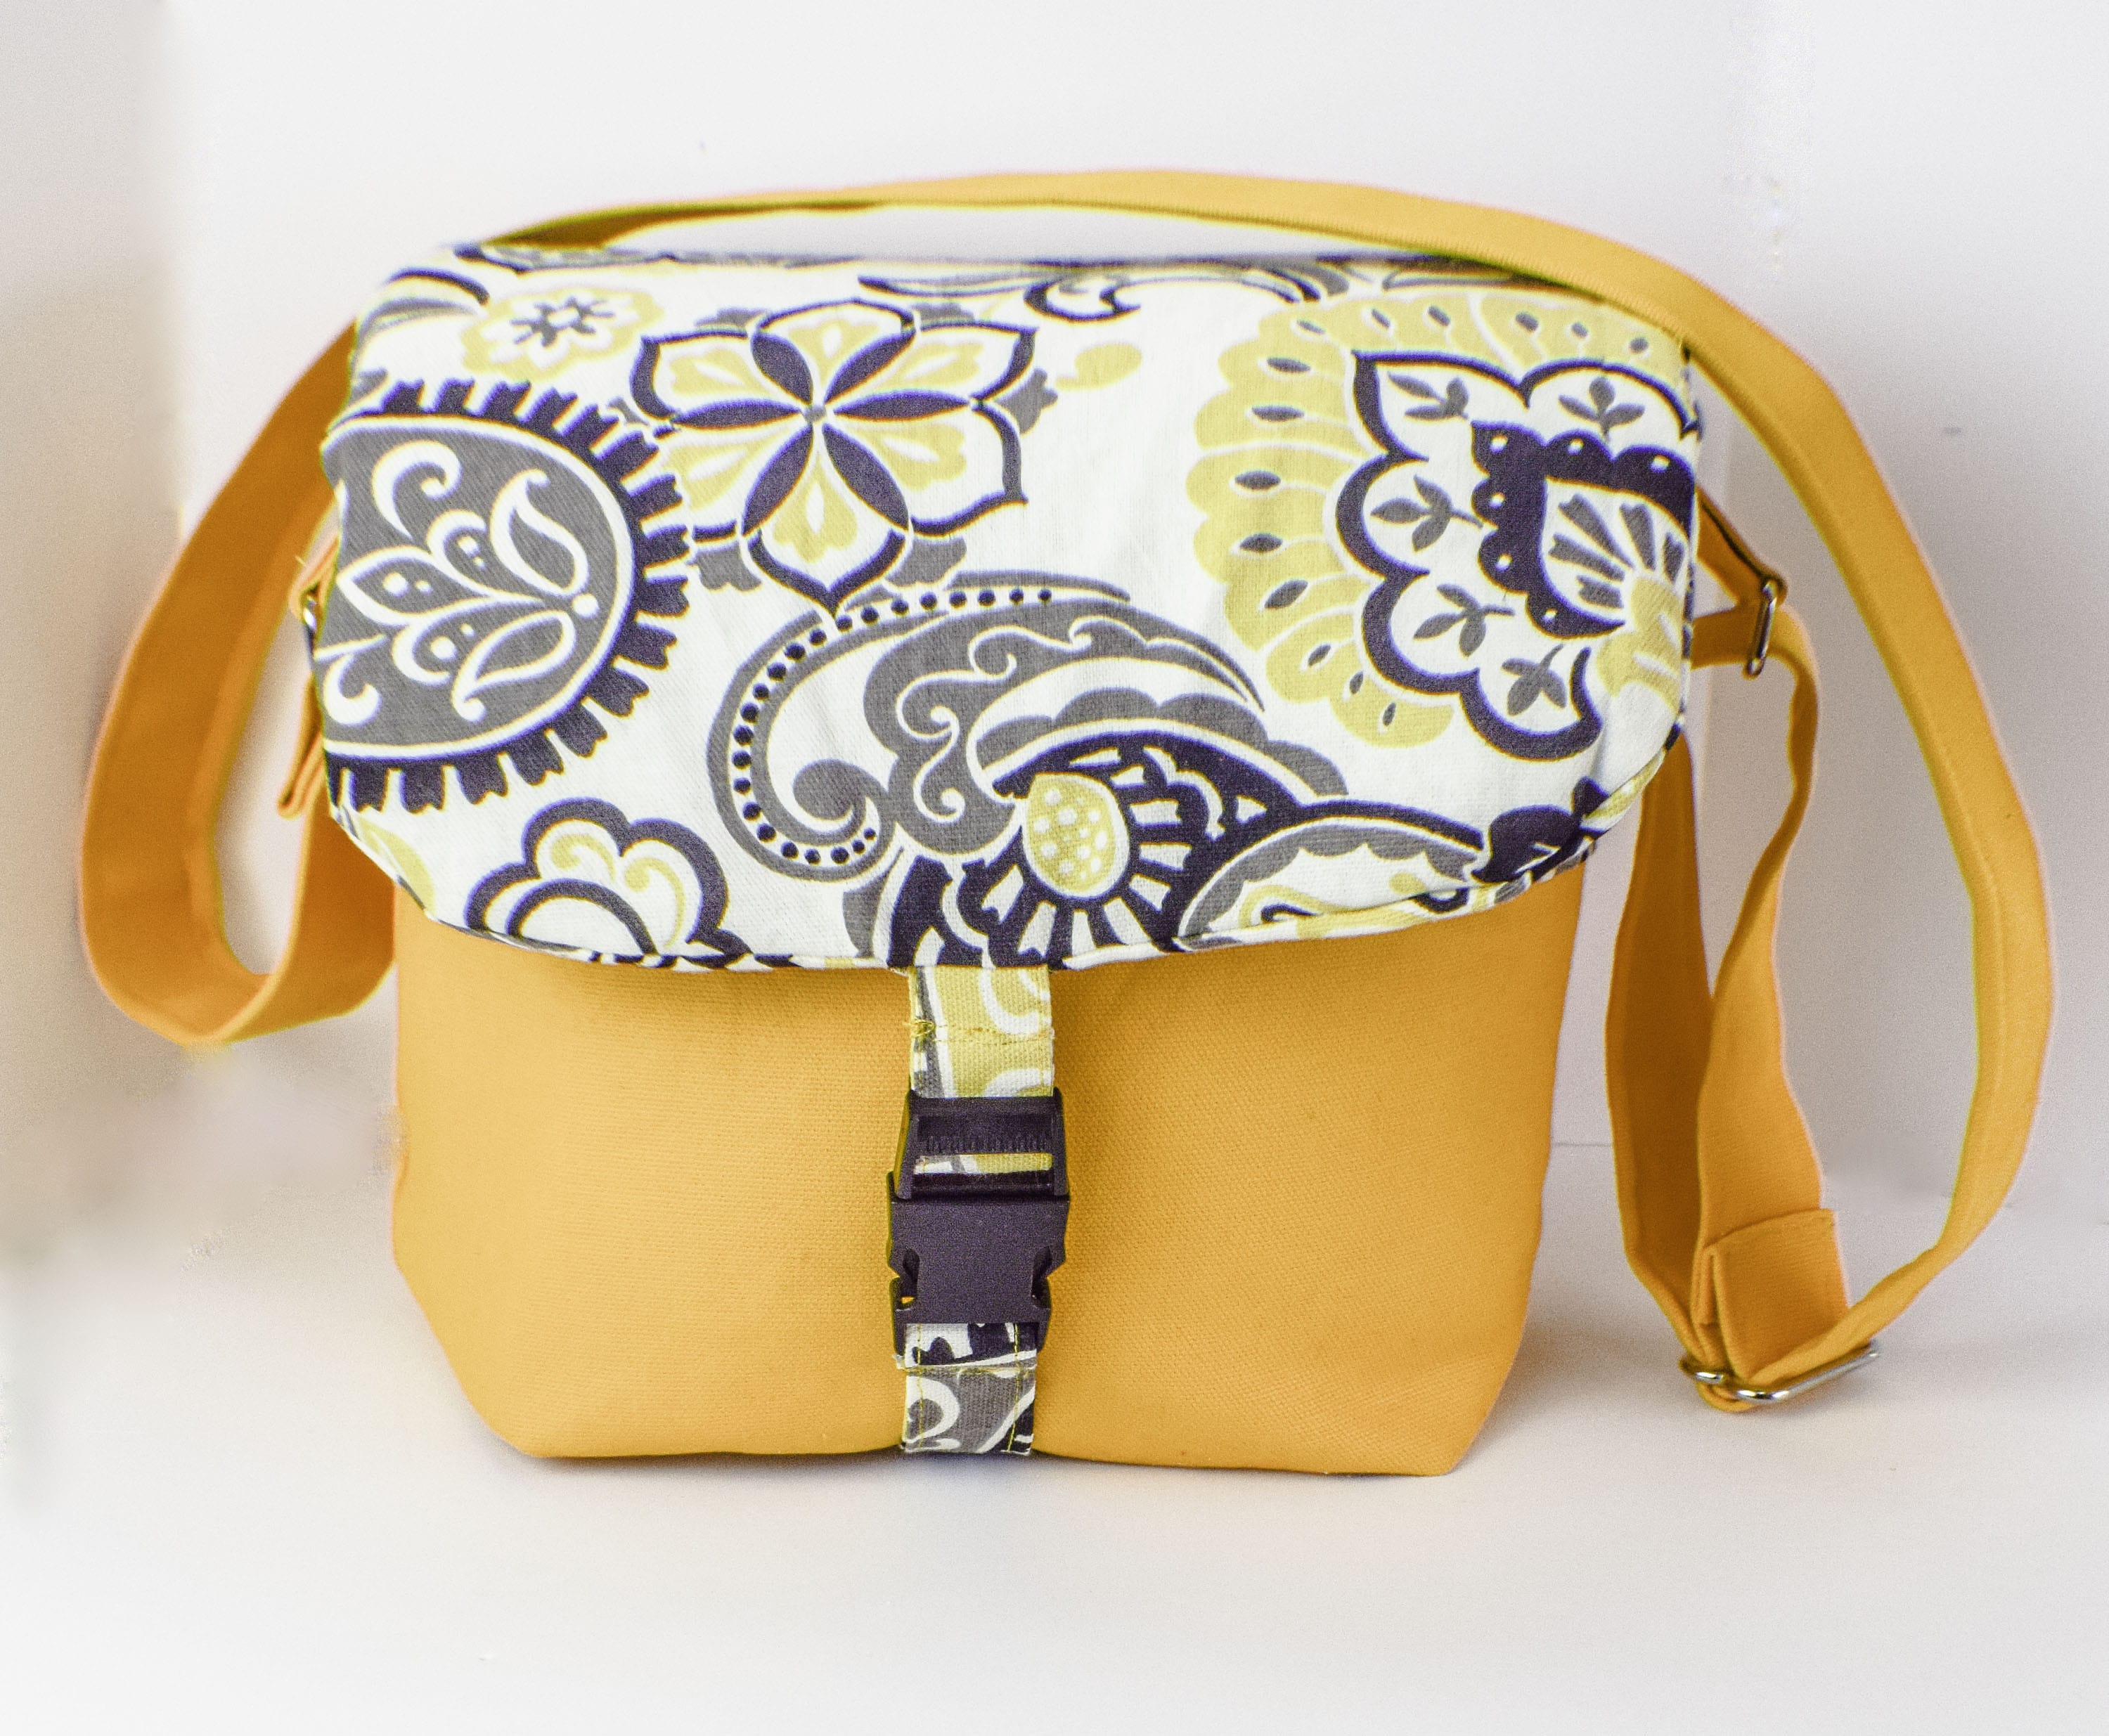
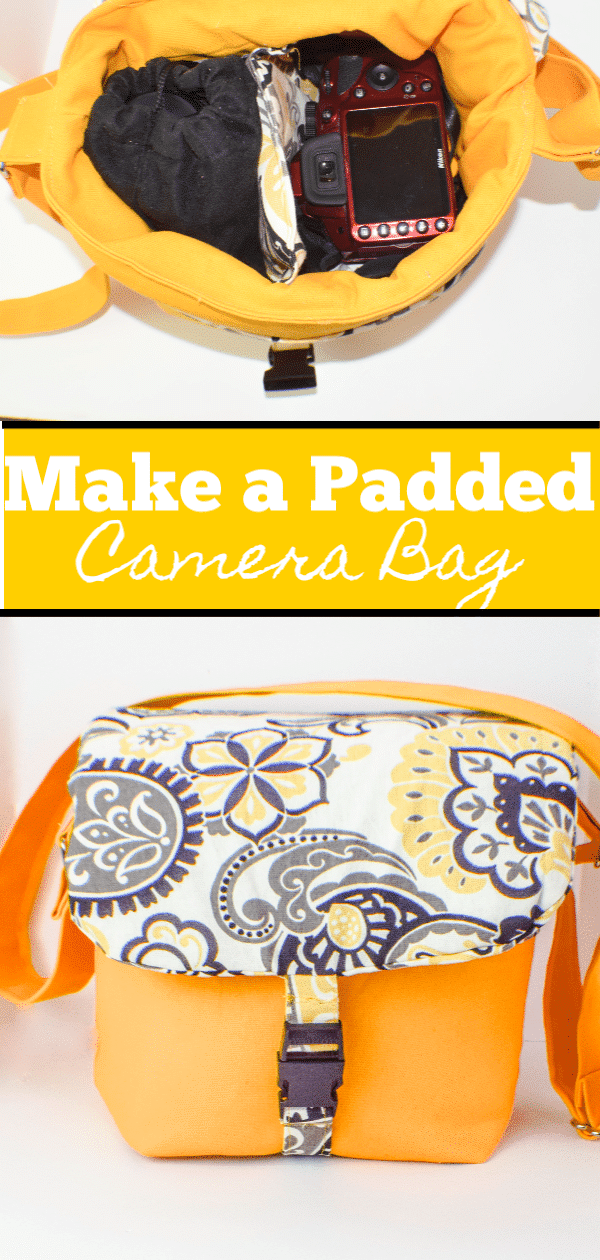
Make a Padded DSLR Camera Bag
I use a DSLR camera to take pictures for Sew Very Crafty and I know that many of you have DSLR cameras that you use at home but are stuck with the standard all black camera bag that either comes with your camera kit or that you bought separately. I am here to tell you that you no longer need to be limited to black. Express yourself with your own beautiful padded DSLR camera bag with this step-by-step tutorial and free pattern. I love bright colors and I definitely used them here. This camera bag is not only beautiful but functional and completely padded.
I wanted a sturdy bag so I used canvas throughout this bag in a nice bright yellow. You can use any color you like but I would stick to canvas or a sturdy decorator weight fabric. I used decorator weight fabric for the accent fabric in this bag but you could use quilting cotton if you like. Regardless, be yourself when making this bag. Head over to Joann's, Amazon fabrics or online fabricatore.net and choose from among thousands of fabrics to get the ones that reflect your personality. This post contains affiliate links that if you click on them and make a purchase I may receive a small commission at no extra cost to you. As an Amazon Associate I earn from qualifying purchases.
This is an intermediate sewing project that requires some bag making skills but an advanced beginner could tackle this bag. I recommend that you give it a try. It really is not that difficult. I modified this pattern from a more complicated one from Creating Happiness Blog to give everyone an opportunity to make their own camera bag.
What you will Need:
- 1 1/2 yds of canvas or decorator weight fabric
- 1 yd of accent fabric
- 2 x 1 1/2″ rectangles
- 1 1/2″ tri glide
- 1 1/2 yd of 1/4″ foam
- 4 6″ x 1/2″ sew in Velcro
- 1 9″ zipper
- Standard sewing supplies

Step 1: Make a Padded DSLR Camera Bag
Cut your fabrics.
- From the Canvas or decorator weight fabric
- Four 12″ x 14″ rectangles as the main body of the bag
- Two 14″ x 9″ canvas pieces for the back pocket
- One width of your fabric (WOF) x 6″ for the strap
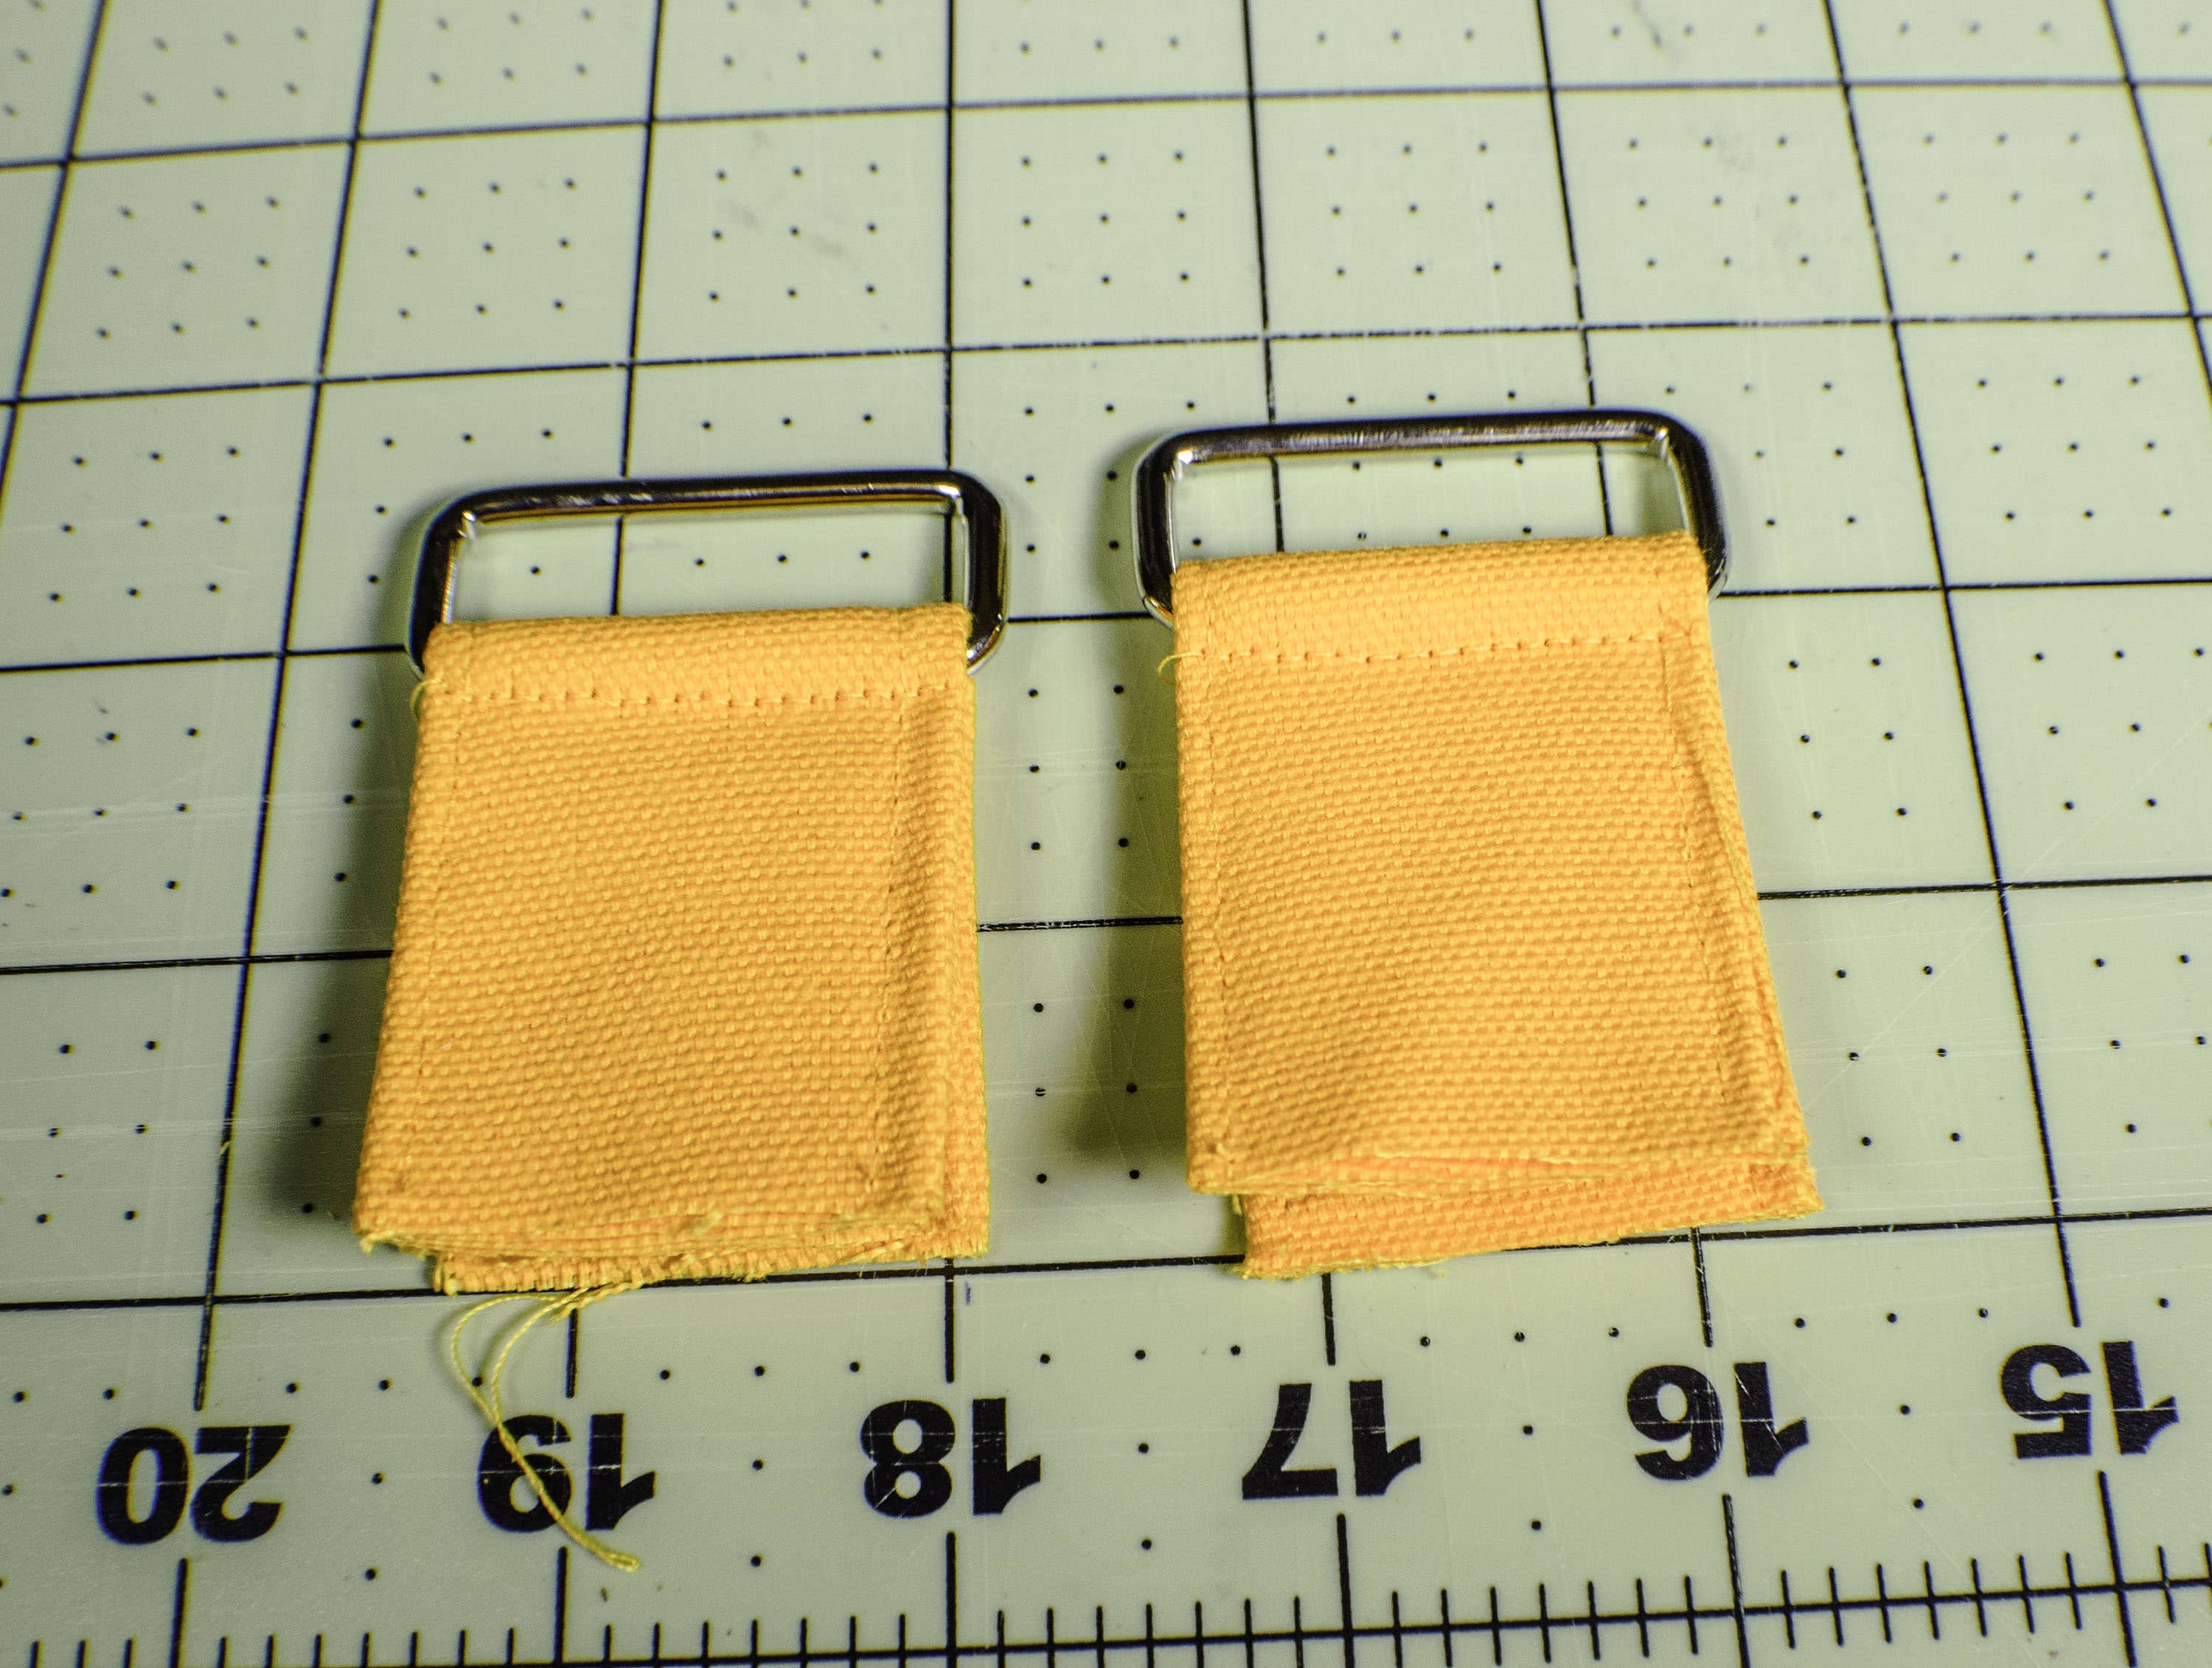
- Two 6″ x 4″ rectangles for the Strap loops
- From the Accent Fabric
- Two 4″ x 7″ for the front parachute clips
- One 14″ x 3″ rectangle for binding of pockets
- Two 10 1/2″ x 11 1/2″ rectangles for the top flap
- One 14 1/2″ x 7″ rectangle to cover the dividers
- One 9″ x 14″ rectangle for zipper pocket
- From the Padding
- 8″ x 8 1/4″ for front and back
- 4 1/2″ x 8 1/4″ for the sides
- 4 1/2″ x 7 1/2″ for the bottom
- 9 1/2″ x 10 1/2″ rectangle for the flap
- 4 1/2″ x 6 1/2″ for the divider
Step 2: Cut out the Bottom Corners
From the 12″ x 14″ rectangles and the 9″ x 14″ rectangle cut a 2″ x 2″ square from each bottom corner.
Step 3: Choose a Zipper for your Camera Bag
Choose one of the rectangles to be the back of the bag. You will insert a zipper pocket to this side of the bag. I chose a contrasting colored metal zipper as an additional accent to my bag but you could use a nylon zipper if want. I did not have a 9″ zipper on hand but I did have a 22″ zipper that I shortened. If you have never shortened a metal zipper before follow my tutorial on how to shorten a metal zipper and learn how.
Step 4: Create the Zipper Opening
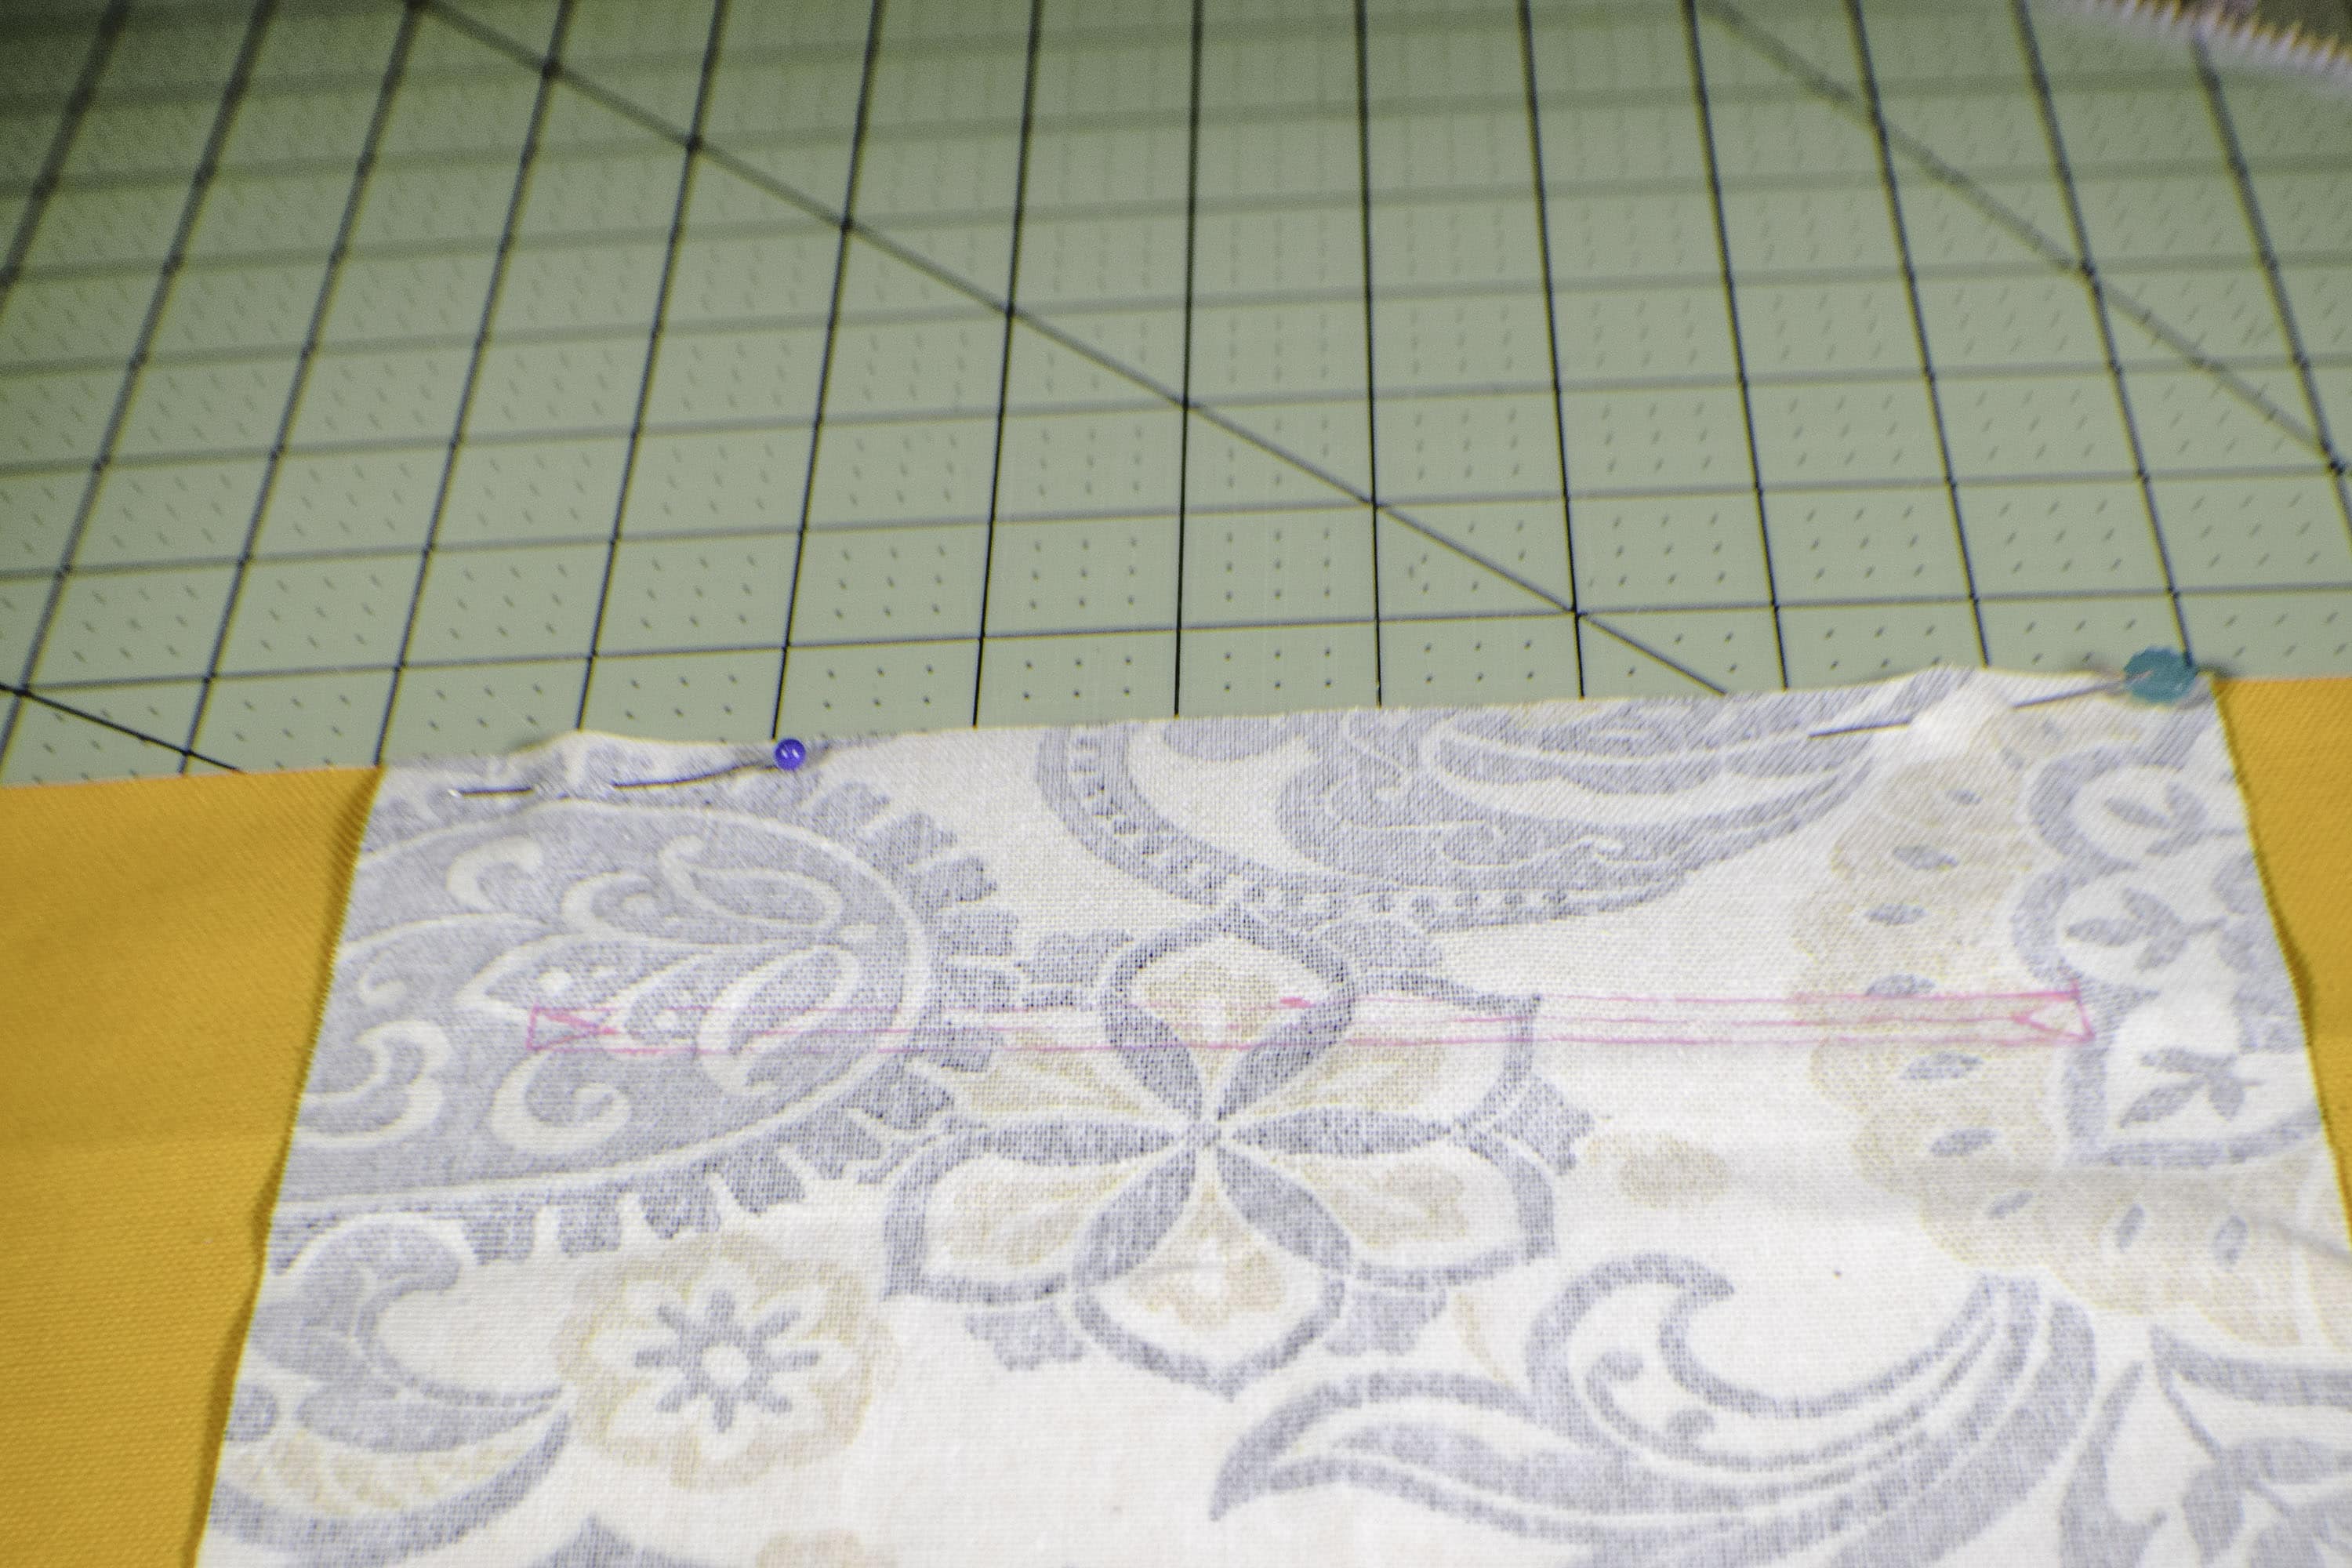
To add the zipper to this bag take your 9″ x 12″ rectangle of accent fabric and turn it so that it is face down and centered on the front of your outer bag. If you are using quilting cotton for this part of your project I highly recommend that you use interfacing to support the pocket piece. I would use either Pellon 808 or SF 101 to give the cotton some body and support. You don't really need to do this with the decorator weight fabric that I used. Pin the pocket fabric to the outer fabric at the top.
Measure down 2″ from the top of the outer fabric and draw a rectangle that measures 7″ x 1/2″ and is centered. I always use heat erasable pens like Frixion for this task. Remember you are drawing the box on the wrong side of the pocket piece fabric or on the interfacing if you are using quilting cotton. Once the box is drawn, draw two triangles at the ends of the box that are about 1/2″ high and connect them with a straight line.
Step 5: Stitch the Opening
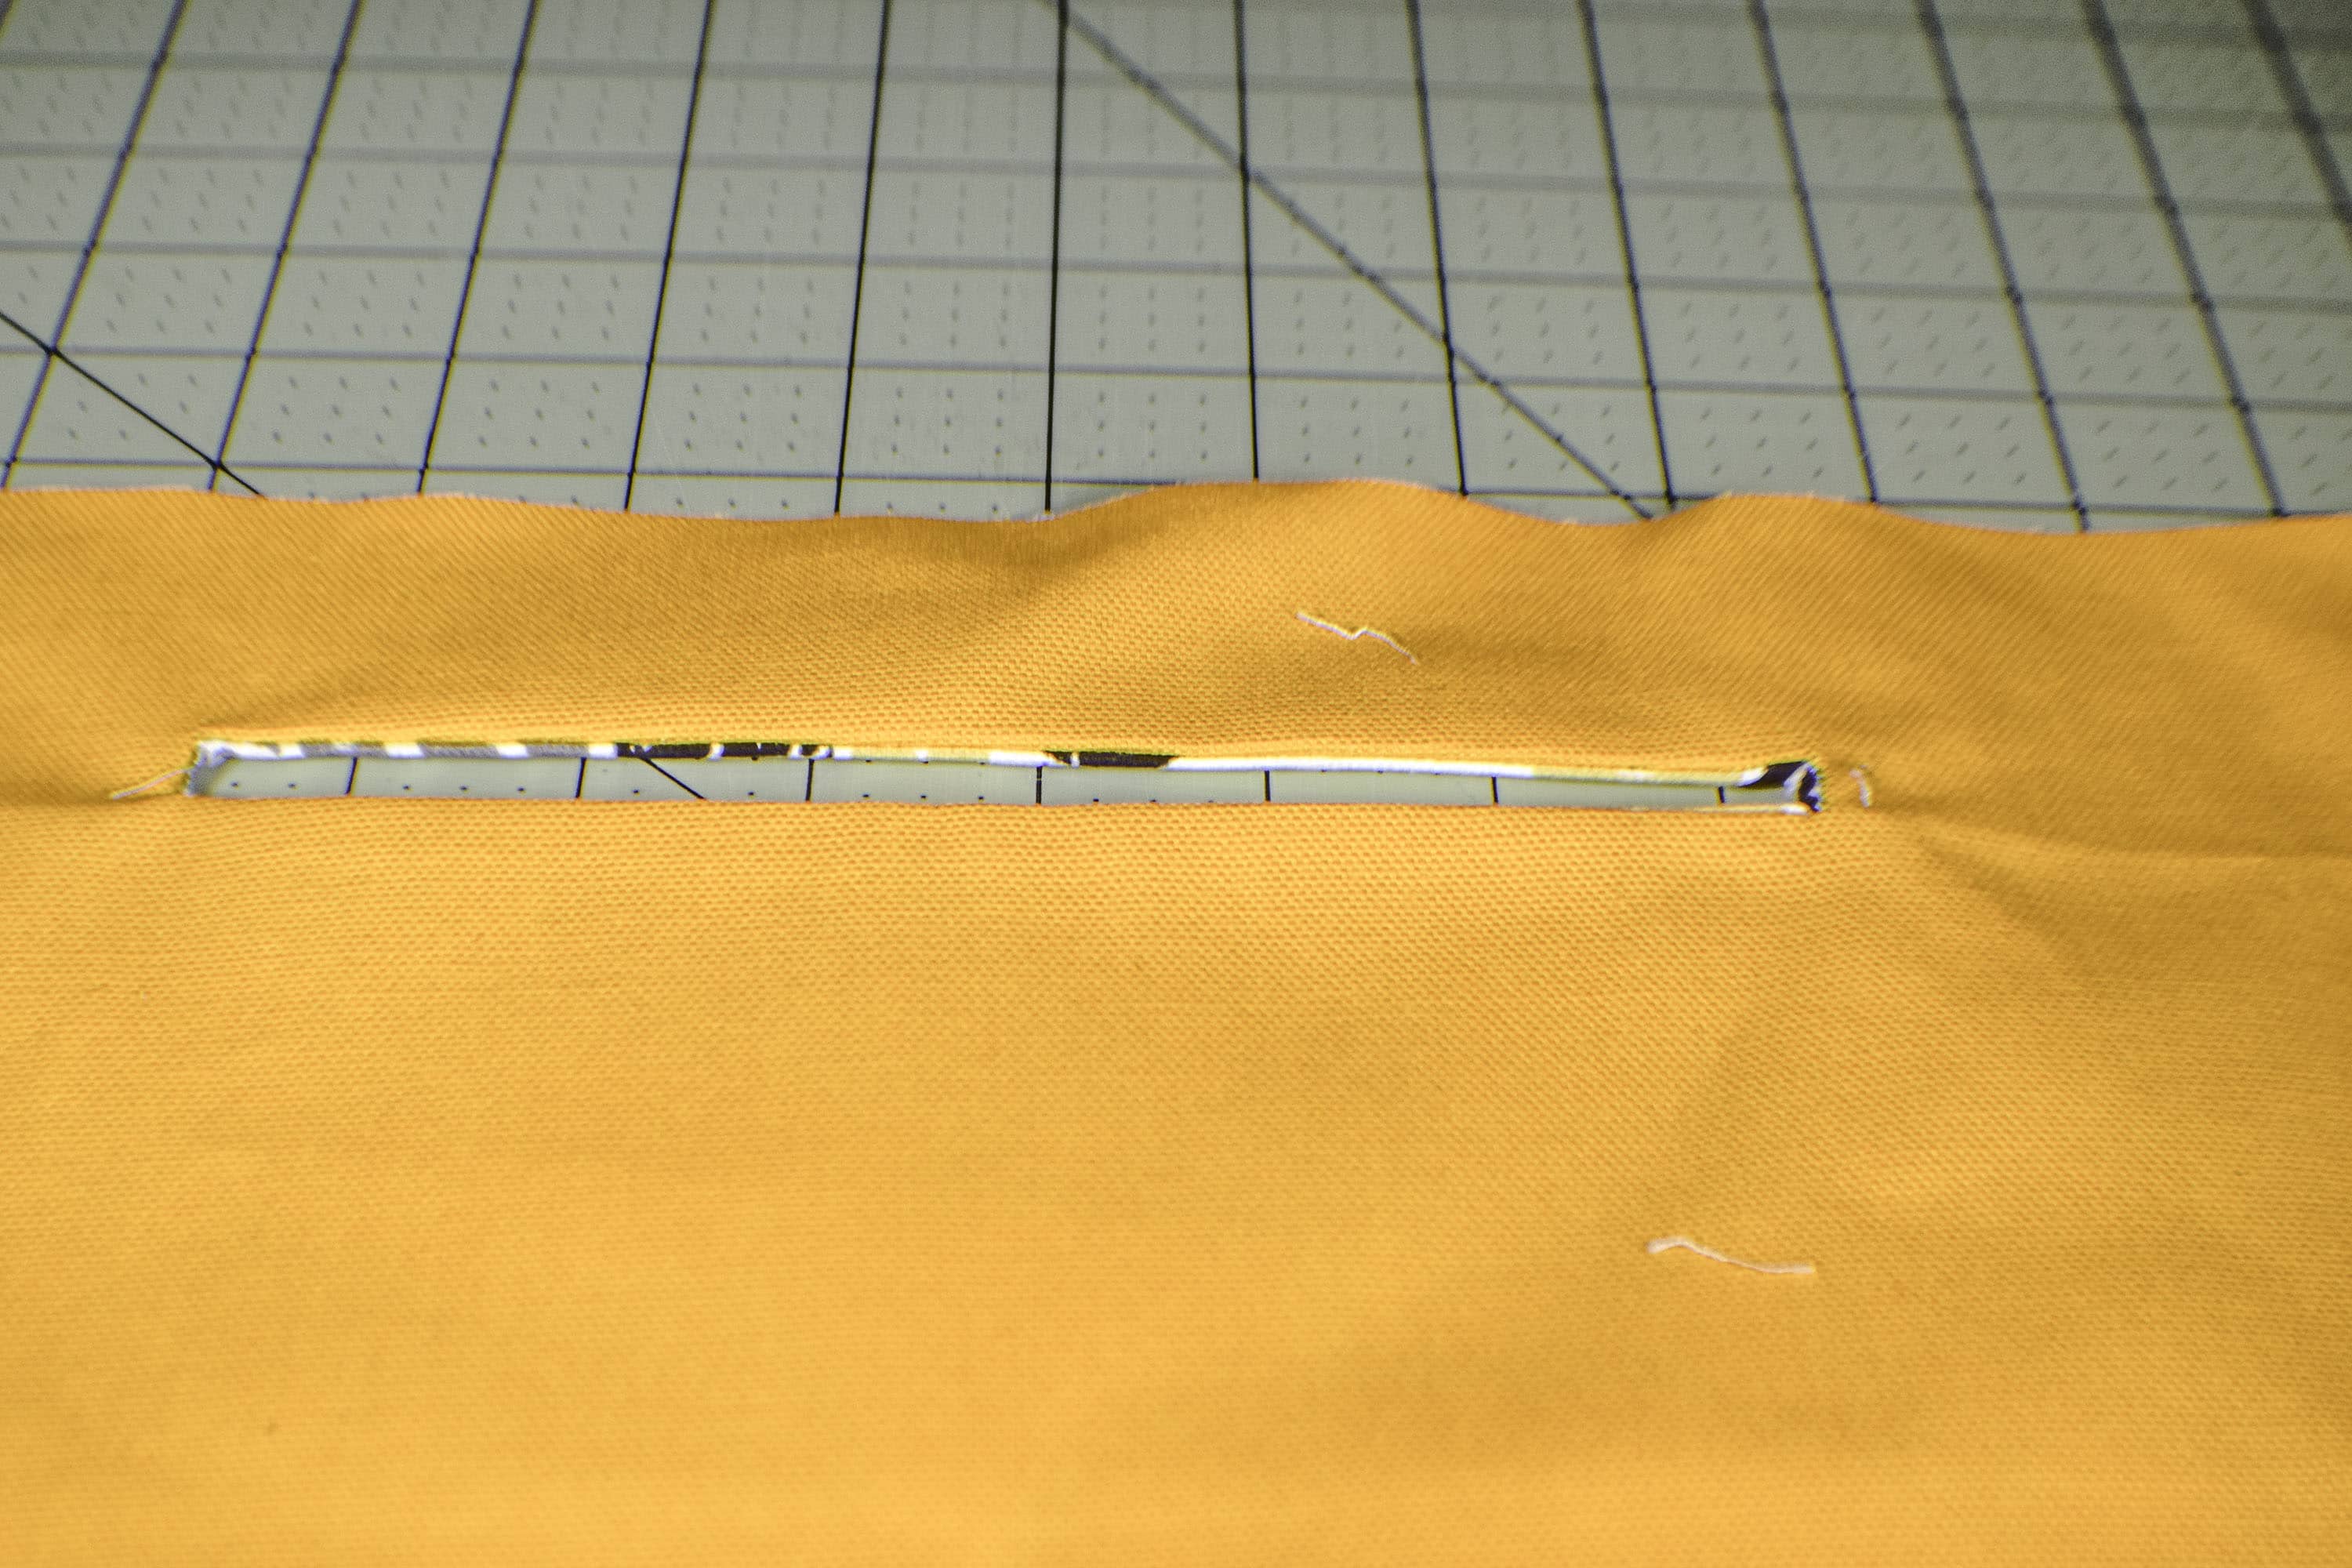
Now that you have drawn the box, sew through the two layers of fabric around the circumference of the box. You can remove the pins at this point. Use a seam ripper and a small pair of scissors to cut open the straight line that you drew down the middle and the triangles making sure not to cut through the stitching. Push the pocket fabric through the opening that you just created and press so that the edges are neat and clean.
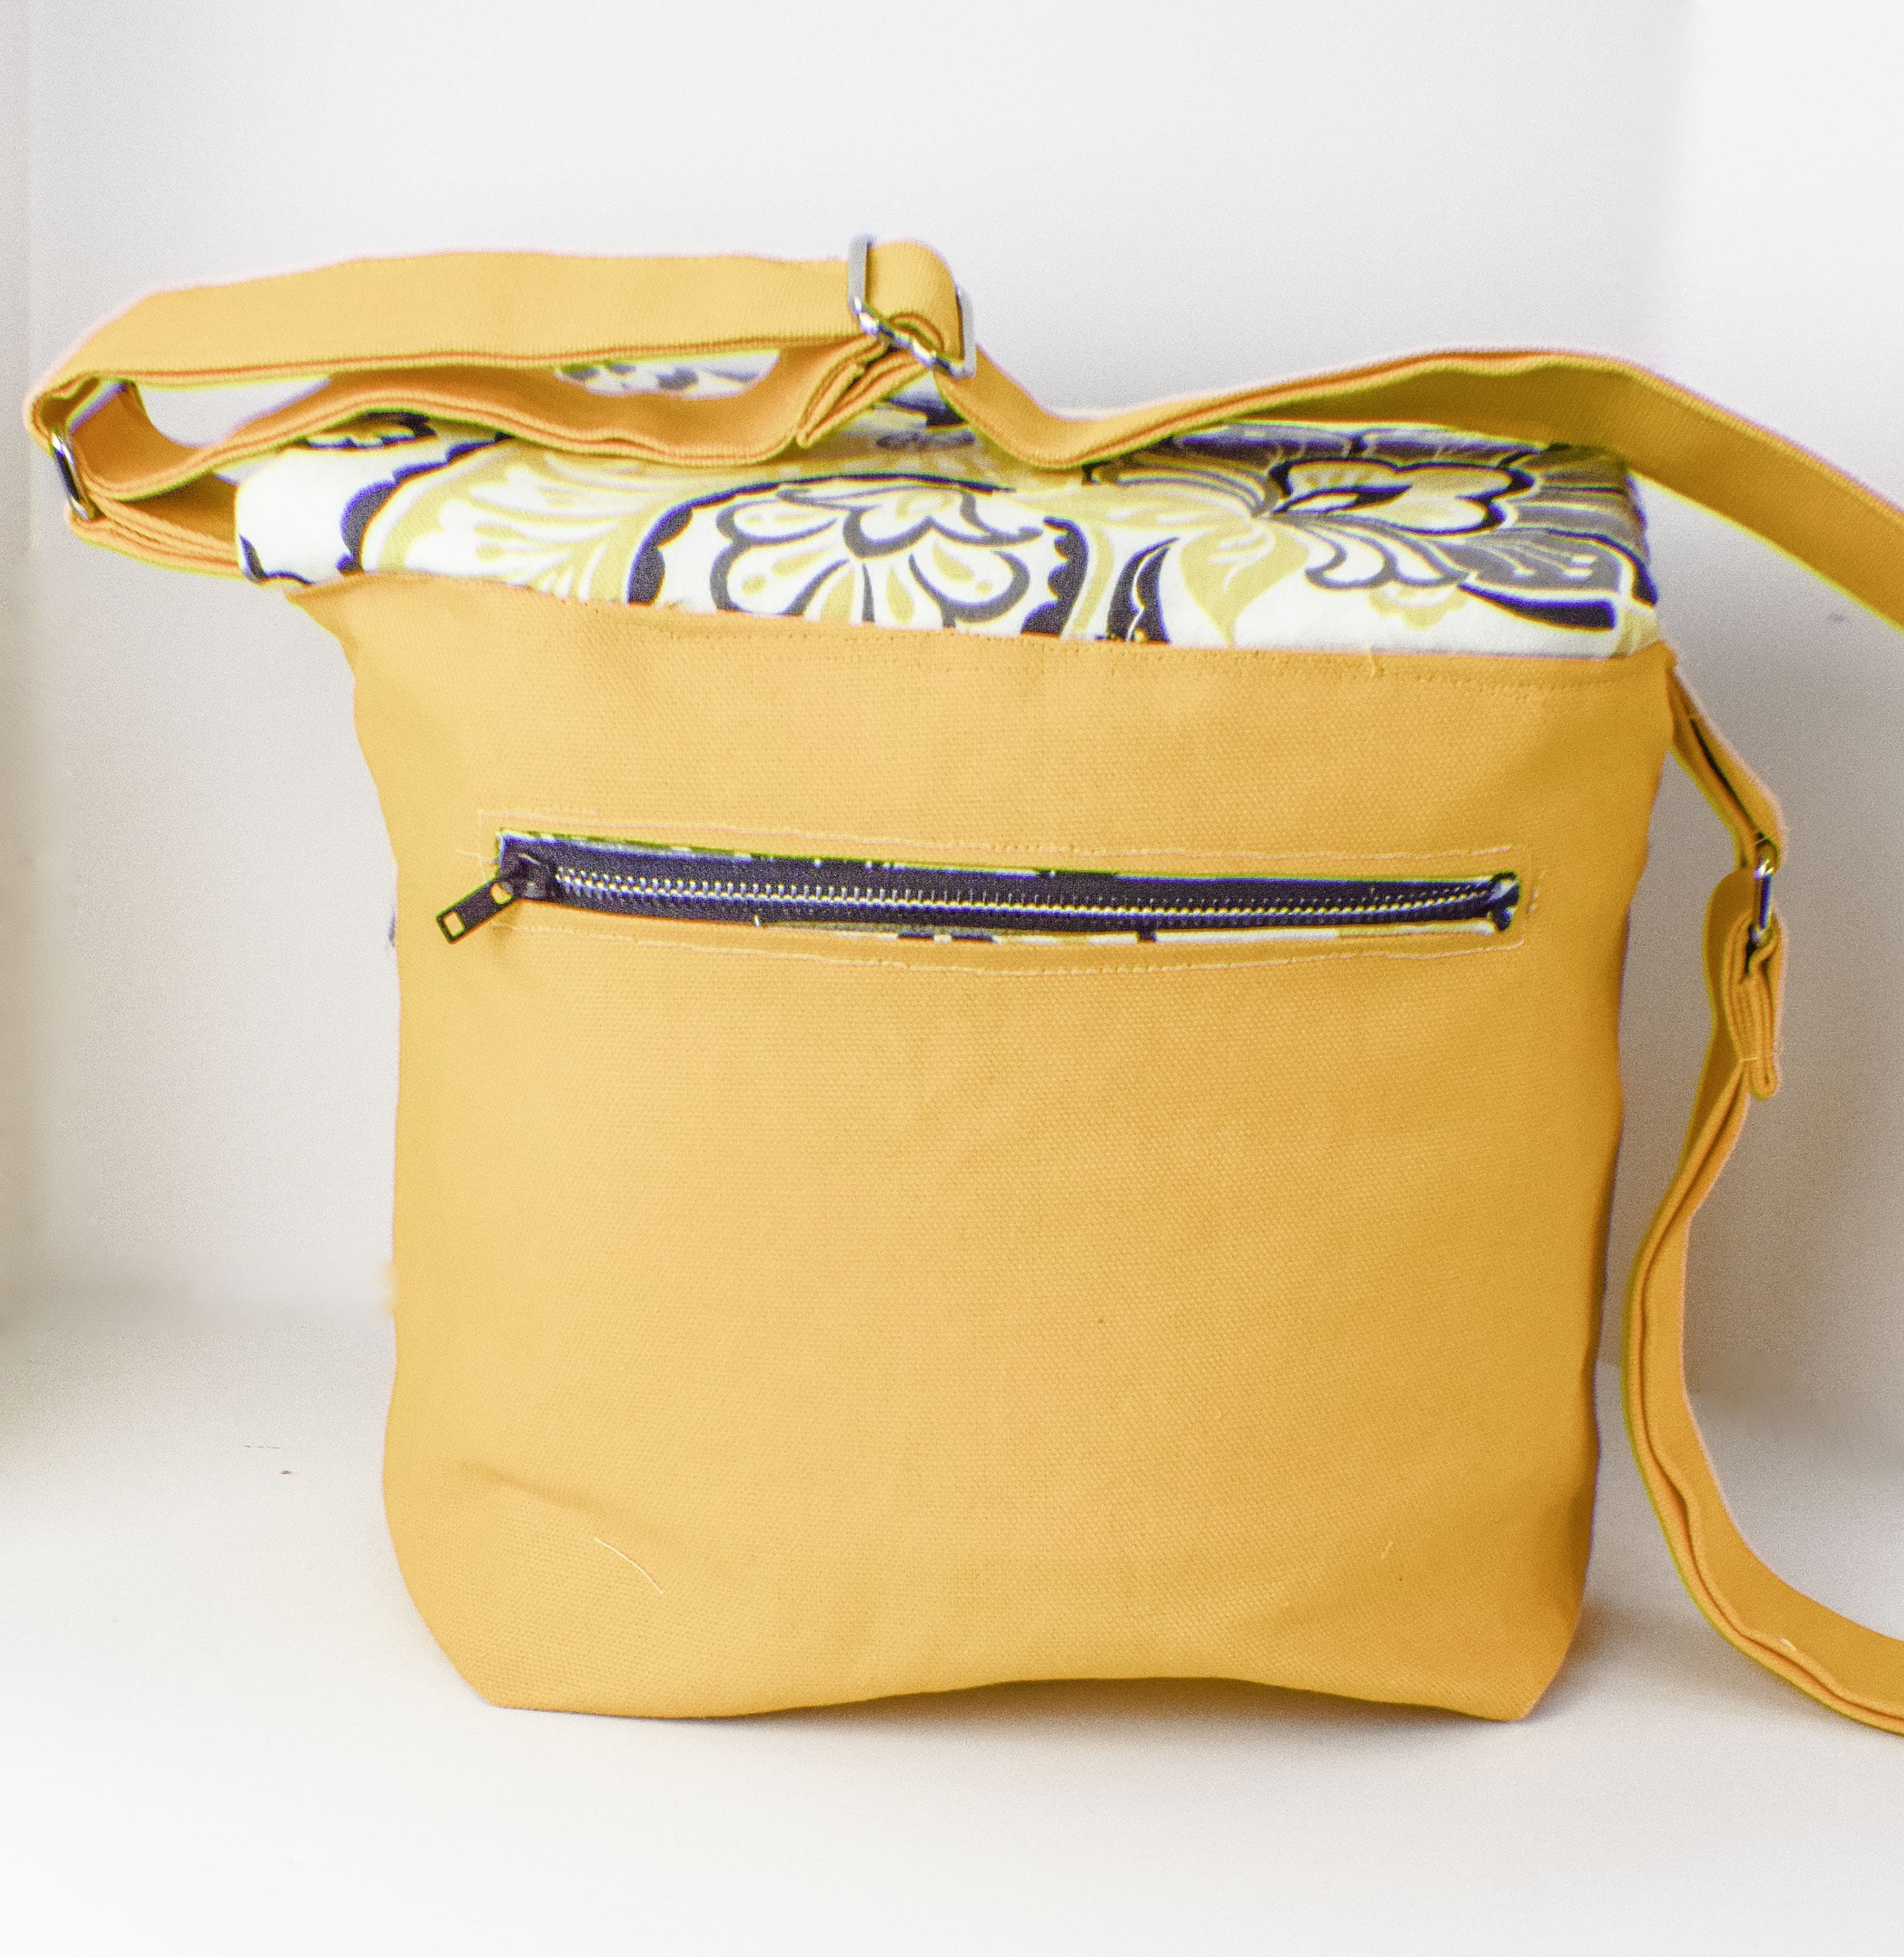
Step 6: Add the Zipper to the Camera Bag
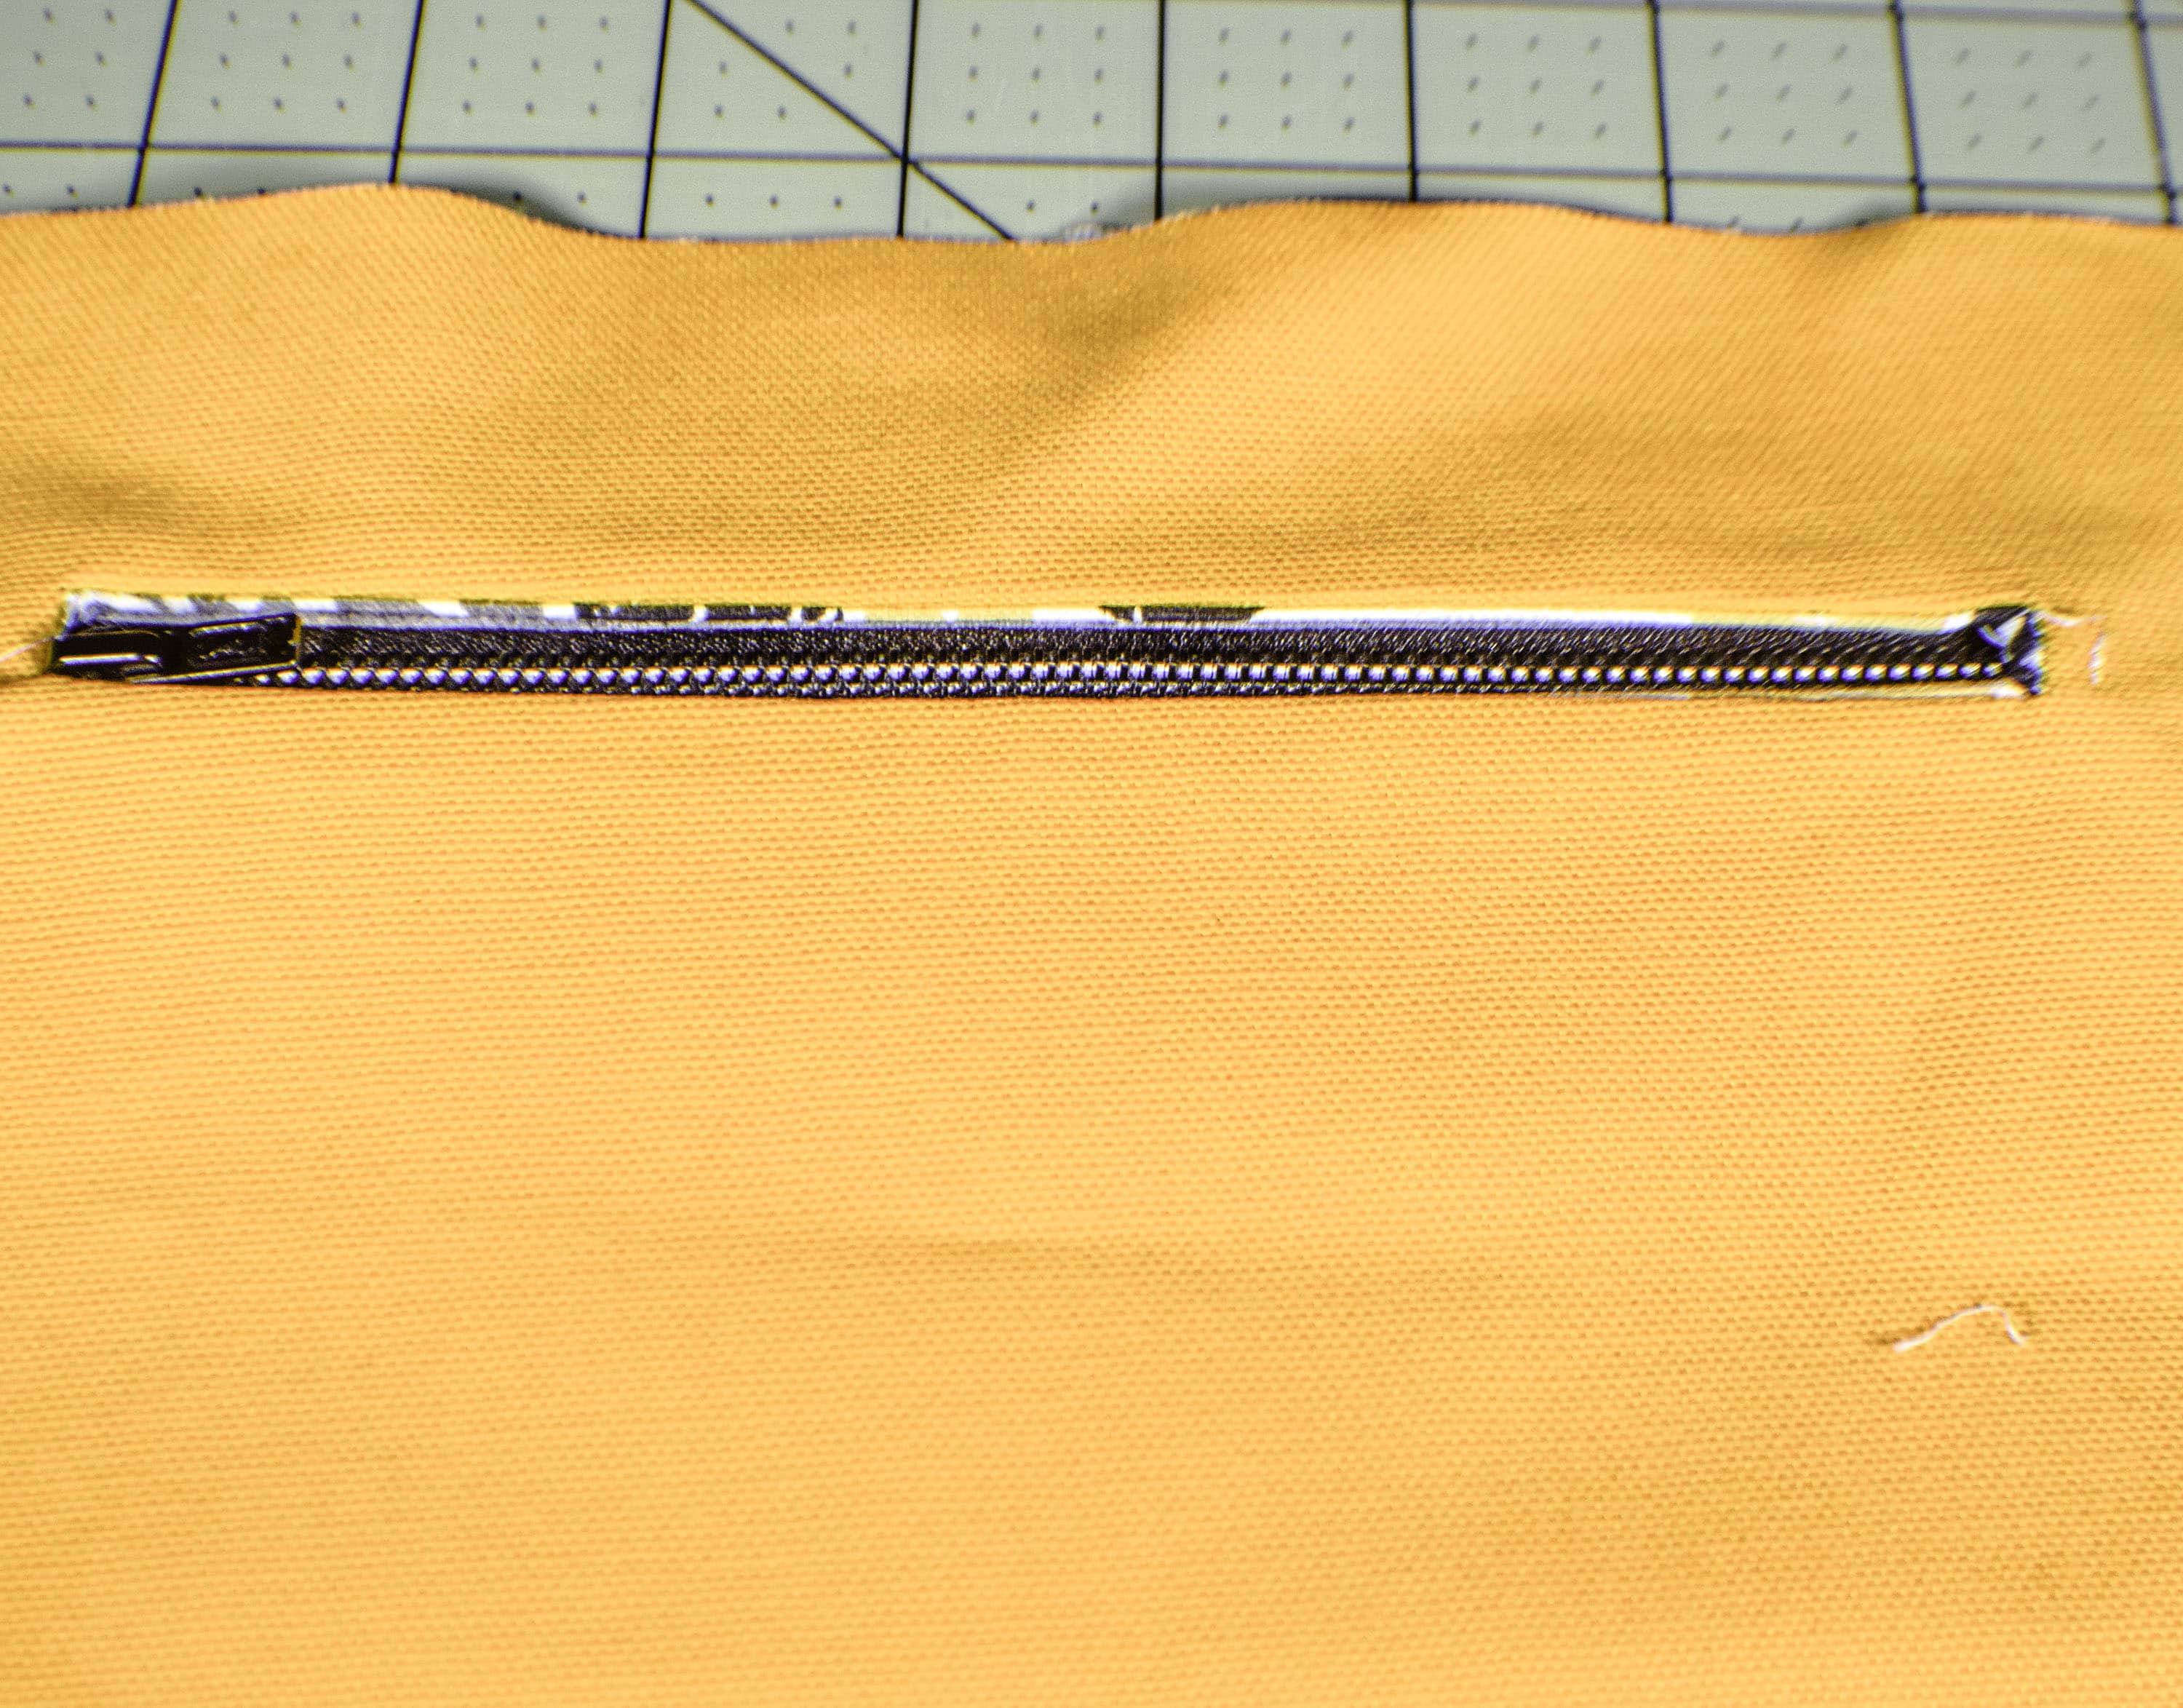
Lay the opening over the zipper so that the zipper is centered and it opens and closes easily. Either pin or use zipper tape to hold it in place. Top stitch the zipper into place. Once the zipper is sewn into place turn the piece to the wrong side and fold the pocket piece up so the bottom raw edge meets the top. Sew along the sides and the top making sure not to catch the outer fabric. This will complete your zipper pocket.
Step 7: Add the Accent Fabric to the Slip Pockets
On the front of the bag you will add slip pockets. The best way to do this is to take the 3″x 14″ piece of accent fabric and fold it in half lengthwise. Open the fold and then fold in the long raw edges to the center and fold in half again so that all of the raw edges are enclosed. Place the folded binding over the long raw edges of the 9″ x 14″ pocket piece and sew along the long edges to secure.
Step 8: Add the pocket Piece
Take the pocket piece and place it on the front outer piece so that the raw edges are aligned. Sew down the center of the pocket piece through all layers creating two pockets.

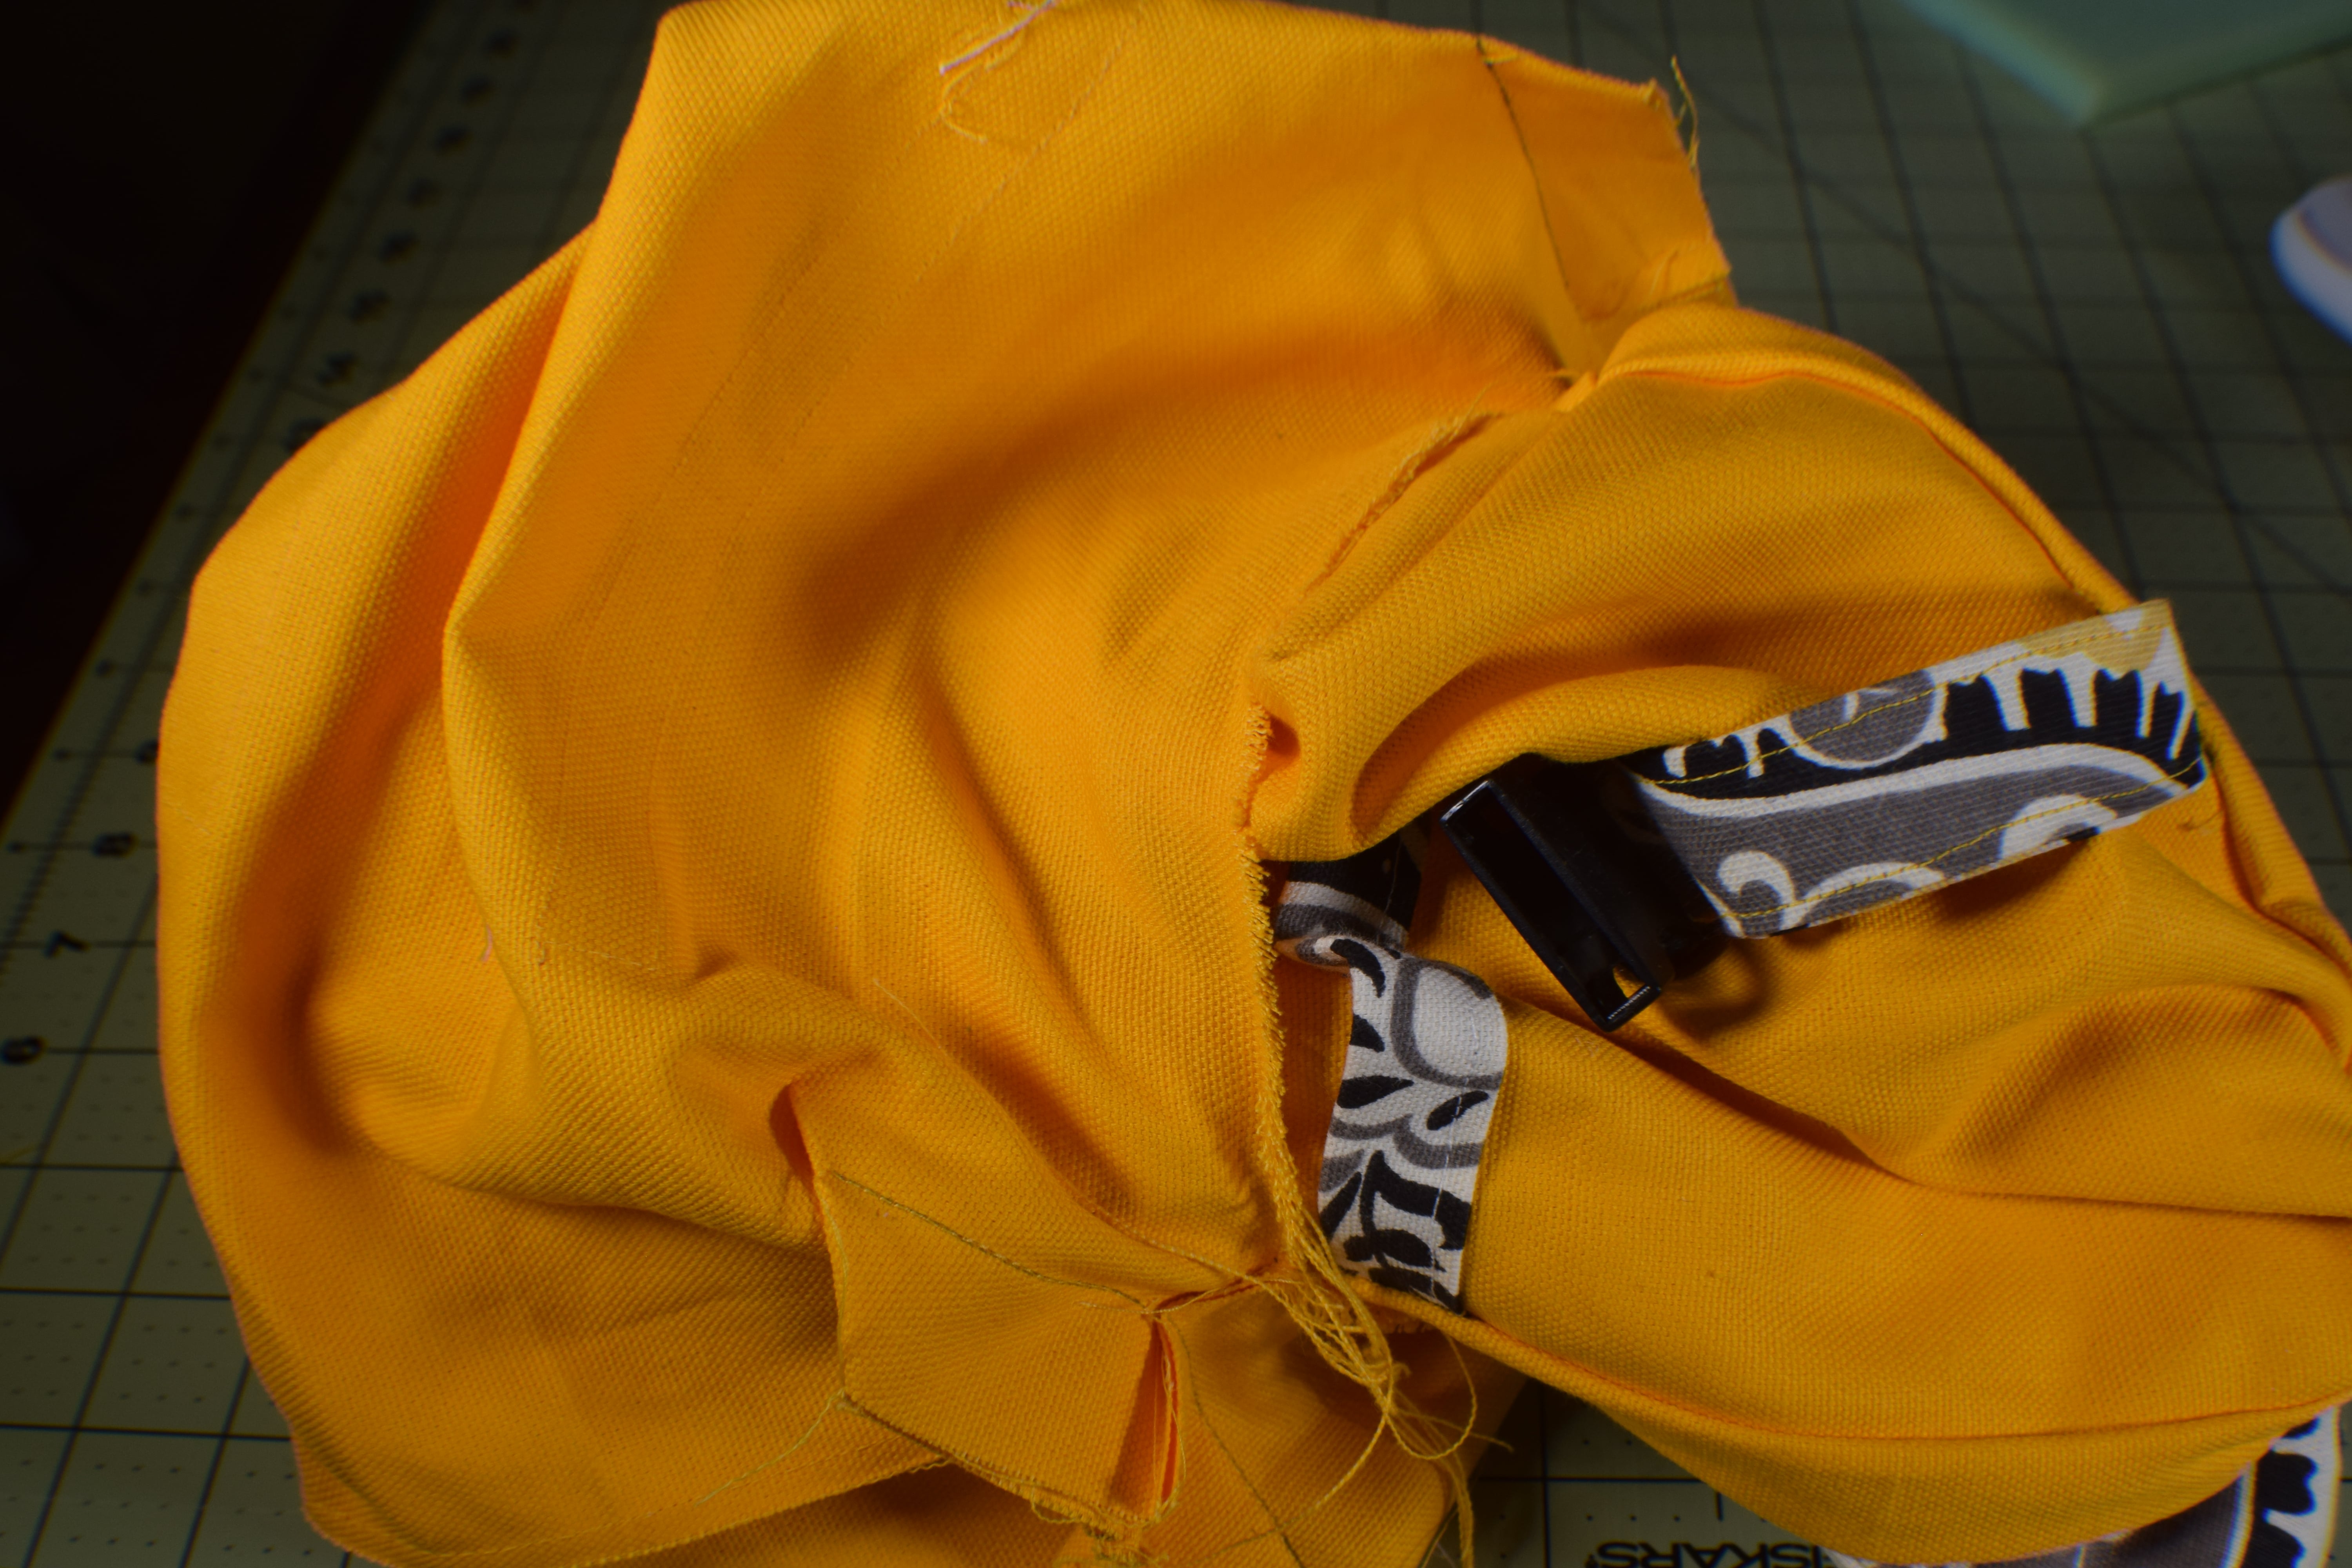
Step 9: Add the Parachutte Clips
Add the front parachute clips. Take both of the 4″ x 7″ pieces of accent fabric and create small straps by folding the rectangles long ways and pressing. Open the rectangle and fold the outer raw edges to the center and press again. Fold in half to enclose the raw edges. Press. Top stitch along both sides of the strap. Attach one side of the parachute clip by inserting the raw edges of one of the straps through the opening. Fold under the raw edges and stitch. There are also manufacturers instructions that come with the clip. Attach the strap with clip raw edges together to the bottom center of the front side of the outer piece and stitch along the sides of the strap and across where you secured the clip. Part of the strap will remain floppy. Leave the other side of the parachute clip for later.

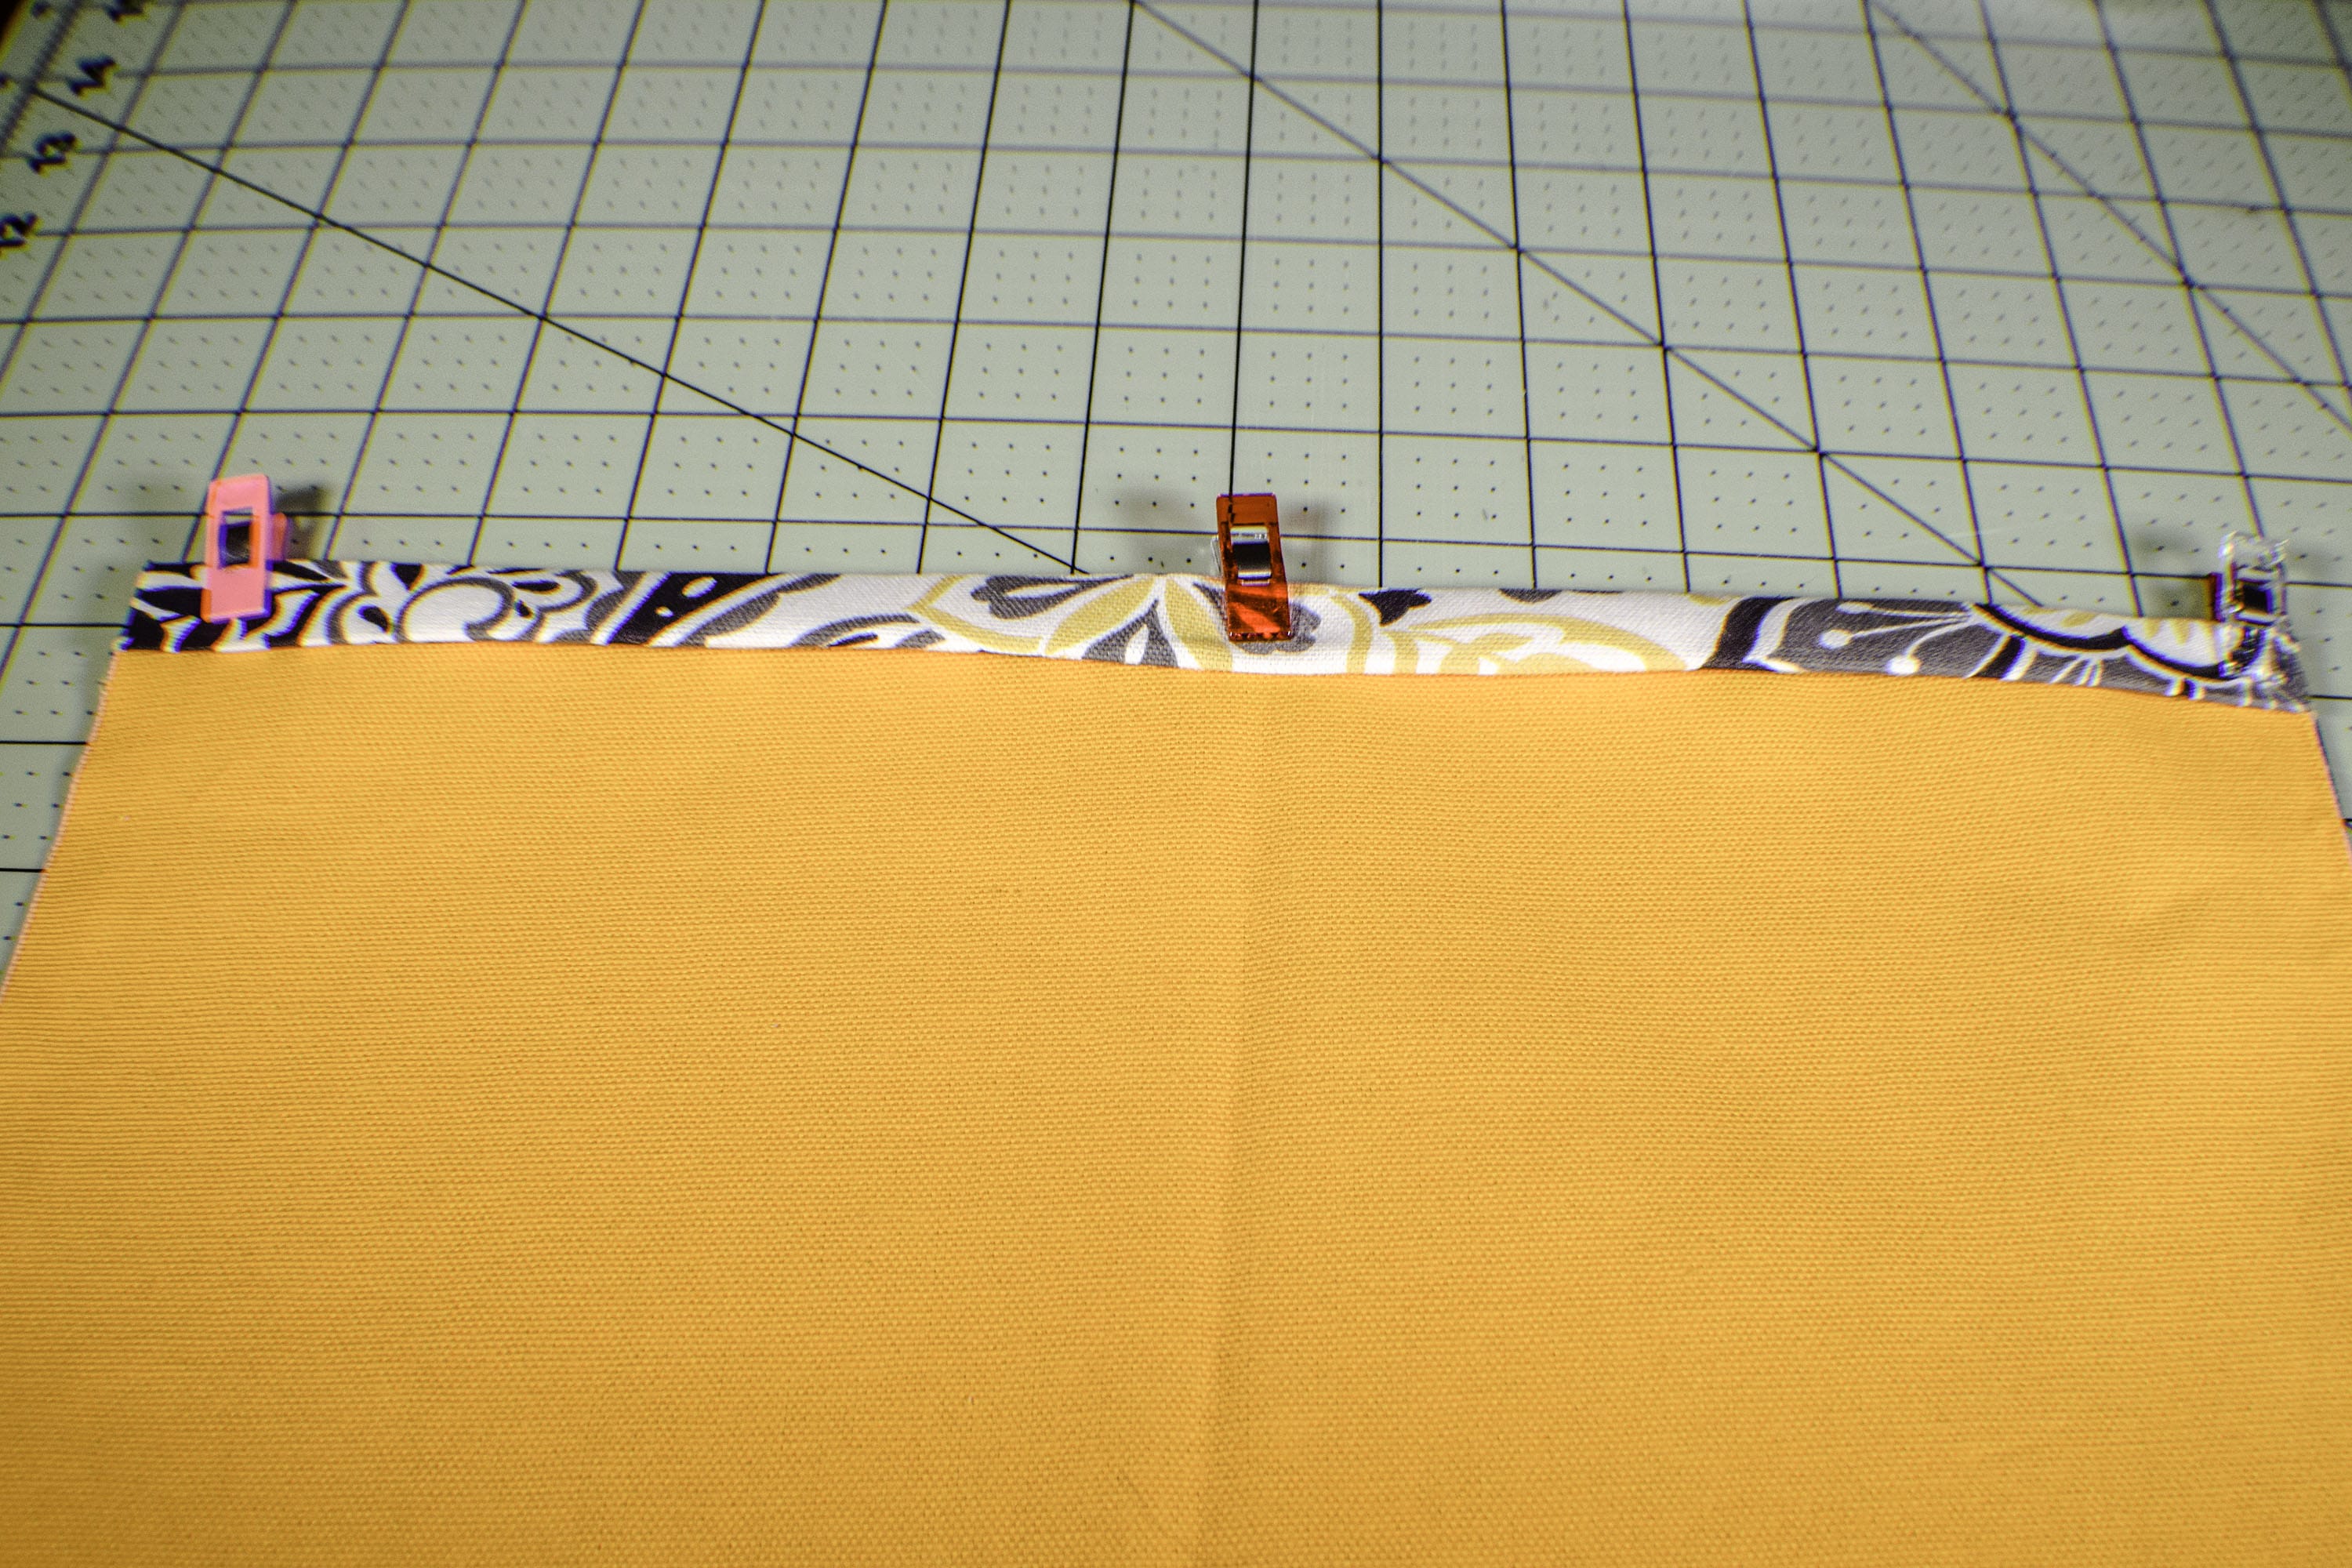
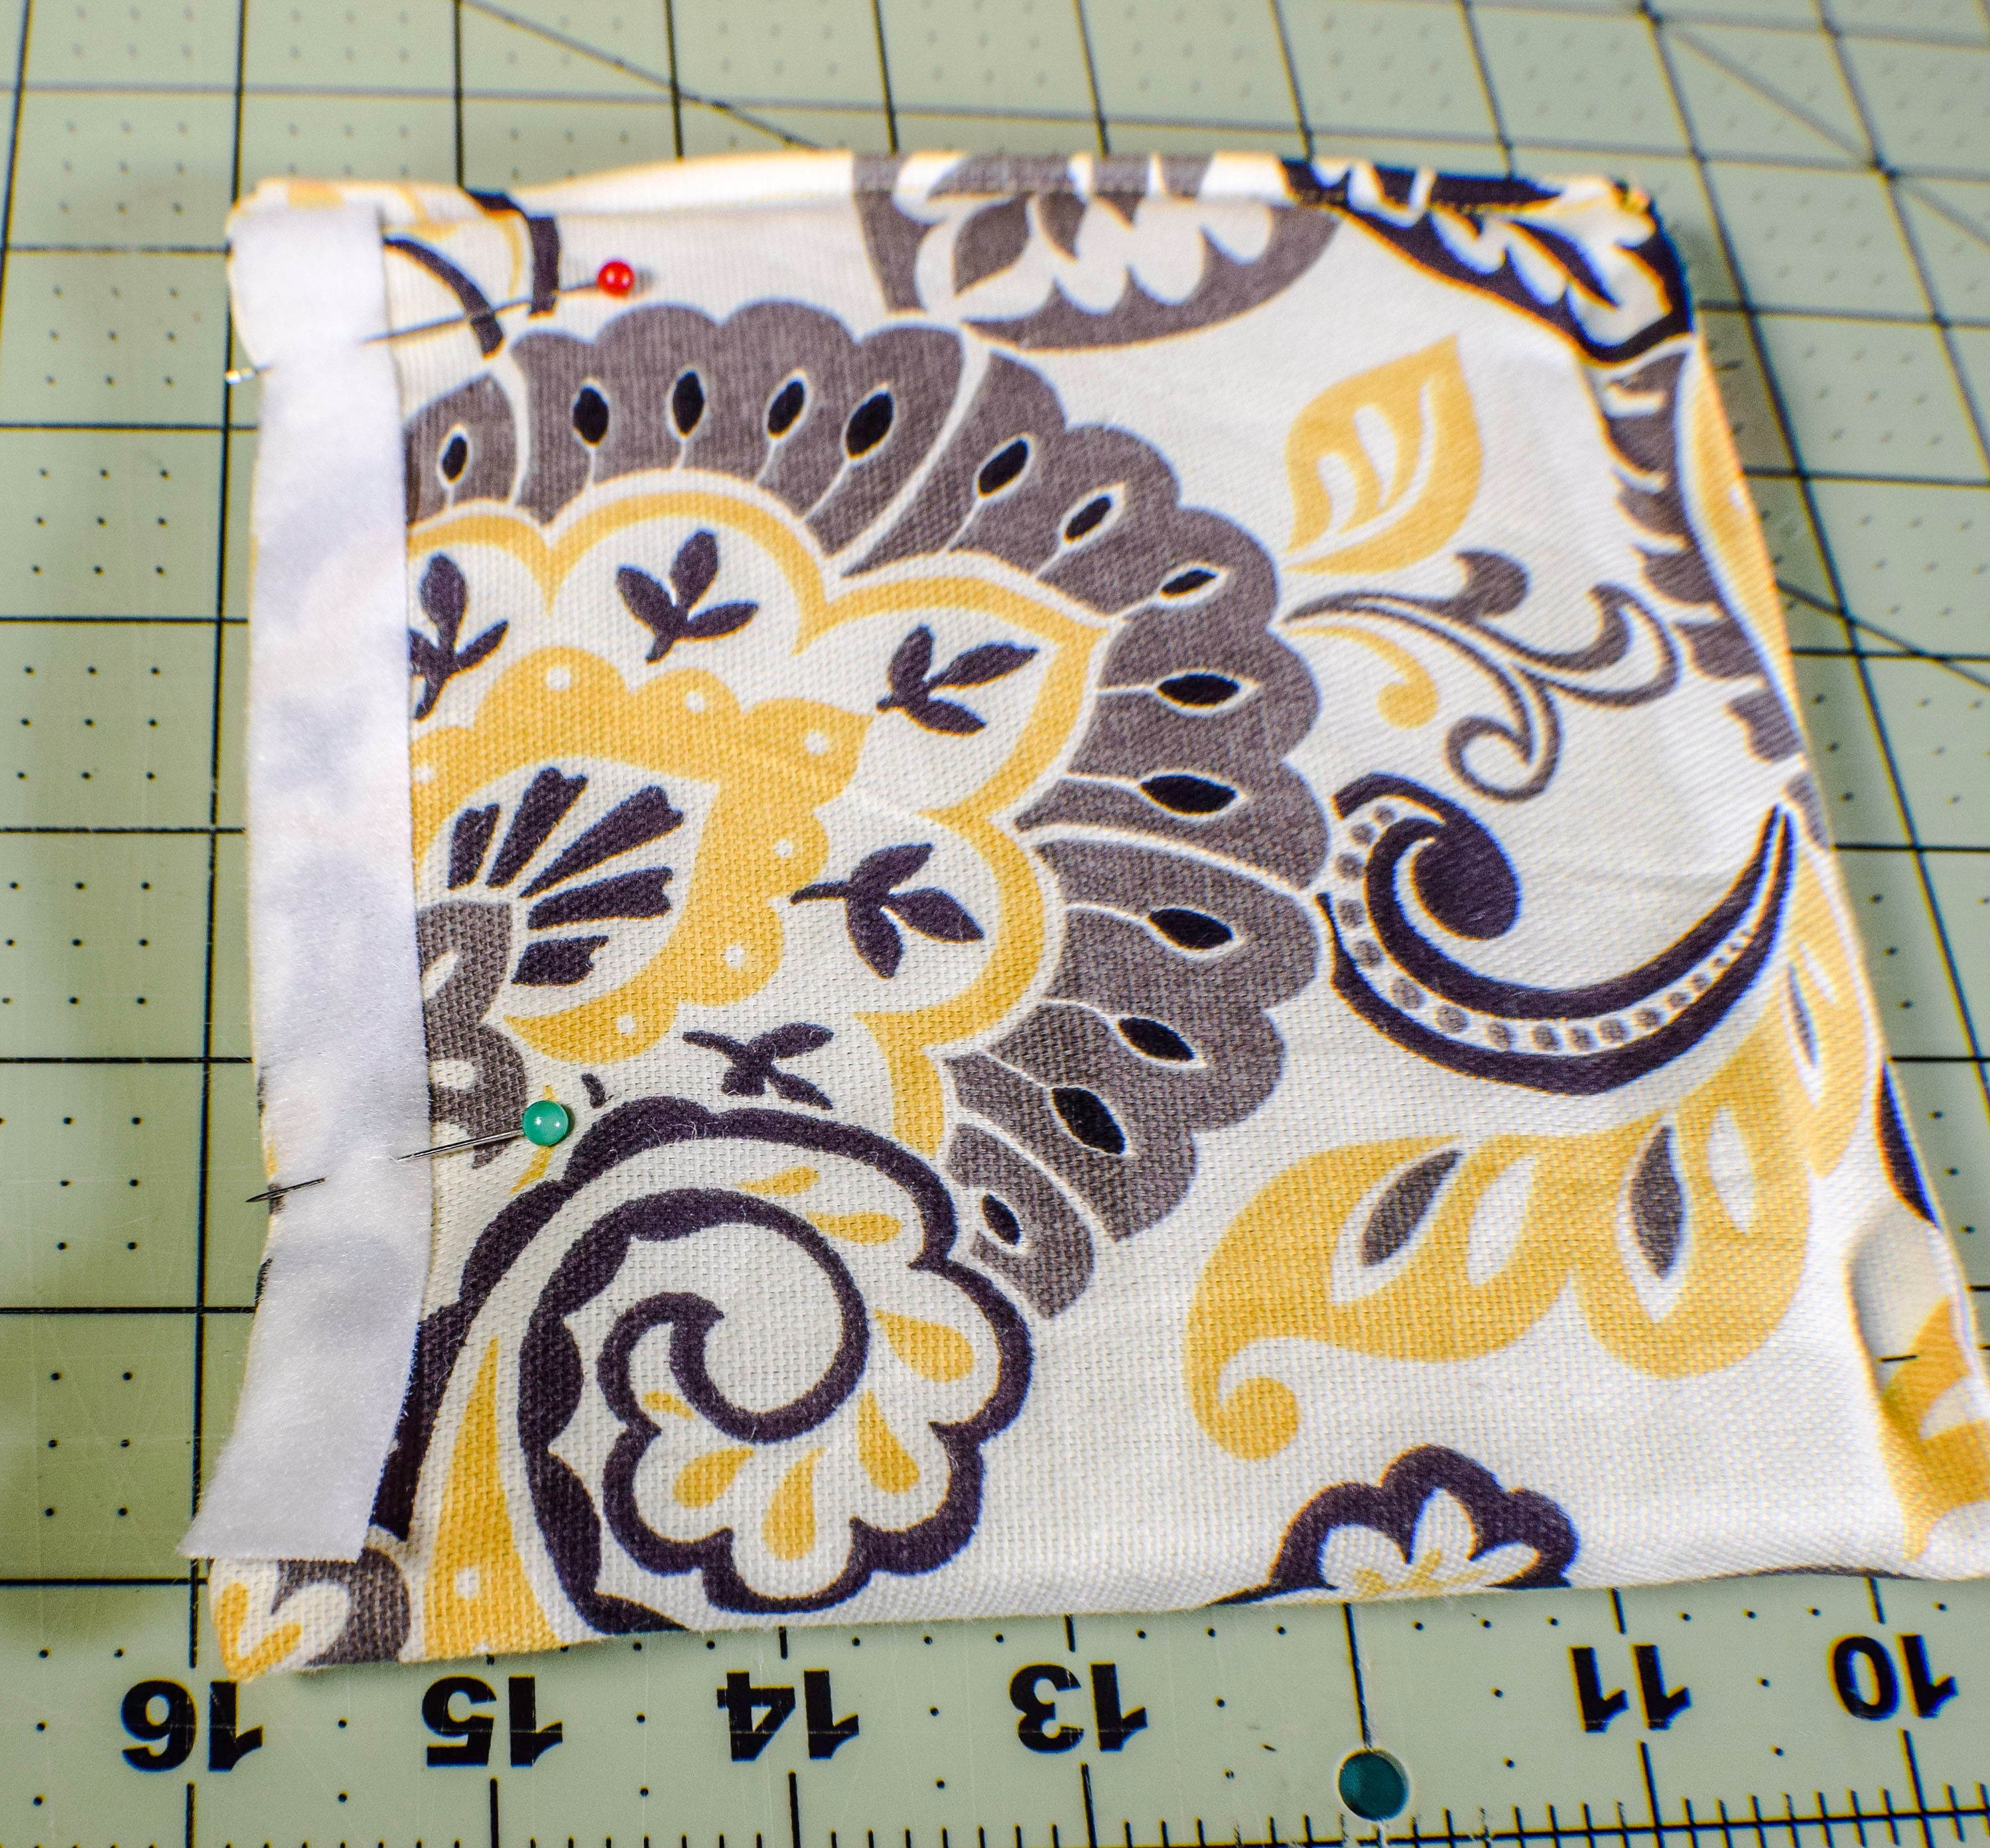
Step 10: Create the Top Flap of the Camera Bag
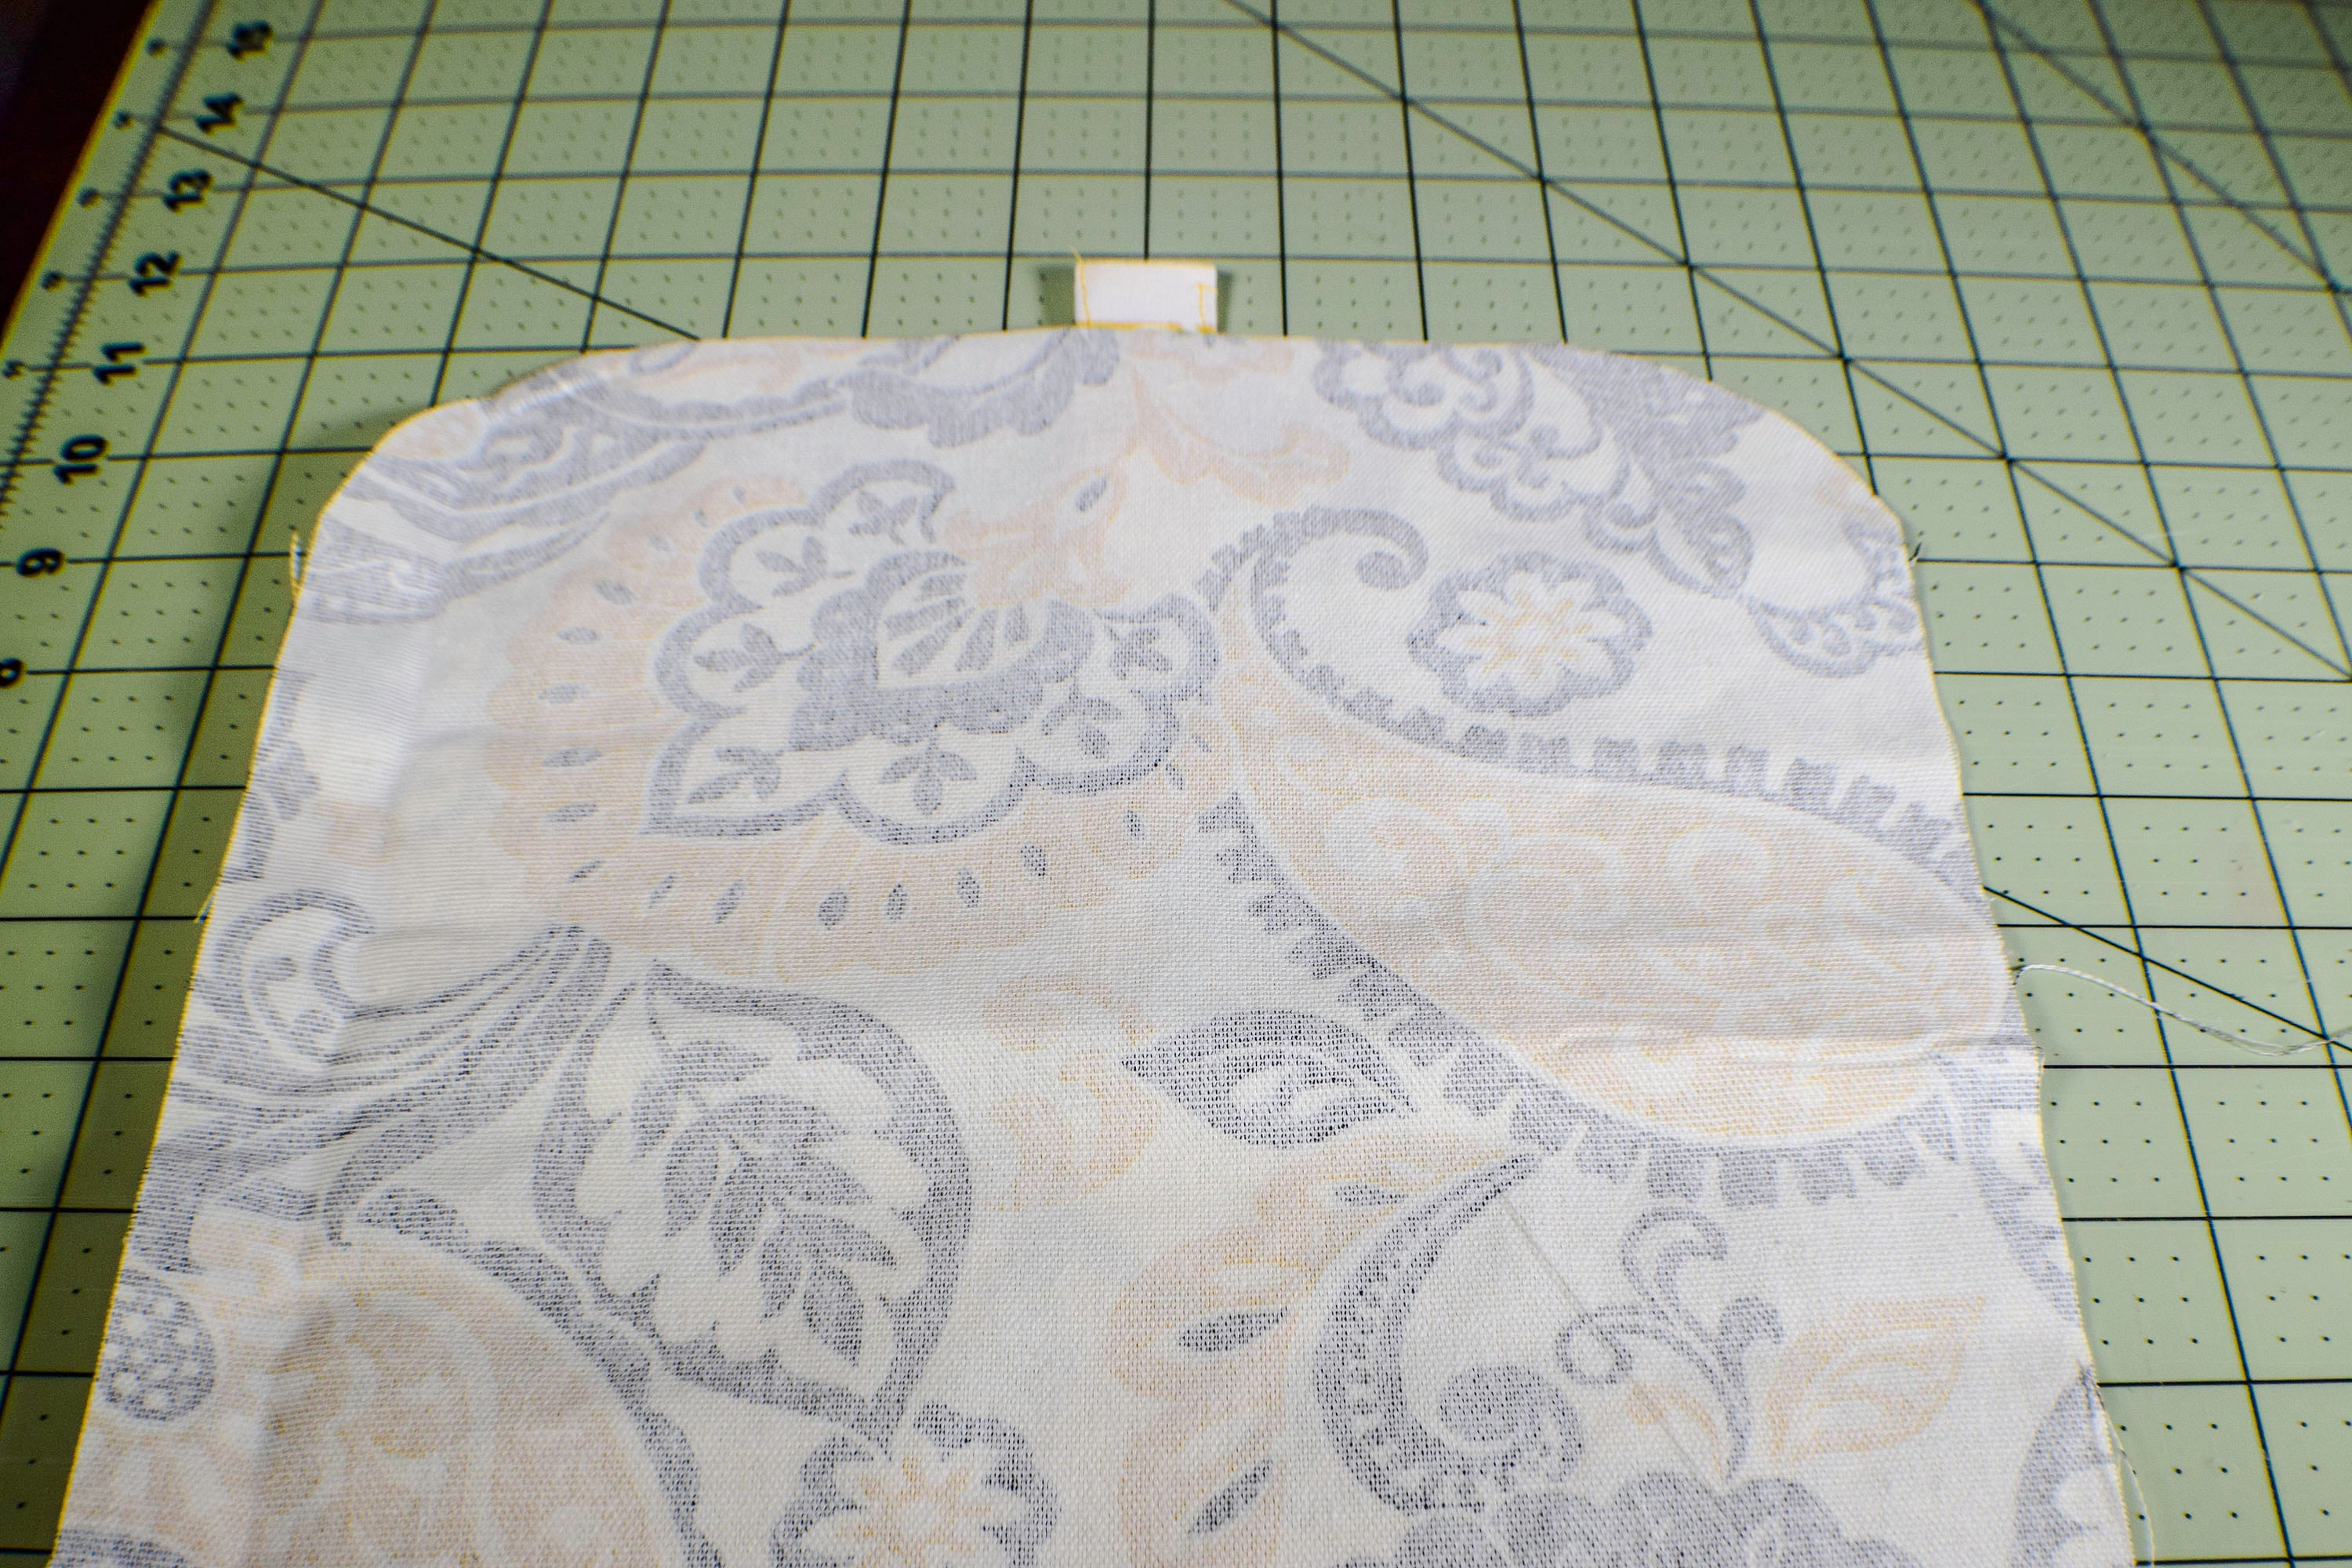
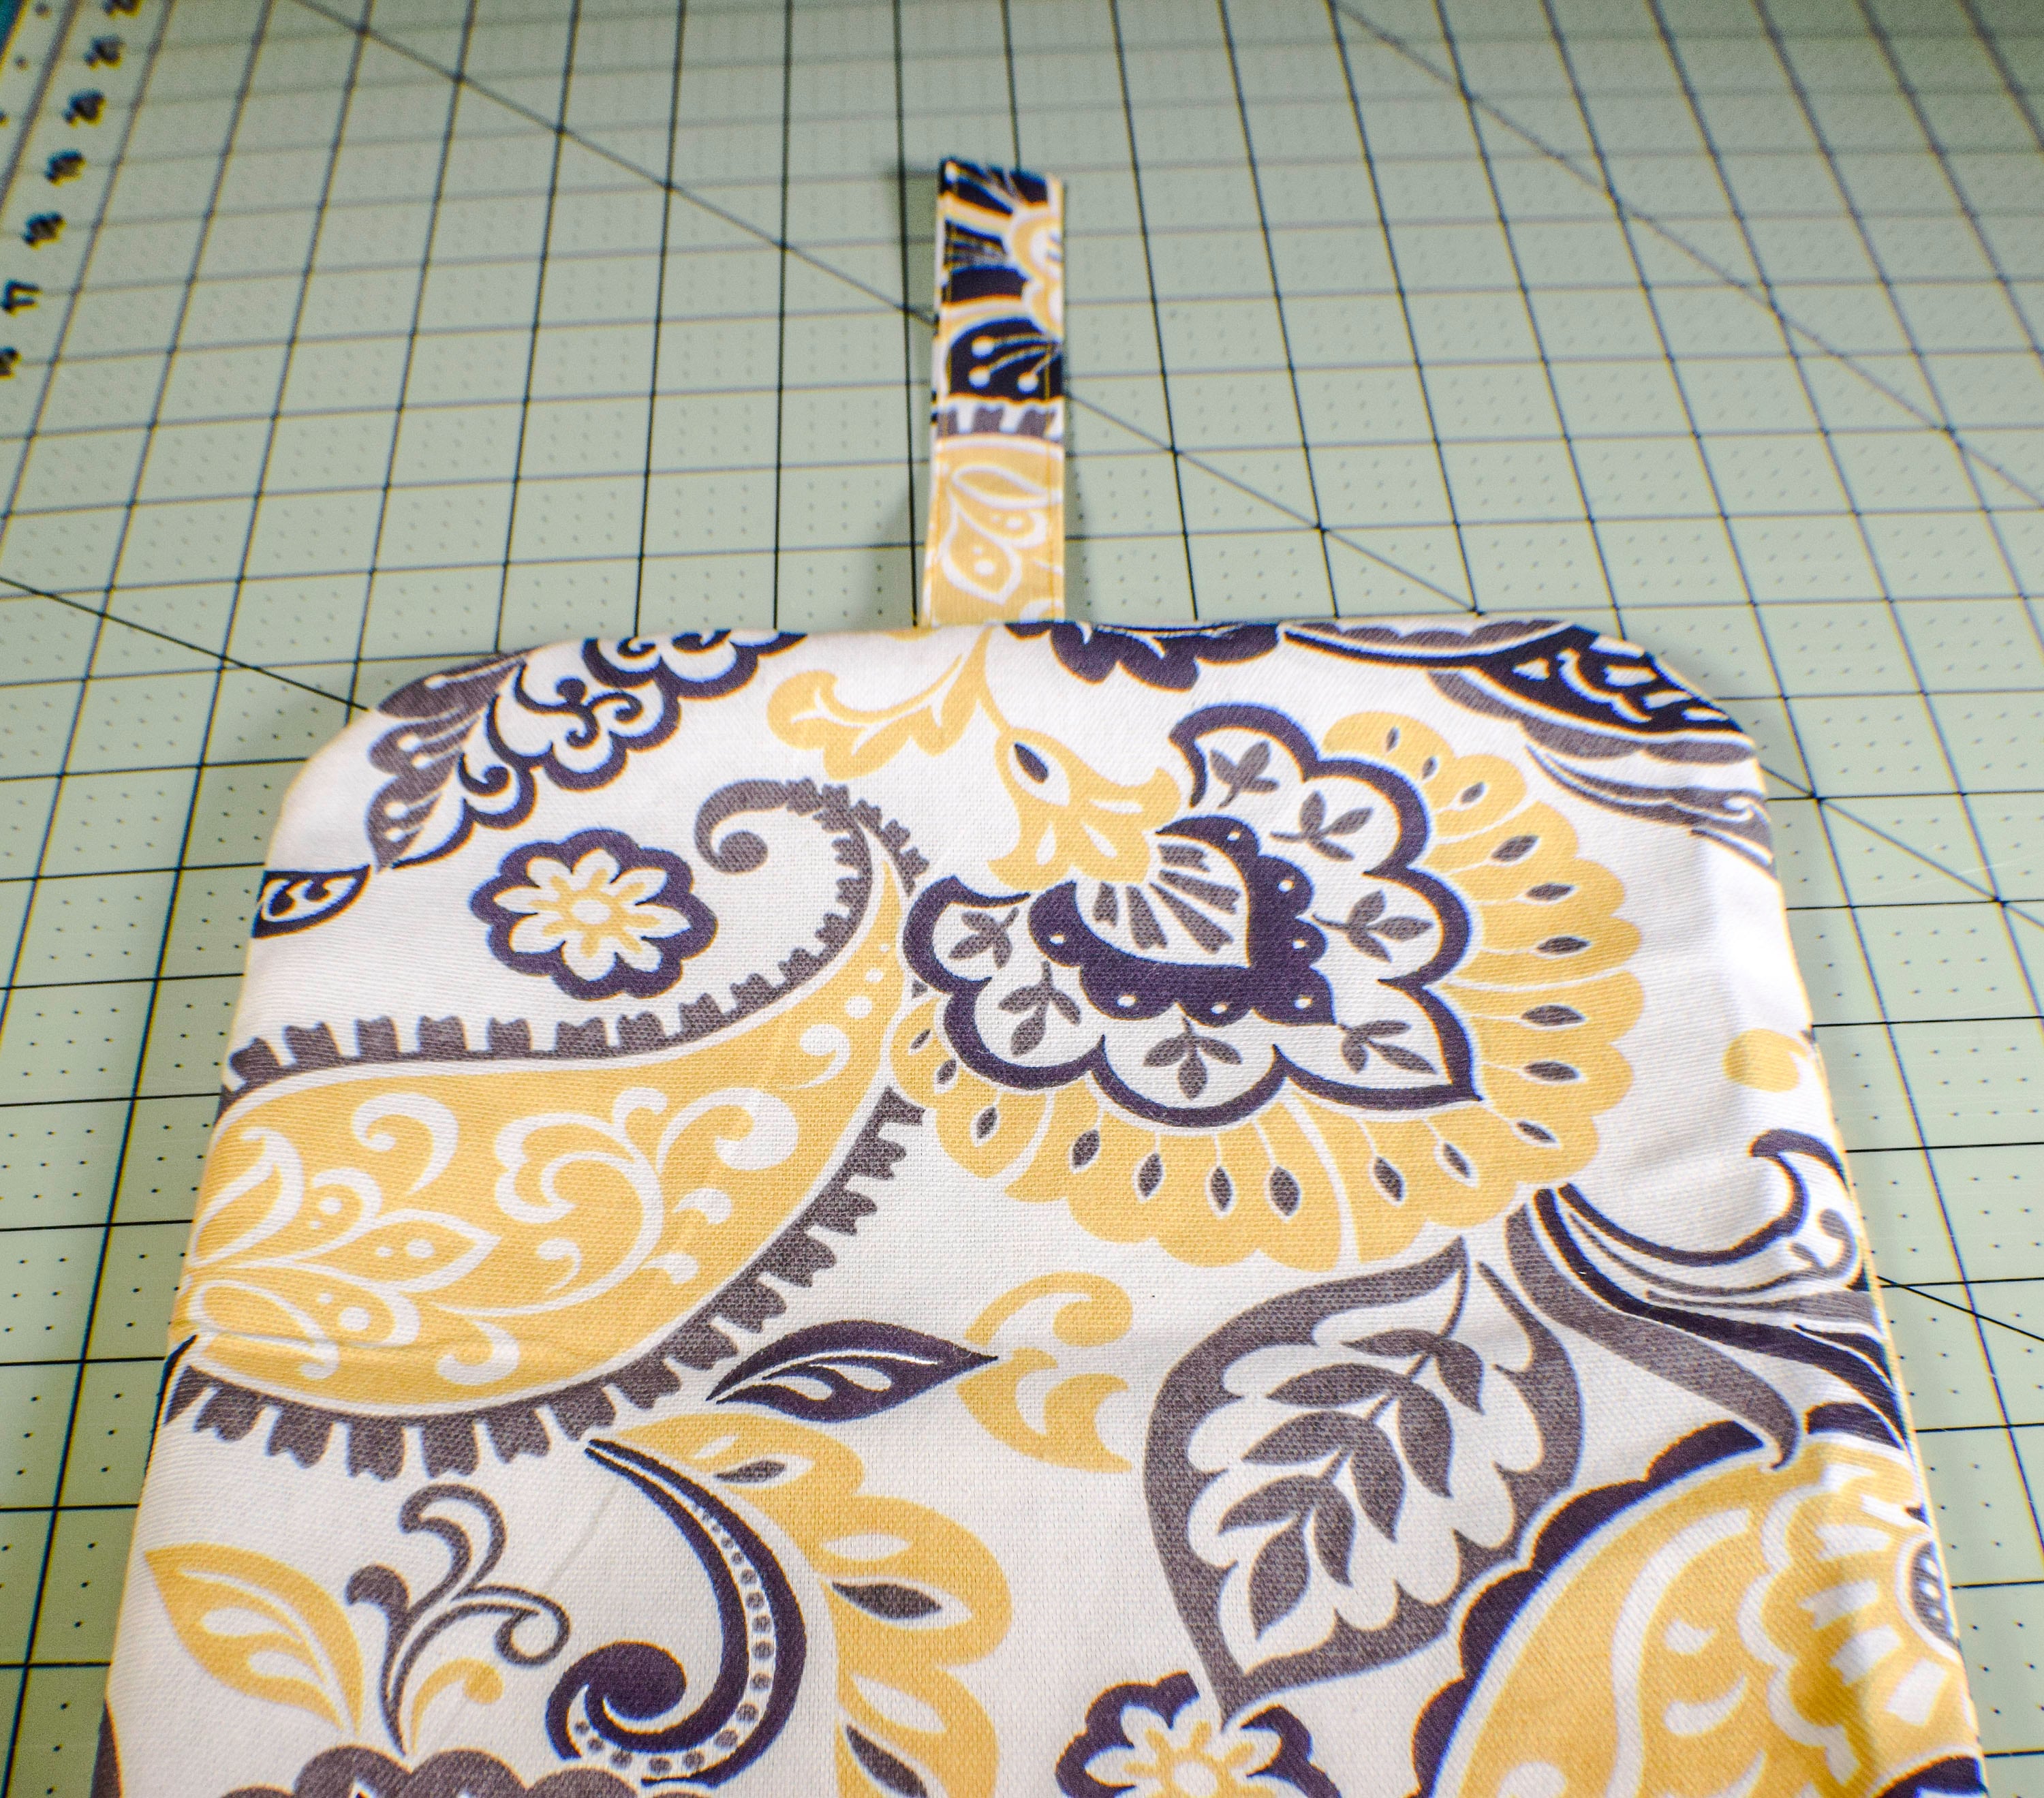
Create the top flap of the bag. You have already cut two rectangles that measure 10 1/2″ x 11 1/2″. Round the front corners of the rectangles for a softer appearance. Pin the other small strap without the corresponding parachute clip to the center front of one of the flap pieces so that it is laying on the flap piece. Place the other flap piece right sides together on the other flap piece sandwiching the small strap. Sew around two sides and the front. Turn right sides out. You should have the flap with the strap hanging out. Insert the flap padding into the flap through the open back side.

Step 11: Create the Lining of the Camera Bag
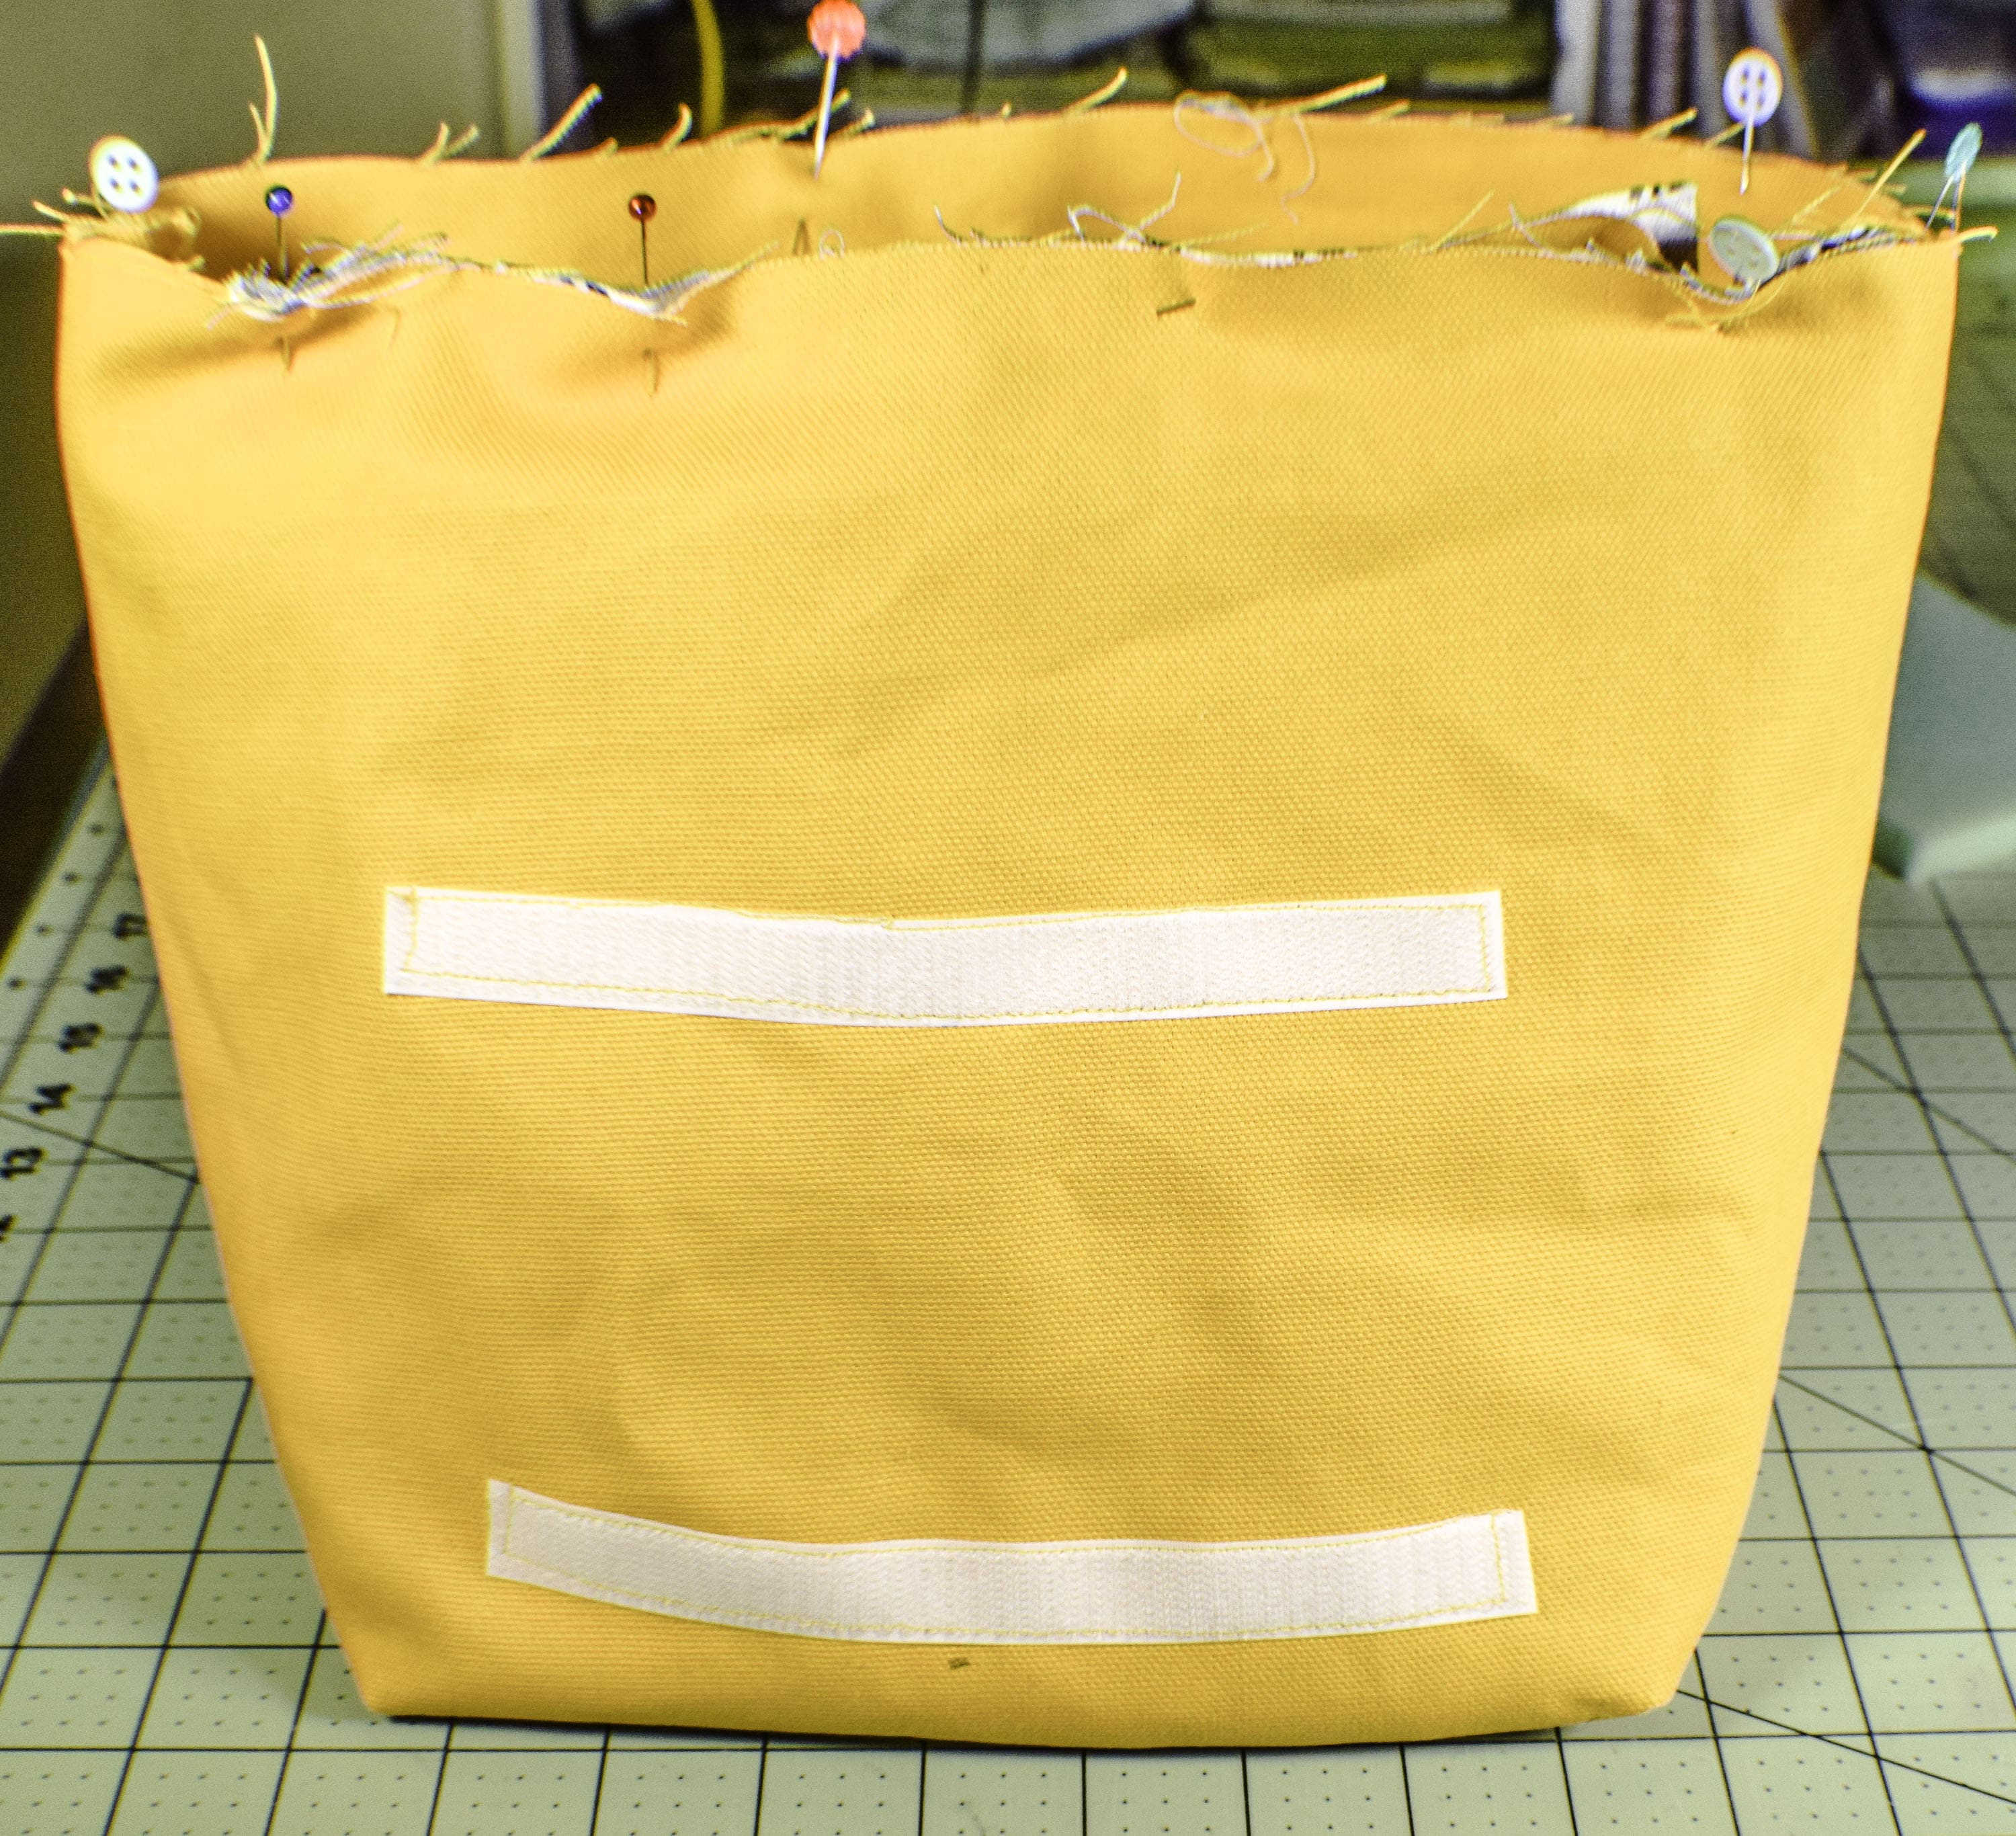
Create the lining of the bag by taking the other canvas rectangles with the squares cut out. Sew on two rows of Velcro onto the front and back of the lining pieces. Measure up 4″ from the bottom for the first row and 4″ in between rows. I used only the loop side for this process. I will use the hook side for the dividers.
Step 12: Add the Lining to the Outer Camera Bag
Sew the front outer to the back and the front lining to the back by sewing the sides and the bottoms only. Leave the cut out squares unsewn. Leave a fairly large opening in the lining bottom for turning the bag and for inserting the padding. Once the sides and the bottoms are sewn you will box the corners. Take the side seam and the bottom seam and match them up. The raw edges of the box that you cut will lay flat. Measure down so that the seam is 5″ long and sew across the raw edges.
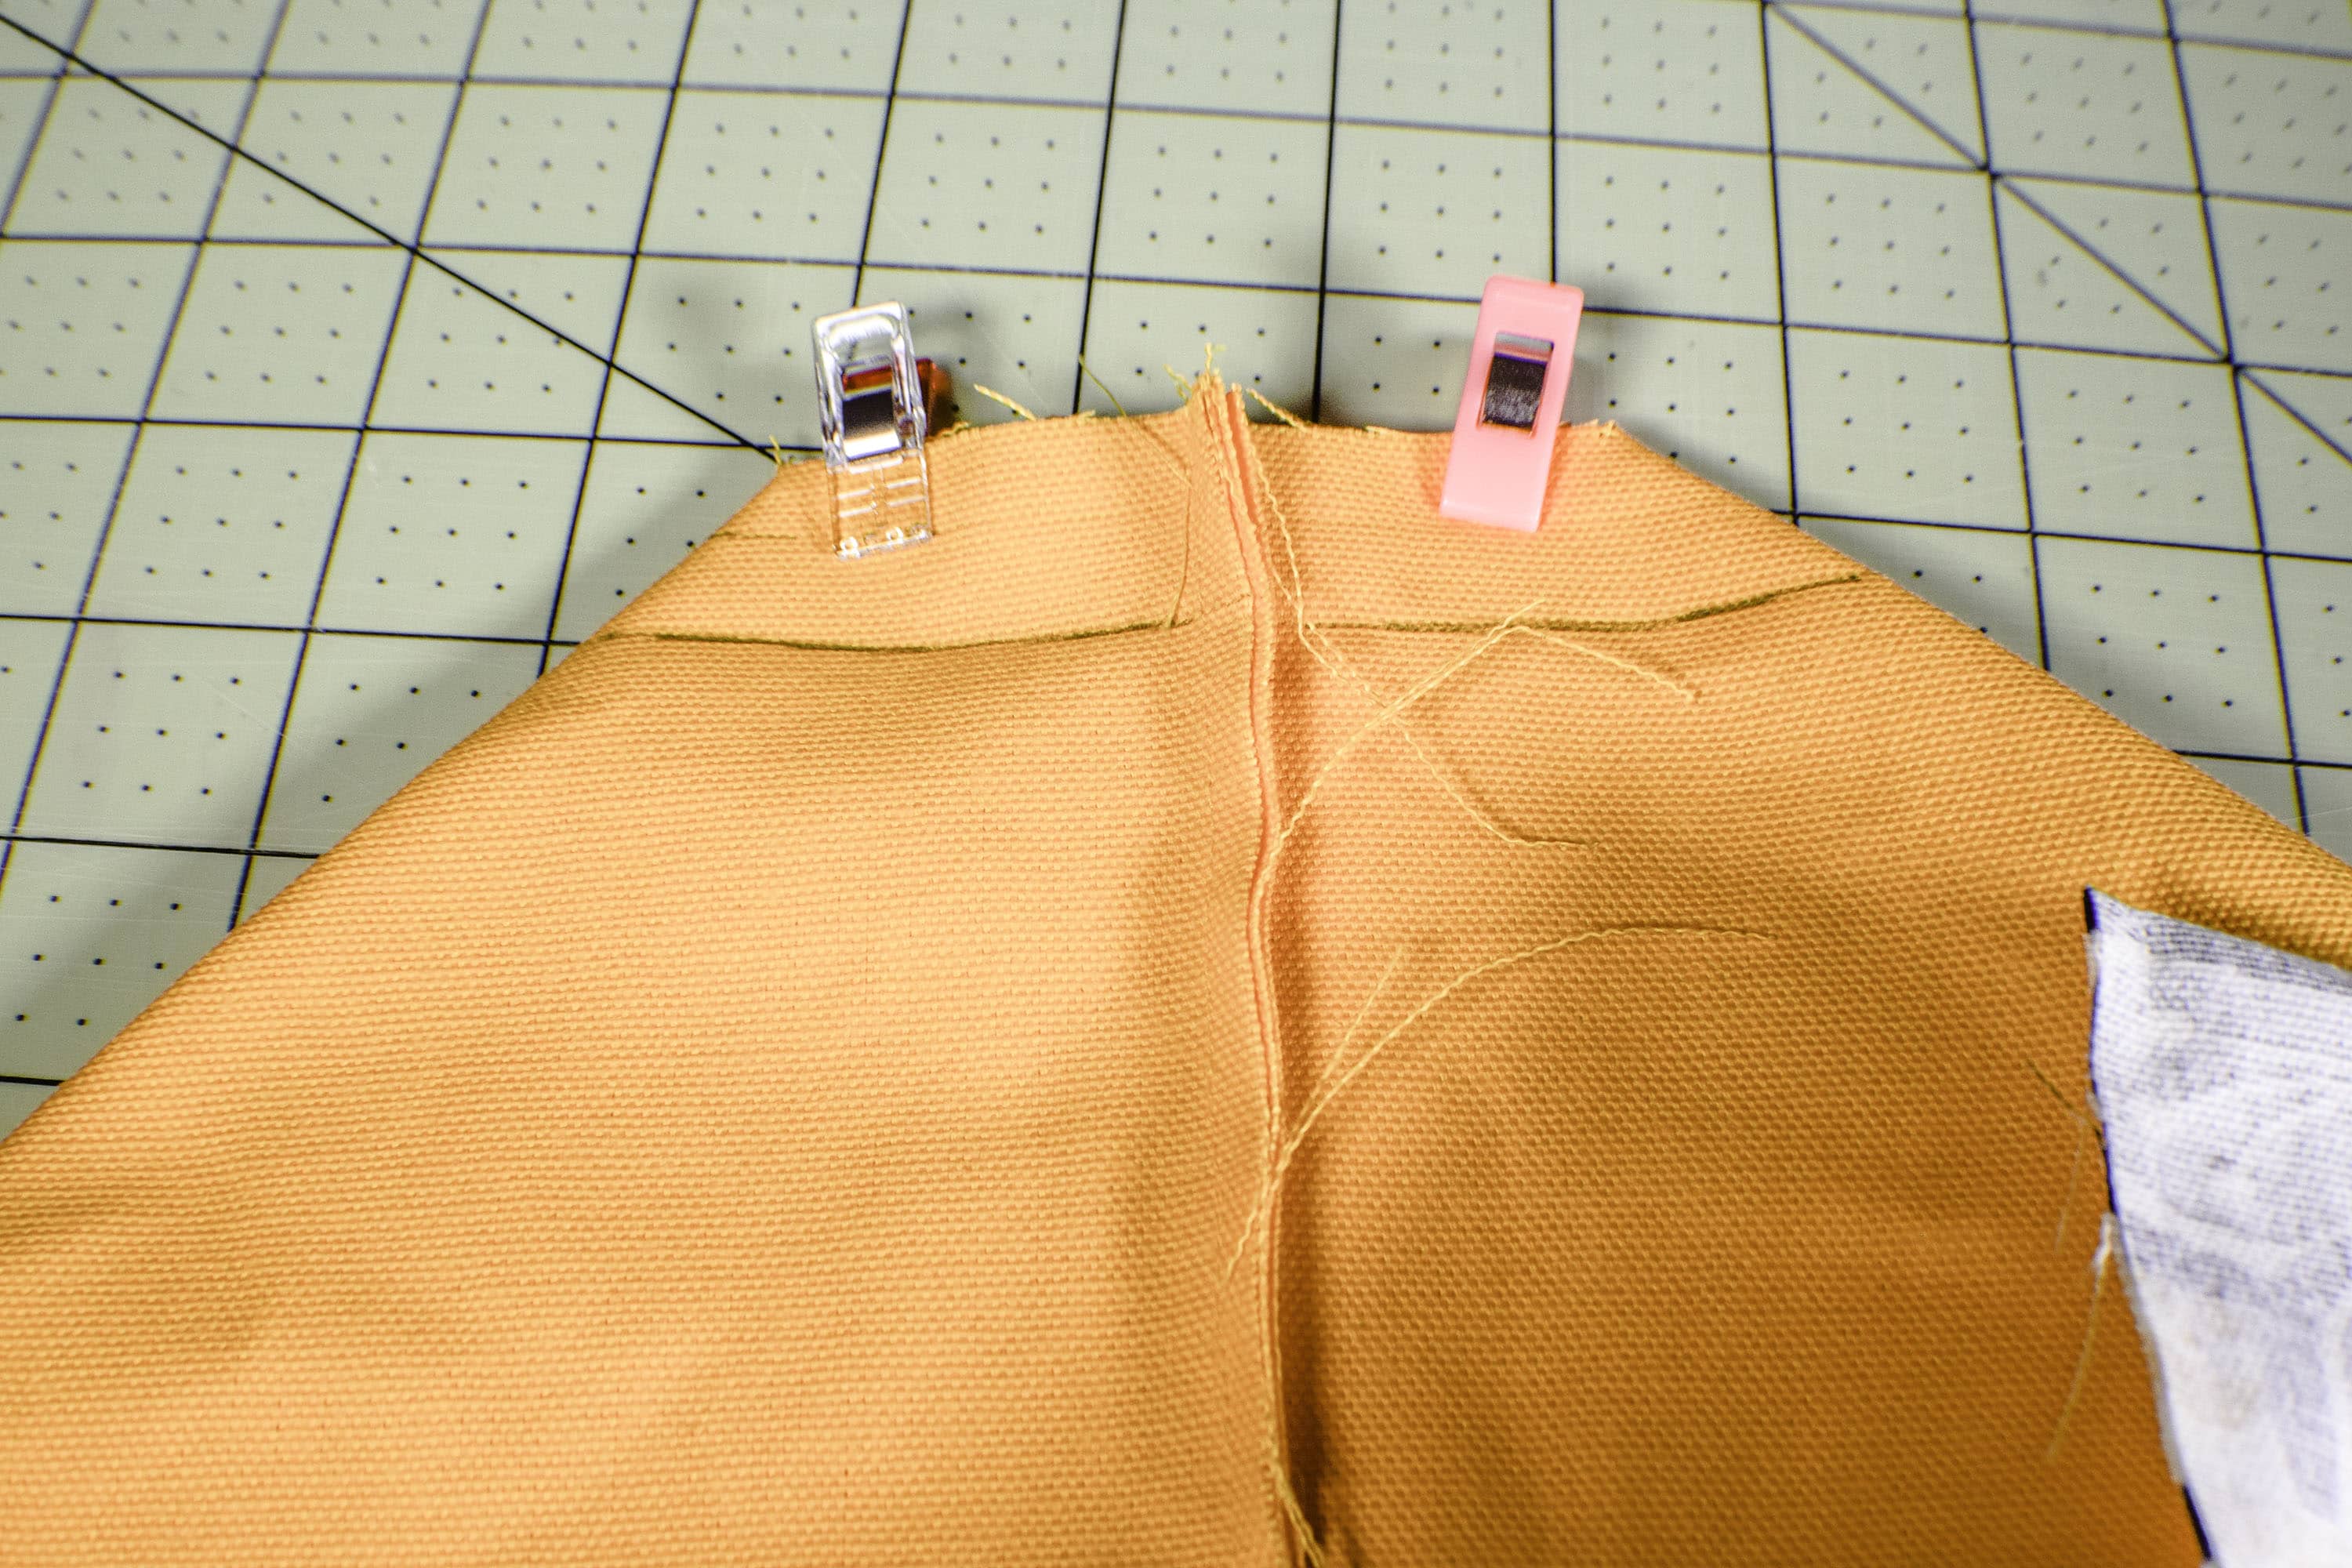
Step 13: You Will Have two Camera Bags
You will have two bags, an outer bag and a lining bag.
Step 14: Make the Straps
Create the straps for the rectangles in the same way that you made the other straps. Insert the rectangles into the straps and baste along the raw edges.
Step 15: Attach the Straps and add the Lining to the Outer Bag
Attach the straps with the rectangles so that they are facing down the side of the outer bag and pin to the side centering the straps with the seam. Place the outer bag which is right side out inside the lining bag which is wrong side out so that they are right sides together. Insert the flap piece so that it is facing down in between the outer bag and the lining bag. Sew around the top of the bag using a 1/4″ seam allowance. Turn the bag right side out through the opening you left in the lining. Push the lining into the outer bag. Top stitch around the top of the bag for a more professional appearance.
Step 16: Insert the Padding Pieced
Insert the padding pieces into the bag ending with the bottom piece. Sew the bottom opening closed using ladder stitch.
Step 17: Add the Other End o the Parachute Clip
Attach the other end of the parachute clip to the top strap so that when the bag is closed it will be taught. You may have to cut off some of the strap to get the feel that you want.
Step 18: Create the Divider
Create the divider. Fold the fabric in half width wise and sew up the sides leaving the bottom open. Slip the padding inside through the bottom. turn under the raw edges and sew the bottom closed. You will notice that the fabric is wider than the padding. This is done on purpose. Add the other side of the Velcro to the extra width of fabric. I placed one piece of Velcro on one side and one on the other side of the pad. This creates wings that can be attached to the rows of Velcro you already added to the lining of your bag. You can adjust the divider to suit your needs.
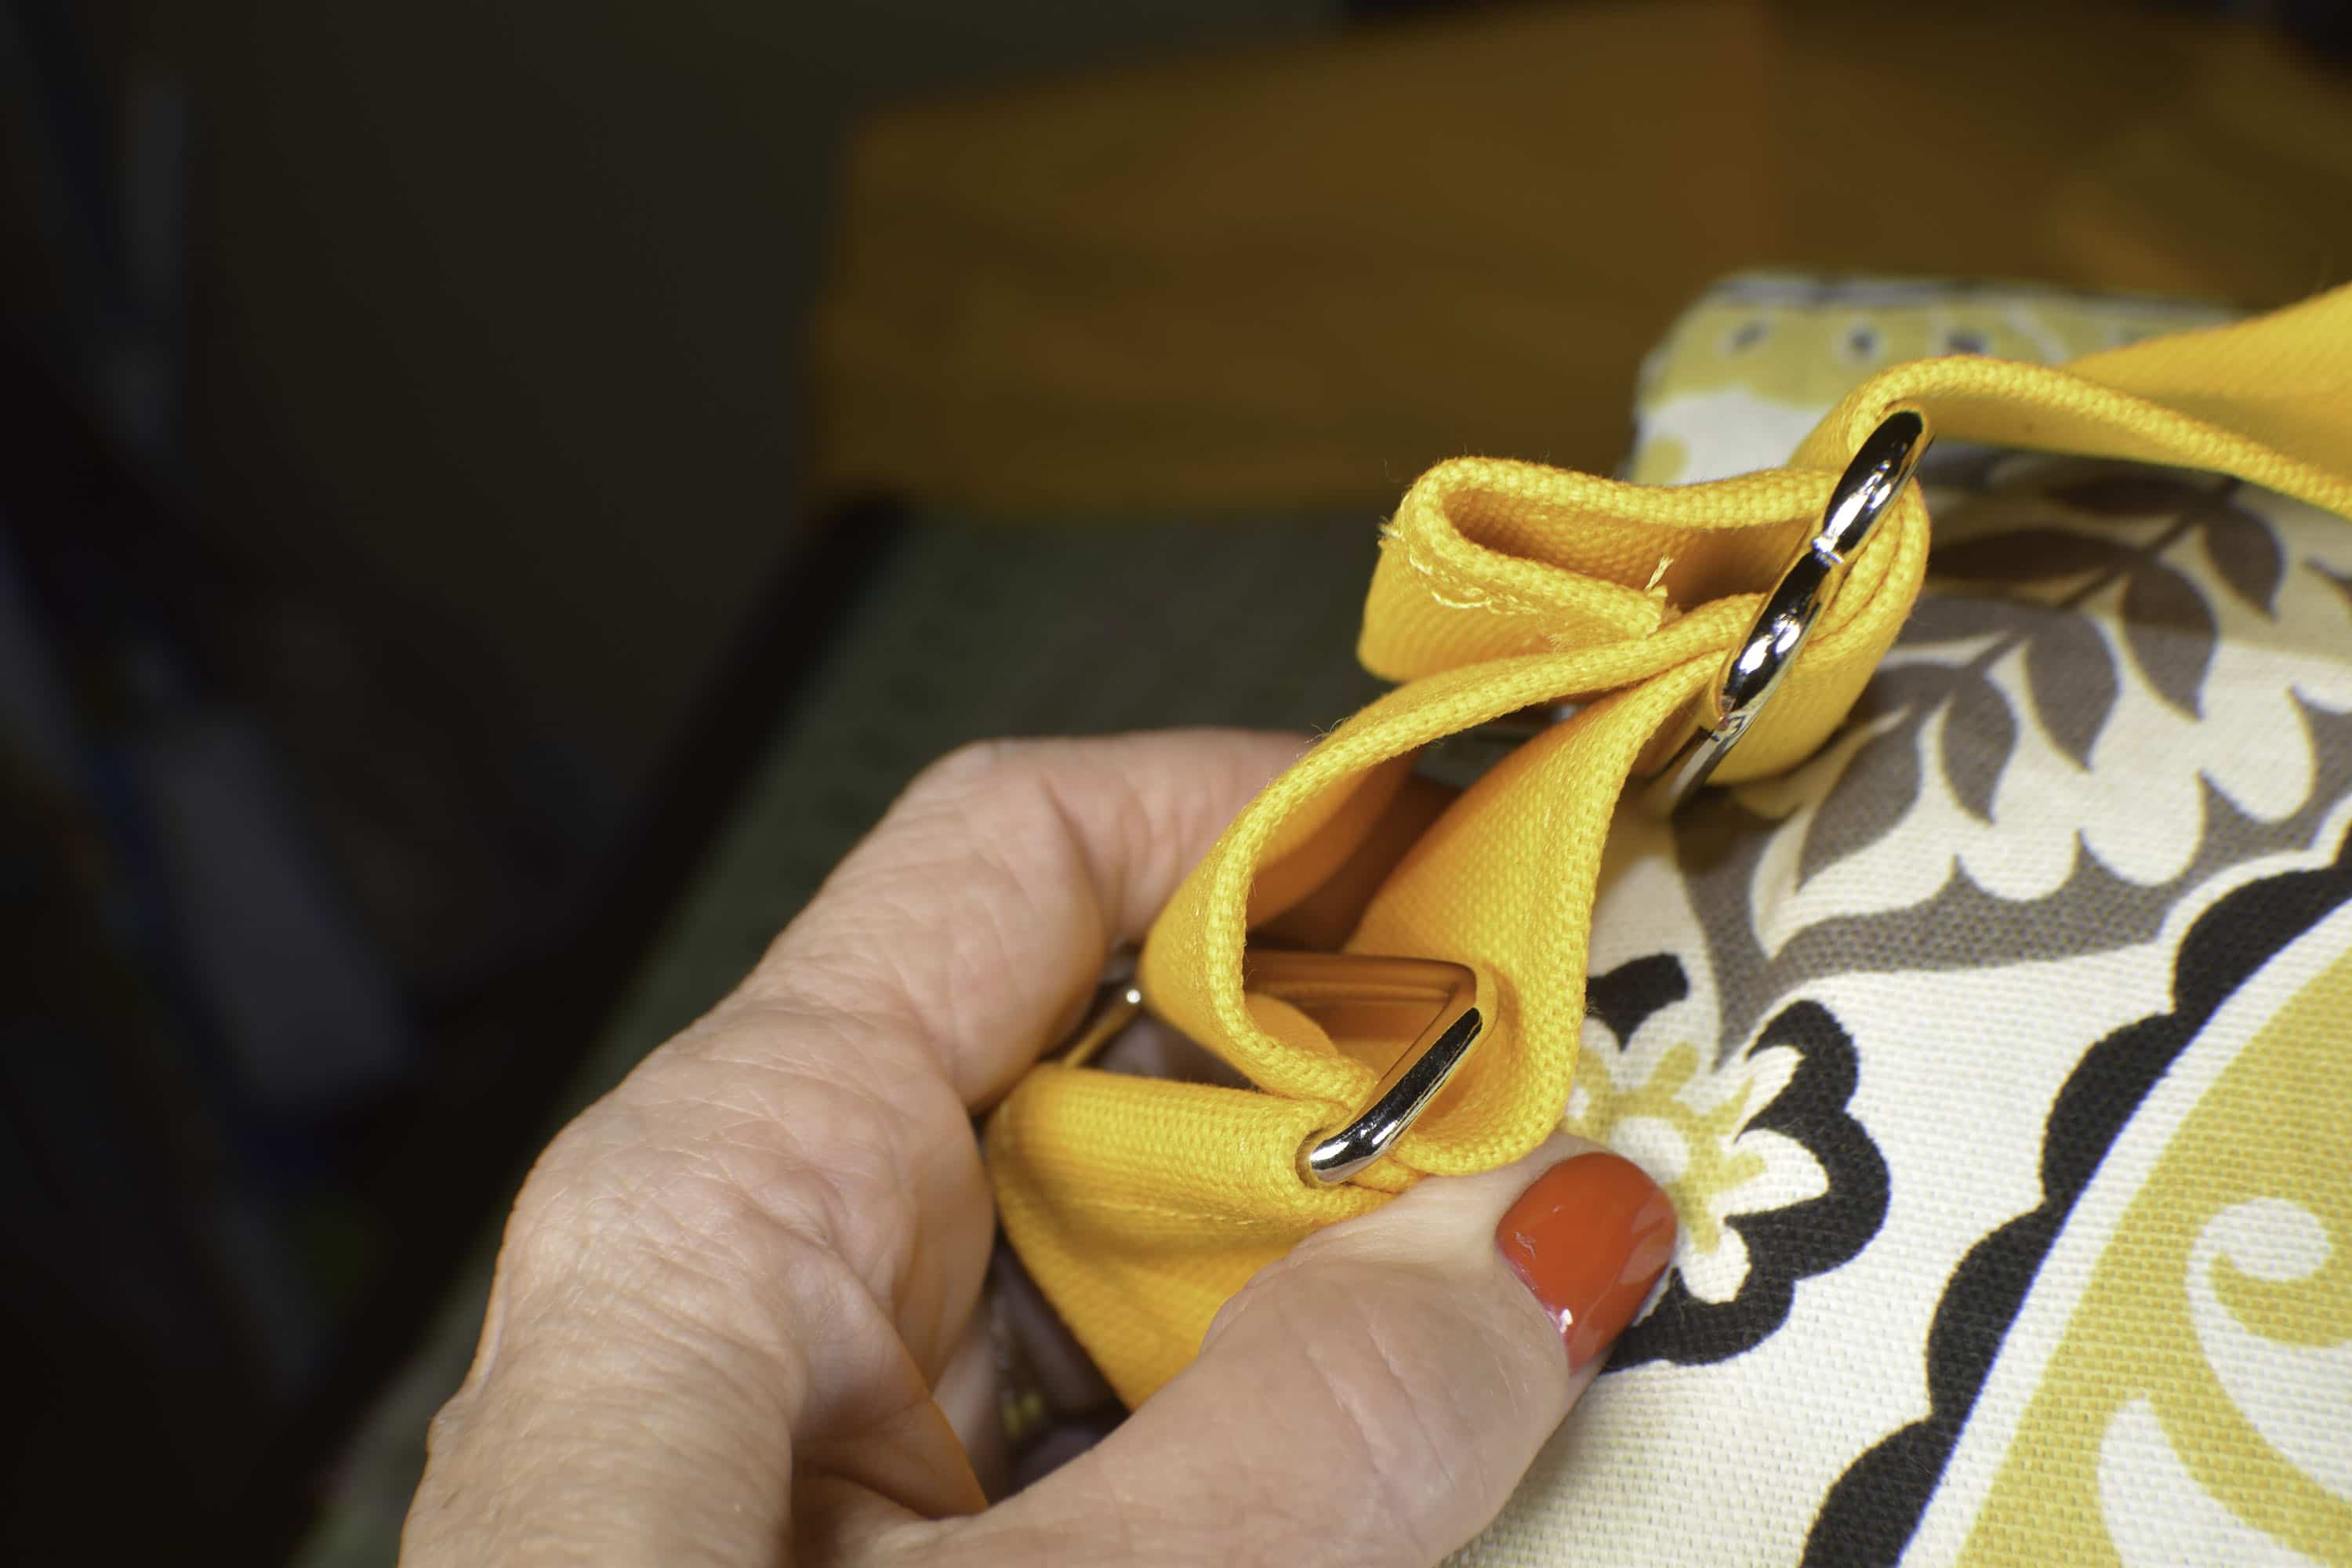
Step 19: Create and add the Strap
Create the strap in the same way that you created the other straps. Place one end of the strap through one of the rectangles and fold under the raw edges. Sew it closed. On the other side of the strap add the tri glide. Then feed the strap through the rectangle. Once it is through the rectangle feed the end back through the center of the tri glide and fold the raw edges under and sew. This will make the strap adjustable.
Step 20: Finish the Camera Bag
You have completed your padded DSLR camera bag. Fill it with your favorite camera and express your personality with your bag and your photos.

If you enjoyed this project sign up for our email list and receive your free eBook of 15 handbag patterns and tutorials.
If you would like more camera projects check out my Padded DSLR Camera Cozy tutorial and Easy DSLR Camera Strap tutorial or my Padded Camera Lens cases


Do you happen to have a video tutorial on this? Im subscribed to your youtube channel but I didn’t think I saw one.
No I don’t. Would you like for me to make one? It would be quite long but I would be willing to make it for you.
What did I miss? The parachute clip looks like it goes on the front not the back. The directions say “Attach the strap with clip raw edges together to the bottom center of the back side of the outer piece and stitch along the sides of the strap and across where you secured the clip.” Does that mean attach the strap to the wrong side of the bag front or does it mean attach it to the back of the bag.
You are right that it is the front of the bag. I am not sure why I wrote the back side. It has been some time since I did this tutorial.
I have just been looking for a YouTube video for something like this! Only 2 came up in my search so it might be a good one!!
Thanks for the suggestion.
What is the finish size of this bag?
This bag is 8″ tall, 10″ wide and 5″ deep.
Nice Job!
Thank you.