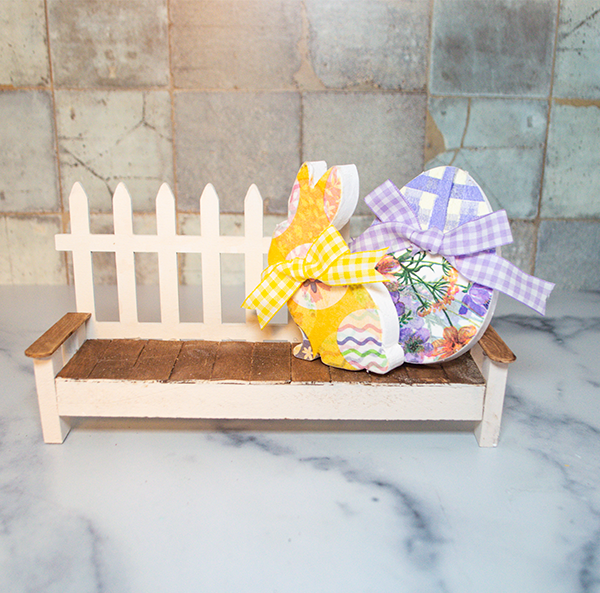
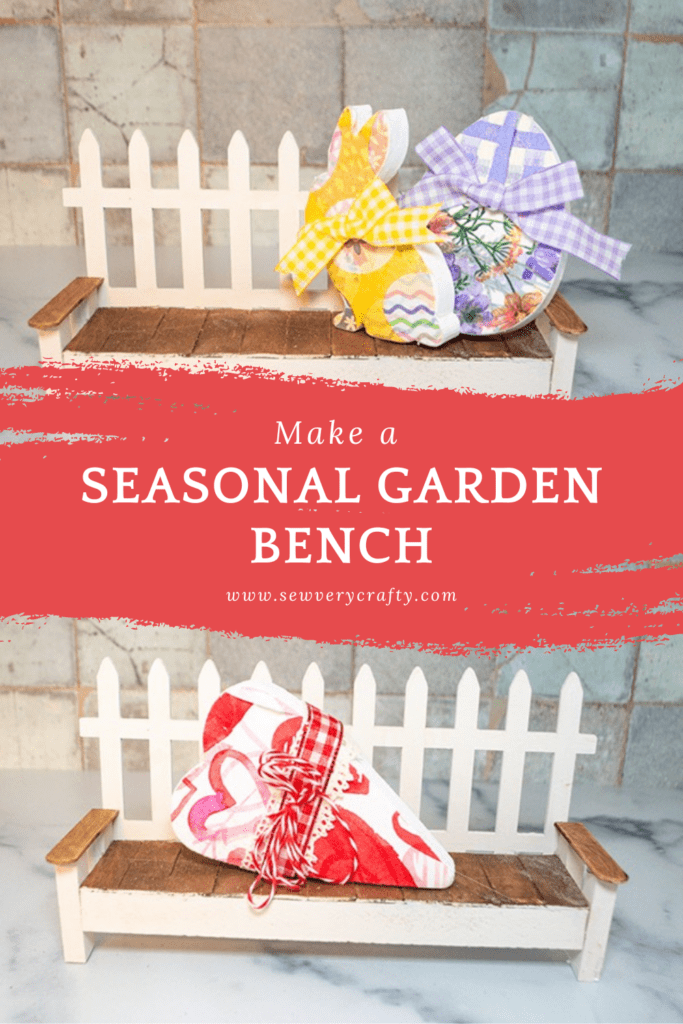
There are seasons and holidays galore this time of year. Soon the warm weather will hit and the flowers will bloom. With this in mind I decided to make a garden bench that I could decorate for the seasons. This is a very easy crafting project using many Dollar Tree products but some that I got elsewhere. I truly am trying to get through my massive stockpile of sewing and crafting supplies so I am using what I have on hand. This project was inspired by We Craft Around. I hope you enjoy this little project. For more Dollar Tree Crafts head over to my Dollar Tree page. If you want holiday sewing and crafting projects check out my holiday project vault.
Note: This post contains affiliate links that if you click on them and make a purchase I will receive a small commission at no extra cost to you. As an Amazon Associate I earn from qualifying purchases.
What you will need: How to Make a Garden Bench for the Seasons
- Fence Piece
- Dollar Tree Wood Piece – I used a flat rolling pin shape from Dollar Tree
- Wide craft sticks
- Narrow craft sticks
- Four Tumbling Tower blocks
- White chalk Paint
- Brown Chalk Paint
- Wood Egg and Bunny from Amazon
- Spackle

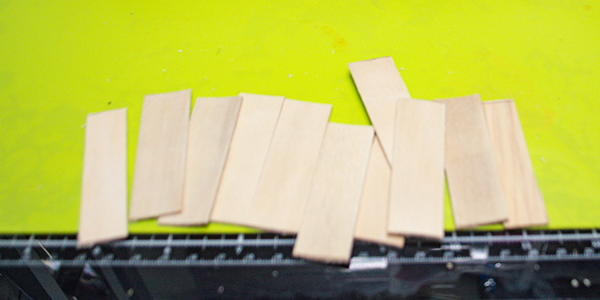
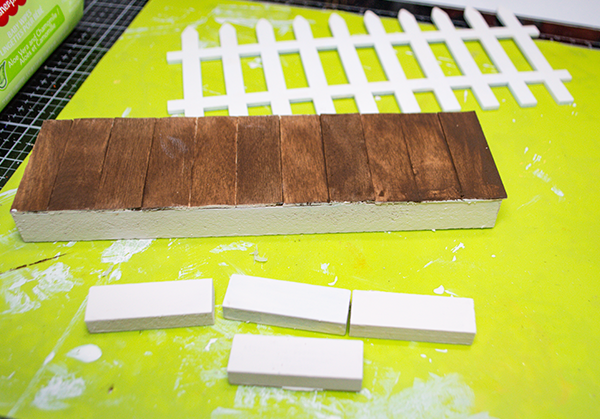
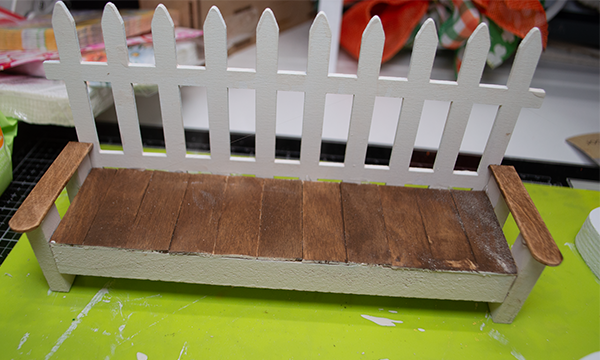
Step 1: Cut the Wide craft sticks
I wanted my flat rolling pin to look more like a bench so I cut a series of craft sticks the width of the rolling pin. Your width may be different than mine depending on what you use as the base.
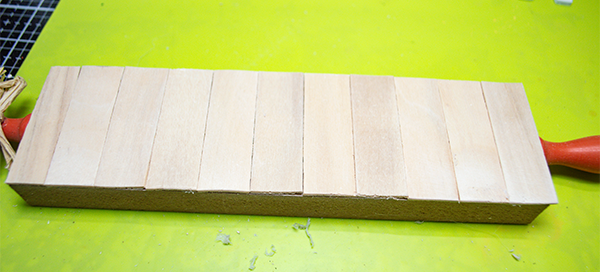
Step 2: Hot Glue the Craft Sticks
Place hot glue on the craft stick pieces and place them on your flat surface one at a time to create a bench like feel.
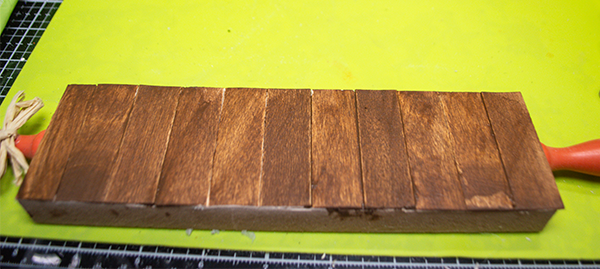
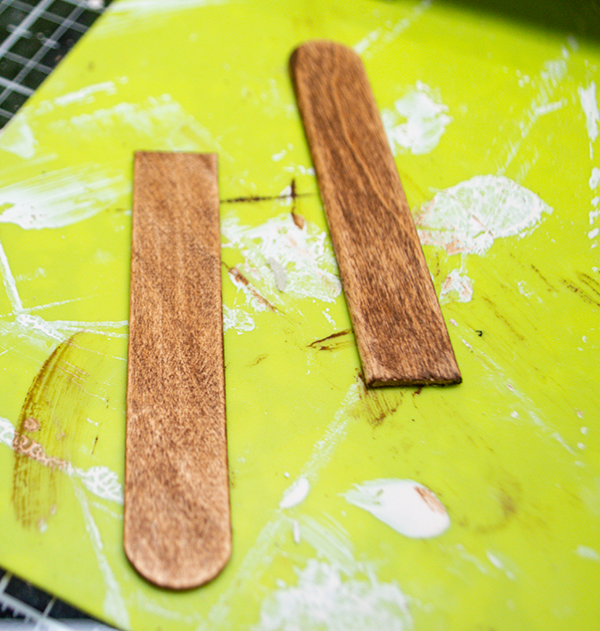
Step 3: Paint the Craft Sticks
Using either stain or brown paint cover the craft sticks so they have a stain like look. I used a Dollar Tree baby wipe to cover the craft sticks to get this look. Cover both the wide and narrow craft sticks.
Step 4: Paint the Fence, Tumbling Tower Blocks and the base White
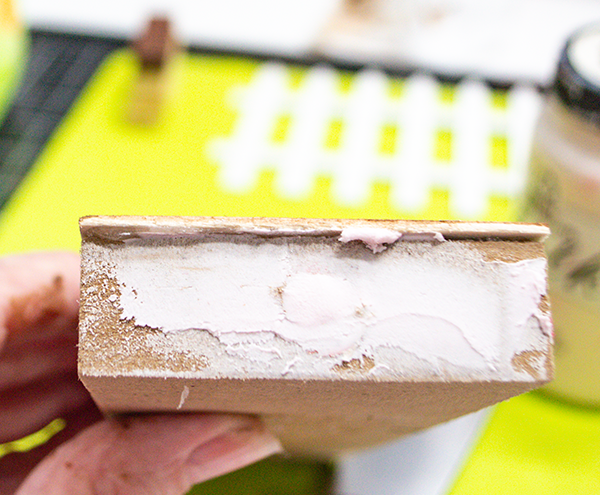
Using white chalk paint cover the fence piece, the tumbling tower blocks and the front, back and sides of the base of your bench. In my case the rolling pin shape. Before painting the rolling pin shape if you are using that remove the handles add some spackle and sand the ends before painting.
Step 5: Add the Fence and Tumbling Tower Blocks
Hot glue the fence piece to the back of the base you have chosen. Make sure that the bottom of the fence lines up with the bottom of the base.
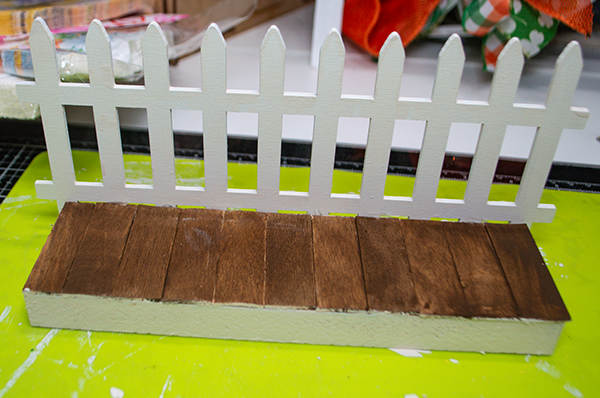
Step 6: Add the Tumbling Tower Blocks
Place the tumbling tower blocks at all four corners of the base so that about 1/4 of the block is sticking up and the bottoms of the blocks are holding up the bench. You will want to measure this out so that your bench is not wobbly. Hot glue the blocks to the base.
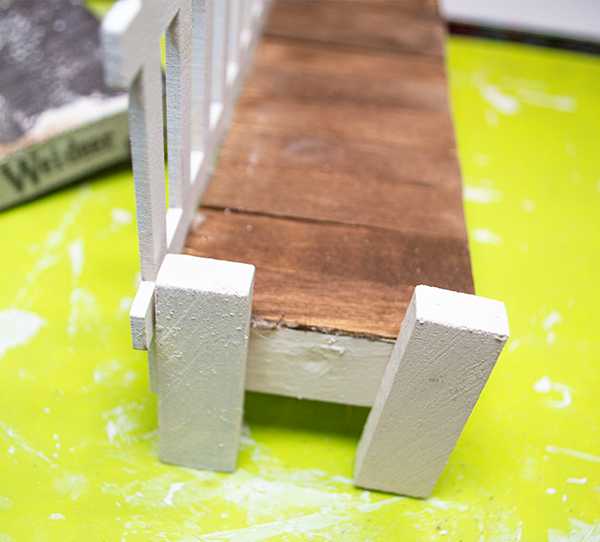
Step 7: Cut the narrow craft sticks
Cut two narrow craft sticks so that they fit across the tops of the tumbling tower blocks to act as the arm rest. You may want to paint the ends of the craft sticks to match the tops. Once the arm rest has been added you have finished your bench.
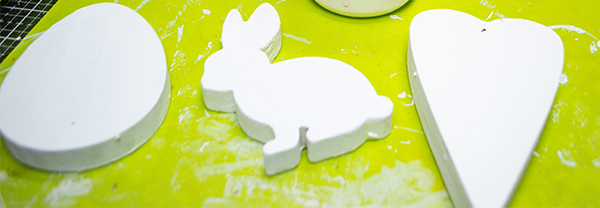
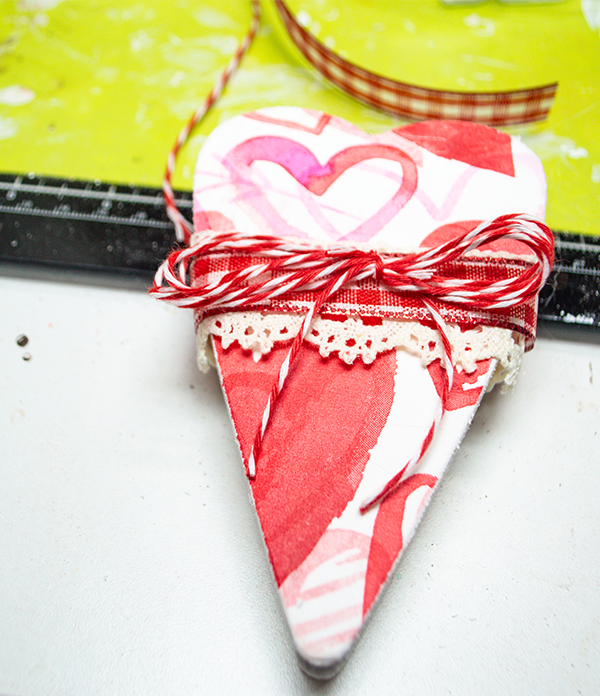
Step 8: Create the Seasonal decor
For this project I wanted to be able to embellish it for the different seasons and holidays. I started out with Easter and found these small egg and bunny wood cutouts. I also found a three dimensional heart at Dollar Tree for Valentine's Day. Decorate them however you like. I find that decoupage is a good way to decorate the pieces but you can do anything you like. Once you have your embellishments you have finished your Garden Bench for the Seasons.
I hope you enjoyed this simple craft project. For more sewing and crafting projects subscribe to our free newsletter and receive your free Dollar Tree Holiday eBook.
If you would like video tutorials of some of Sew Very Crafty's most popular posts subscribe to our free YouTube channel here.
Join our Sew Very Crafty Fans Facebook group
If you want to ask questions and share your projects join our Facebook group here. The community will help to achieve your sewing and crafting dreams.