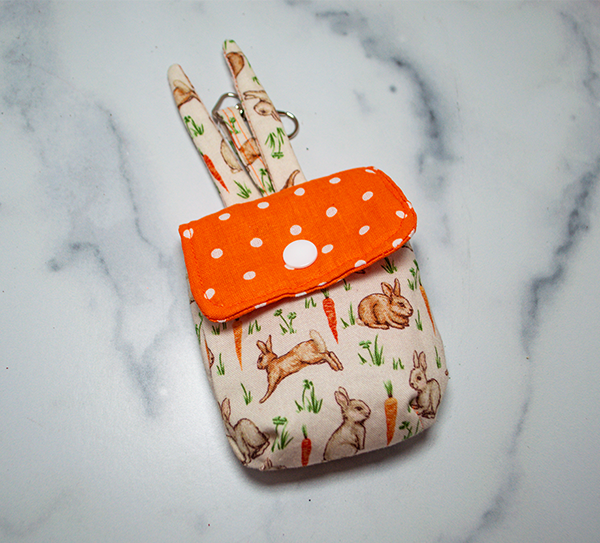
Easter really is not that far away so I decided to make this really cute Bunny pouch to celebrate the occasion. I had this cute bunny fabric that I got at Joann's before they went out of business but there are loads of bunny fabrics out there if you are leaning in that direction. This pouch is perfect for coins or children. It is also a beginner sewing project that anyone with basic sewing skills can make. If you like this project and would like more holiday sewing and crafting projects head over to our holiday project vault.
Note: This post contains affiliate links that if you click on them and make a purchase I will receive a small commission at no extra cost to you. As an Amazon Associate I earn from qualifying purchases.
What you will Need: How to Make a Bunny Pouch
- Pattern you can get by clicking on this link
- 1/4 yd bunny fabric
- 1/4 yd lining fabric
- 1/8 yd fusible fleece
- 1/8 yd Pellon 808
- 1 Kam snap
- 1 1/2″ swivel clip
Step 1: Print and cut out the Pattern
Print out the pattern and cut out the number of pieces designated on each pattern piece. For the ears cut one Pellon 808 and one Fleece piece from each ear pattern piece.

Step 2: Draw the Darts
Take a piece of the fusible fleece that you created from the body pattern piece. Using a marker or pen draw darts on either side of the bottom. Measure down 3 1/4″ from the top and make a mark. Measure 3″ from the side and make another mark. Draw lines toward the middle so that the two lines meet. Draw another line down the center where the two lines meet and the curved bottom. Measure up 1″ from the curved bottom up the center line and make a mark. Measure another 1 /2″ from the center line along the curve on both sides and make marks. Draw lines connecting the first center mark with the two bottom marks. Fold the fleece in half lengthwise and cut the small triangle you just created. Repeat for the other fleece piece.

Step 2: Transfer the marks
Place the fleece on the right sides of the lining pieces and draw the triangles you just cut.
Step 3: Fuse the Fleece
Fuse the fleece to the wrong sides of the outer pieces.
Step 4: Stitch the Darts
Fold the curved parts of the outer and lining pieces so that the raw edges of the cut triangle meet. Do this for all of the darts on the outer and lining pieces. Stitch the darts along the raw edges using a 3/8″ seam allowance

Step 5″ Create the Strap
Fold the long raw edges of the strap to the wrong sides of the strap piece and press. Fold the strap in half lengthwise and press again. Stitch along both long edges to secure. Add the swivel clip and clip the short raw edges together. Place the swivel clip in the top center of one of the outer pieces. Just fold the outer piece in half to find the center. Stitch the swivel clip to the outer piece using a 1/8″ seam allowance.

Step 6: Create the Ears
Fuse Pellon 808 to one each of the ear pairs. Then fuse the fleece on top. Place the corresponding outer fabric pieces right sides together and stitch around the top and sides using a 3/8″ seam allowance leaving the bottom open. Turn right sides out and press.


Step 7: Add the Ear Pieces
Place the ear pieces on either side of the strap piece so that they are right sides together and they meet in the center of the strap piece. Stitch them to the outer piece using a 1/8″ seam allowance.


Step 8″ Create the Flap
Fuse the fleece to the wrong side of one of the flap pieces. Place the two flap pieces right isdes together. Stitch along the sides and bottom using a 3/8″ seam allowance. Leave the bottom open and turn the flap right sides out. Press and topstitch around the sides and bottom.


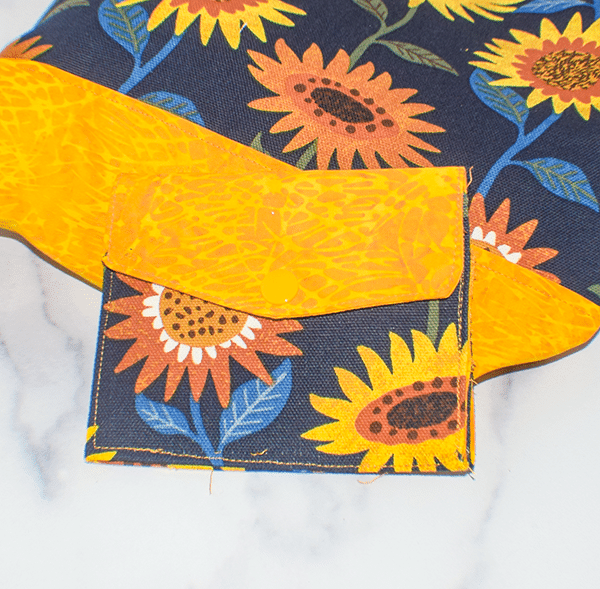
Step 9: Add the Flap
Place the flap right sides together with the outer piece where you placed the strap and ears. line up the centers of each piece. stitch using a 1/8″ seam allowance.

Step 10: Create the outer Pouch
Place the outer pieces right sides together and stitch along the bottom and sides using a 3/8″ seam allowance. Repeat for the lining pieces.
Step 11: Join the outer and lining pouches
Place the outer and lining pouches so that they are right sides together and the side seams align. Stitch all the way around the top leaving an opening for turning. Turn right sides out. Press and topstitch all the way around the top making sure to enclose the opening.


Step 12: Add the Kamsnap
Measure 5/8″ from the center of the flap and create a hole using the awl that came with your Kamsnap kit. Insert one side of the Kamsnap and secure using your Kamsnap tool. Fold the flap over to measure for the other half of the Kamsnap. Install it in the same way. You have now finished your Bunny Pouch.


I hope you enjoyed this simple bunny pouch. For more sewing and crafting projects subscribe to our free newsletter and receive your free handbag eBook.
If you would like video tutorials of some of Sew Very Crafty's most popular posts subscribe to our free YouTube channel here.