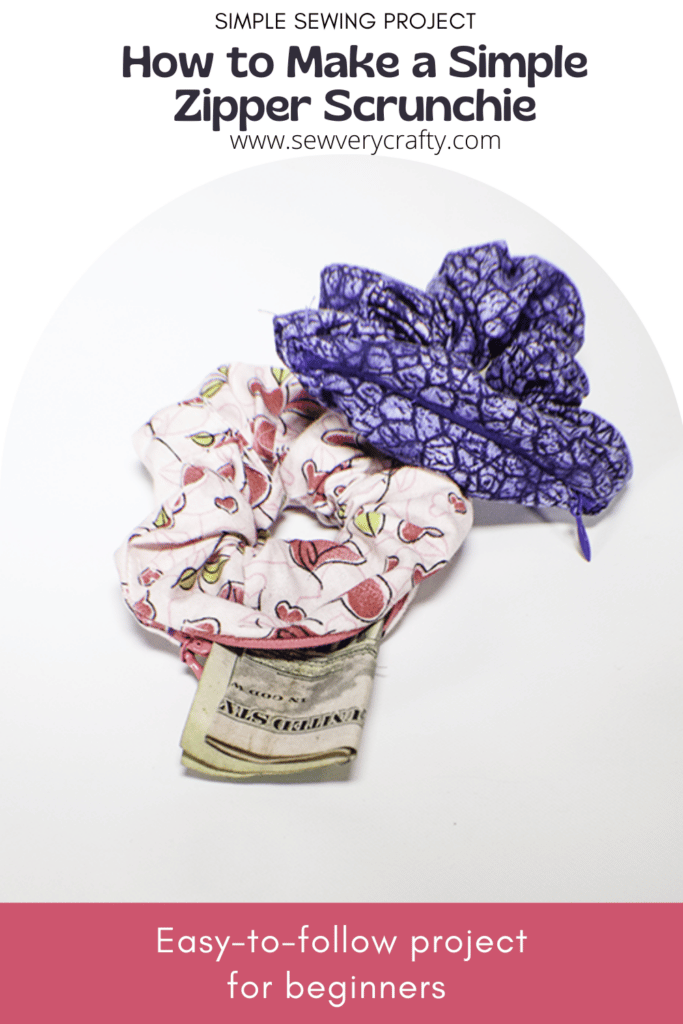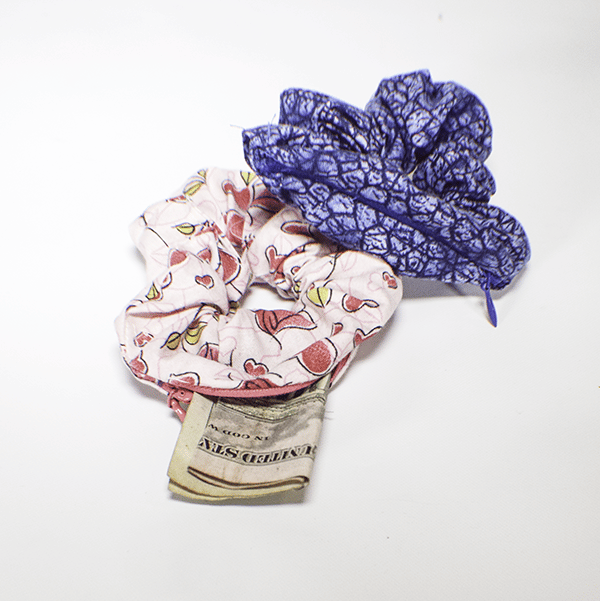
I have been wanting to do this project for a while. I have a post on how to make a scrunchie but I wanted to add a zipper to it to make a zipper scrunchie where I could store a few dollars and maybe a key or some chapstick. This is such a simple project to do you will be amazed. It does require that you know how to install an invisible zipper but you can check out my tutorial here.
I used some remnant fabric that I purchased at JOANN Fabric & Craft Stores![]() and an invisible zipper that I had on hand. I also used some 1/4″ elastic that was left over from mask making. (Glad that is over.) This post contains affiliate links that if you click on them and make a purchase I may receive a small commission at no extra cost to you. As an Amazon Associate I earn from qualifying purchases.
and an invisible zipper that I had on hand. I also used some 1/4″ elastic that was left over from mask making. (Glad that is over.) This post contains affiliate links that if you click on them and make a purchase I may receive a small commission at no extra cost to you. As an Amazon Associate I earn from qualifying purchases.
If you would like a video tutorial of this project head over to YouTube and check out my video. While you are there subscribe to my free YouTube channel.

What you will Need: how to Make a Zipper Scrunchie
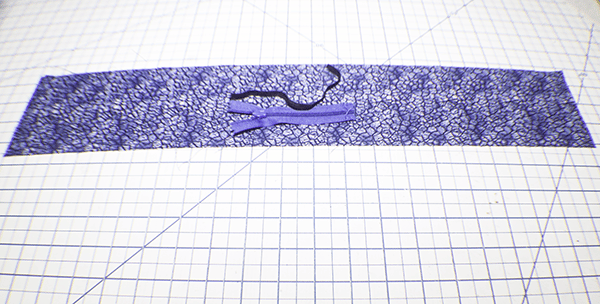
- 4″ x 21″ piece of fabric — I am using cotton
- 3-4″ invisible zipper
- 6″ of 1/4″ elastic
- Invisible zipper foot
Step 1: Cut your Materials
Cut your fabric to measure 4″ x 21″. You will probably have to shorten your zipper, I did. To do this, measure 3-4″ from the top stop and stitch across the zipper several times. Cut off the end of the zipper. Cut the elastic to measure 6″.
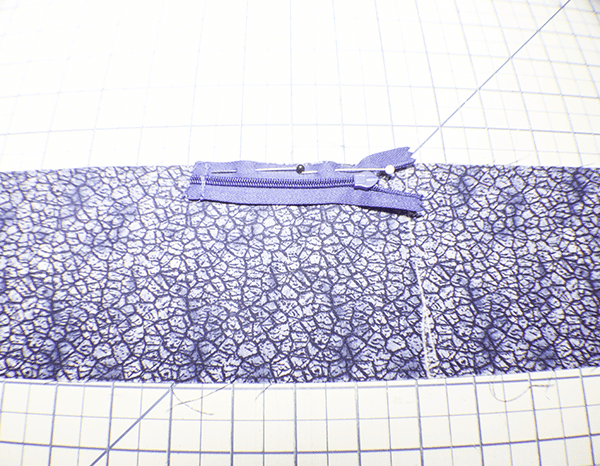
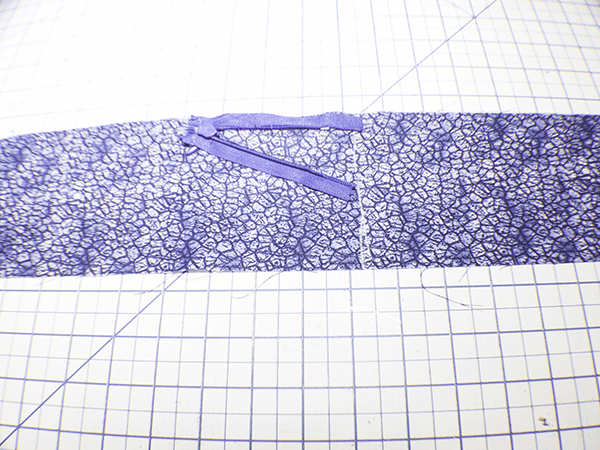
Step 2: Add the Invisible Zipper
Fold the fabric in half widthwise to find the halfway point. Using an erasable pen or tailor's chalk draw a line across the fabric. Place the top of one side of the open zipper on the line you just drew right sides down. Using an invisible zipper foot stitch one half of the zipper to the fabric on the right side of the fabric. Stitch the other side of the zipper in the same way. Turn so the zipper is right sides out.
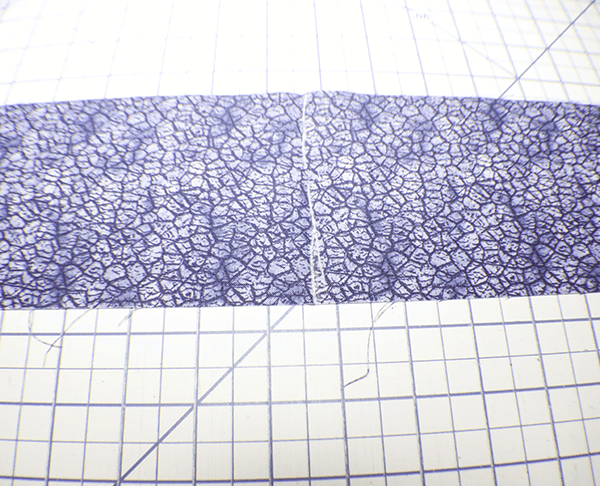
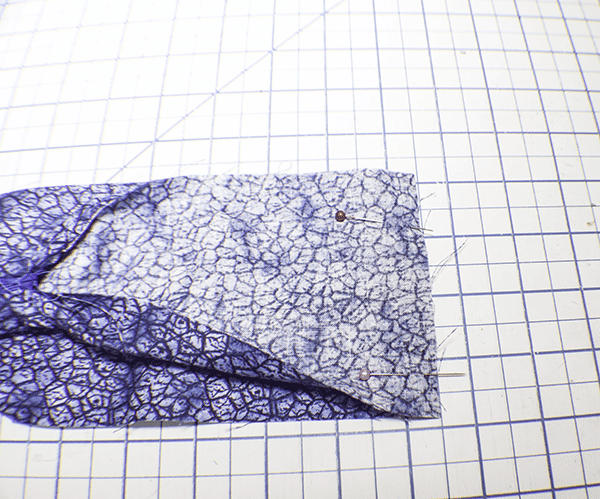
Step 3: Stitch the Short ends
Place the short ends right sides together. Stitch them together using a 3/8″ seam allowance.
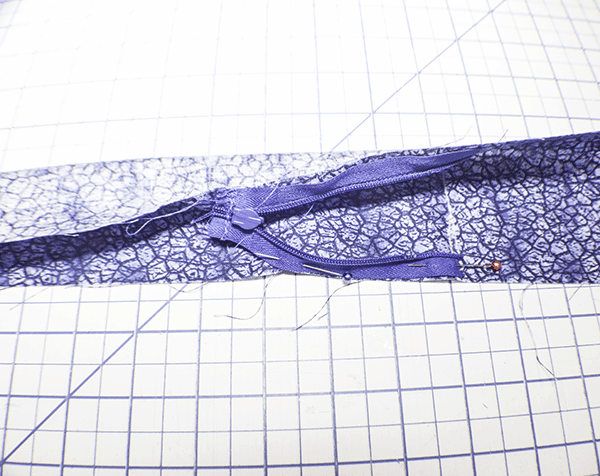
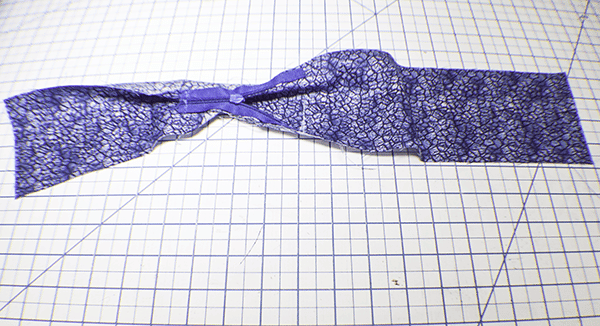
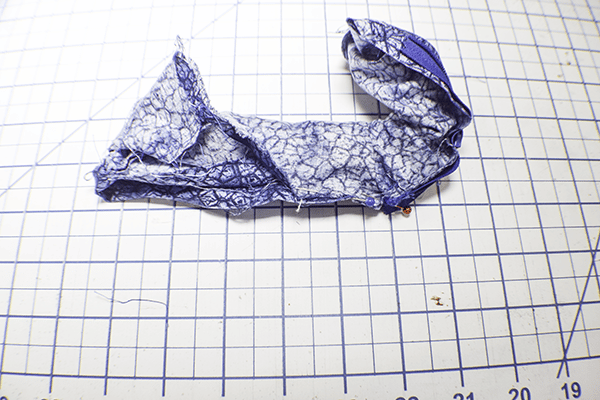
Step 4: Stitch the Long Sides
Close the zipper part way. Push the zipper through the long opening and find the seam where the zipper has been sewn. Start to stitch the rest of the seam using a 3/8″ seam allowance. Keep pulling the Long edges and stitching them until you reach the other end of the zipper. Backstitch. Unzip the zipper. Turn right sides out.
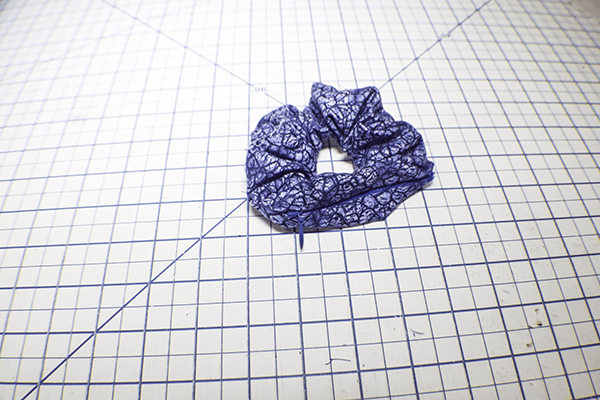
Step 5: Add the Elastic
Using a safety pin or a bodkin feed the elastic through the zipper in the scrunchie. Stitch the ends together several times to secure. You have now finished your zipper scrunchie.
I hope you enjoyed this zipper scrunchie project. If you would like more sewing and crafting projects subscribe to our newsletter and receive access to our free printables library.
If you would like video tutorials of some of Sew Very Crafty's most popular posts subscribe to our free YouTube channel here.