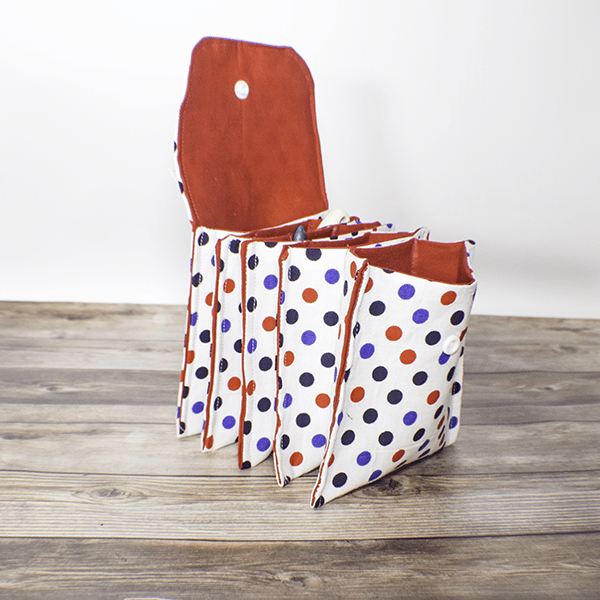
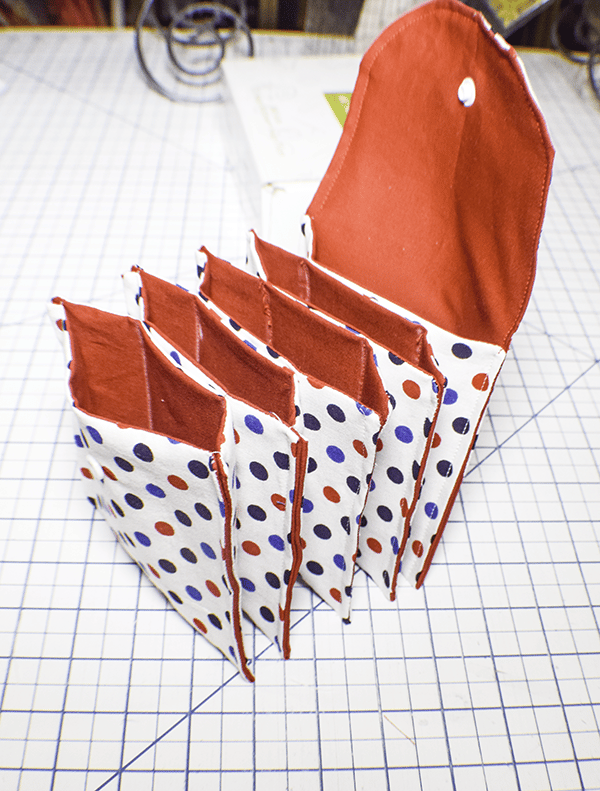
I just love this simple accordion pouch from Sewing Times. I decided to share it with you. It is a fun and functional sewing project that is far easier than it looks. In fact, this is a beginner sewing project that anyone with basic sewing skills can make. I thought it was perfect for travel to store all of those smalls that are difficult to carry otherwise. it can also be perfect of the sewing room for small items as well. If you would like other little pouch projects check out my basic zipper pouch or my patchwork zipper pouch.
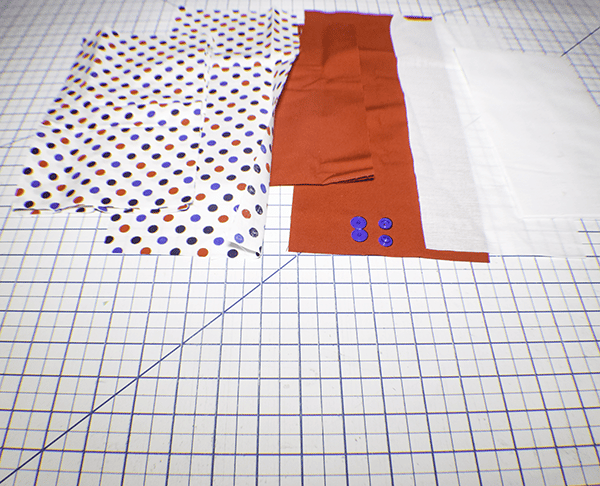
I used basic cotton fabrics for this project along with som Pellon SF101 interfacing. I purchased my fabrics at JOANN Fabric & Craft Stores![]() but you could head to Amazon fabrics or
but you could head to Amazon fabrics or
What you will Need: How to Make an Accordion Pouch
- 1/2 yd outer and lining fabric
- 1/2 yd Pellon SF 101
- 1 Kam Snap
- Standard sewing supplies
Step 1: Cut out your Fabrics
From the outer and lining fabrics:
- 1 piece each 5 3/4″ x 15″
- 4 pieces each 5 3/4″ x 10 3/4″
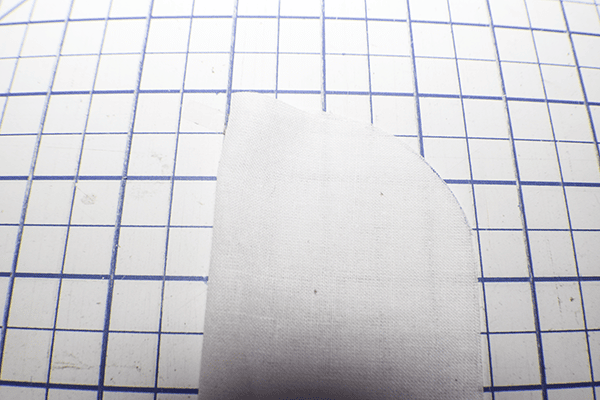
From the pollen SF 101
- 1 piece 5″ x 14 1/8″
- 4 pieces 5″ x 10″.
Step 2: Round the Corners
Take the piece of Pellon SF 101 that measures 5″ x 14 1/8″ and fold it in half lengthwise. Round the top corner so that both sides are even.
Step 3: Fuse the Interfacing
Following the manufacturer's instructions, fuse the interfacing to all of the outer fabric pieces.
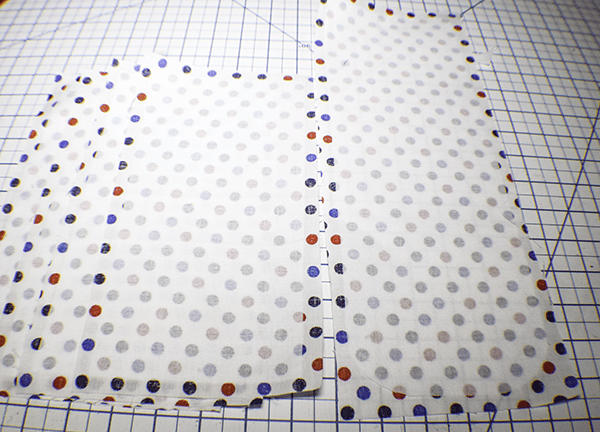
Step 4: Create the Five Strips
Place the outer piece to the corresponding lining piece right sides together. Stitch all the way around using a 3/8″ seam allowance leaving an opening in the side for turning. On the piece with the rounded interfacing, stitch following the rounded edges. Trim off the excess corners, notch the curves and clip the remaining corners. Turn all of the pieces right sides out and press. Top stitch along the top and bottom of all of the rectangular pieces and just the bottom of the rounded piece.
Step 5: Close the Openings
Using ladder stitch, stitch the openings of all of the pieces closed so that you cannot see the stitches.
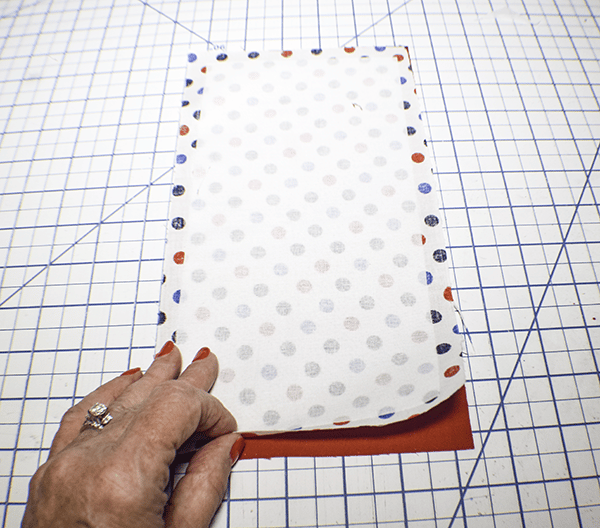
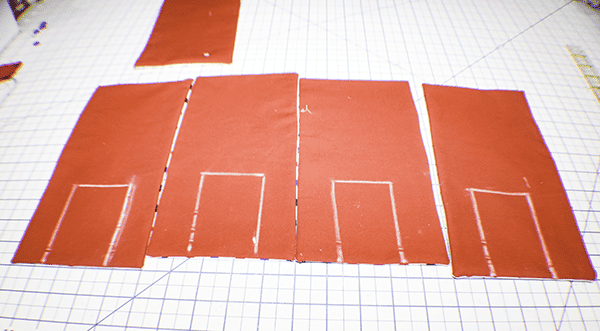
Step 6: Draw the Boxes
On the lining side of all of the rectangular pieces measure in 1 3/8″ from each side and make a mark using an erasable pen or tailor's chalk. From the marks you made, draw a line that measures 3 5/8″. Complete the box by joining the two lines.
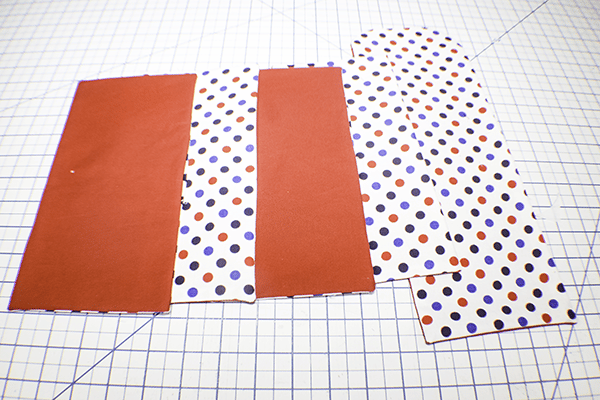
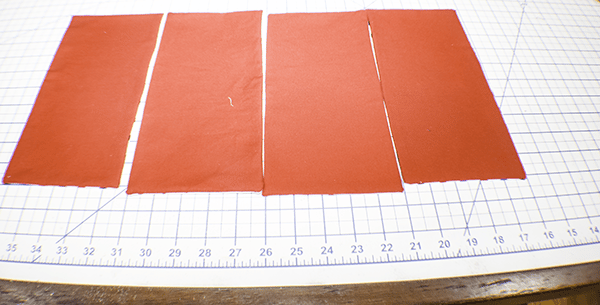
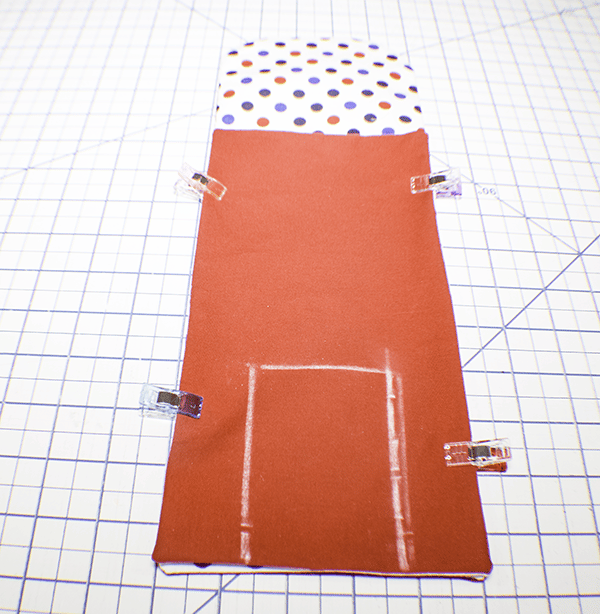
Step 7: Stitch the Rectangles
Place the first rectangle right sides together with the rounded piece matching the bottoms and sides. Stitch the pieces together following the lines you just drew. Place the next rectangle right sides together with the rectangle you just stitched. What was the top of the rectangle now becomes the bottom so you are stitching the bottom of the new rectangle to the new bottom of the previous rectangle. Repeat this process until all of the rectangles have been stitched together.

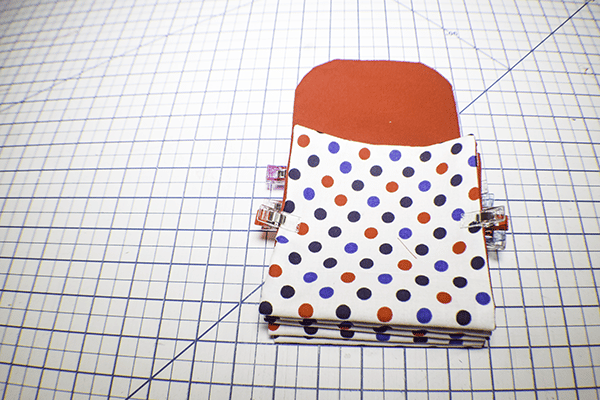
Step 8: Fold the Accordion
Starting at the bottom, fold the accordion pieces lining sides together and pin or clip the sides individually making sure the bottoms line up.

Step 9: Stitch the Sides
Starting in the back, topstitch all the way around from the bottom around the curve to the other side. Then stitch each side seperately using a 1/4″ seam allowance.
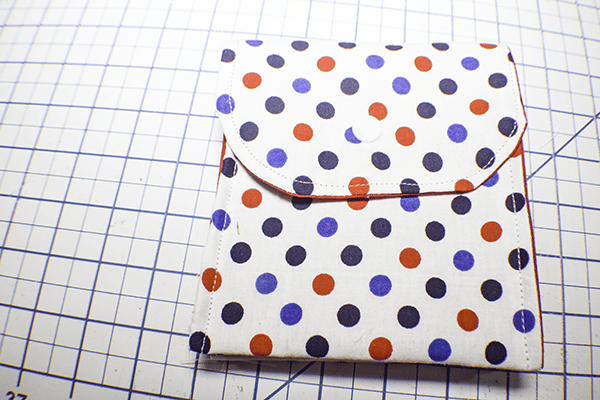
Step 10: Add the Kam Snap
Find the center of the curved edge and measure up 1″ plate one half of the Kam Snap. Fold down the curved edge to determine where the other half of the snap goes and place it there. If you are unfamiliar with how to install Kam Snaps check out this video. You are now finished with your accordion pouch.
I hope you enjoyed this simple accordion such project. If you would like more sewing and crafting projects subscribe to our email and get your free eBook of 15 handbag patterns and tutorials taken from the blog.
If you would like video tutorials of some of Sew Very Crafty's most popular posts subscribe to our free youTube channel here.