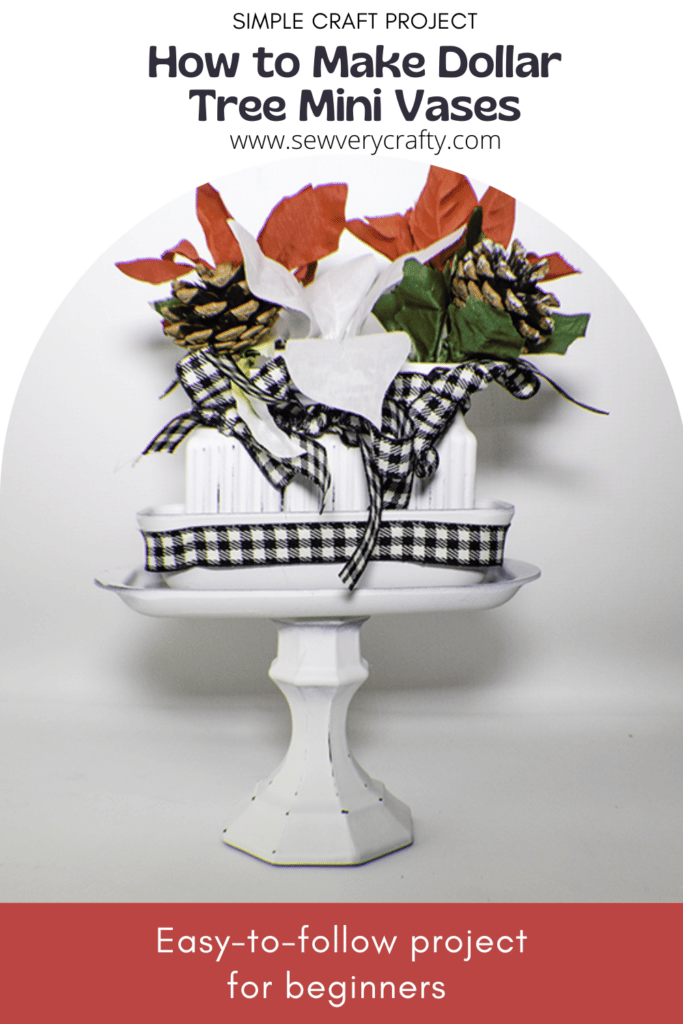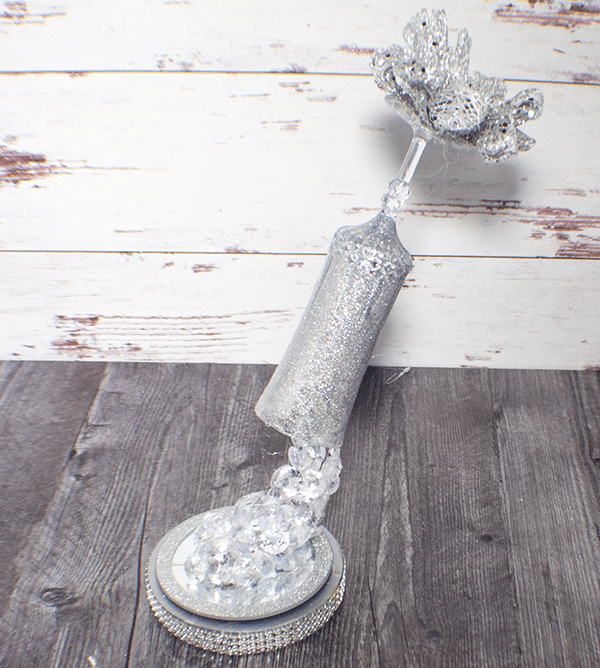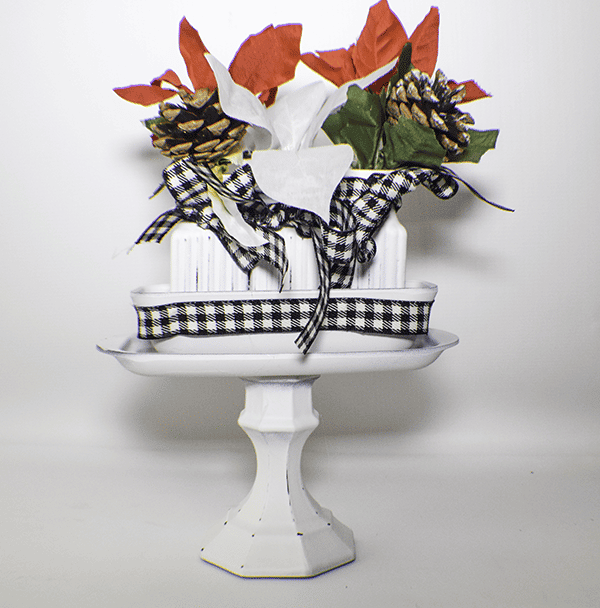
Here is another fun Dollar Tree craft that I just love. These Dollar Tree Mini vases are a super simple Dollar Tree craft that any beginner crafter can make. It is such cute little project that I urge you to try this one out. I made this project in the farmhouse style and it came out super cute. I thought I could change out the foliage in the vases depending on the season so I wanted to keep everything else relatively neutral. Other than the spray paint that I used everything came from Dollar Tree. You could use Dollar Tree paints if you like but I thought the spray paints would be easier. If you would like more Dollar Tree crafts head over to my Dollar Tree crafts page here.
What you will Need: How to Make Dollar Tree Mini Vases
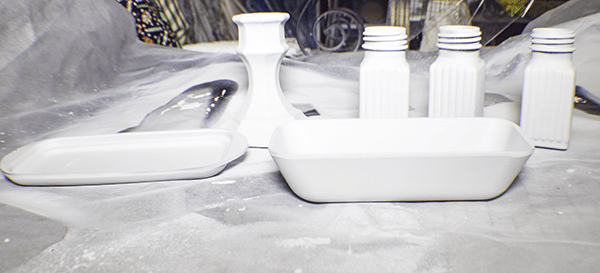
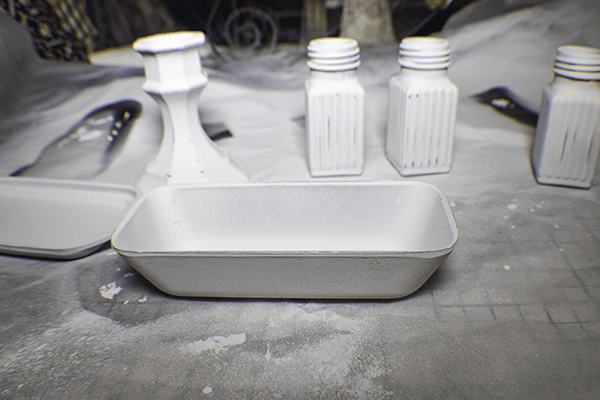
- 3 Dollar Tree Salt and pepper shakers
- 1 Dollar Tree butter dish
- 1 Dollar Tree Candle holder
- Black spray paint or Dollar Tree paint
- White spray paint or Dollar Tree paint
- Sand paper
- Dollar Tree Silk flowers
- Hot Glue
- Ribbon
Step 1: Paint the Pieces Black
Remove the tops from the shakers and paint the three salt and pepper shakers, the butter dish and the candle holder using their black paint. I used a multi surface black spray paint. Let dry completely.
Step 2: Paint the Pieces White
Once the black paint has dried paint the pieces white. Make sure to let them dry completely. Use a second coat if necessary.
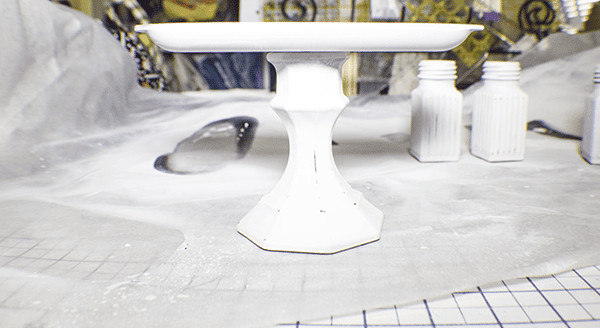
Step 3: Sand off the Curves and Corners
Using the sand paper, sand through the white paint to get to the black paint to simulate wear on all of your pieces. You could just paint the areas black to create the wear spots but I wanted a more subtle look.
Step 4: Glue the Pieces Together
Using hot glue or e6000, glue the bottom of the butter dish to the top of the candle holder so that it is centered. Turn the top of the butter dish upside down and glue it on the bottom of the butter dish.

Step 5: Add the Ribbon to the Shakers
Place the ribbon of your choice around the threads of each shaker and tie a bow.
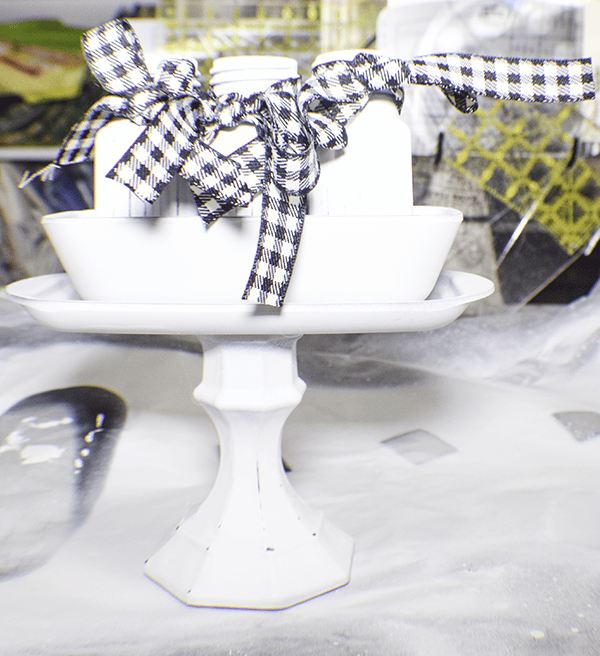
Step 6: Add the Shakers to the Butter Dish
Add the salt and pepper shakers to the lid of the butter dish.
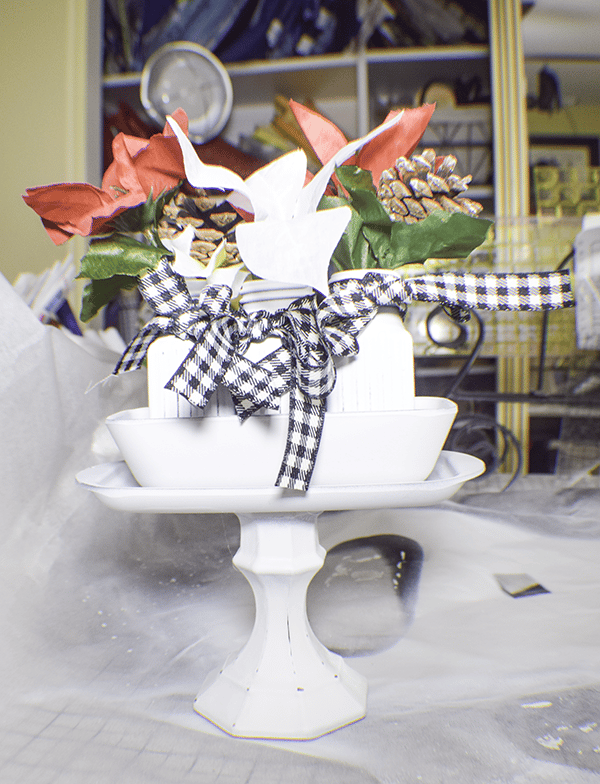
Step 7: Add the Foliage
Add the foliage to suit your season to the shakers and you have finished your Dollar Tree Mini Vases.
Bonus Craft!!!
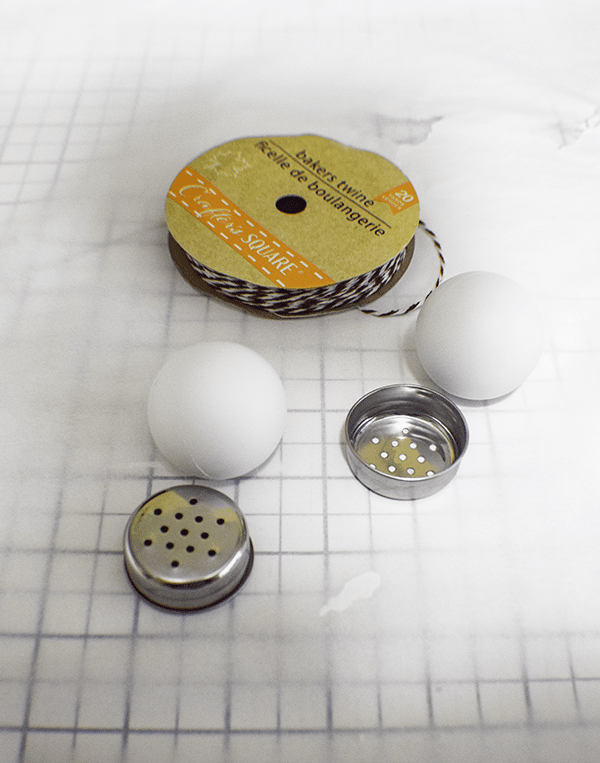
I had these lids left over from the project and had some ping pong balls left over from another project so I put them together and made some snowman Christmas ornaments. This is how I did it.
What you will Need: How to Make Snowman Ornaments
Step 1: Paint the Table Tennis Balls
I painted the table tennis balls to give me a better surface to paint the face on. I used a white multi-surface spray paint to paint the balls.
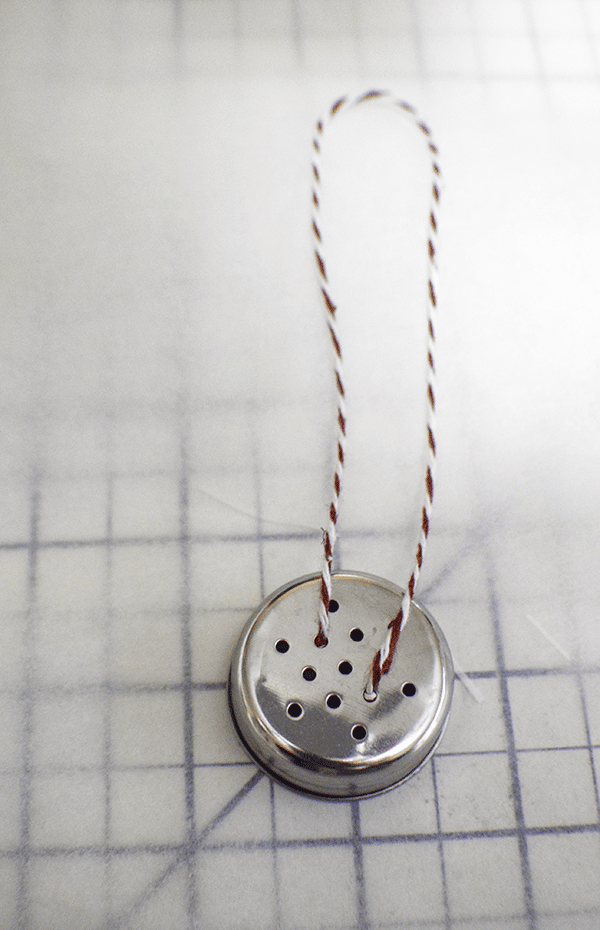
Step 2: Add the Baker's Twine
I used baker's twine as the hanger for my snowman. I cut a piece that measured 12″ and put one end thorough a hole in the lid and tied three large knots to secure. Then I put the other end through another hole and also tied three knots to secure.
Step 3: Glue the Lid to the Ball
Glue the lid to the ball.
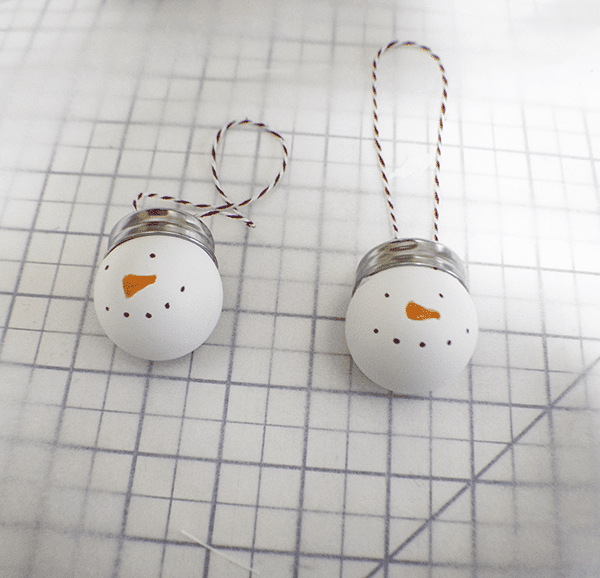
Step 4: Paint the Face
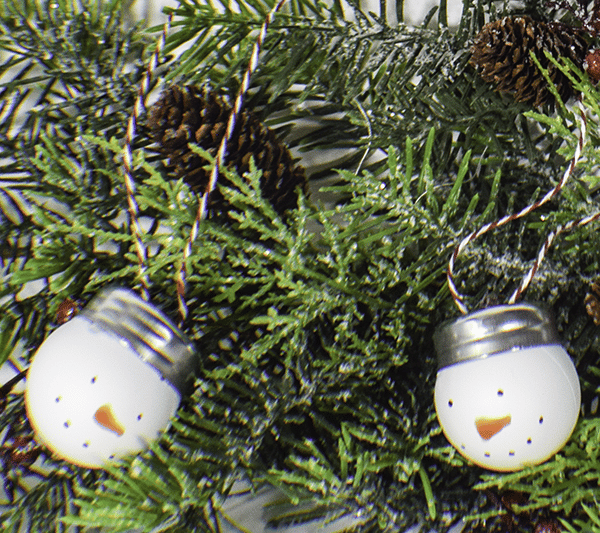
Paint the eyes, nose and mouth on the ball. Add it to your Christmas tree.
I hope you enjoyed this project. If you would like more sewing and crafting projects subscribe to our newsletter and receive access to our free printables library.
If you would like video tutorials of some of Sew Very Crafty's most popular posts subscribe to our free YouTube Chanel here.