How to Make Mini Halloween Treat Bags
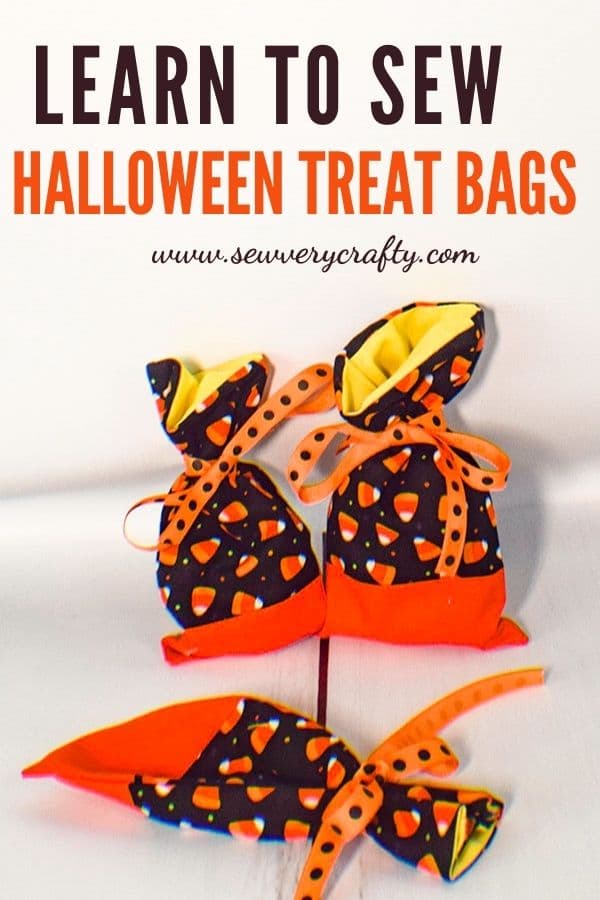
I am always searching for fun projects. Many I create myself and share them with you. This one I came across at Bernina's sewing site called We All Sew and thought I would give it a go. These are super simple mini Halloween Treat bags that any beginner can make. They are a fun way to hand out treats to little goblins this year. Treat Bags and small at home parties will be the way to go this year for Halloween. These mini treat bags are a perfect solution. Thanks to Kymona Tracey at Bernina for this terrific little project.
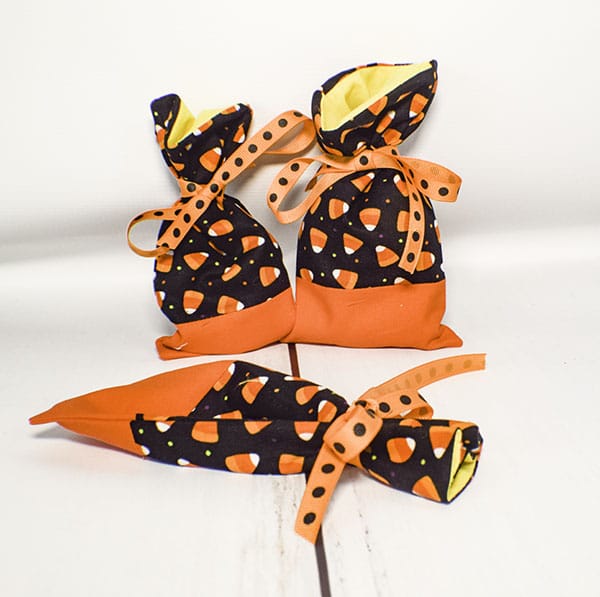
I used fabrics that I had on hand for this project that I purchased at JOANN Fabric & Craft Stores![]() . Two of the fabrics were remnants but this is a perfect project for fat quarters. If you do not have any Halloween fabrics on hand head to Hobby Lobby, Fabric.com or onlinefabricstore.net to get exactly what you need for your mini Halloween treat bags. This post contains affiliate links that if you click on them and make a purchase I will receive a small commission at no extra cost to you.
. Two of the fabrics were remnants but this is a perfect project for fat quarters. If you do not have any Halloween fabrics on hand head to Hobby Lobby, Fabric.com or onlinefabricstore.net to get exactly what you need for your mini Halloween treat bags. This post contains affiliate links that if you click on them and make a purchase I will receive a small commission at no extra cost to you.
What you will need:How to Make Mini Halloween Treat bags
- 1/4 yd of three different Halloween fabrics
- Ribbon
- Standard sewing sewing supplies
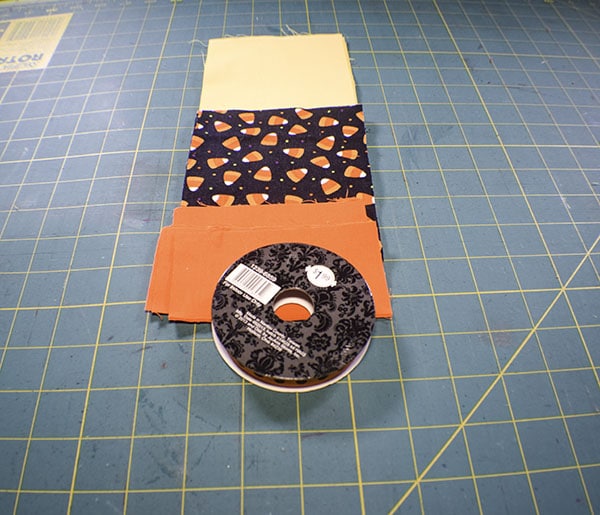
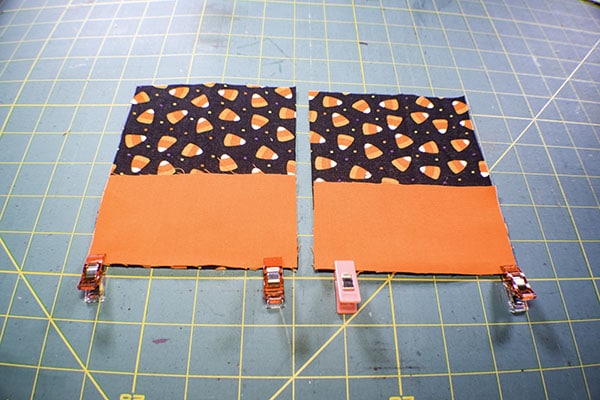
Step 1: Cut Your fabrics
Cut 2 pieces that measure 2 1/2″ x 4 1/2″ for the exterior bottom
2 pieces that measure 5 1/2″ x 4 1/2″ for the main exterior
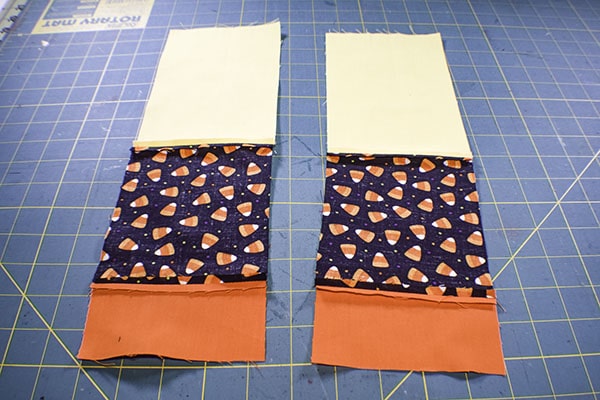
2 pieces that measure 4 1/2″ x 7 1/2″ for the linin
Step 2: Stitch the Main and bottom pieces
Place the main exterior piece and the bottom exterior piece right sides together and stitch using a 1/4″ seam allowance. Repeat for the other exterior pieces.
Step 3: Add the Lining
Place the lining right sides together with the outer pieces you just stitched and sew using a 1/4″ seam allowance. Repeat for the other piece. Press all seams open.

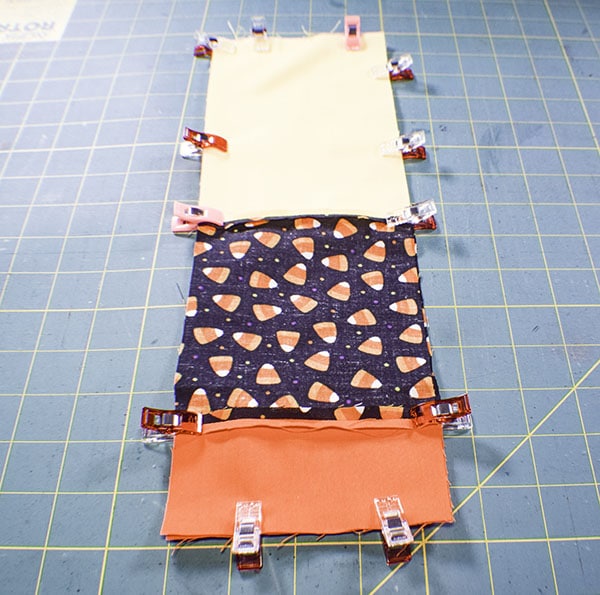
Step 4: Create the treat Bag
Place the two pieces right sides together matching all of the seams. Stitch all the way around using 1/4″ seam allowance and leaving an opening at the bottom of the lining for turning. Turn the bag right sides out. Stitch the opening in the lining closed using ladder stitch or your machine. Stuff the lining into the outer bag. Press.

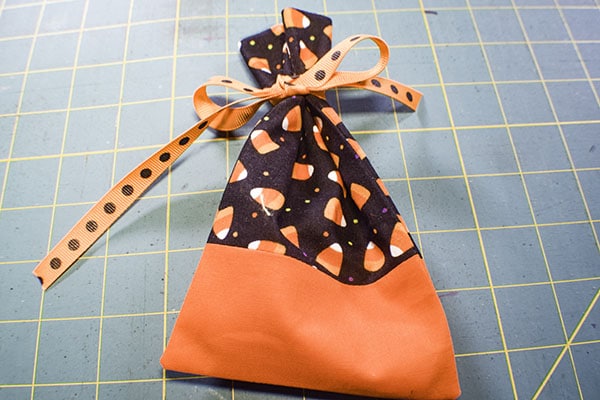
Step 5: Add the ribbon to yout treat bags
Place your treats in the bag. Secure with a ribbon.
I hope you enjoyed this project. If you would like more sewing and crafting projects sign up for our newsletter and receive your free eBook of 15 handbag patterns and tutorials taken from the blog.
If you would like video tutorials of some of Sew Very Crafty's most popular projects subscribe to our free YouTube channel here.