
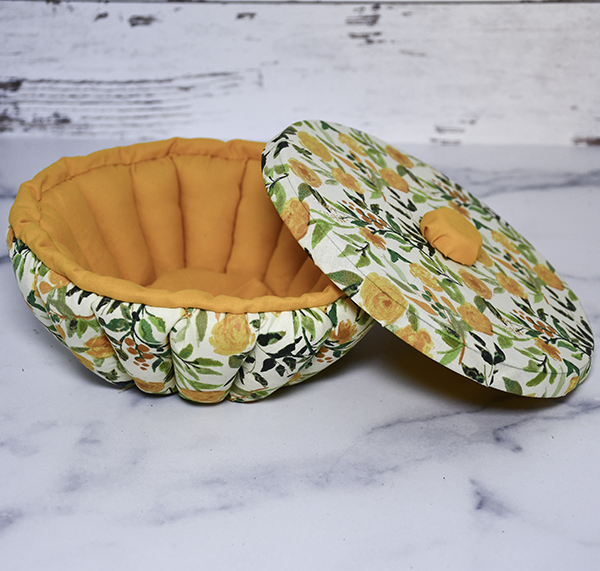
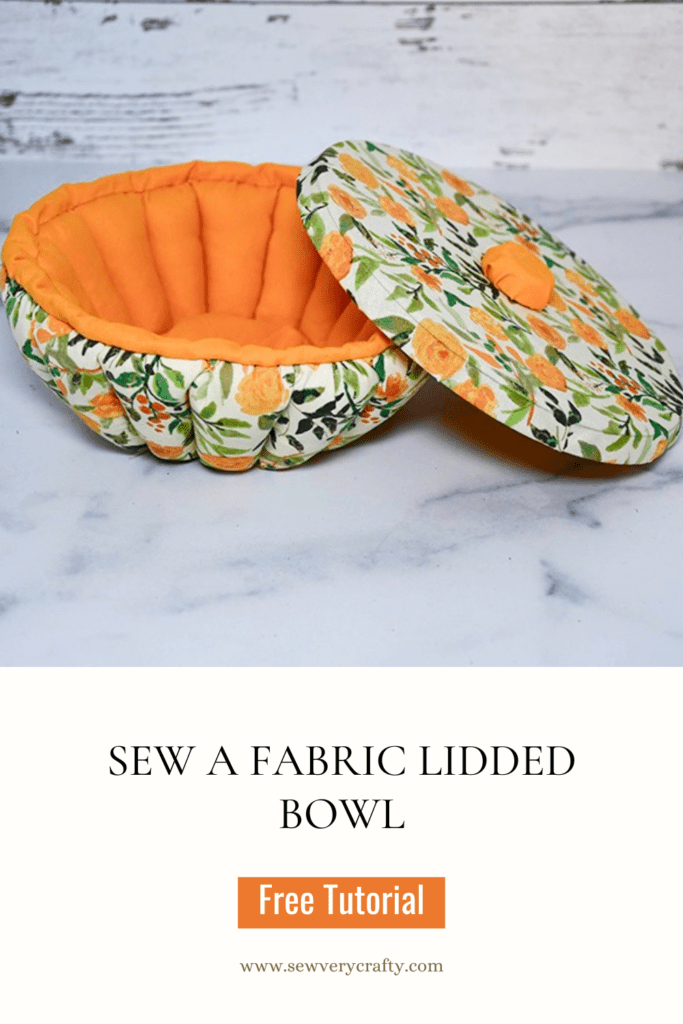
I found this fun and useful storage bowl with lid on YouTube at Trefa Craft. I thought this would make a great project to share with you. It wouldn't be Sew Very Crafty without a Dollar Tree item. This is a beginner sewing project so just about anyone should be able to create this covered bowl. I made a pin cushion using a similar design a long time you ago you can check that out here. I hope you enjoy this simple sewing project. It is great for storing small things especially sewing items.
What you will Need: How to Sew a Storage Bowl with Lid
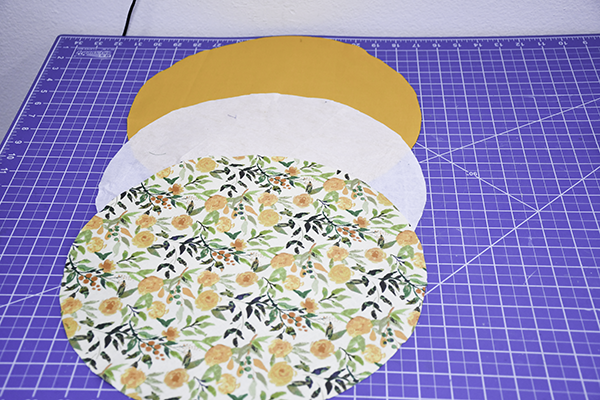
- 1/2 yd outer fabric
- 1/2 yd lining fabric
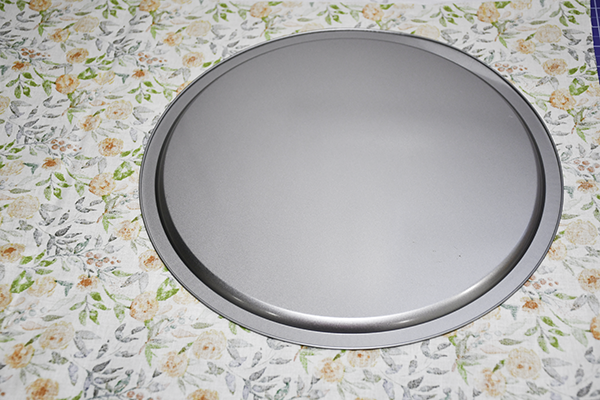
- 1 Dollar Tree pizza pan or large plate
- 1 small Dollar Tree Stove Top Cover
- 1/2 yd SF 101 interfacing
- 1 Bottle Cap
- 1 Piece of cardboard the size of the stove top cover
- Polyester fiberfill
- Hot Glue
- Sewing Machine
- Standard Sewing Supplies
Step 1: Draw the Circle
Using the pizza pan trace a circle onto the reverse side of the outer fabric, lining fabric and interfacing.
Step 2: Layer the Fabrics
Fuse the interfacing to the wrong side of the outer fabric using a hot iron and following the manufacturer's instructions. Place the lining circle right sides up onto the interfacing.
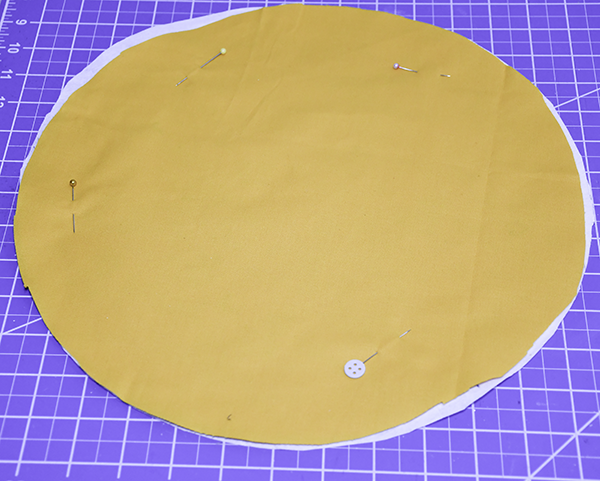
Step 3: Draw the Inner Circle
On the lining side of the fabric sandwich draw the smaller circle in the center. I used a Dollar Tree stove top cover. Take a long ruler and draw a line from one side of large the circle to the other through the center. Draw another line through the center creating a plus sign. Measure the distance between one line and the next. Draw two marks on the curved edge that are equidistant apart. Do this for all four pie shapes. Draw additional lines connecting the opposite marks through the center.

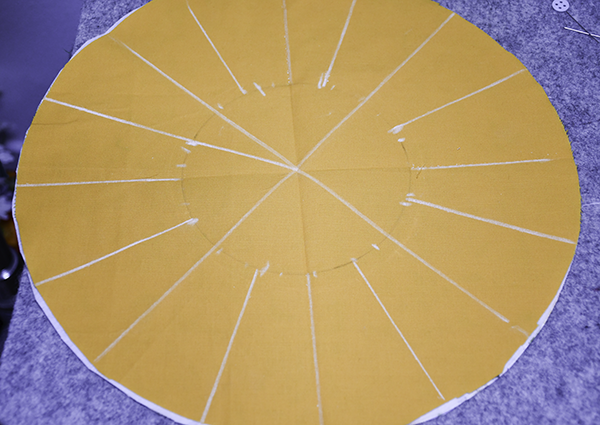
Step 4: Stitch the Fabrics
Stitch the circle through all layers. Then, stitch the original plus sign through all layers and through the center of the circle. Finally, stitch the remaining lines just from the inner circle to the edge of the larger circle.

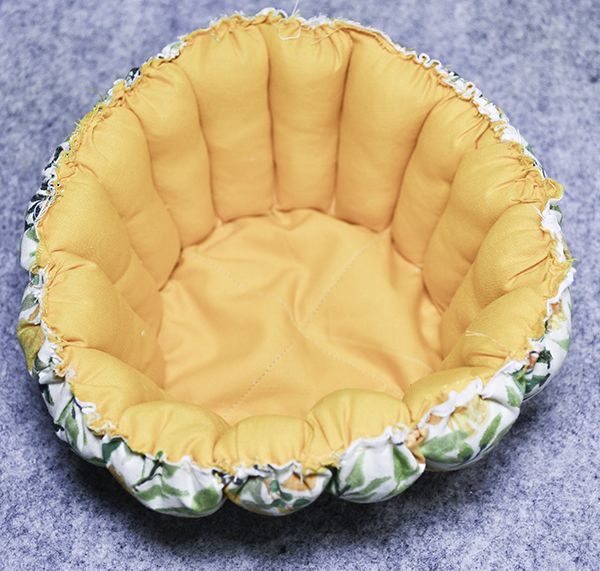
Step 5: Stuff the Compartments
Using the polyester fiberfill stuff each of the the compartments evenly until of them have been stuffed.

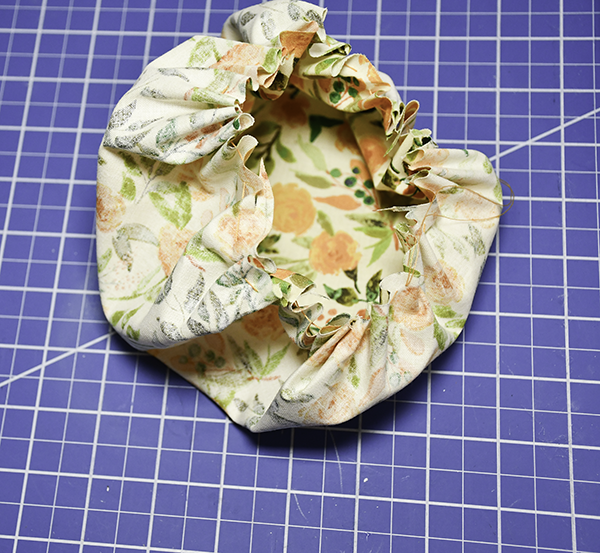
Step 6: Hand stitch the compartments
Hand stitch the lining side to the outer side of each compartment. using a basting stitch and pulling the thread taut.
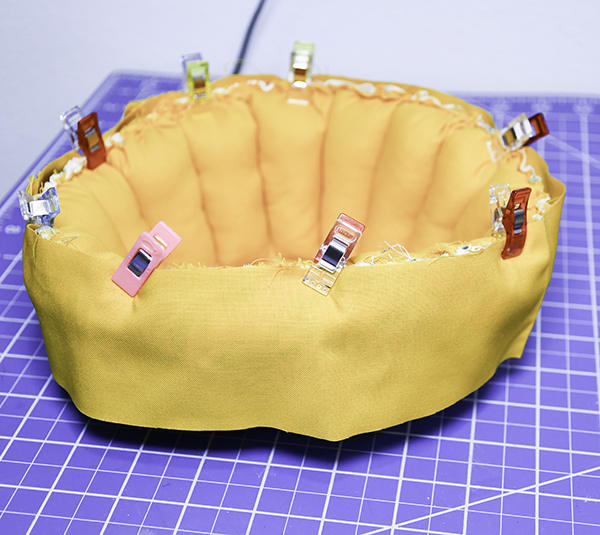
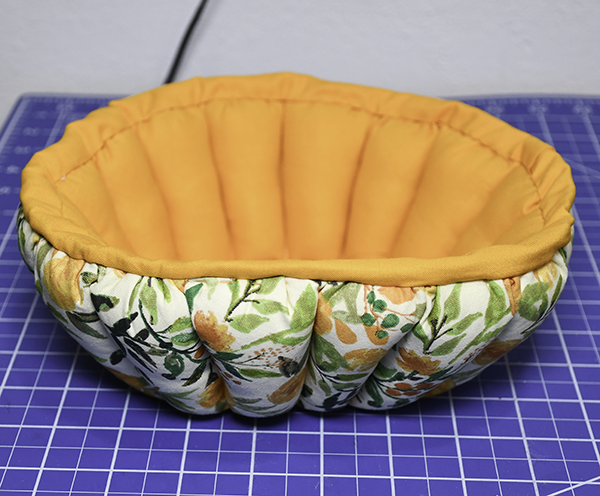
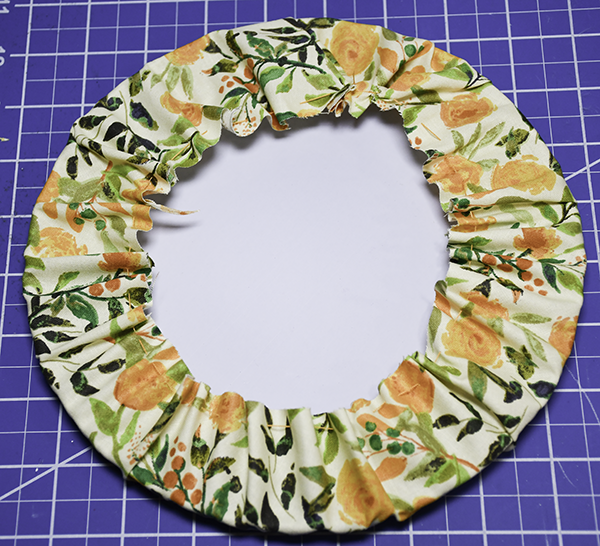
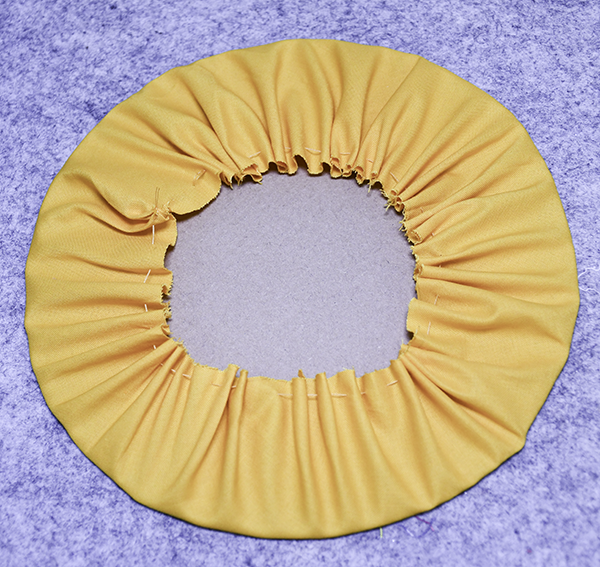
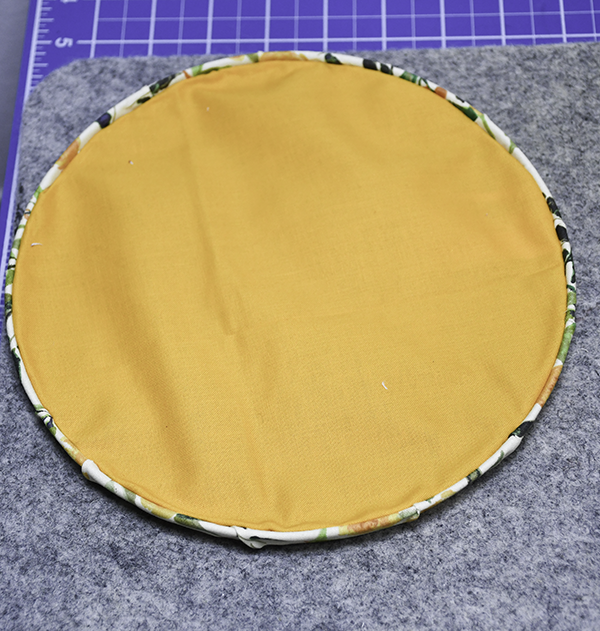
Step 7: Add the Binding
Create bias binding using the same fabric as the lining or use premade binding. If you do not know how to create bias binding check out my bias binding tutorial here. Fold one short end of the binding. Wrap the binding around the hand stitched edge overlapping the short ends. Stitch all the way around. Double fold the unstitched side of the binding over the raw edges and stitch to secure.
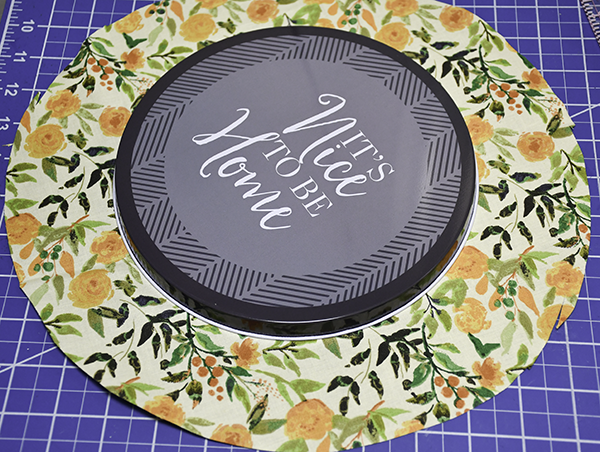
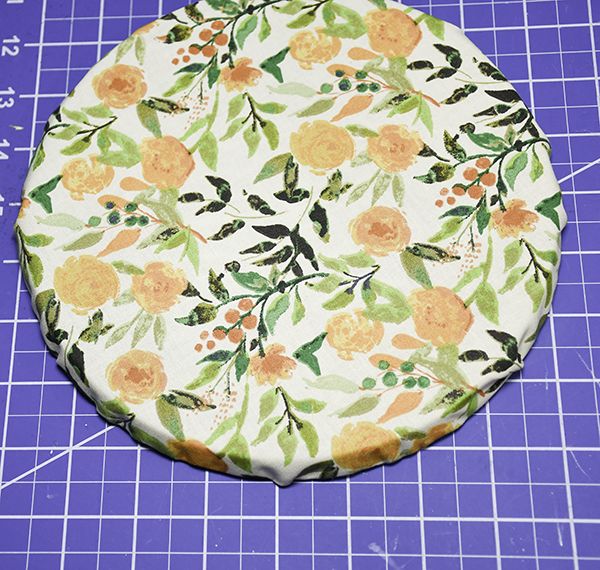
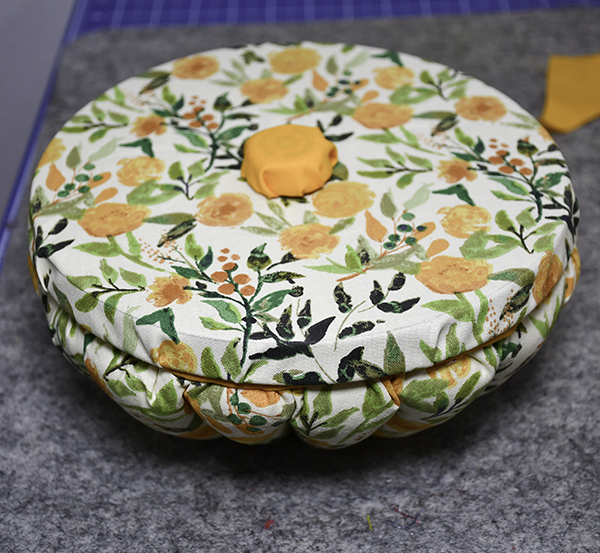
Step 8: Cover the Lid
Cut a circle 3″ larger than the small metal cover onto the outer fabric. Hand stitch a basting stitch around the raw edge of the circle. Insert the small metal cover into the center of the fabric piece and pull the thread taut so that the fabric is taut around the cover. Cut a piece of cardboard the same size as the metal cover. Repeat the process to cover the cardboard. Place some hot glue onto the underside of the metal cover. Attach the cardboard to the metal cover with the lining side facing up.
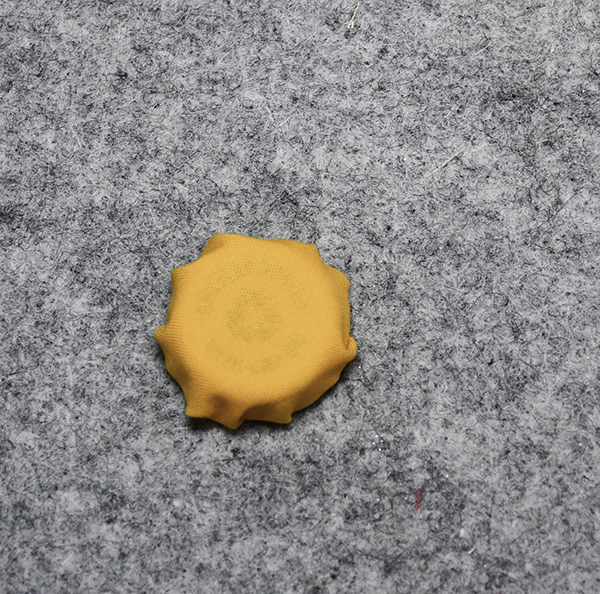
Step 9: Cover the Bottle cover
Cover the water bottle cap in the same way you did the metal and cardboard.
Step 10: Add the Bottle Cap
Hot glue the covered bottle cap to the center of the outside of the covered metal cover. Place the cover onto the bowl and you are finished.
I hope you enjoyed this simple sewing project. If you would like more sewing and crafting projects subscribe to our free newsletter and receive access to our free Printables library.
Subscribe to our Free YouTube Channel!
Join our Sew Very Crafty Fans Facebook group
If you want to ask questions and share your projects join our Facebook group here. The community will help to achieve your sewing and crafting dreams.


