
How to Make Sharpie Knobs in 3 Easy Steps
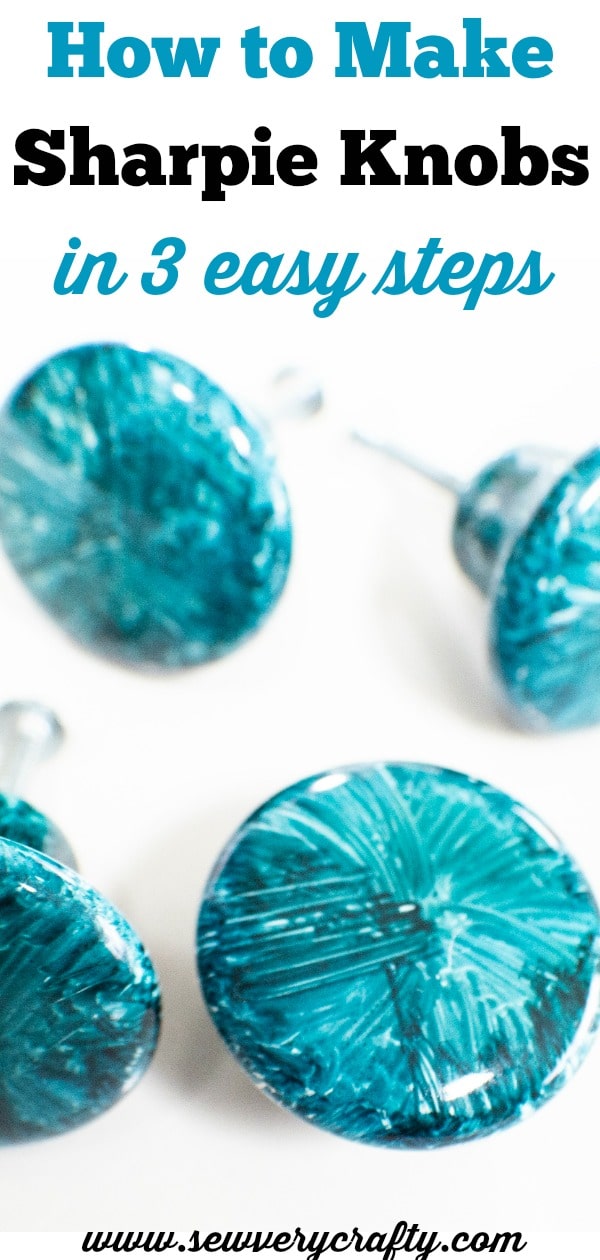
Sharpies have been around forever it seems but leave it to crafters to discover uses other than writing with them. I came across this fun, functional and inexpensive tutorial on how to make sharpie knobs in 3 easy steps from Engineer Mommy. I just love this project. It only takes inexpensive ceramic or porcelain knobs and sharpies in any color you like to create these stunning drawer pulls. You can color them any color you like and they will match your personal style and decor.
I have a green bedroom in my house so I decided to color my knobs green but you can use any color or multiple colors to match your decor. I also have an old chest of drawers that can definitely use some sprucing up. That project will have to wait but in the meantime the sharpie knobs will brighten an otherwise dull piece of furniture. This post contains affiliate links that if you click on them and make a purchase I may receive a small commission at no extra cost to you.
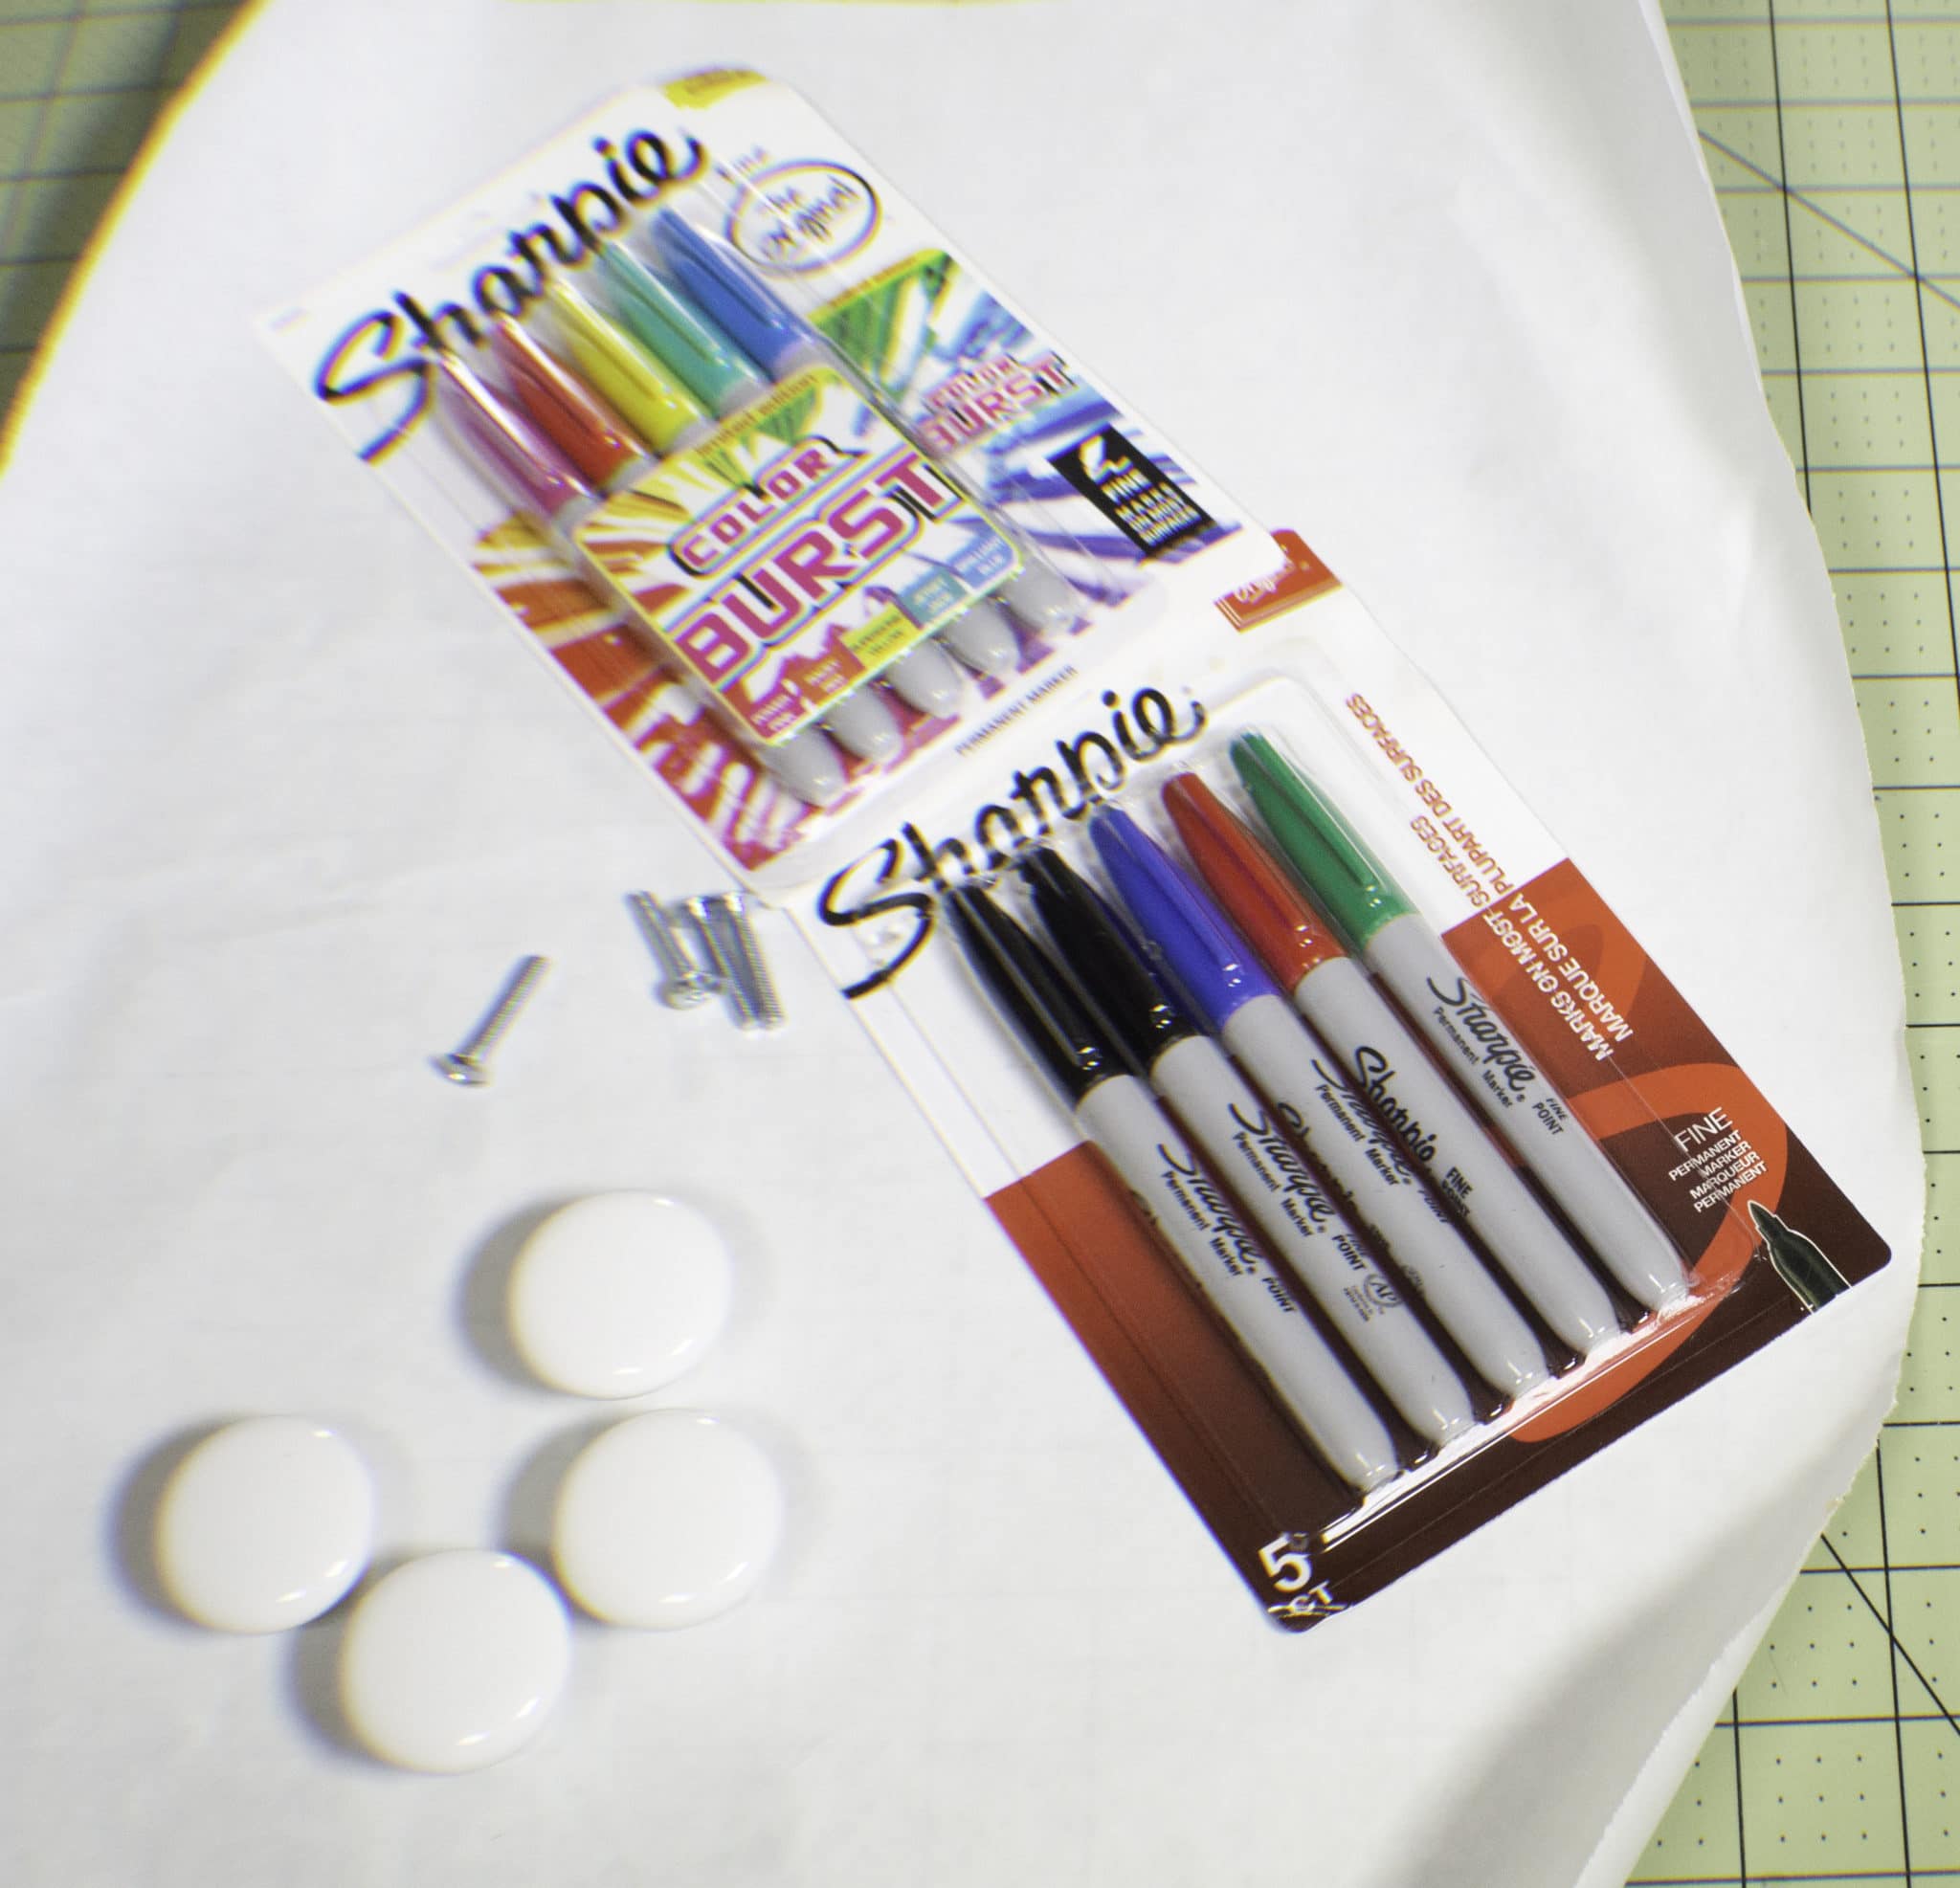
What you will Need:
- Ceramic or Porcelain knobs
- Sharpie in any color
- Disposable glvoes
- Oven
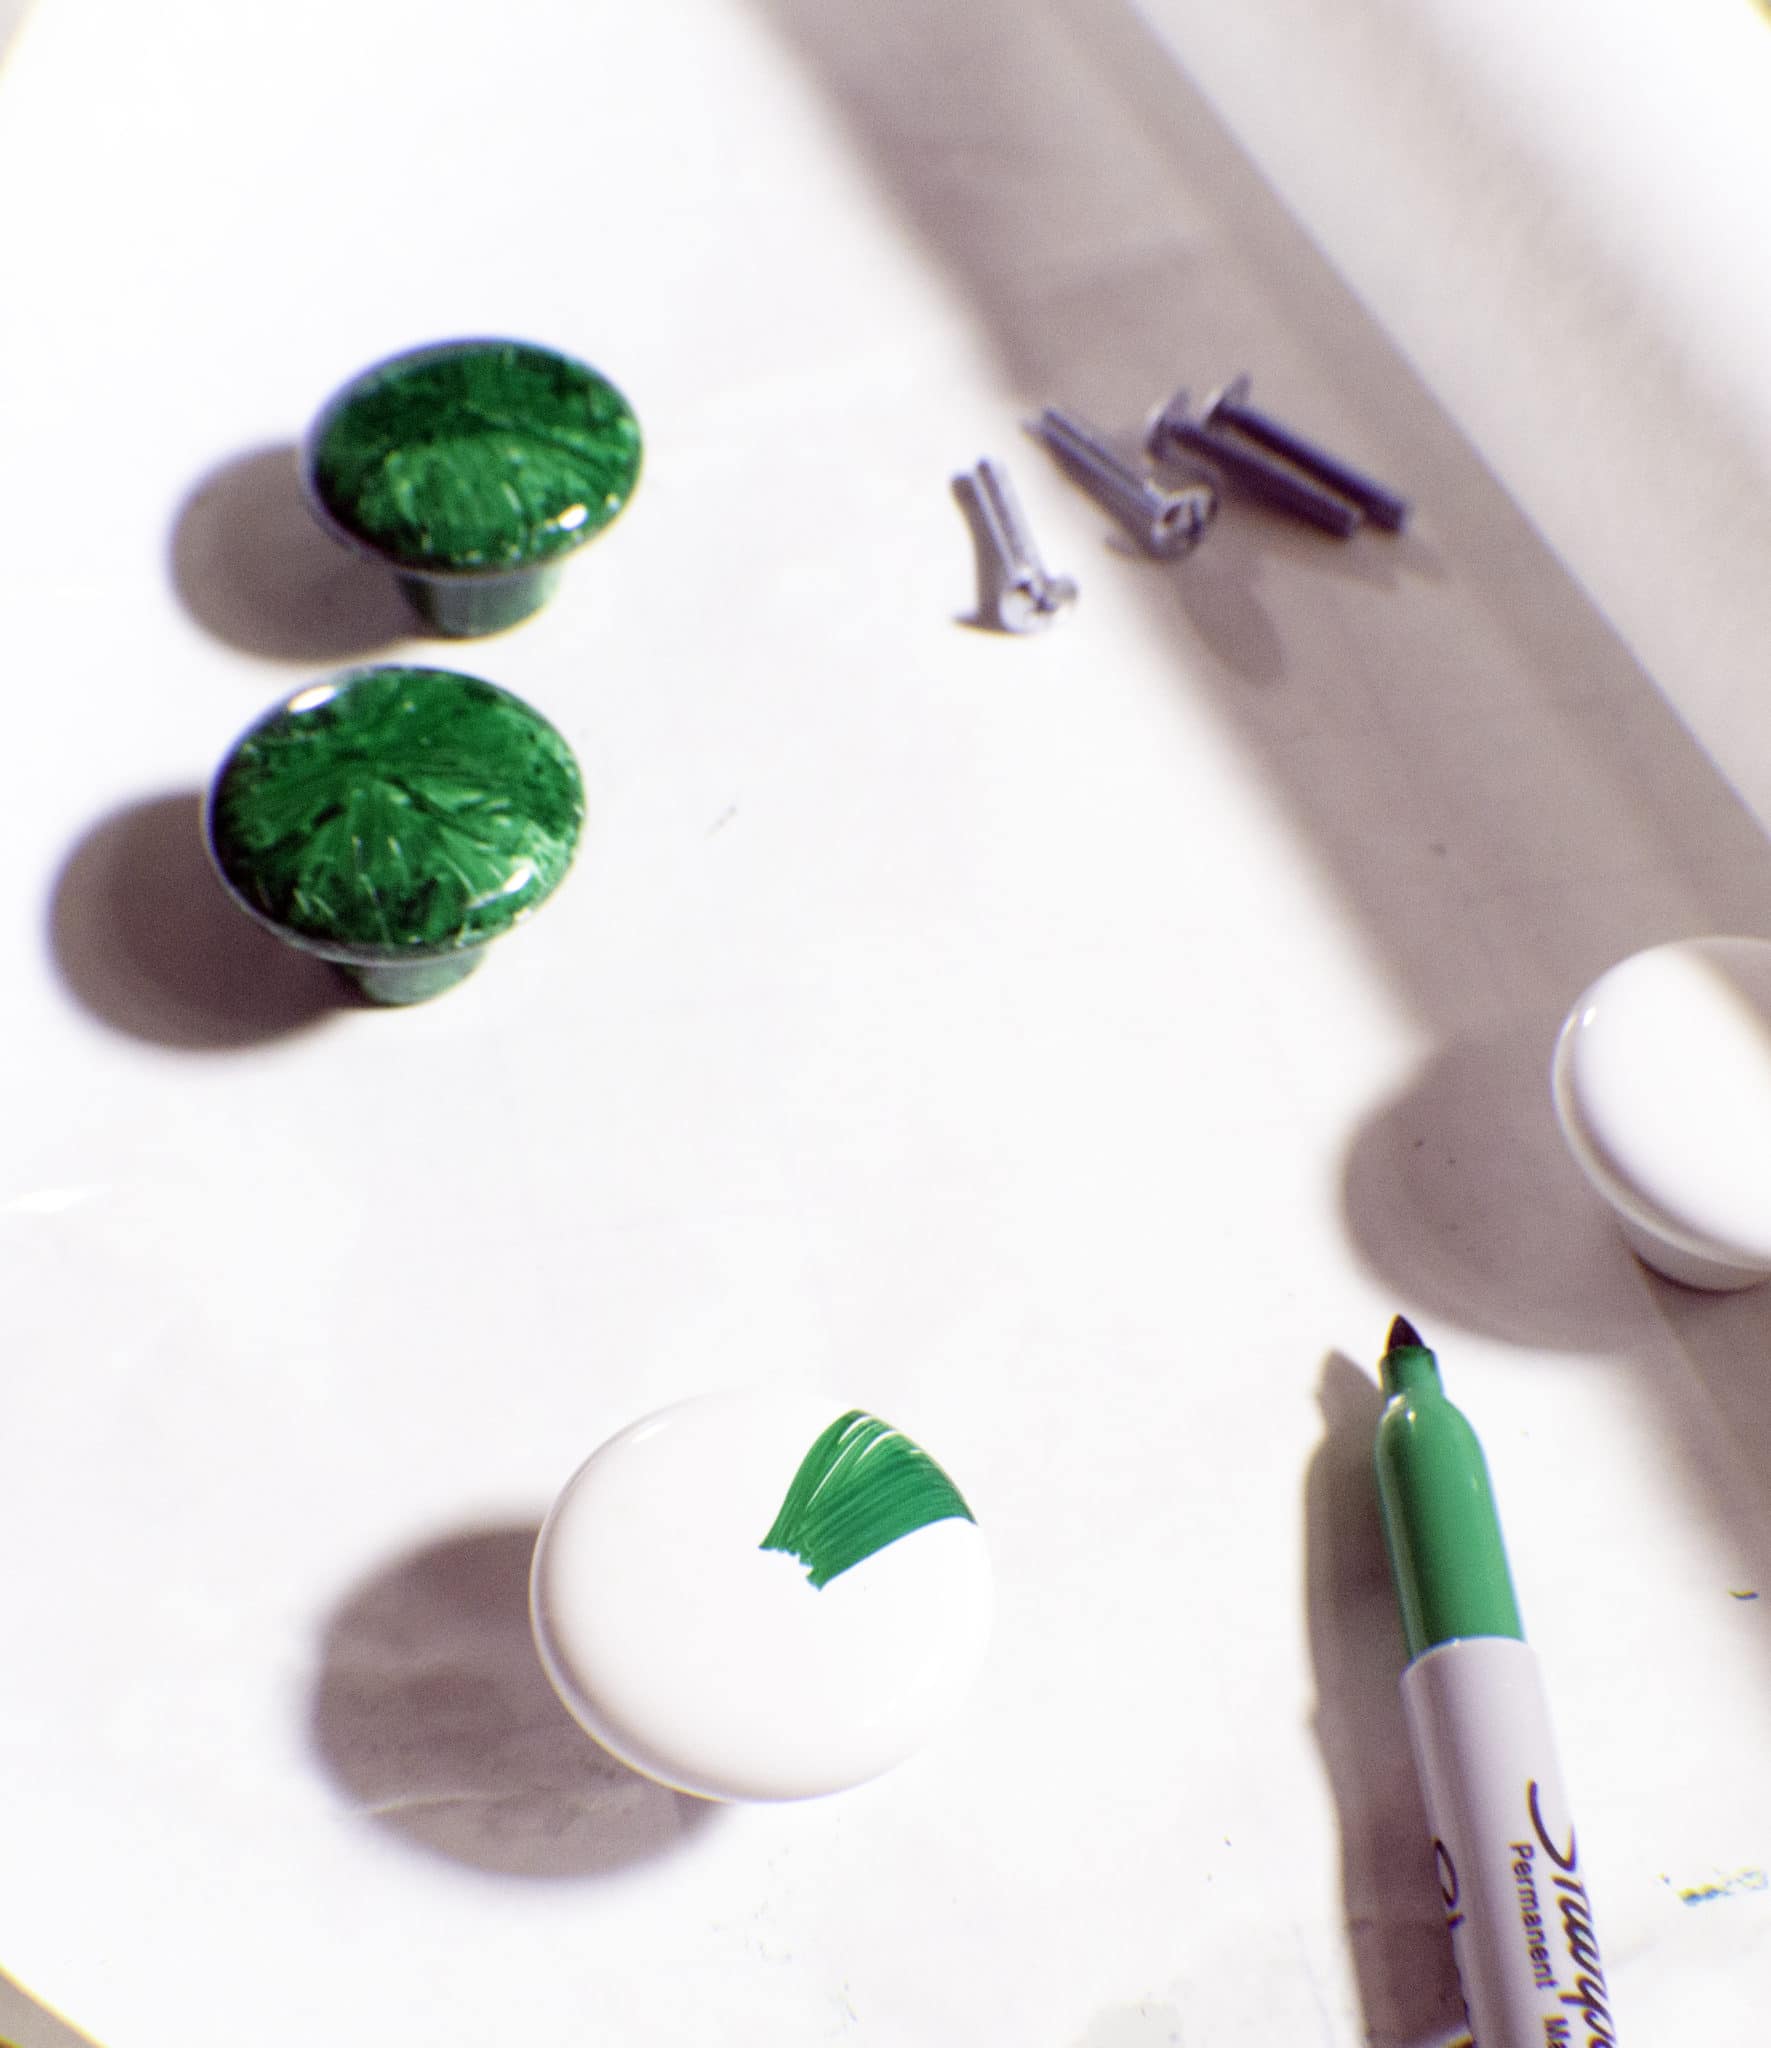
Step 1: How to Make Sharpie Knobs in 3 Easy Steps
Draw lines on your knobs starting in the center and radiating out to the edges. You will be making quite a few lines and it is a bit fidgity when you are doing the side of the knob so I used some latex disposable gloves to prevent the sharpie from getting on my hands. You want to cover the entire knob with the sharpie lines. Let the knobs dry overnight.
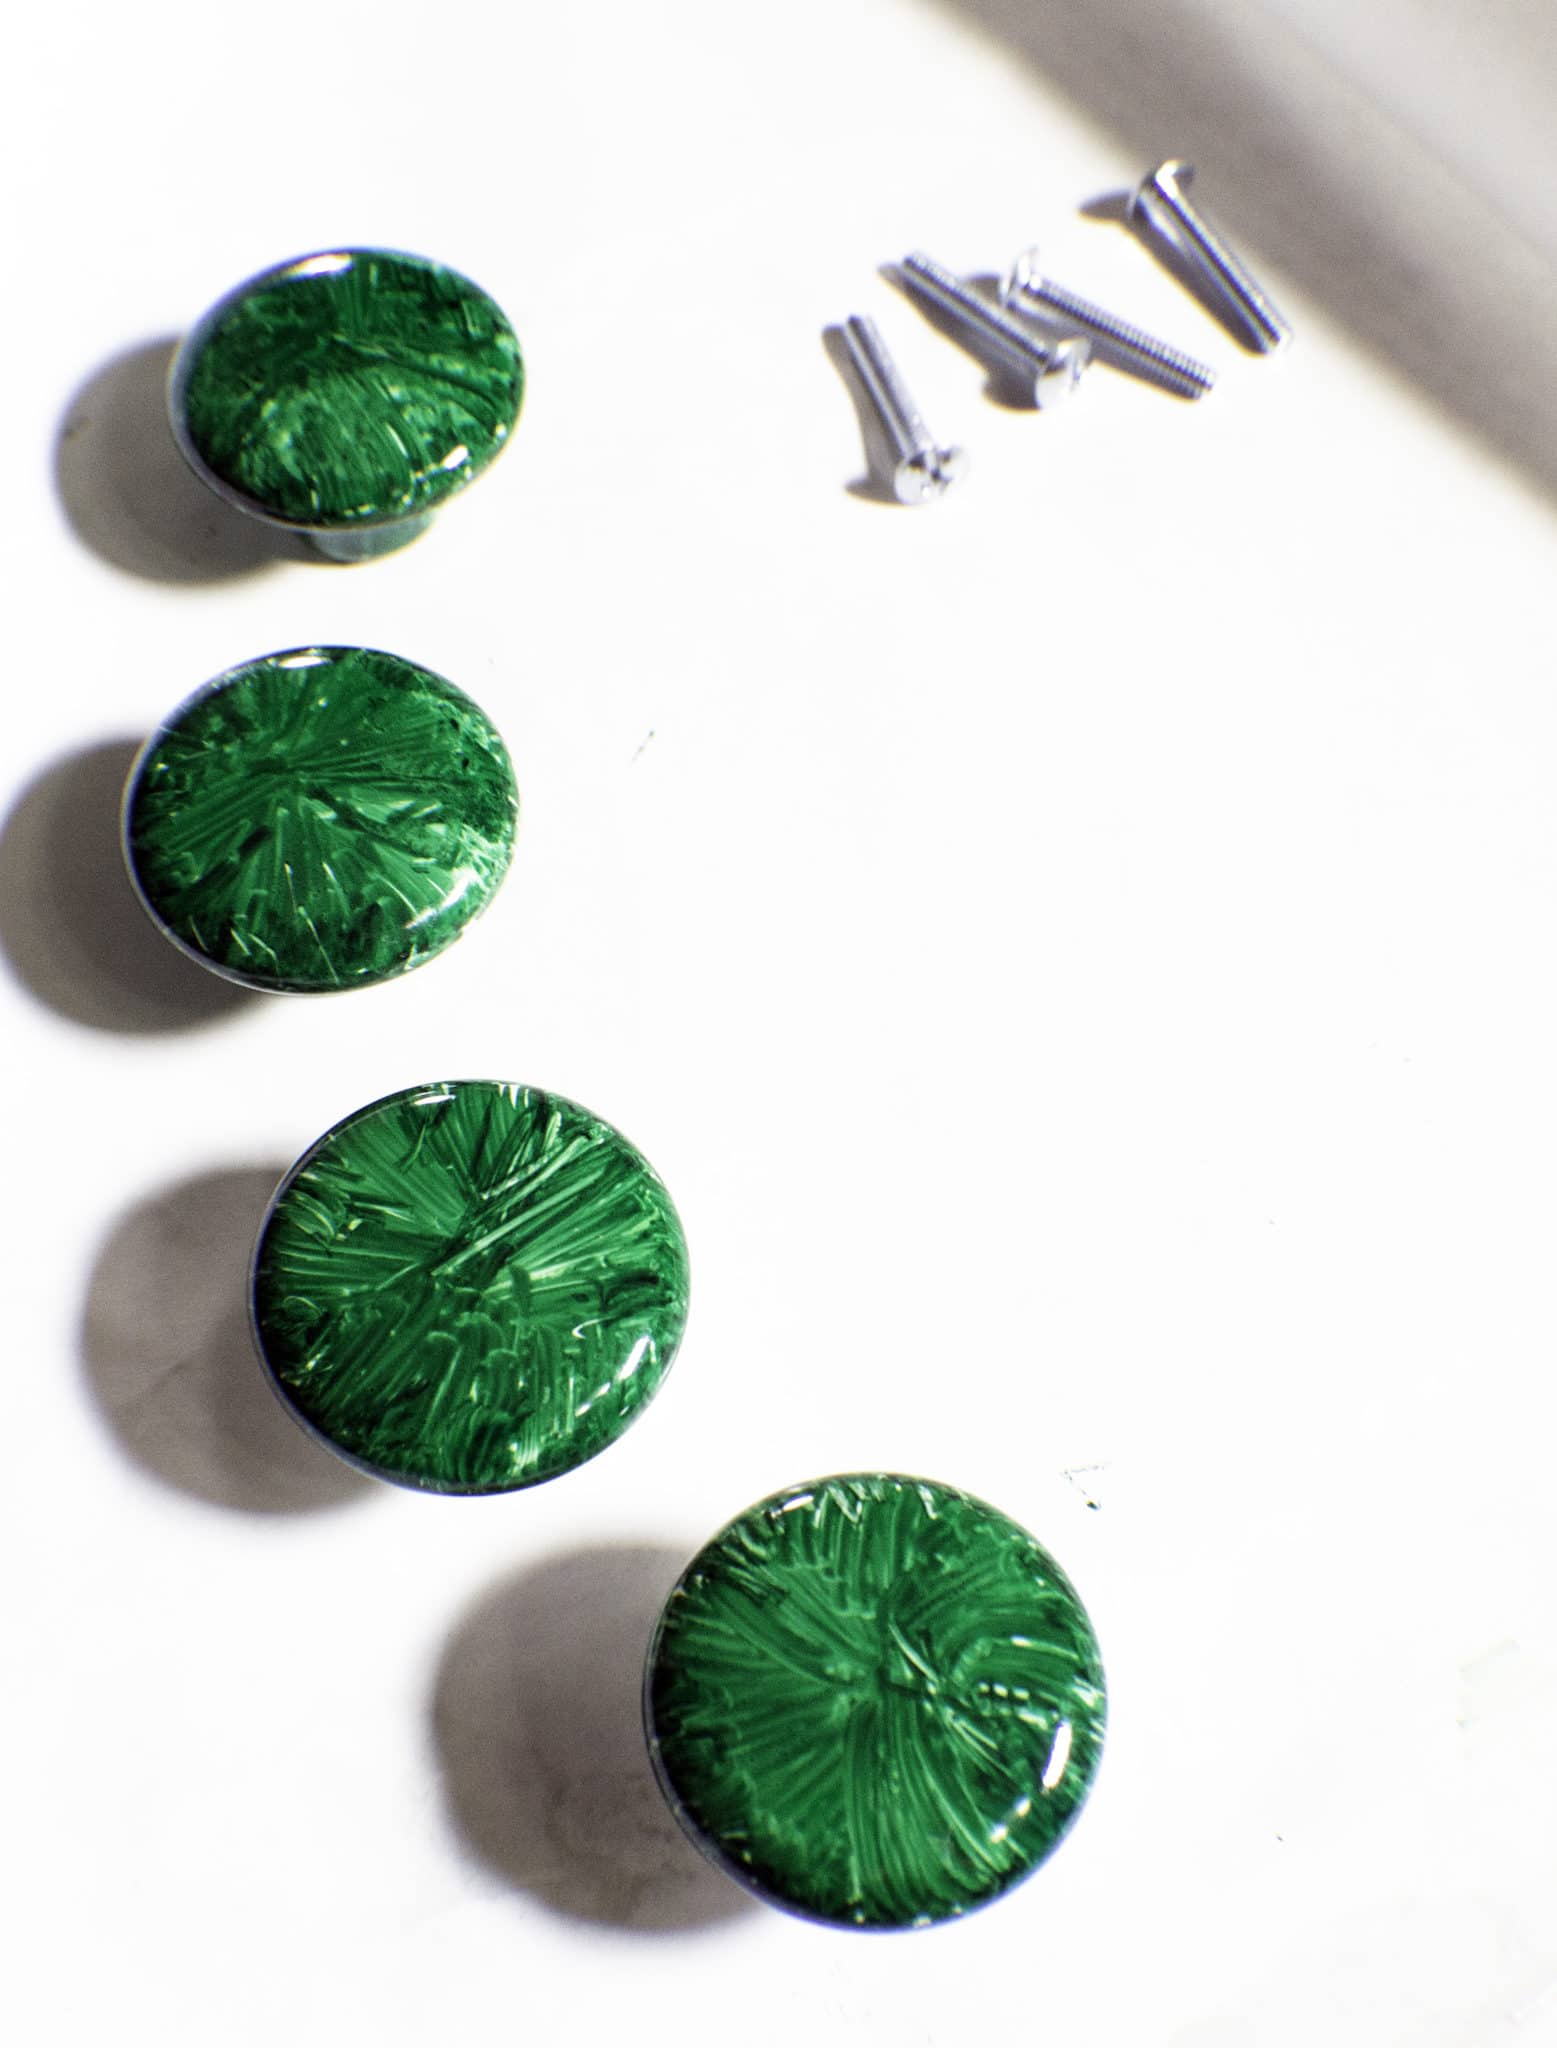
Step 2: How to Make Sharpie Knobs in 3 Easy Steps
Place the knobs with the color side up on some aluminum foil on a baking pan or dish and place them into a cold oven. Turn the oven on to 400 degrees. Once the oven reaches 400 degrees bake the knobs for 30 minutes. After 30 minutes turn off the oven and leave the knobs to cool inside the oven. Remove them from the oven when cooled and let them sit overnight. What you will see are beautiful colored knobs that are glossy and durable and a great addition to any piece of furniture or other craft projects. You will notice that the knobs have changed color. I was disappointed with the change in color in this instance. I really wanted the bright green color for my room and ended up with a blue-green color that will not match at all so I will use these knobs elsewhere. Regardless, these knobs came out beautifully. I love the glossy look and feel of these drawer pulls. You will have to see it to believe just how beautiful these sharpie knobs are.
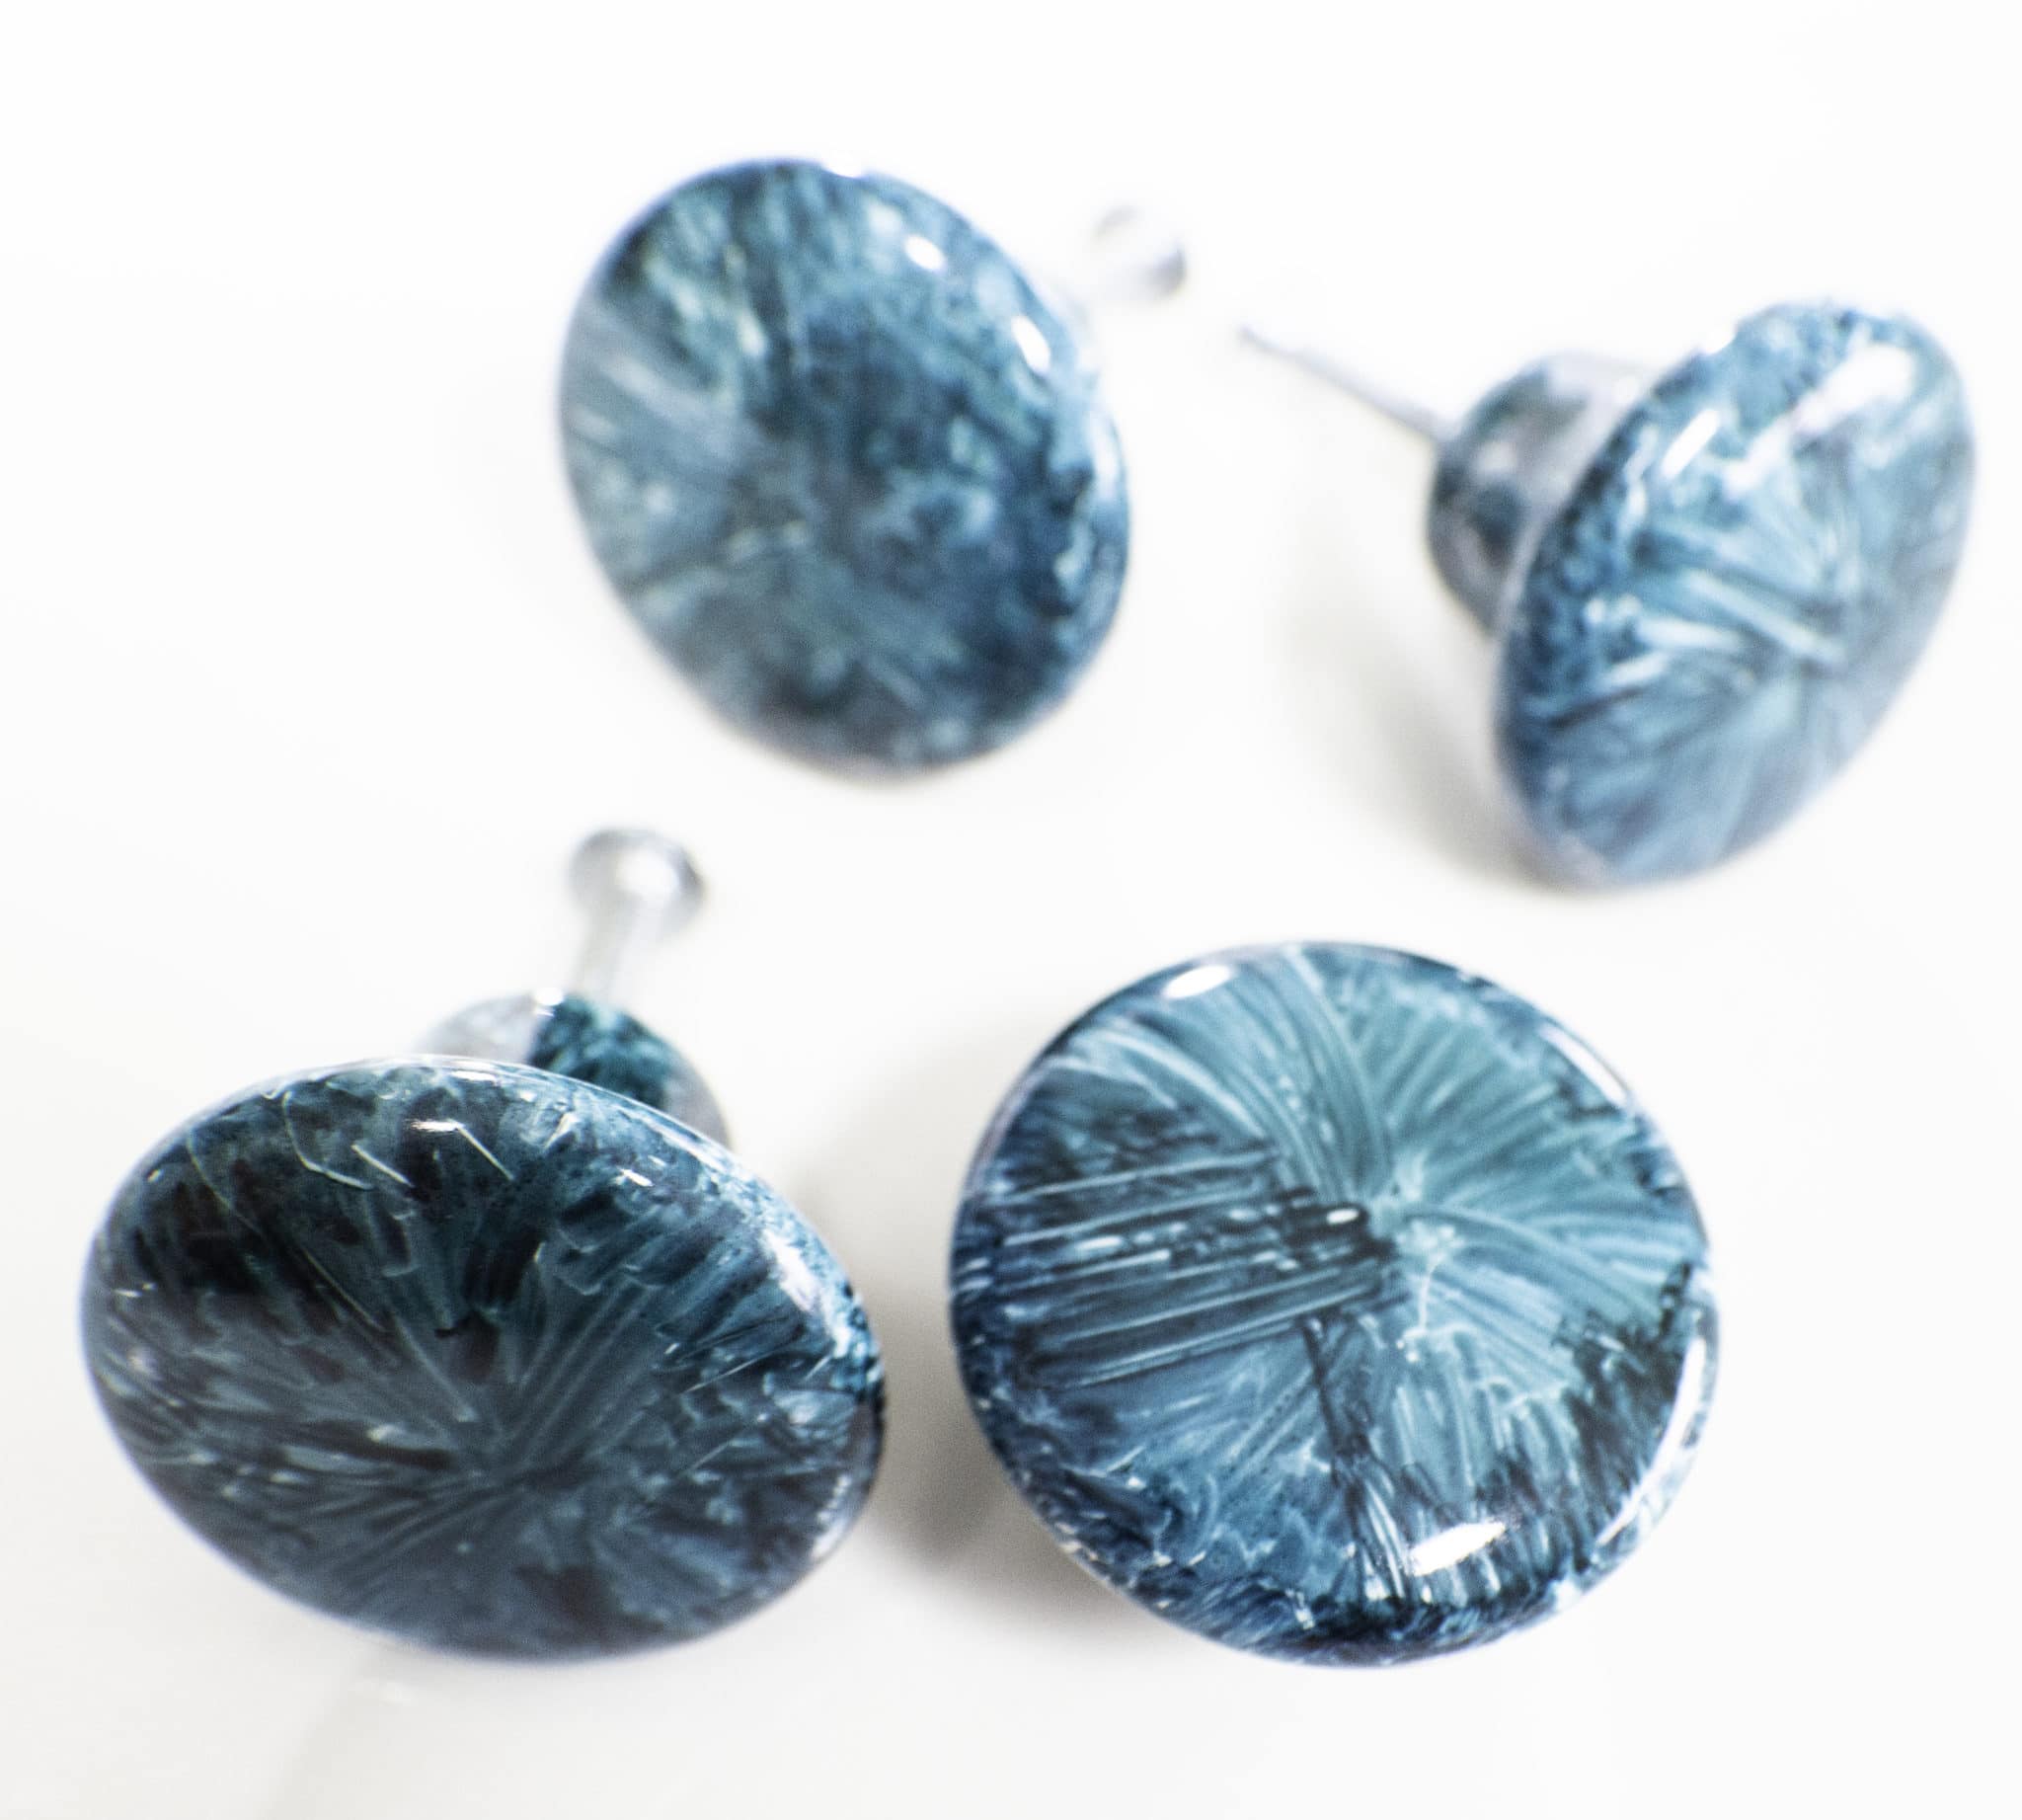
Step 3: How to Make Sharpie Knobs in 3 Easy Steps
Install the knobs onto your piece of furniture or other craft project and enjoy the beautiful effect you will see with these knobs. You will notice that these knobs wear well once they have been baked. The baking is the key to this project. Even though the color changed, with a little experimenting you can get the perfect color for your project. I hope that you will give this project a try. It is very easy to do and costs a minimal mount of money to get a big bang.


Do you not put a sealer at the end?
I don’t think I did but you could spray it with a clear polyurethane to be really safe.