
How to Make a Fabric Closet Safe
How to make a fabric closet safe. I absolutely love this project. It is the perfect fabric closet safe that can be hung in your closet or taken on the road to hide your valuables while traveling. It is discreet and can be hidden among your clothes so that your valuables are well hidden from prying eyes.
This project is an advanced beginner project because of the zippers but it is easy to create by just using the secret safe pattern, fabric, and 2 zippers. You will be so pleased with this project that you will want to make them as gifts for family and friends. This secret storage project is perfect for home or on the road. Note that the pattern for this project is for a wire hanger. I will hopefully be able to rework the pattern to fit a plastic hanger in the future.
If you would like more travel patterns check out my post on how to make travel patterns and a passport wallet. These are easy projects to make and are perfect for any traveler on the go. This post contains affiliate links that if you click on them and make a purchase I may receive a small commission at no extra cost to you.
If you would like a complete video tutorial of this project head over to YouTube and check out my brand new video. Here it is.
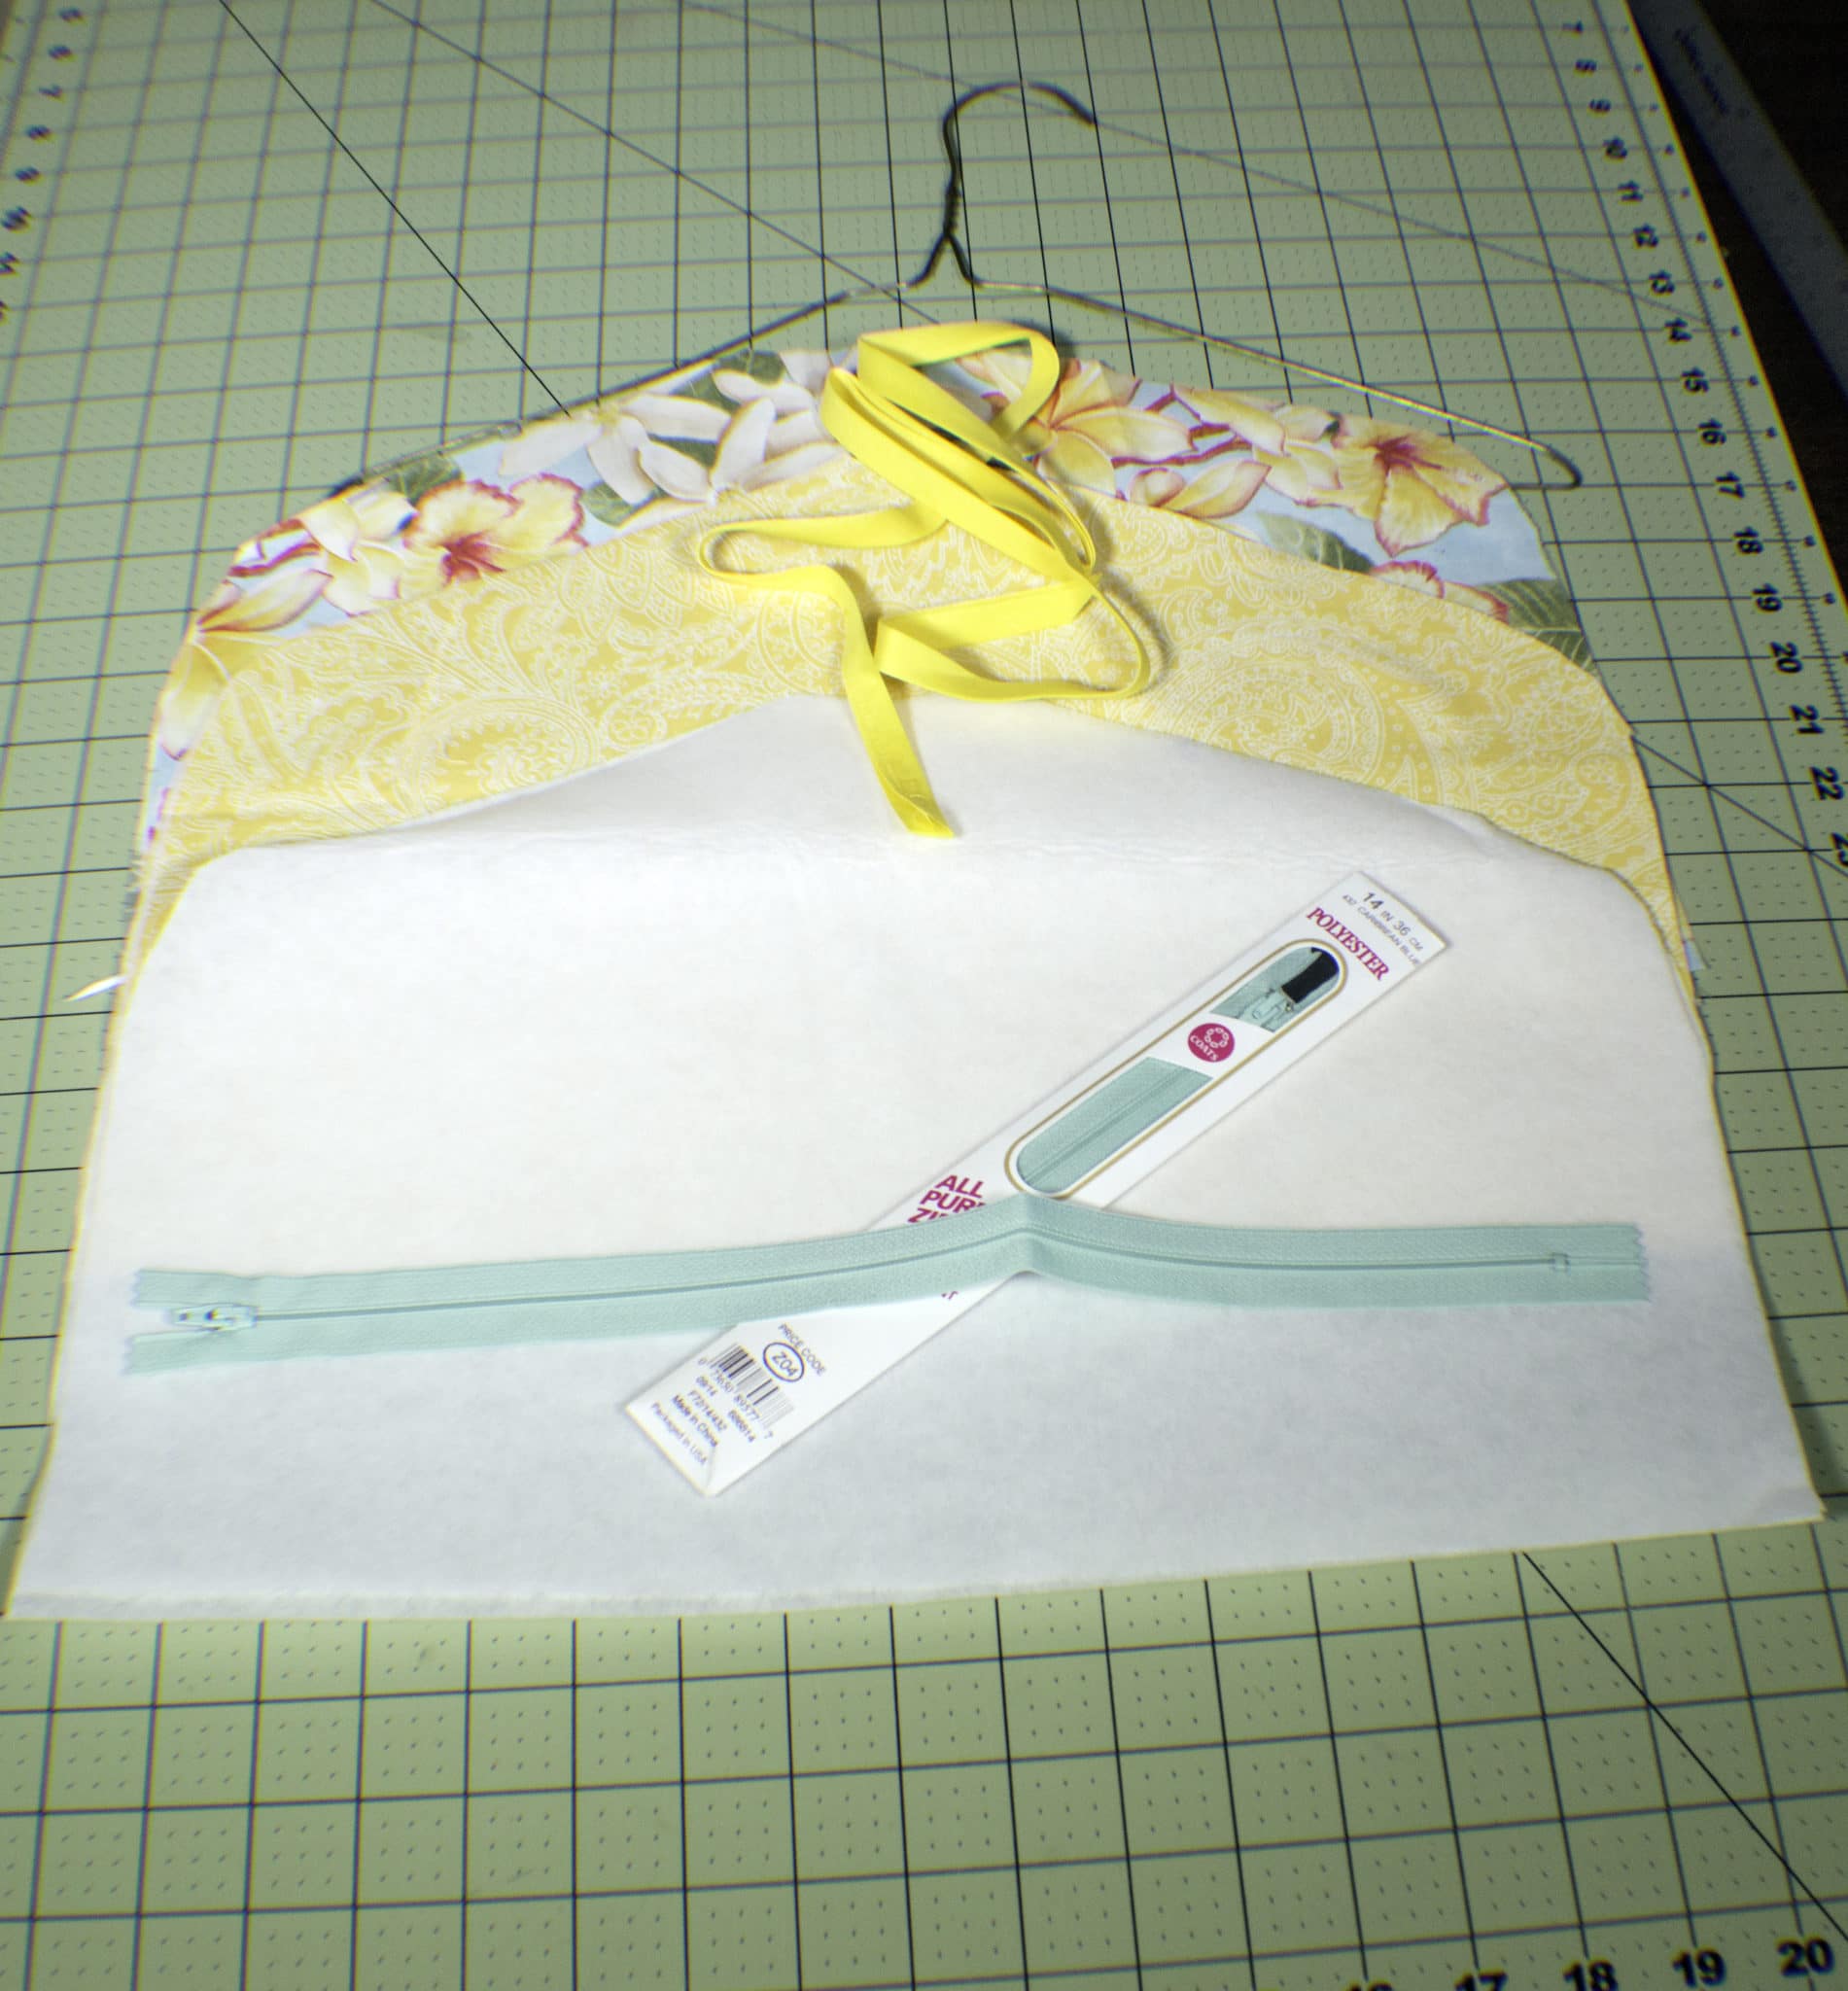
What you will Need: How to Make a Fabric Closet safe
- Pattern you can get here by clicking on this link
- 1/2 yd of fabric or a remnant
- 1/2 yd of lining fabric or remnant
- Additional 1/2 yd of either fabric for pocket piece
- Small length of bias binding (Optional)
- 1 1/2 yd Pellon 808 Interfacing
- 2 14″ zippers
- Standard sewing supplies
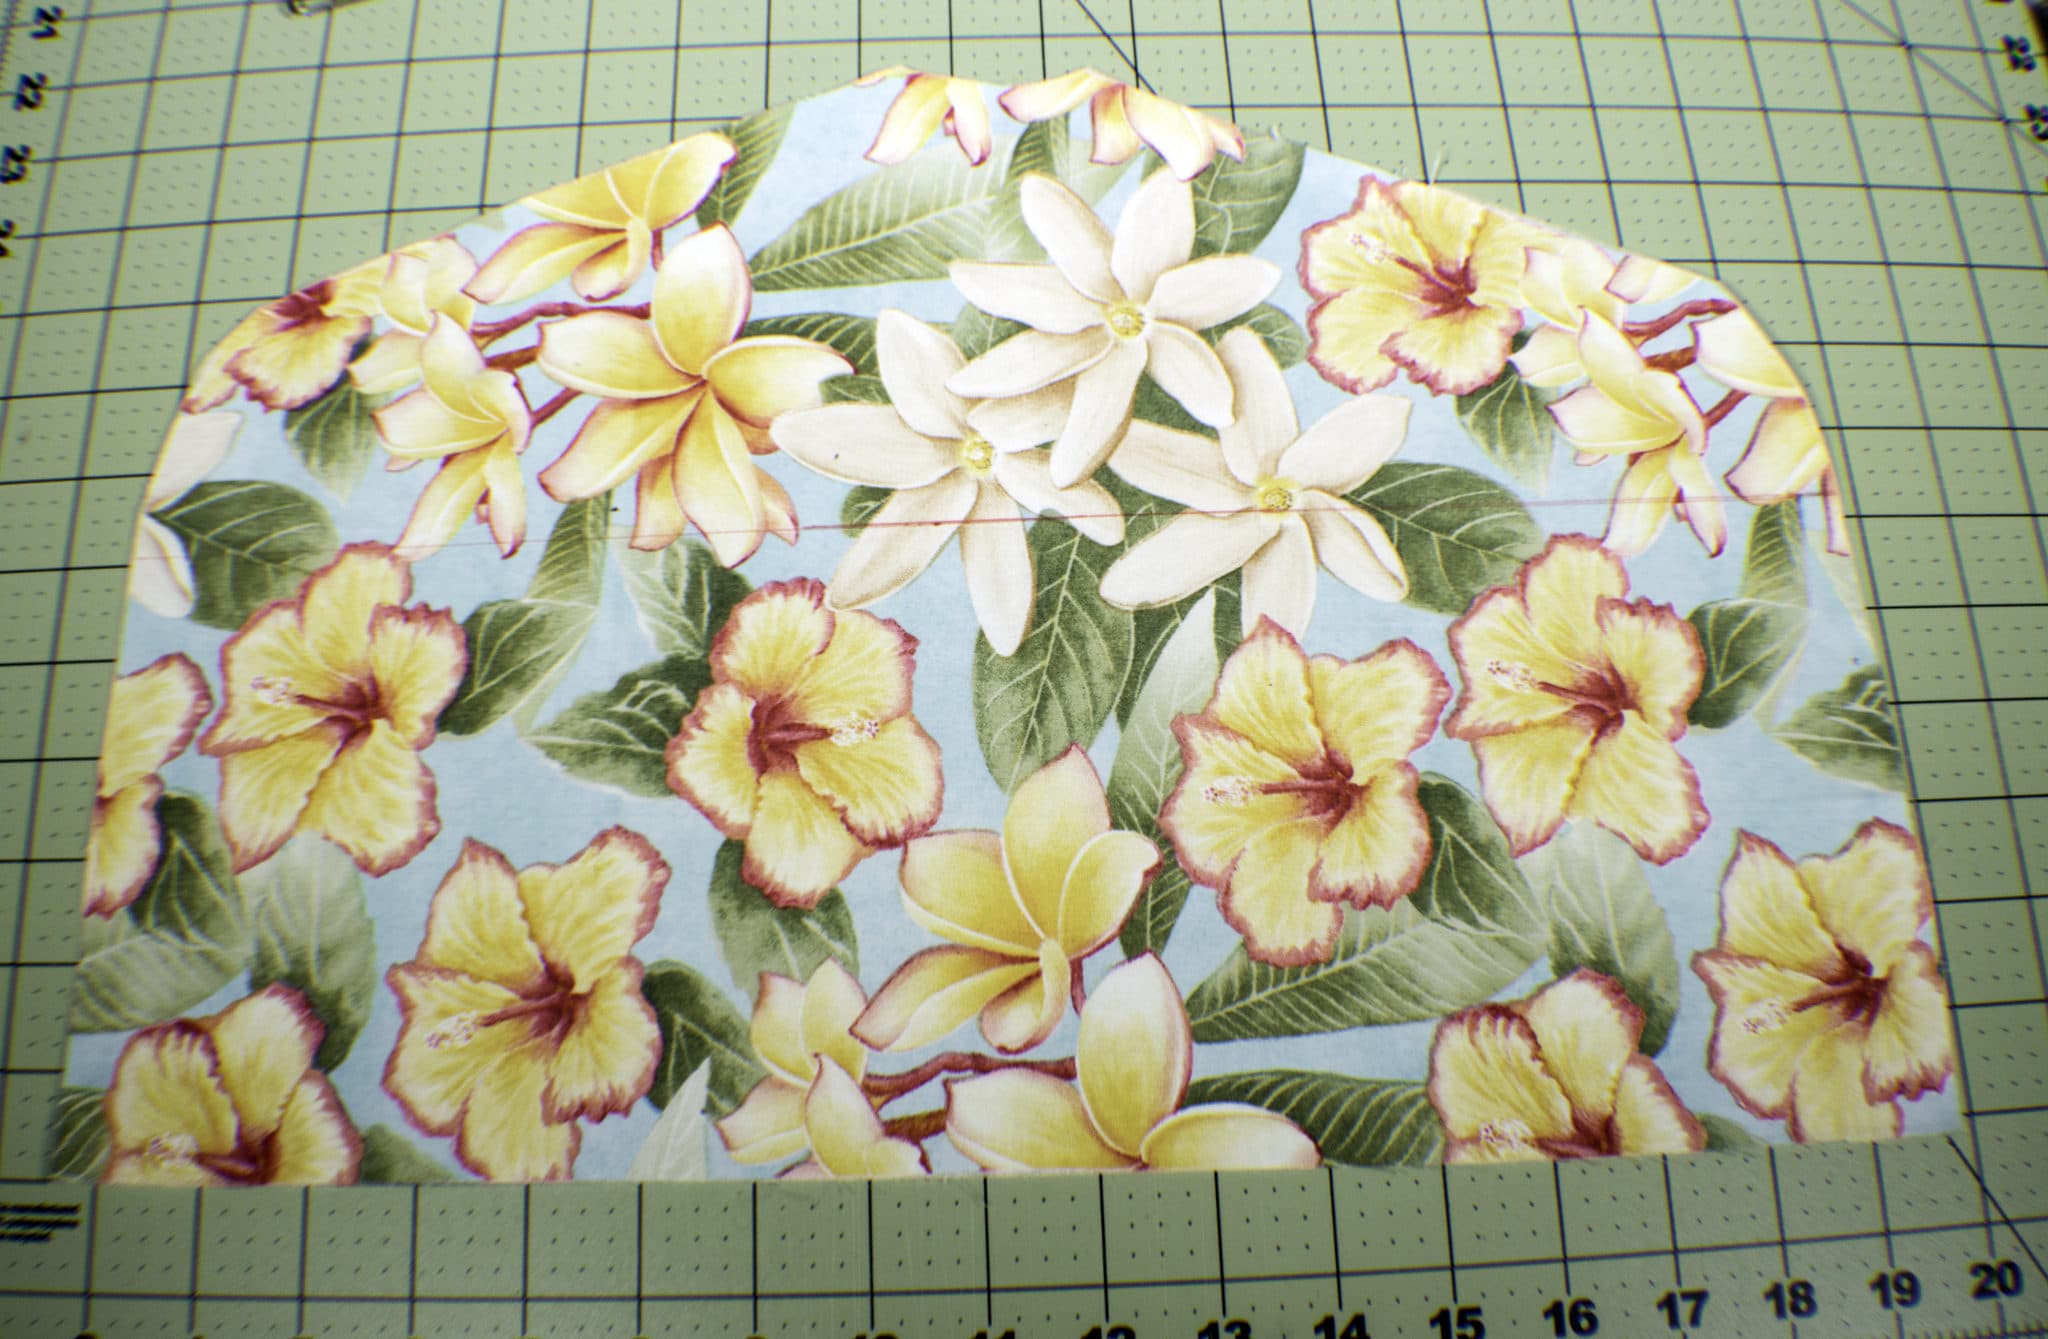
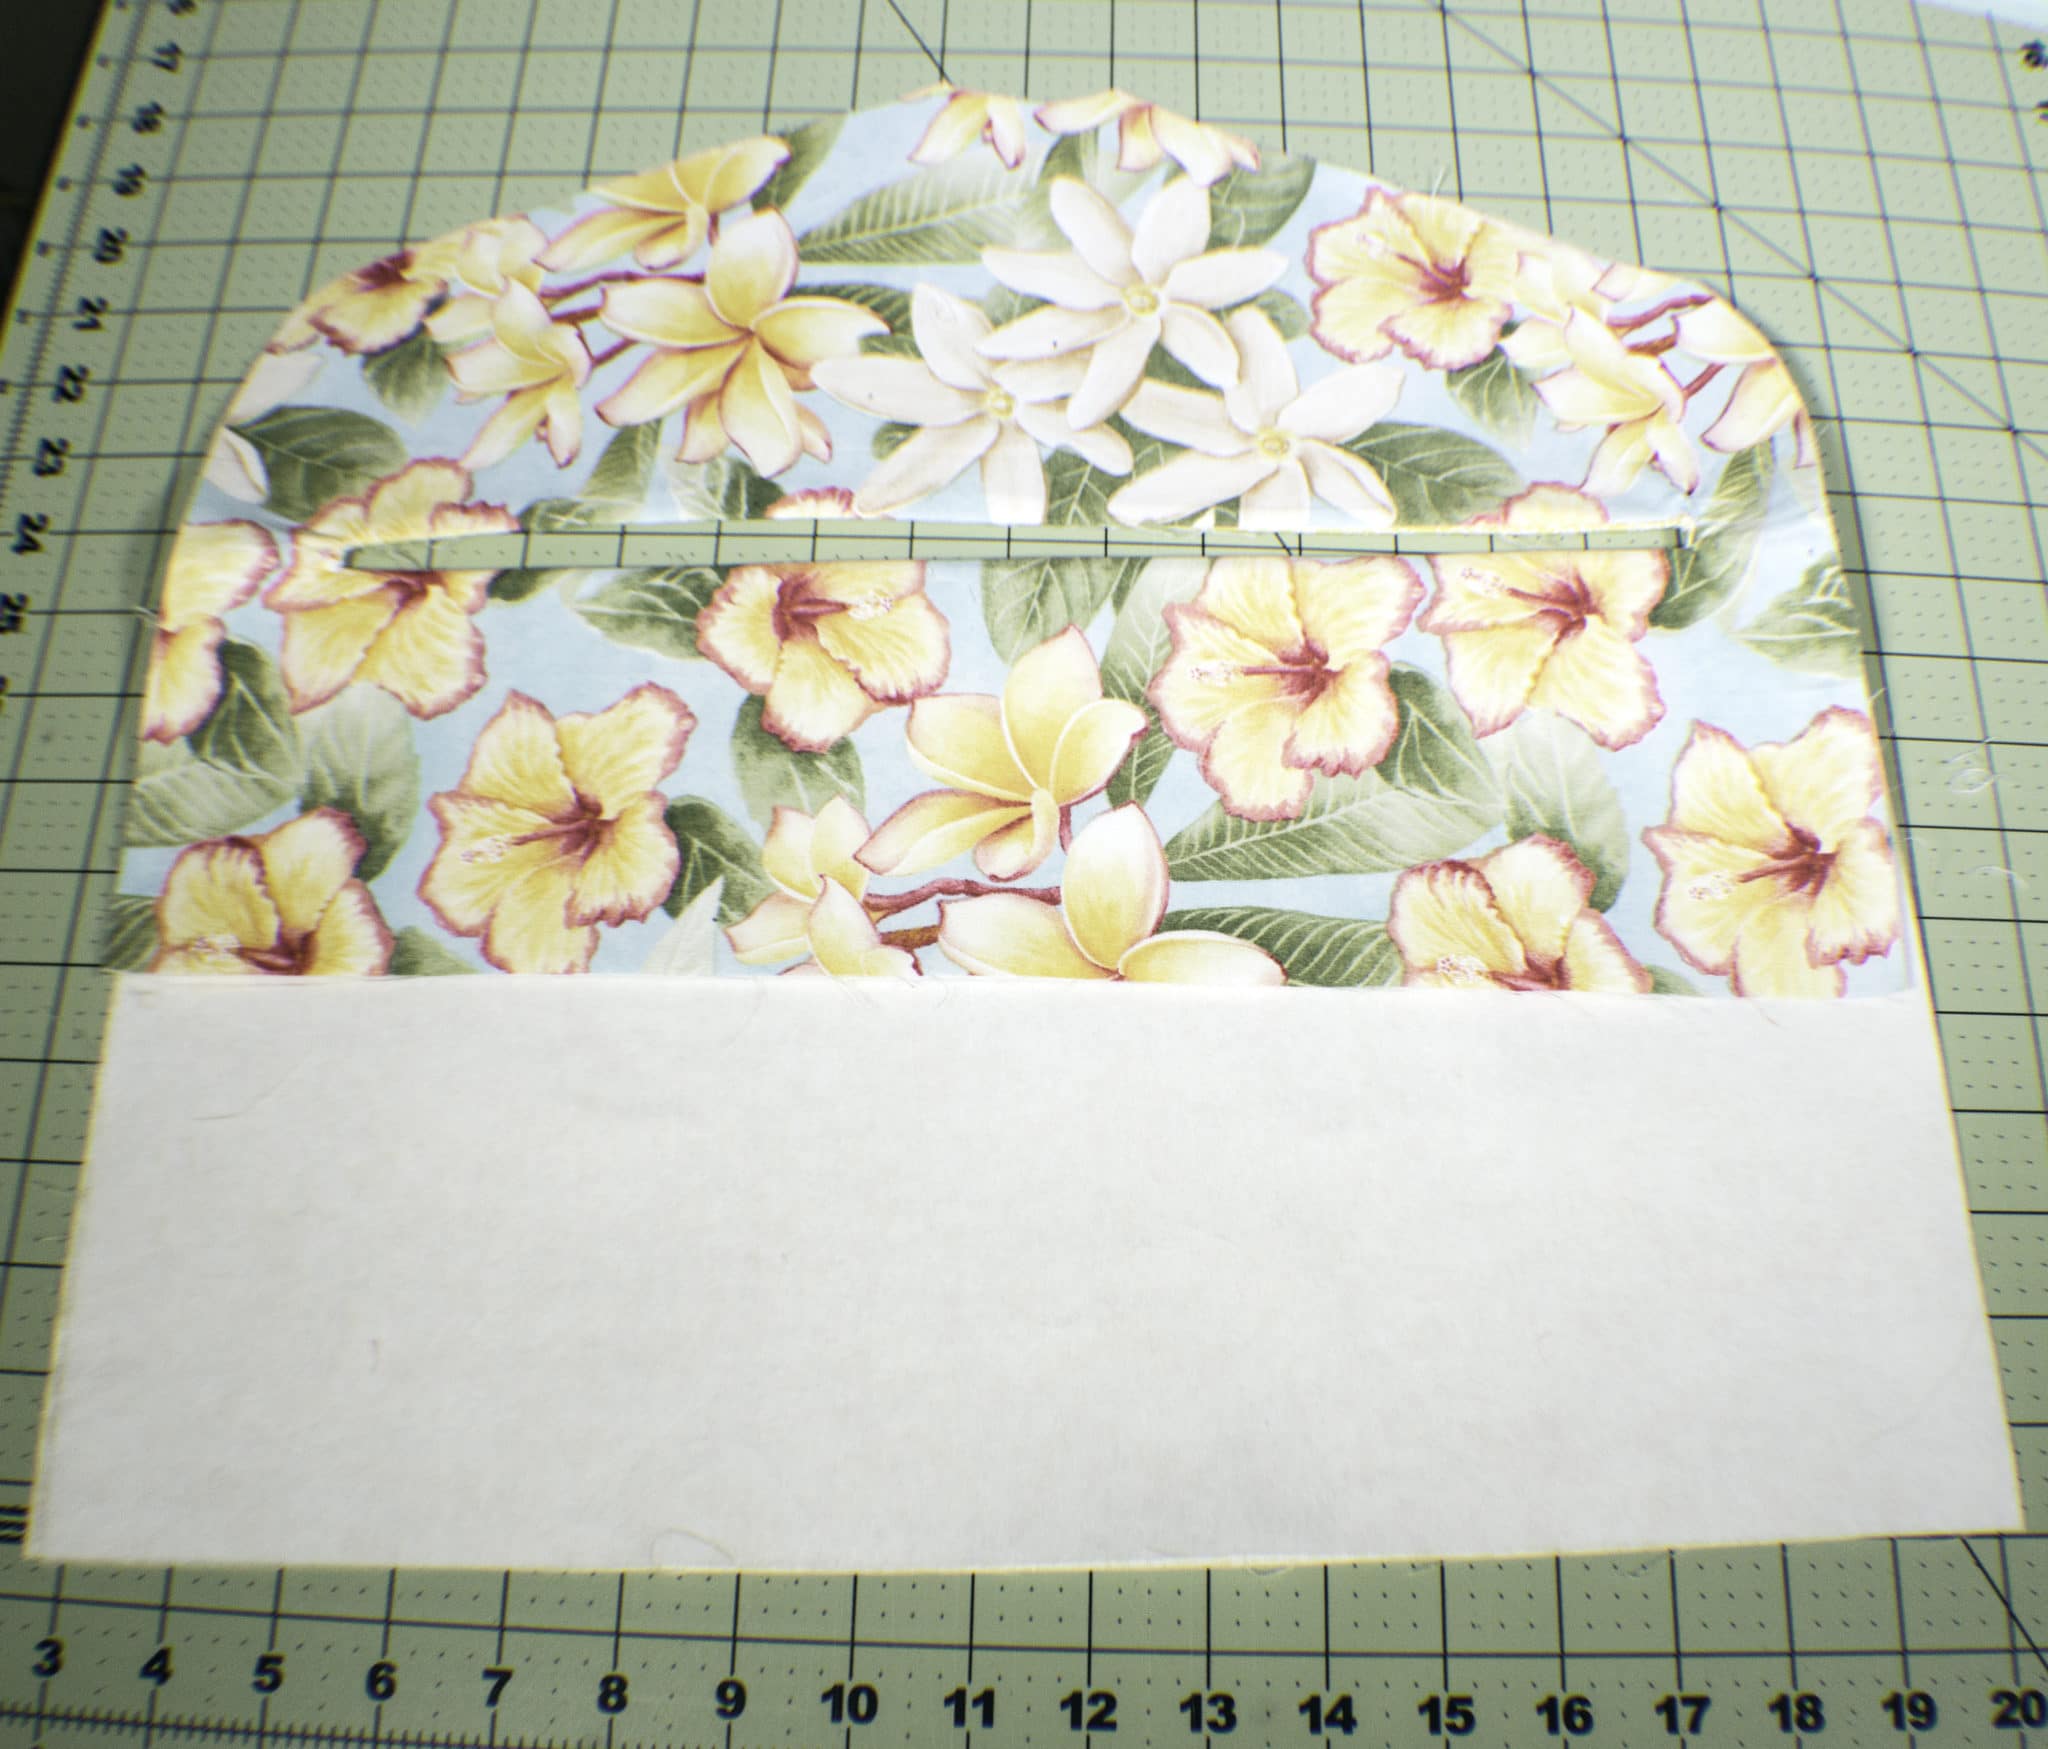
Step 1: Cut your Fabrics
Print out the pattern and tape the pieces together by abutting the edges. Cut two of the outer fabric, lining fabric and interfacing. Cut a pocket piece from either fabric and interfacing that measures 11 1/2″ x 17 1/4″ and two zipper tabs that measure 1″ x 2″. From this you will have:
- 2 outer pieces
- 2 lining Pieces
- 2 interfacing pieces
- 1 pocket piece with interfacing
- 2 zipper tabs
Step 2: fuse the interfacing
Fuse your interfacing to the wrong side of the outer fabrics and the pocket piece. If you are not familiar with interfacing it is a product that provides structure to garments and bags. It typically comes with instructions on how to attach it but the process is quite easy. The interfacing has a glue side and a non-glue side. Lay the wrong side of your fabric on the glue side of the interfacing and press with a hot iron until it fuses with the fabric and you can treat the two pieces as one.
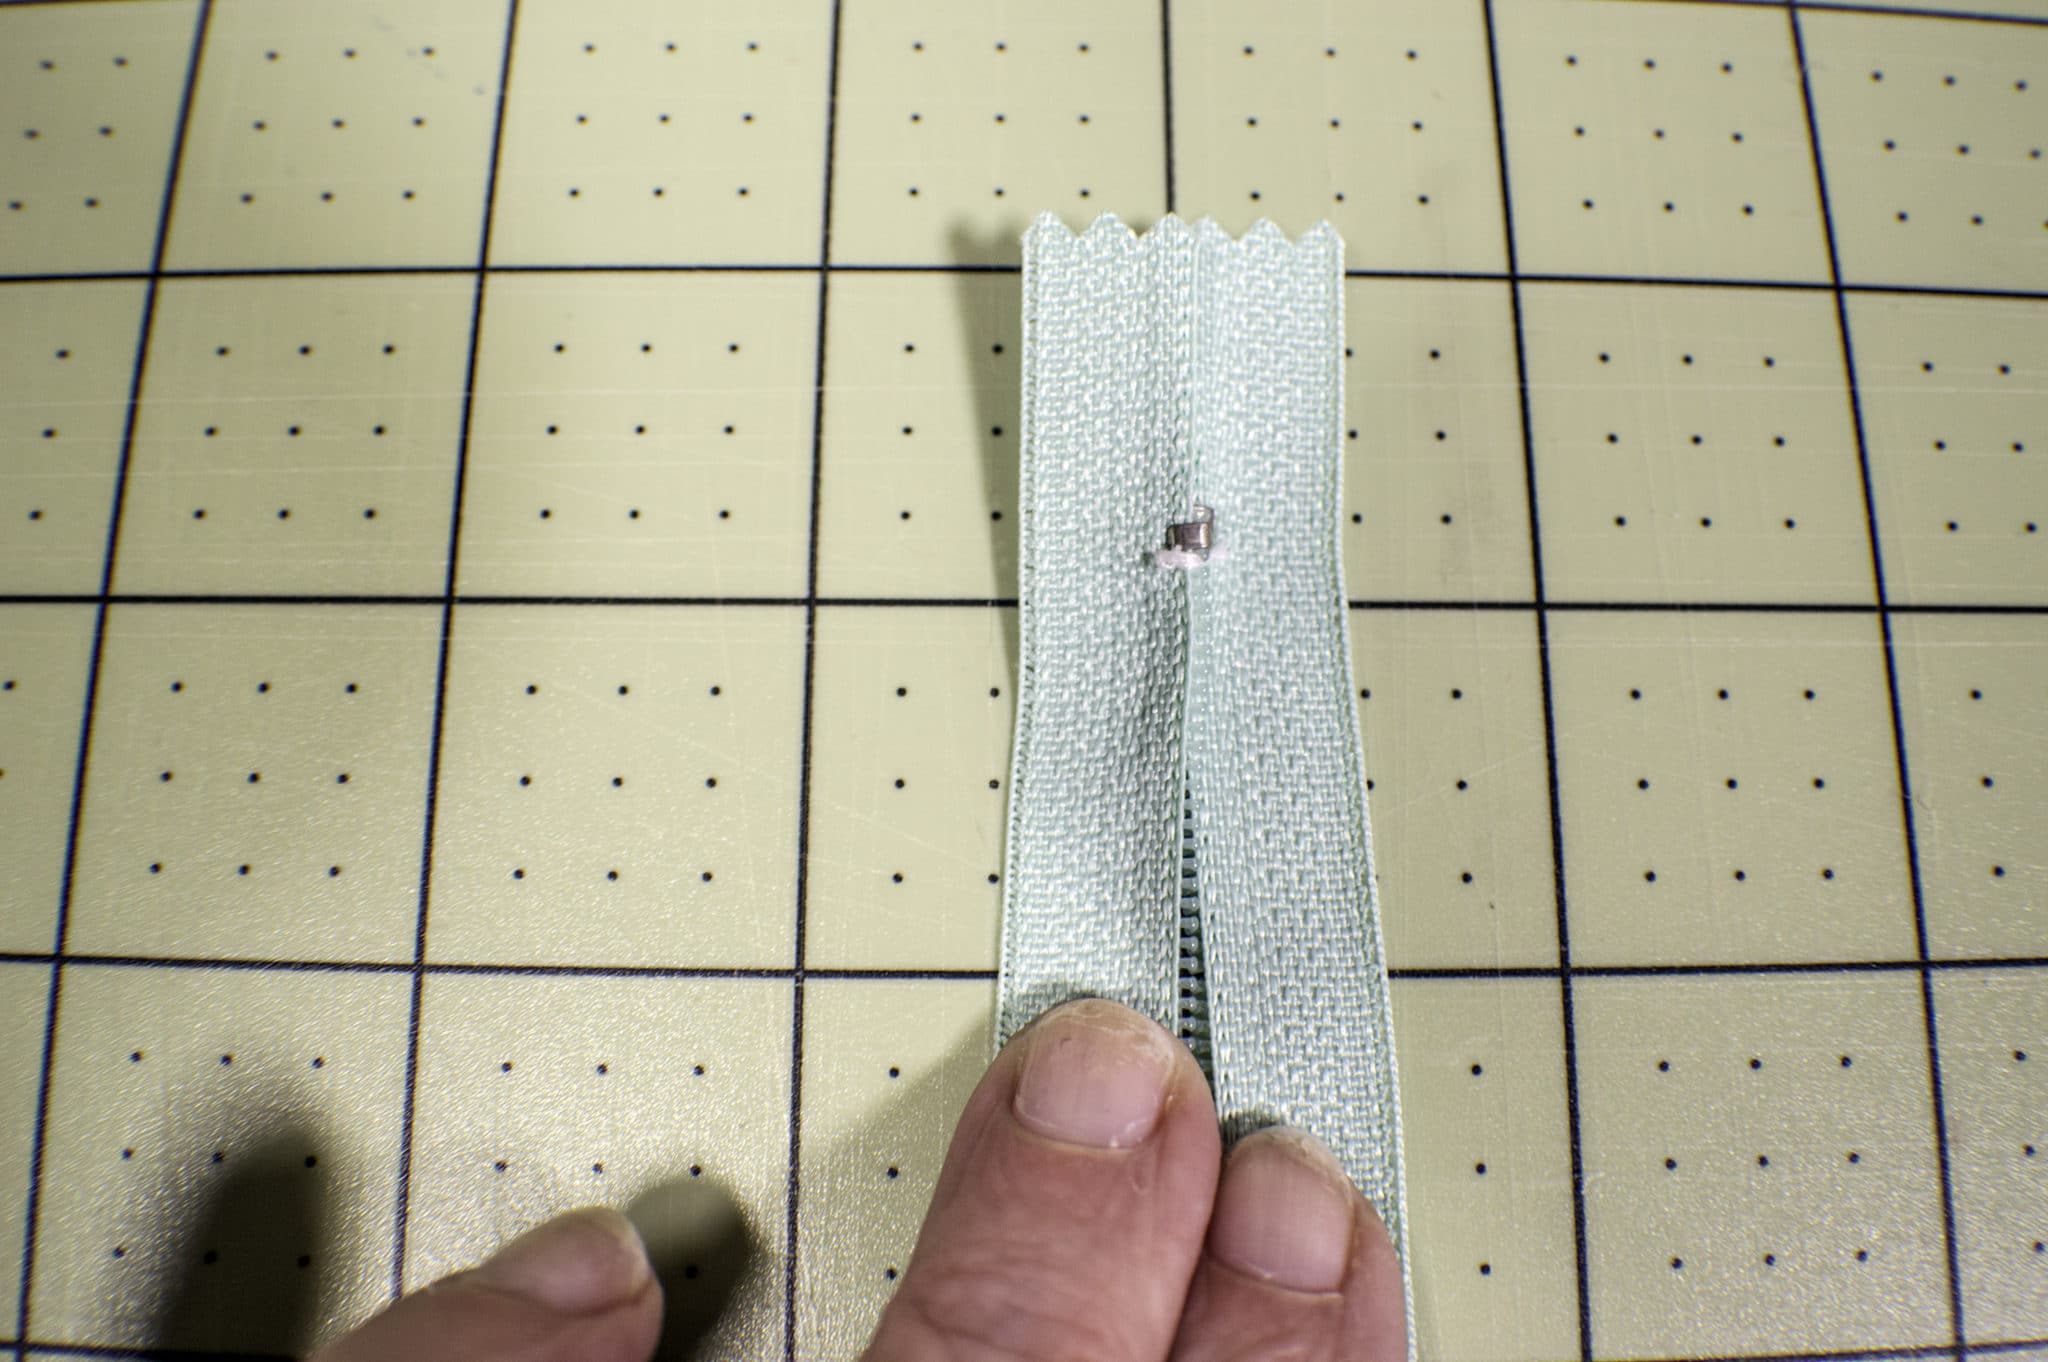
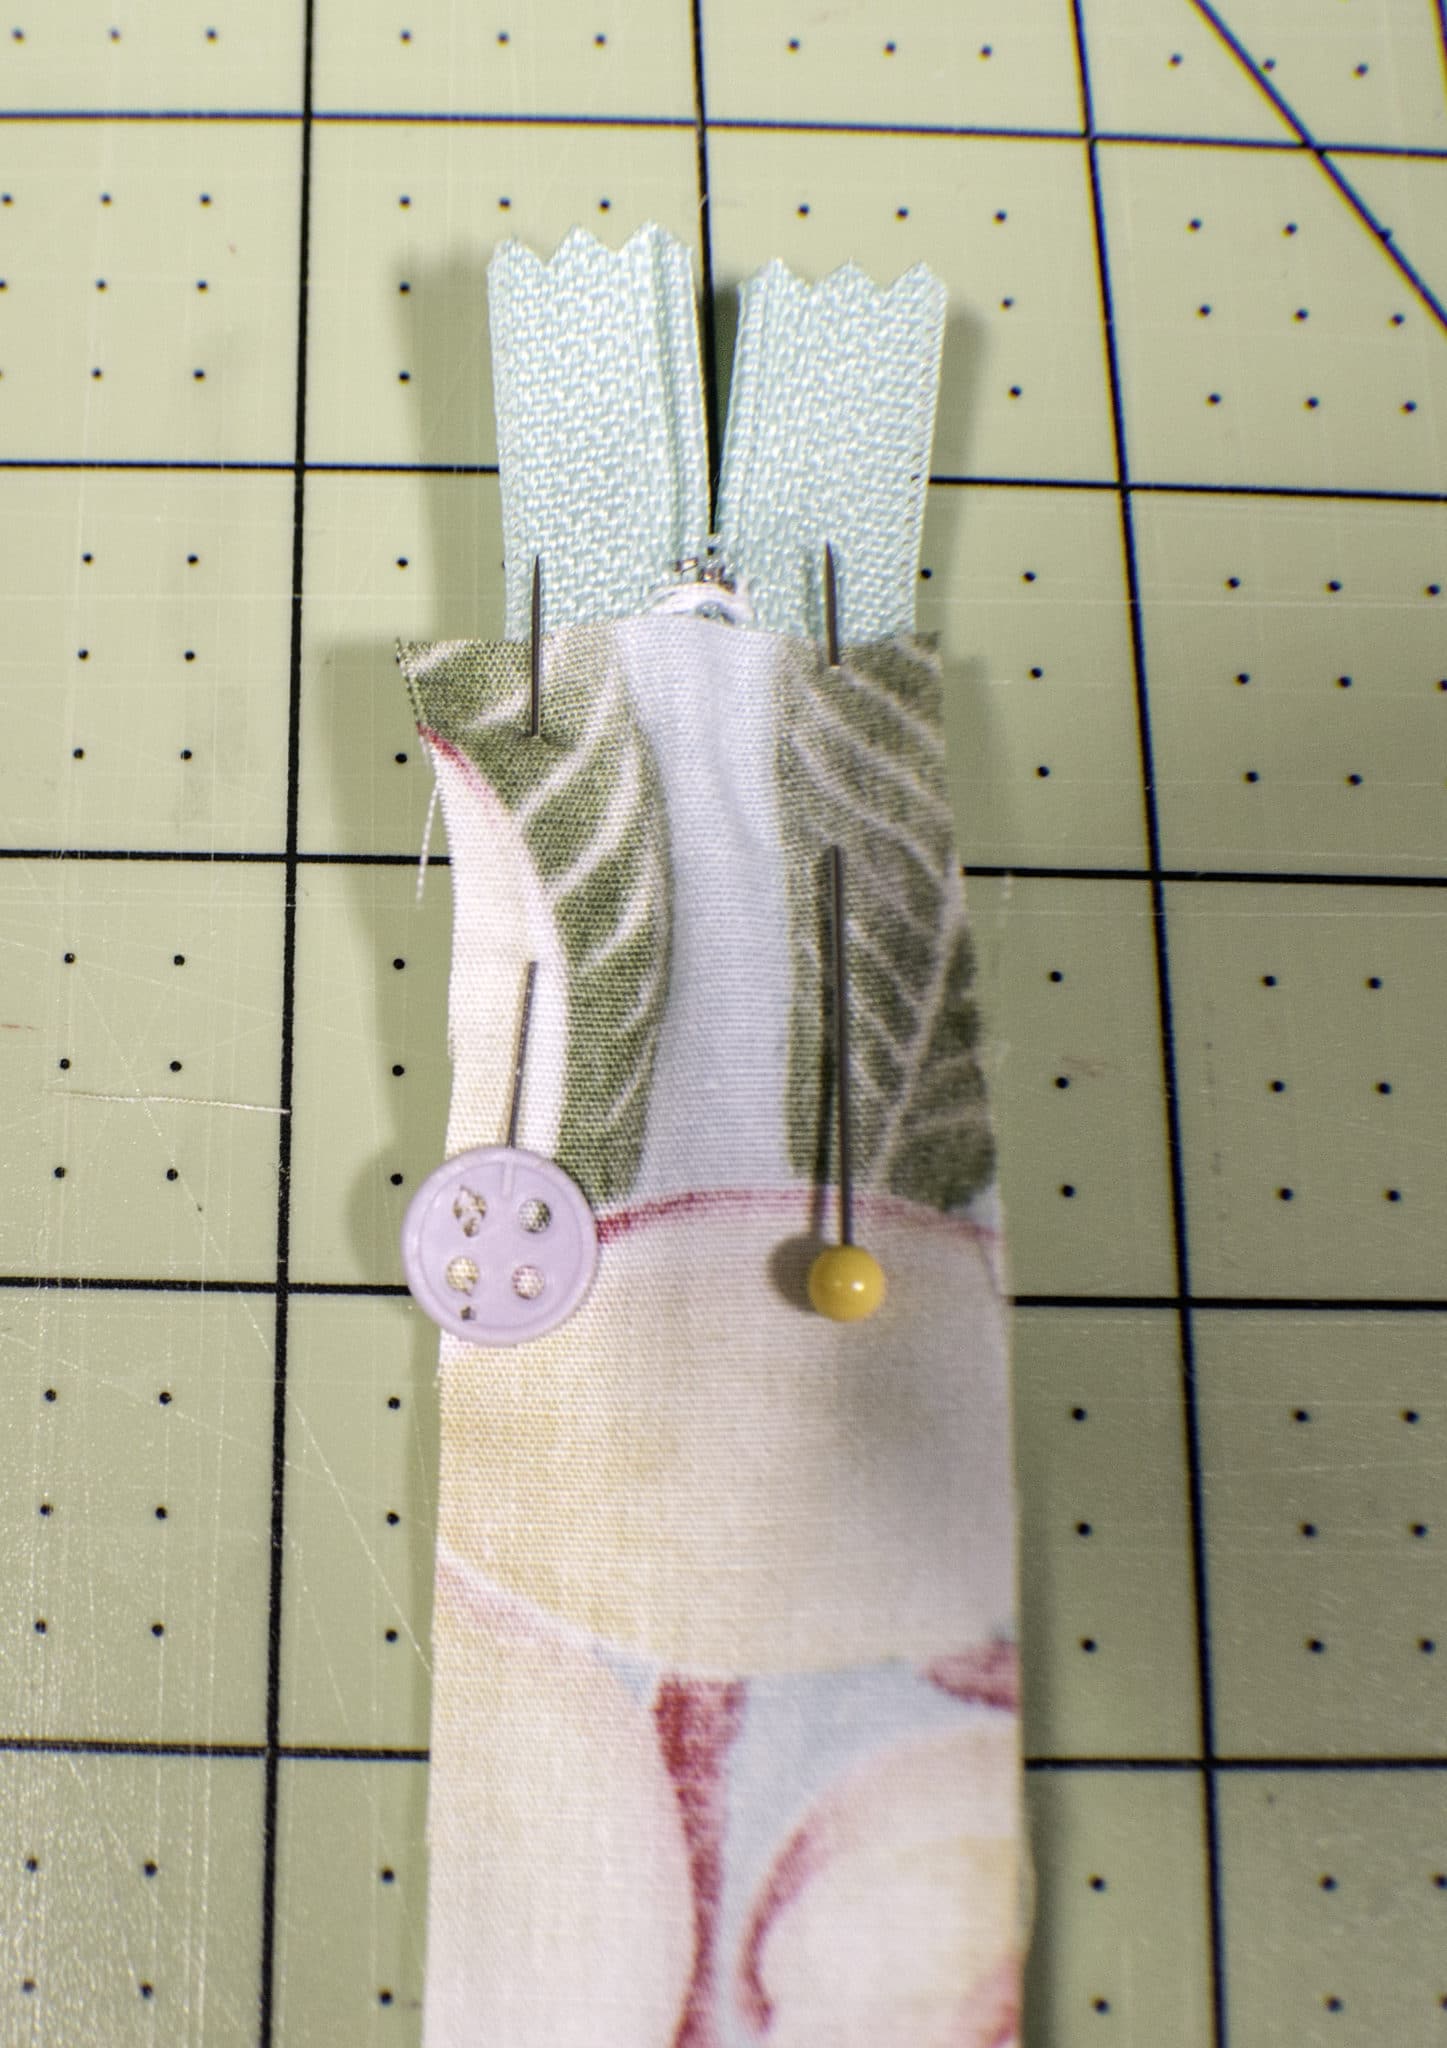
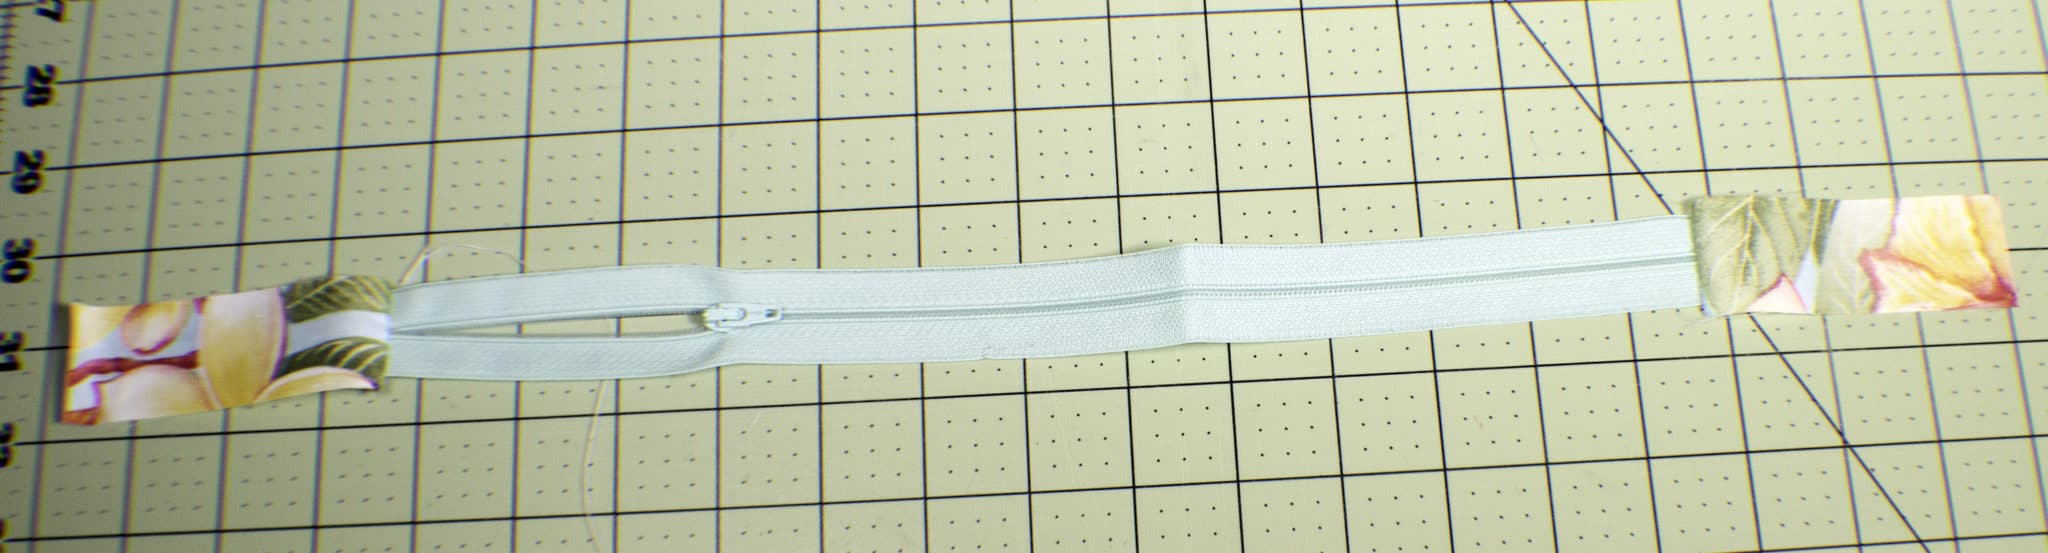
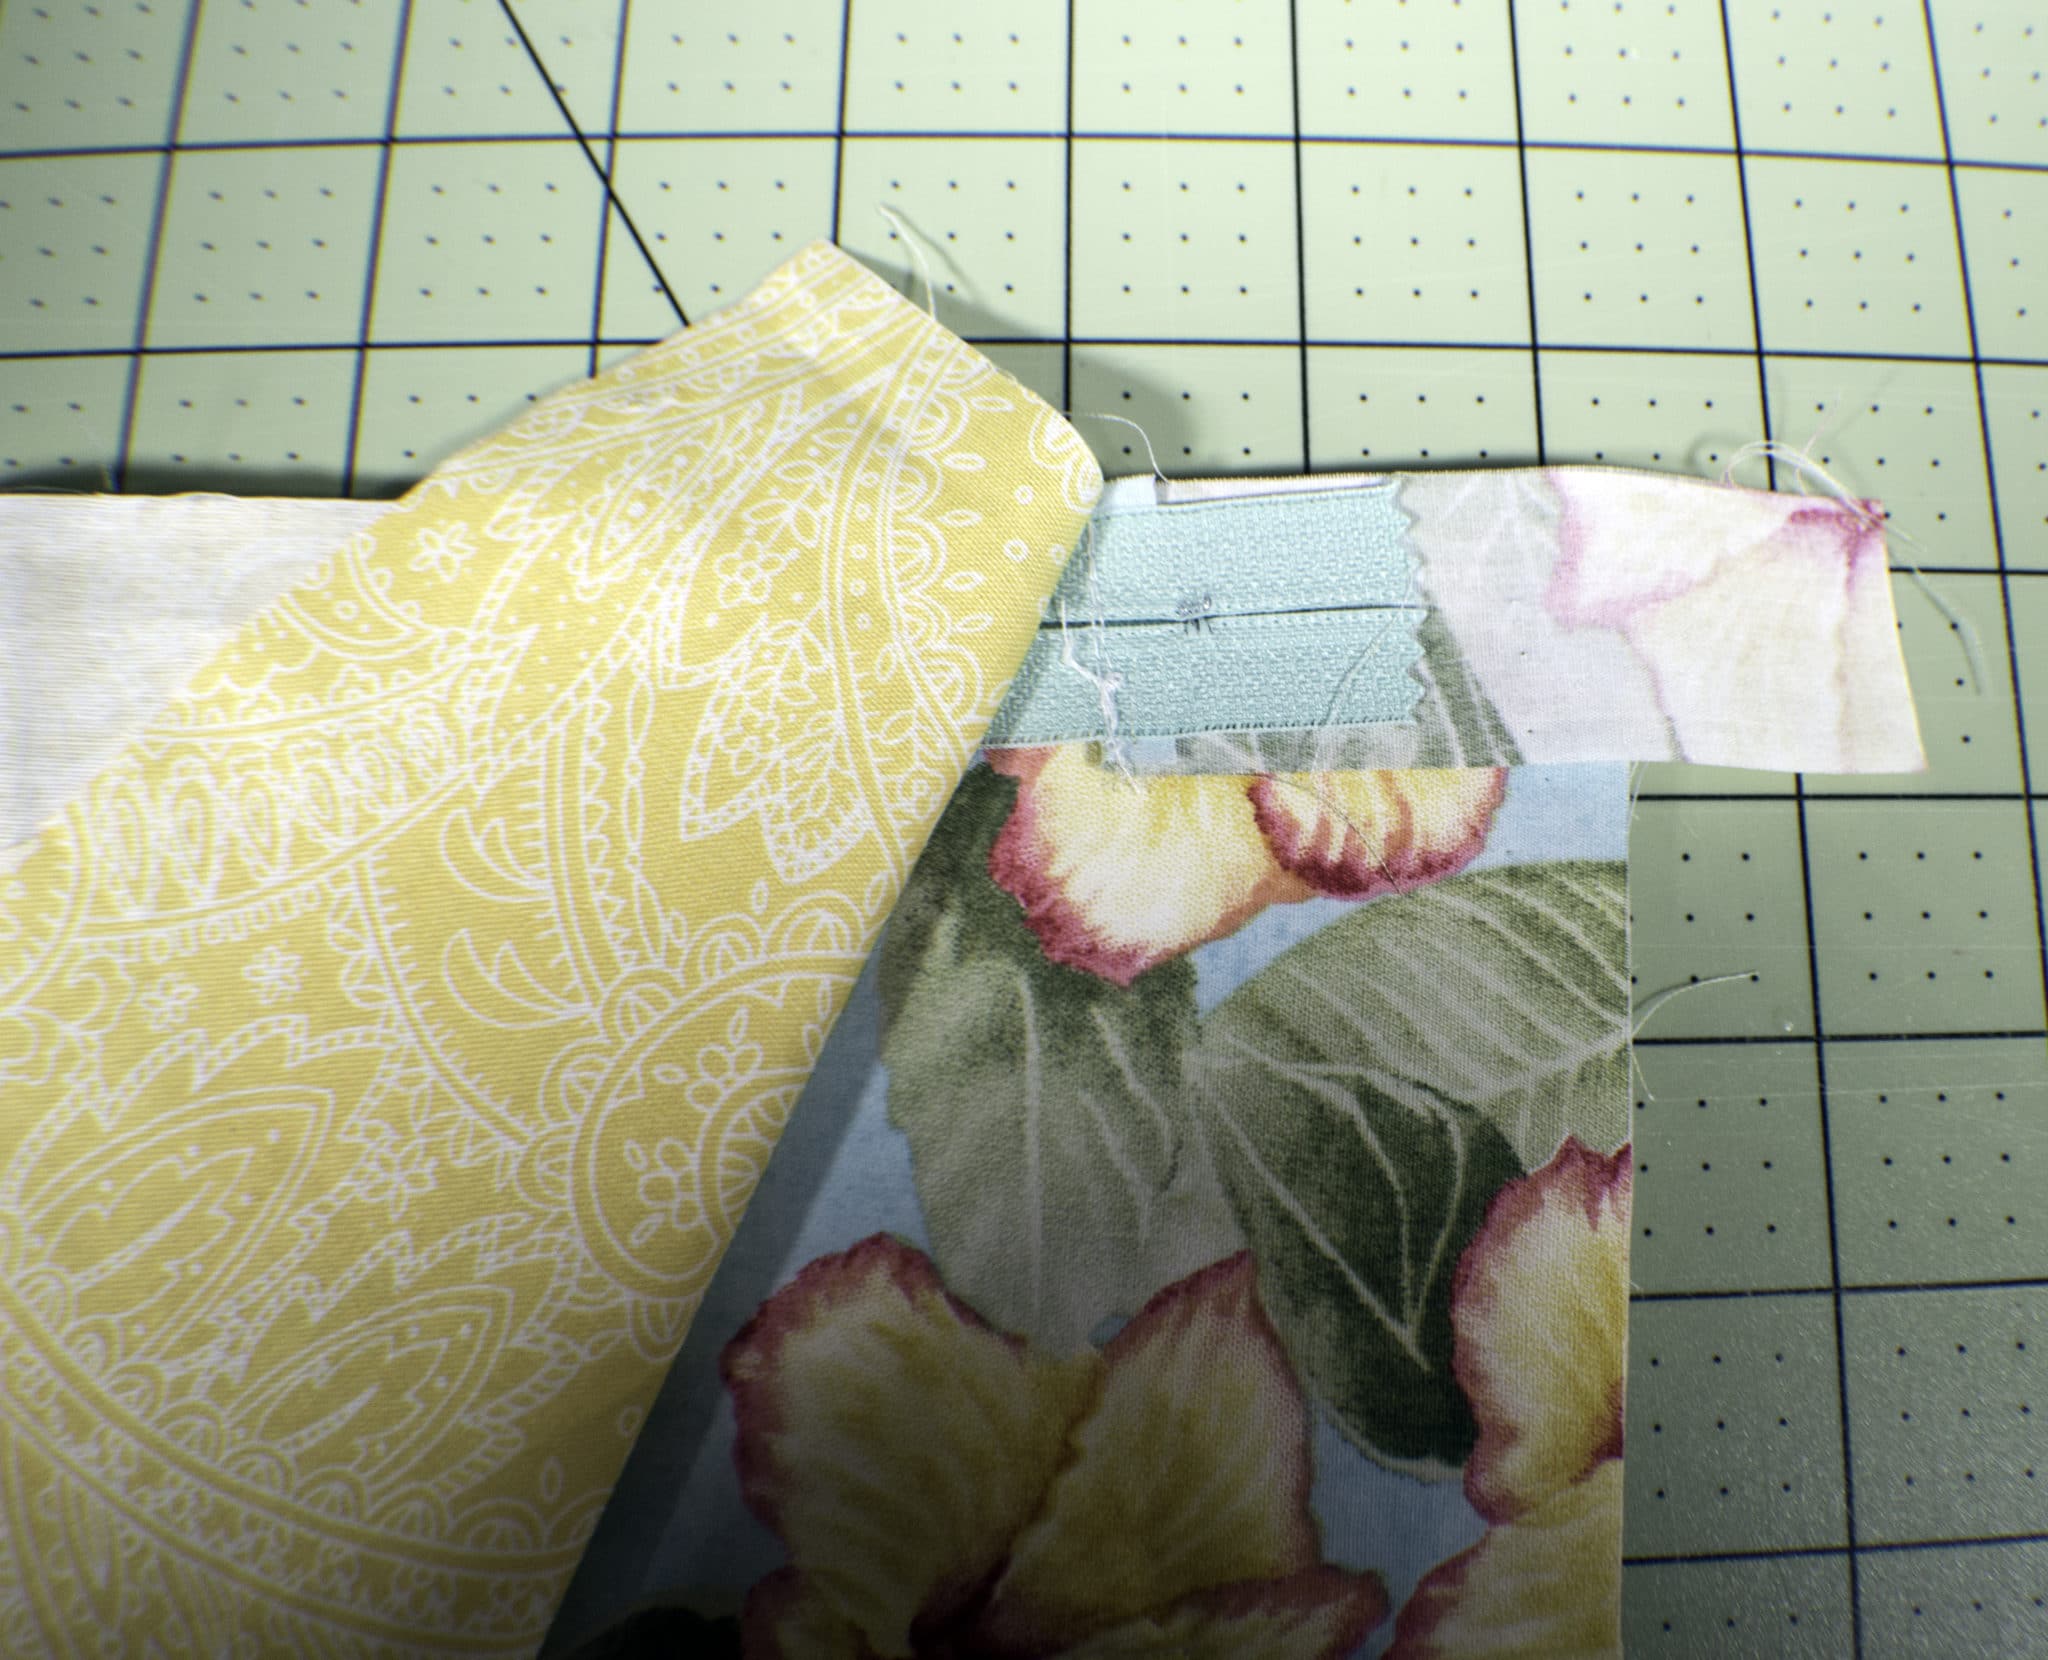
Step 3: add the zipper tabs
Add the zipper tabs to the ends of the zipper. If you have never added zipper tabs the process is quite easy. For this project, because the zipper tabs will be sewn into the body of the closet safe you will not have to worry about the sides. You can leave them raw. First tack the pull ends together. Then, simply lay the tab right sides together with each end of the zipper so that the tab is laying on the zipper. Sew the tabs across the short ends. Make sure that you do not sew over the stops of the zipper or you will break your needle. Fold the tab so that it is right side out and press. You have now added the zipper tabs to your zipper.
I added zipper tabs because my zipper was not quite long enough for this project and I wanted to make sure that the zipper laid flat while sewing it to the body.
Step 4: add the center zipper
Add the first zipper. This is the zipper without the zipper tabs. This zipper will be added to the center of the safe and will serve as the place to put your valuables. You will create a pocket from the lining fabric. First you will fuse interfacing to the pocket piece. Measure 6″ up from the bottom of one of the outer safe pieces and draw a line across the piece using an erasable pen like Frixion. Frixion ink disappears with the use of heat so when you press the safe it will disappear. This is one of my favorite sewing hacks and you can get it at Amazon by clicking on the link.
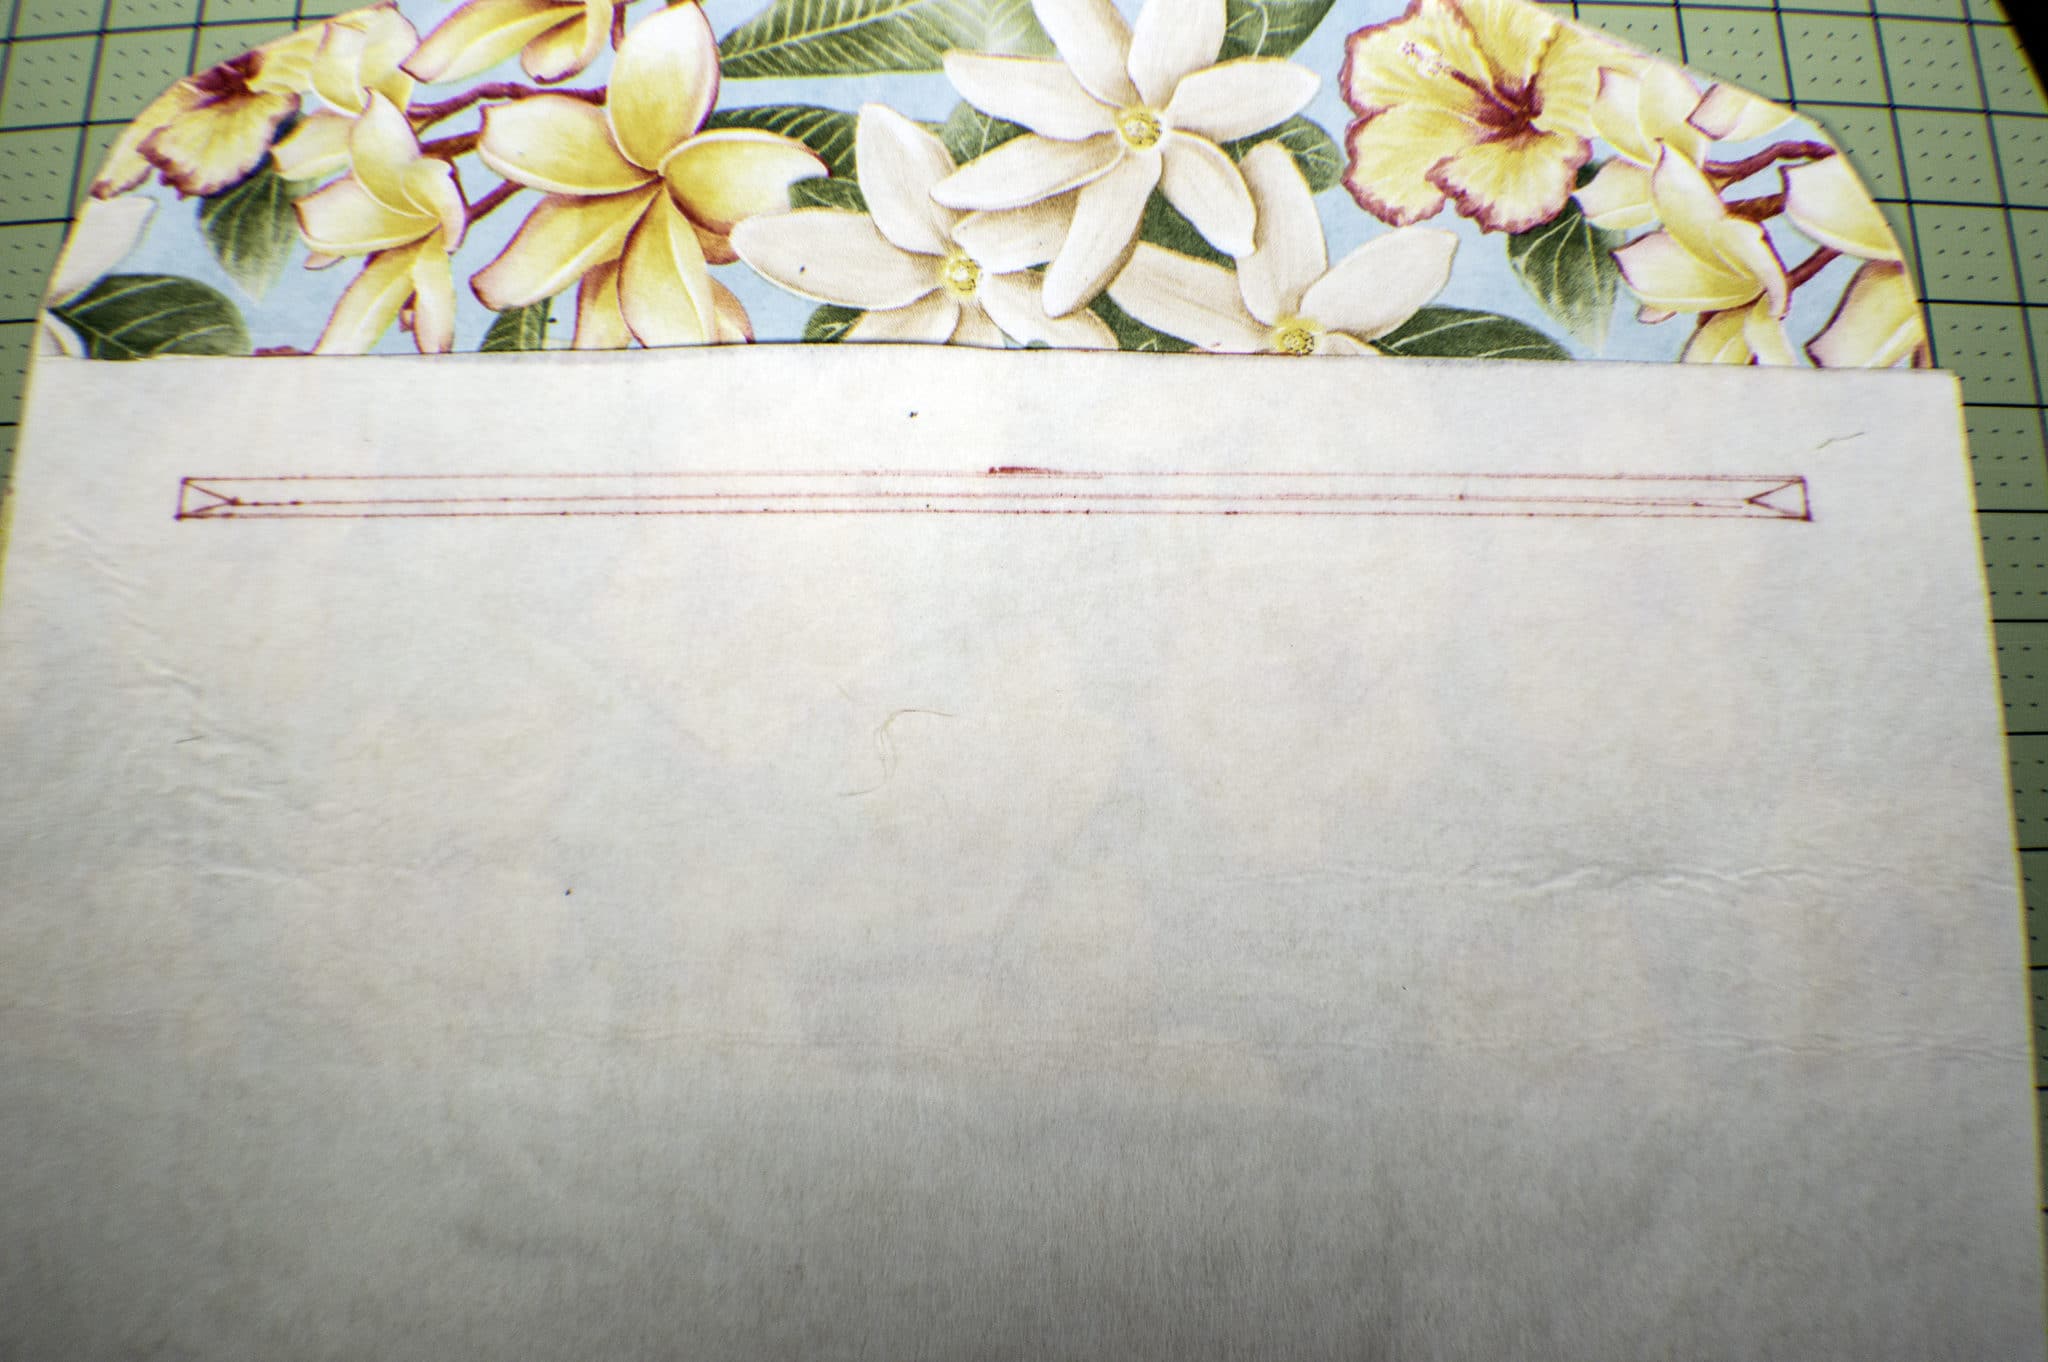
Step 5: draw the opening
On the reverse side of the pocket piece on the interfacing draw a box 1″ down from the top and in the center of the rectangular piece that measures 3/8″ x 14″. Measure in 1/2″ from the short ends and draw a triangle. Then connect the two triangles with a straight line. Line up the raw edge of the pocket piece with the line you previously drew on the outer safe piece. Pin. These pieces will be right sides together. Sew a straight seam all the way around the box
Step 6: open the opening
Using a seam ripper or a small pair of scissors cut a slit along the center line until you get to the points of the triangles. Stop and cut the legs of the triangles without cutting through the stitching. Push the pocket piece through the hole you just created and press.
Step 7: Add the zipper
Place the zipper in the center of the hole and either pin or use basting tape. I like to use basting tape. Using a zipper foot sew around the zipper close to the edge of the fabric. The zipper is now installed.
Step 8: make the pocket
Turn the piece to the wrong side and fold up the pocket piece so the bottom meets the top and pin. Sew around the three raw edges of the pocket piece making sure not to catch the outer fabric. The pocket is now complete.
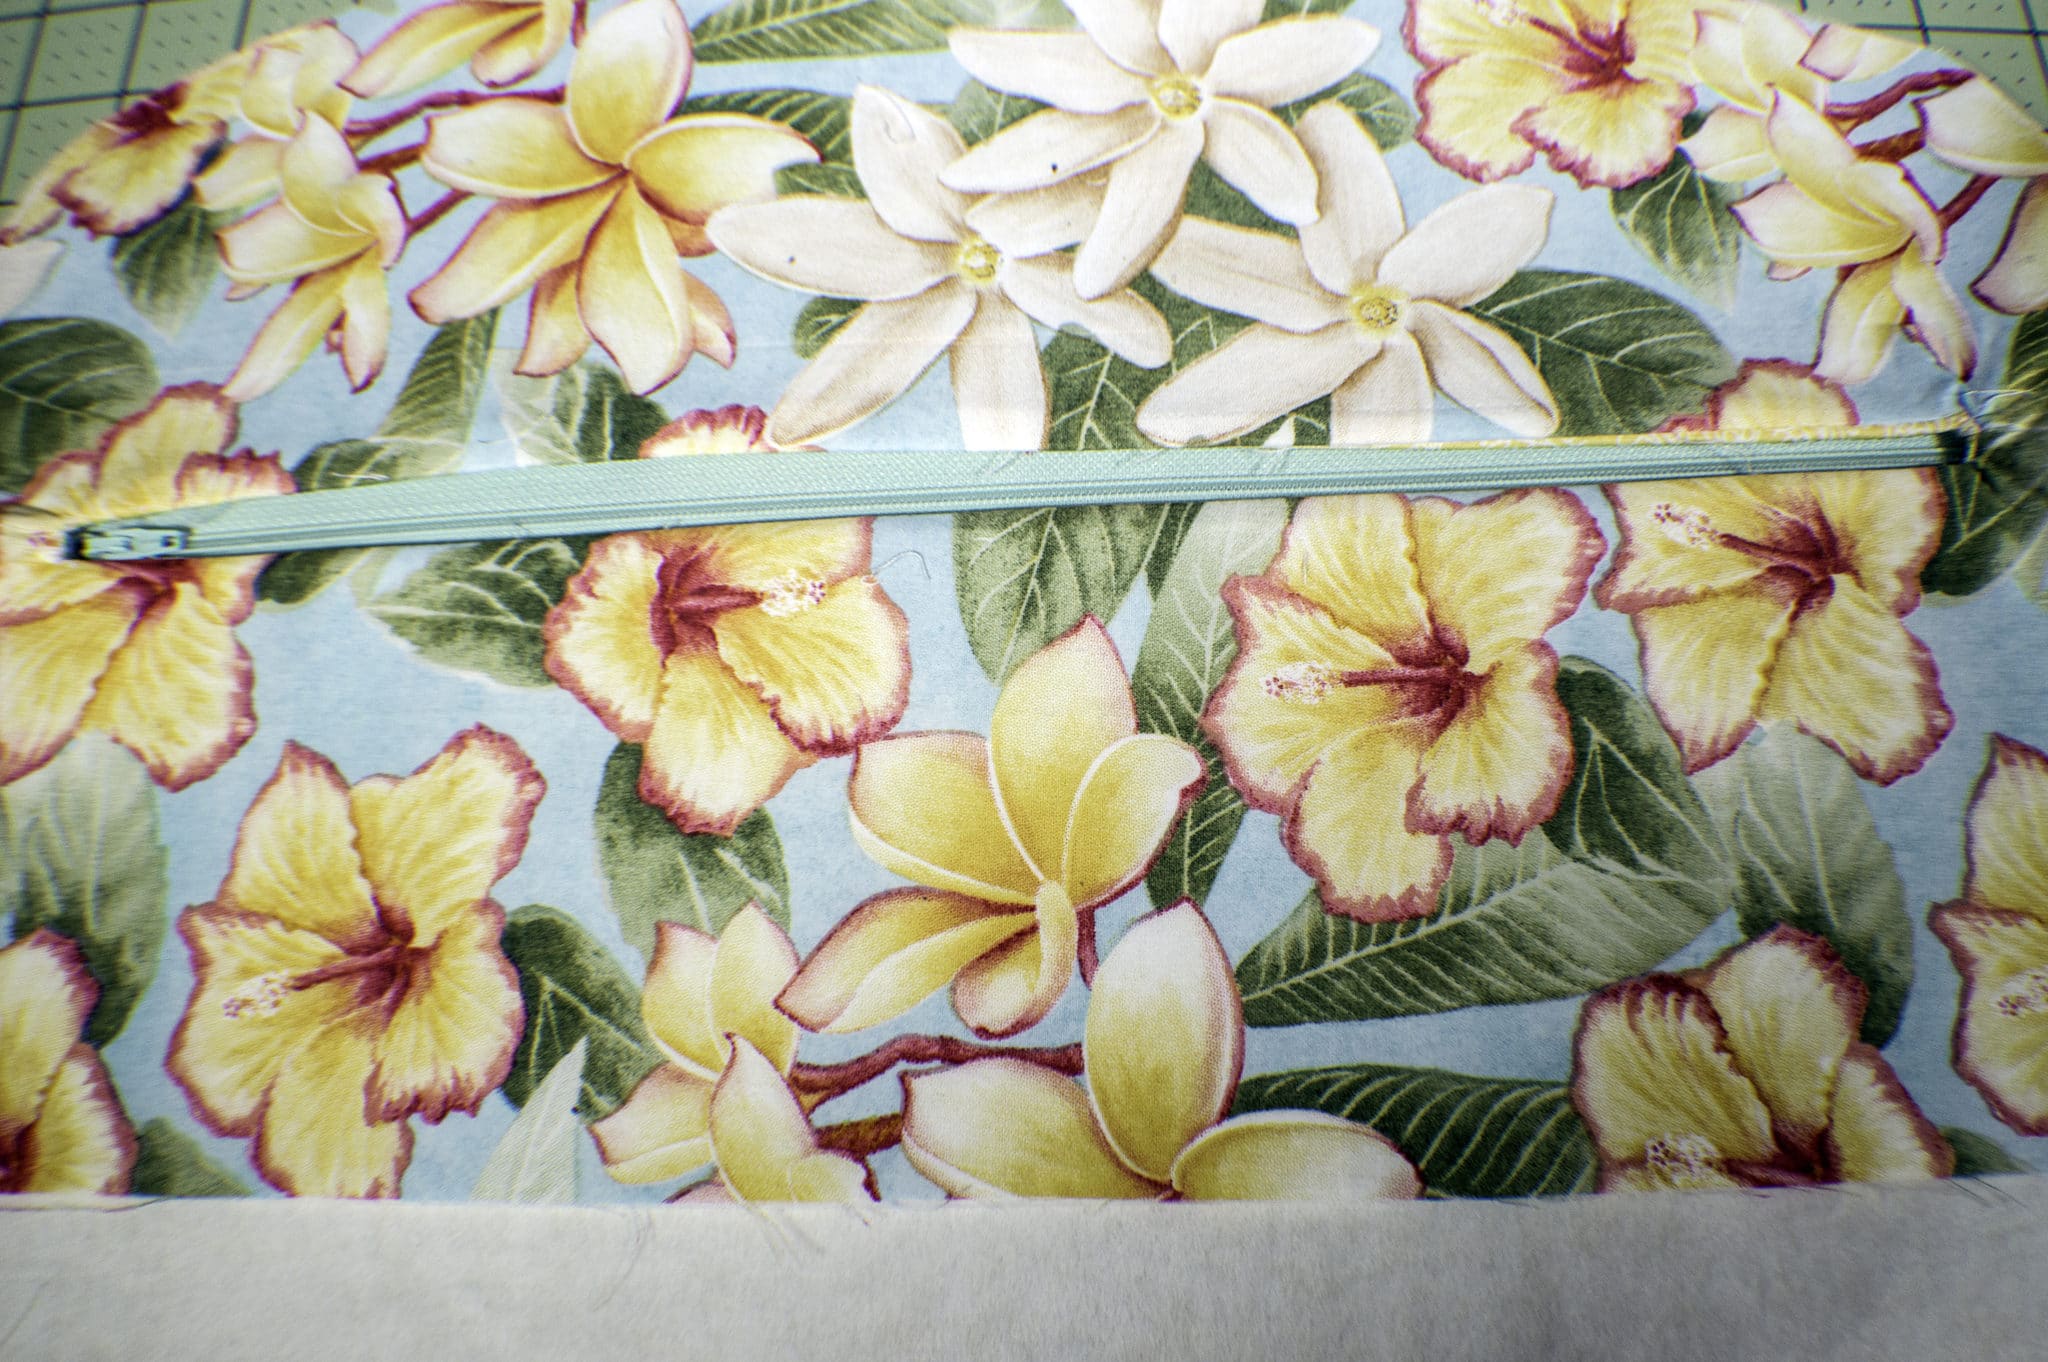
Step 9: add the bottom zipper
Add the bottom zipper that has the tabs. This can be done by laying the main fabric right side up on your table. Place the zipper right side down and the lining on top of the zipper right sides down so that it makes a zipper sandwich. Using a zipper foot sew the zipper close to the teeth. Repeat for the other side of the zipper. Top stitch along the right side of the zipper for a more professional look and to prevent the zipper from catching on the lining.
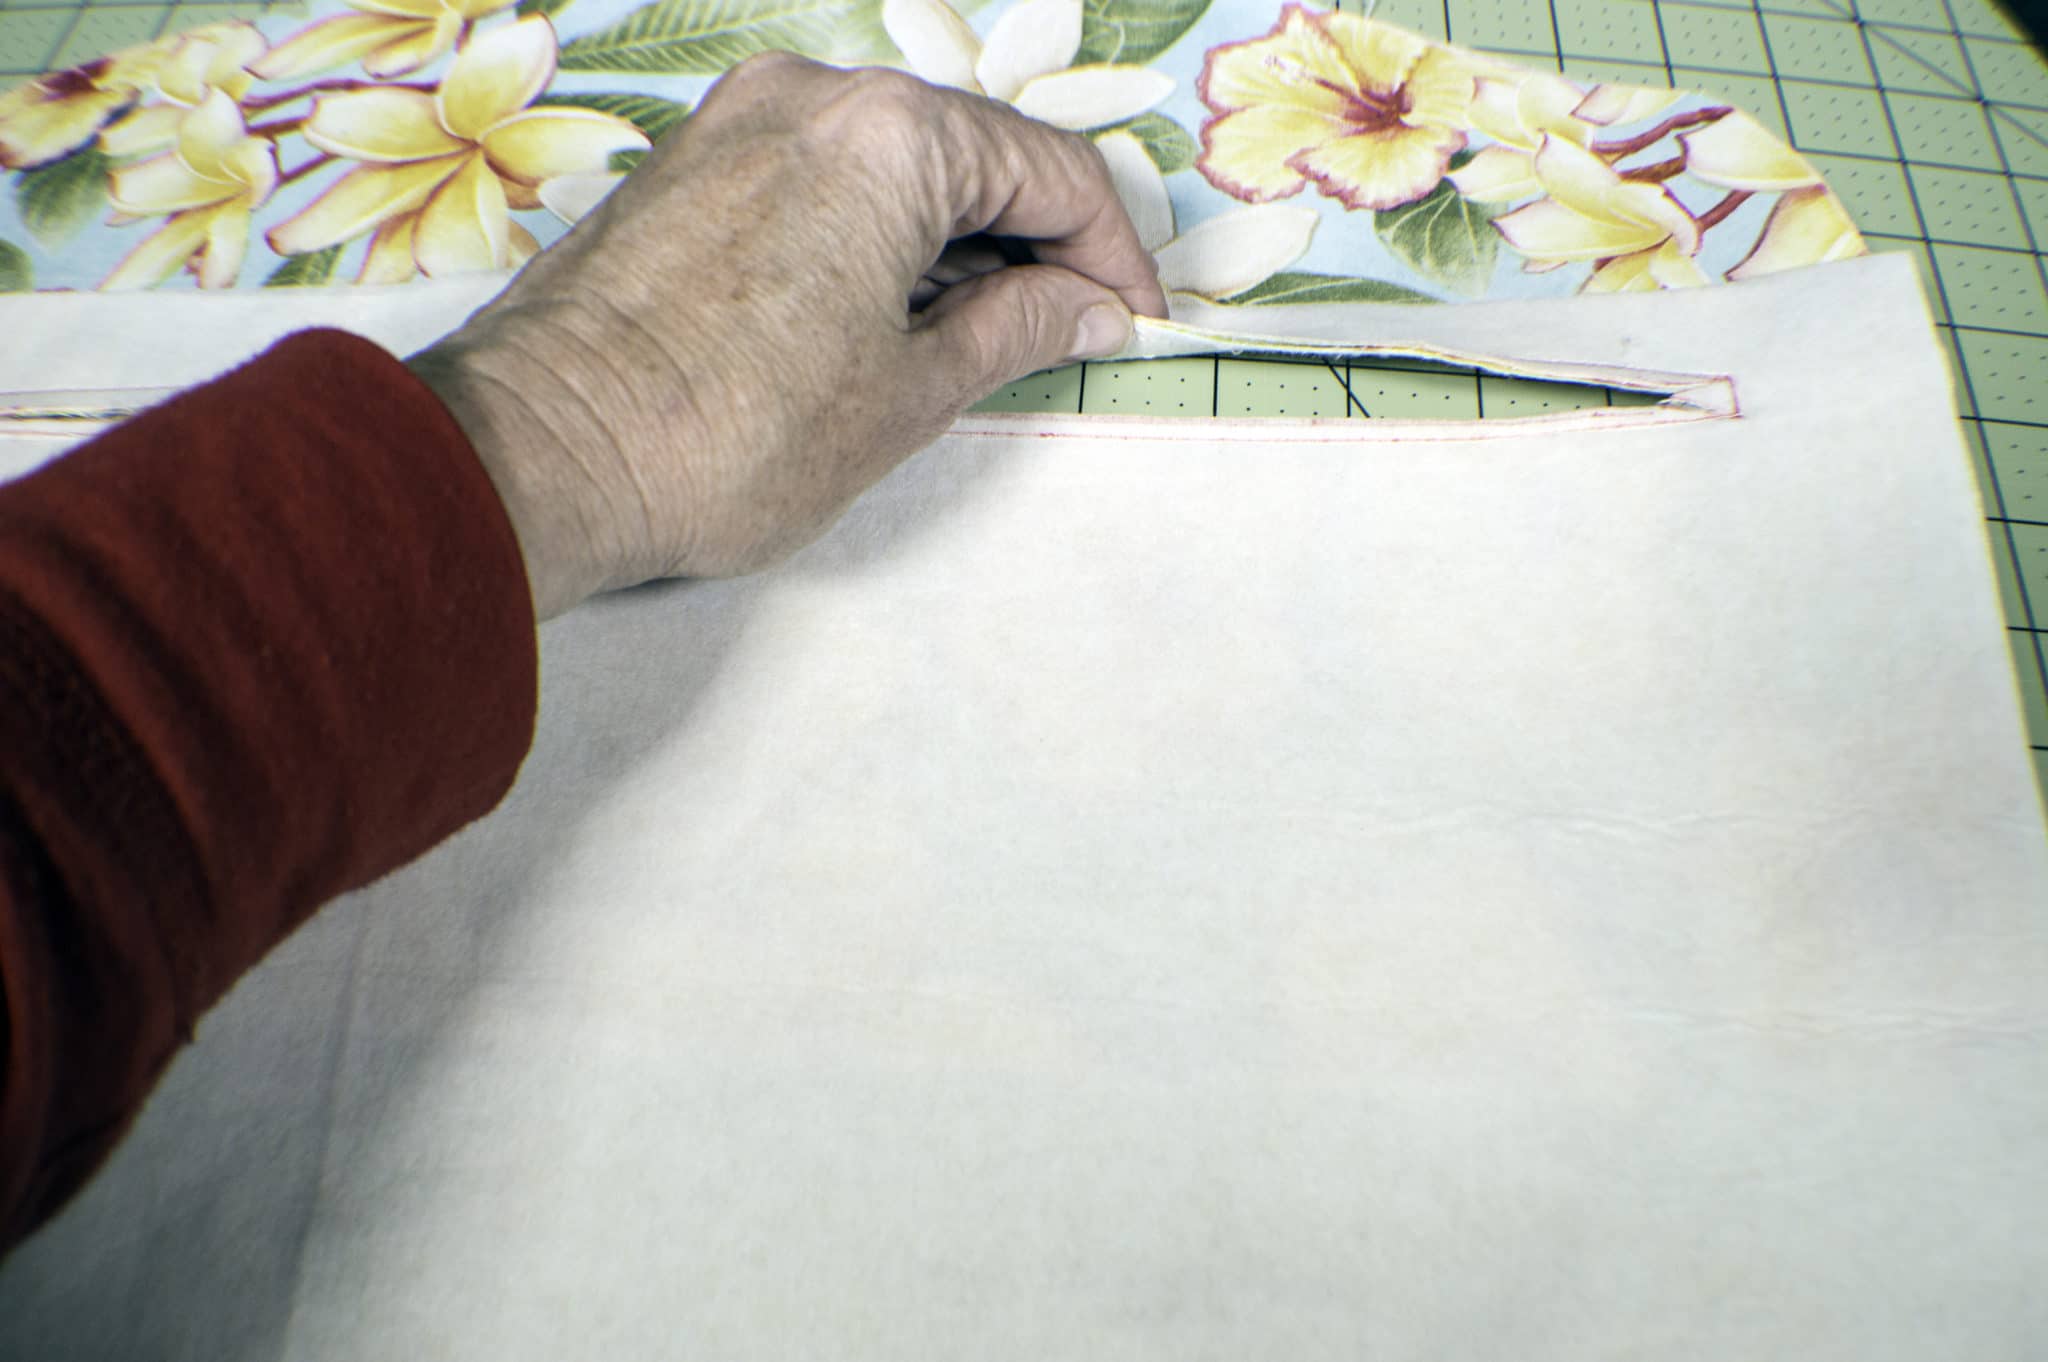
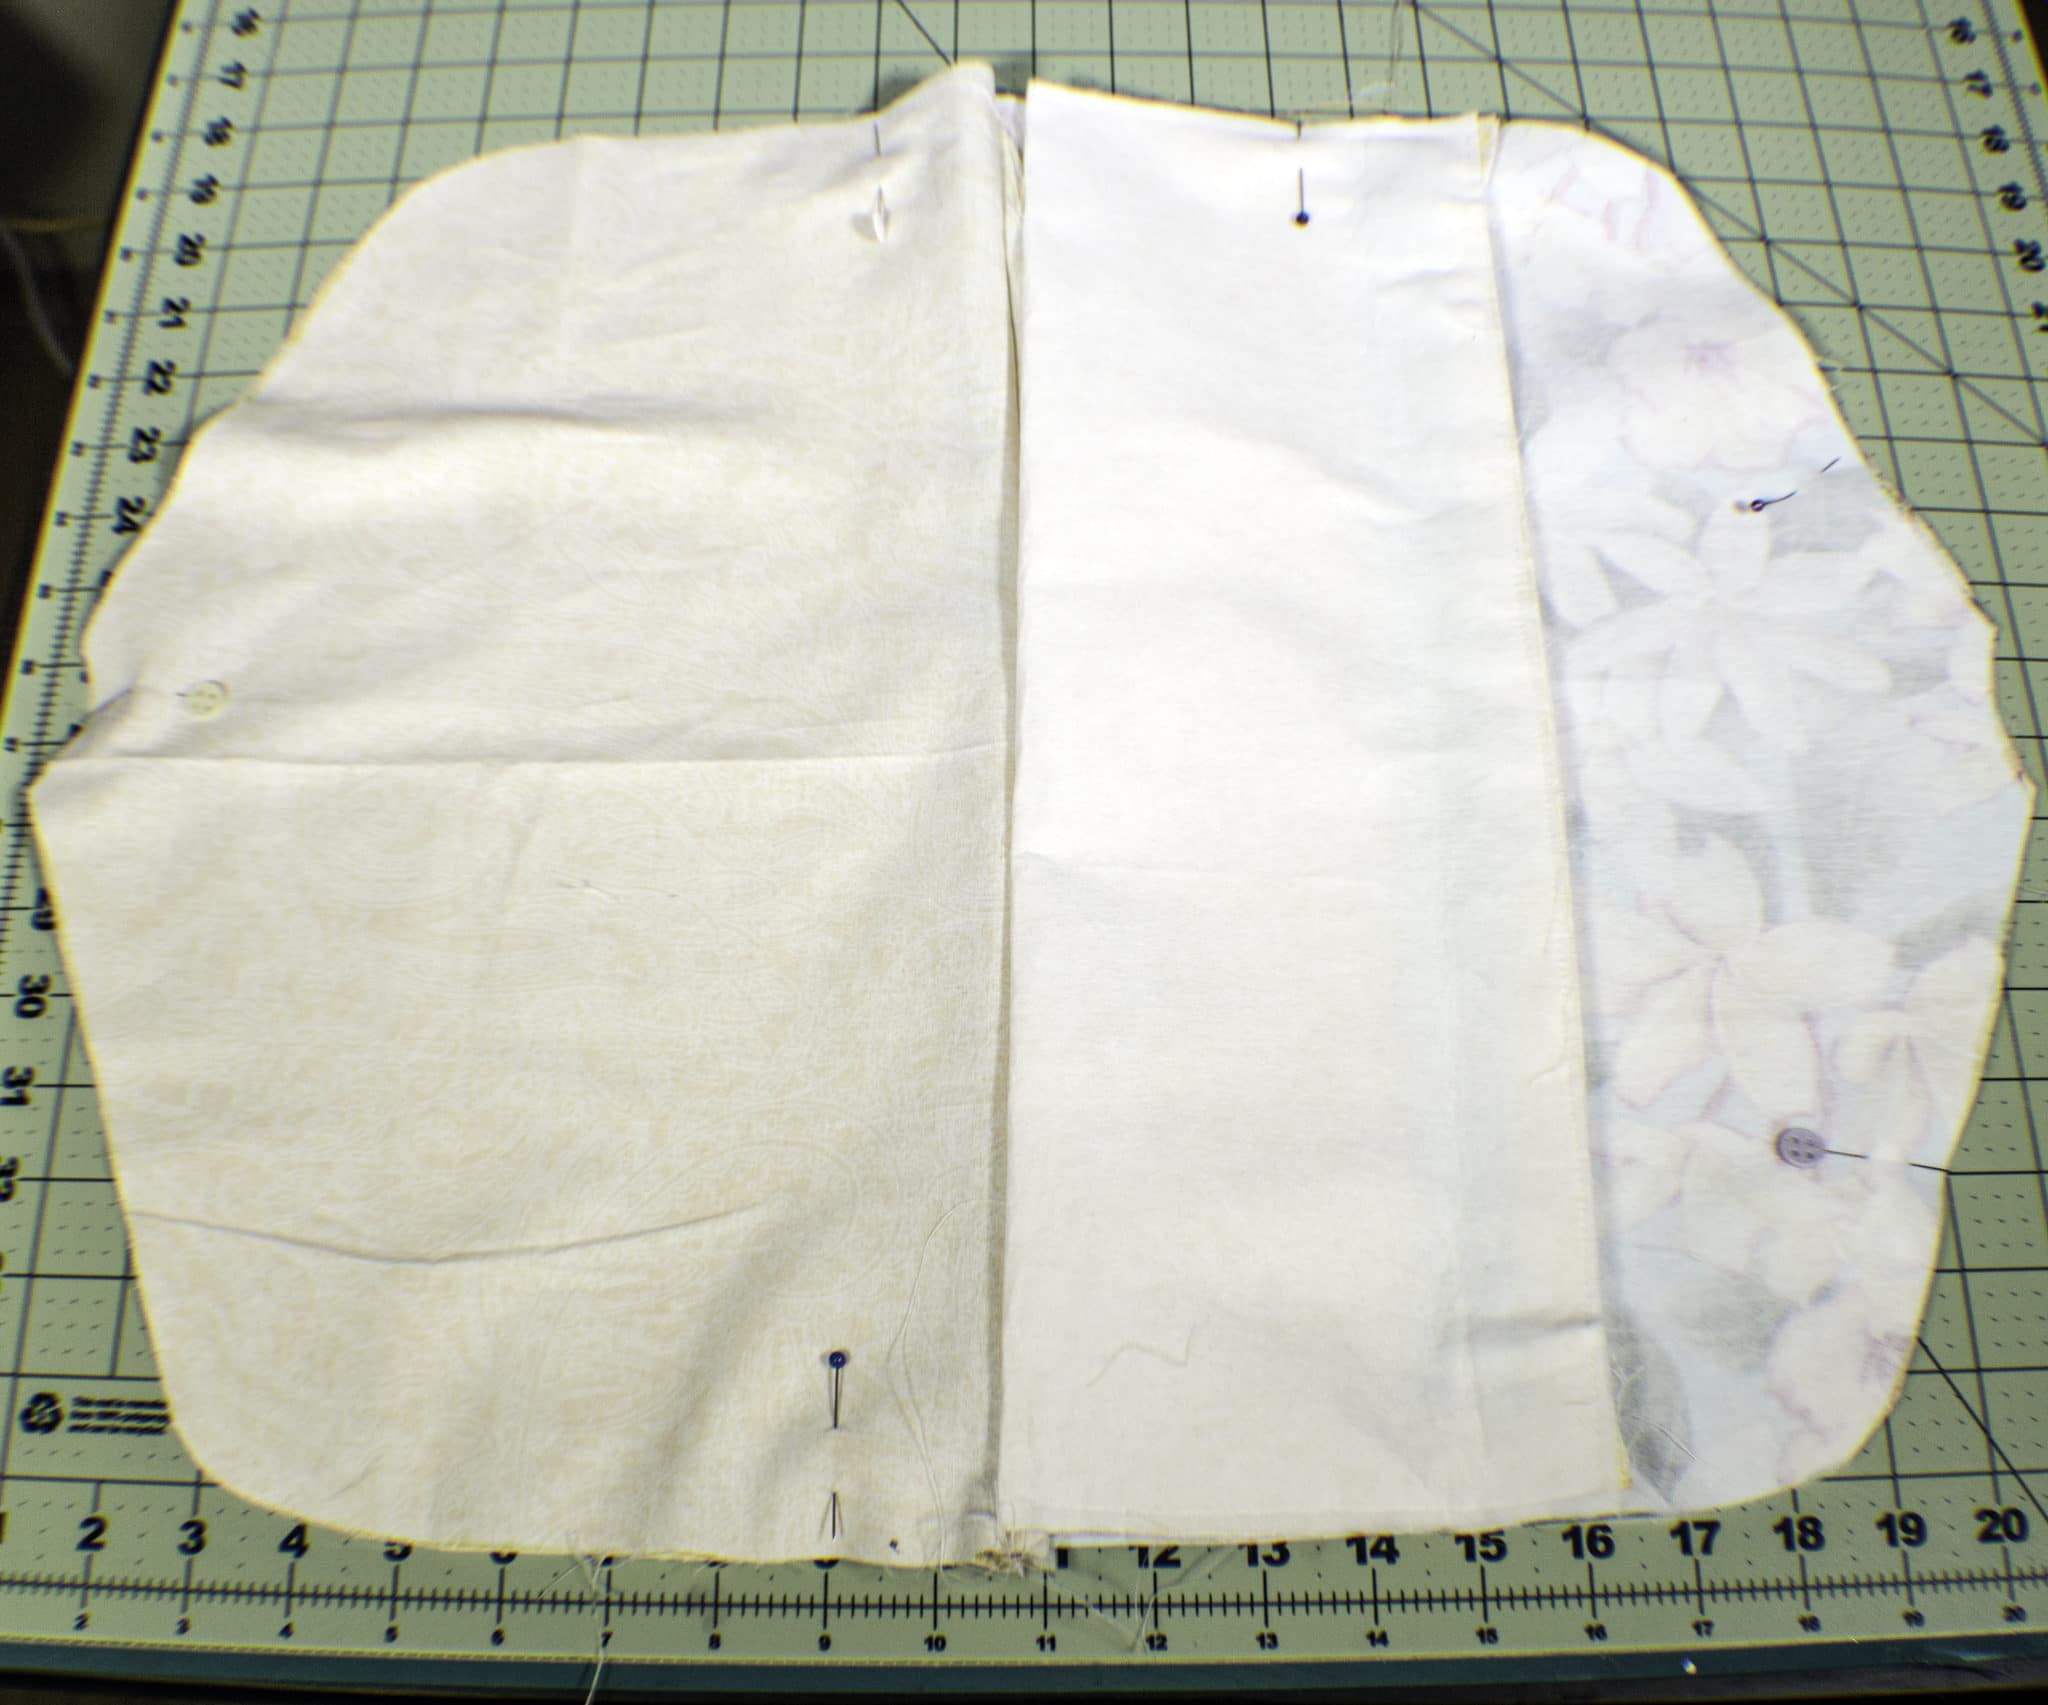
Step 10: Sew the sides
Unzip the bottom zipper. Pin the lining pieces right sides together and the outer pieces right sides together. Sew all the way around leaving the top curve and an opening in one side of the lining piece for turning. You should have two pieces separated by the bottom zipper.
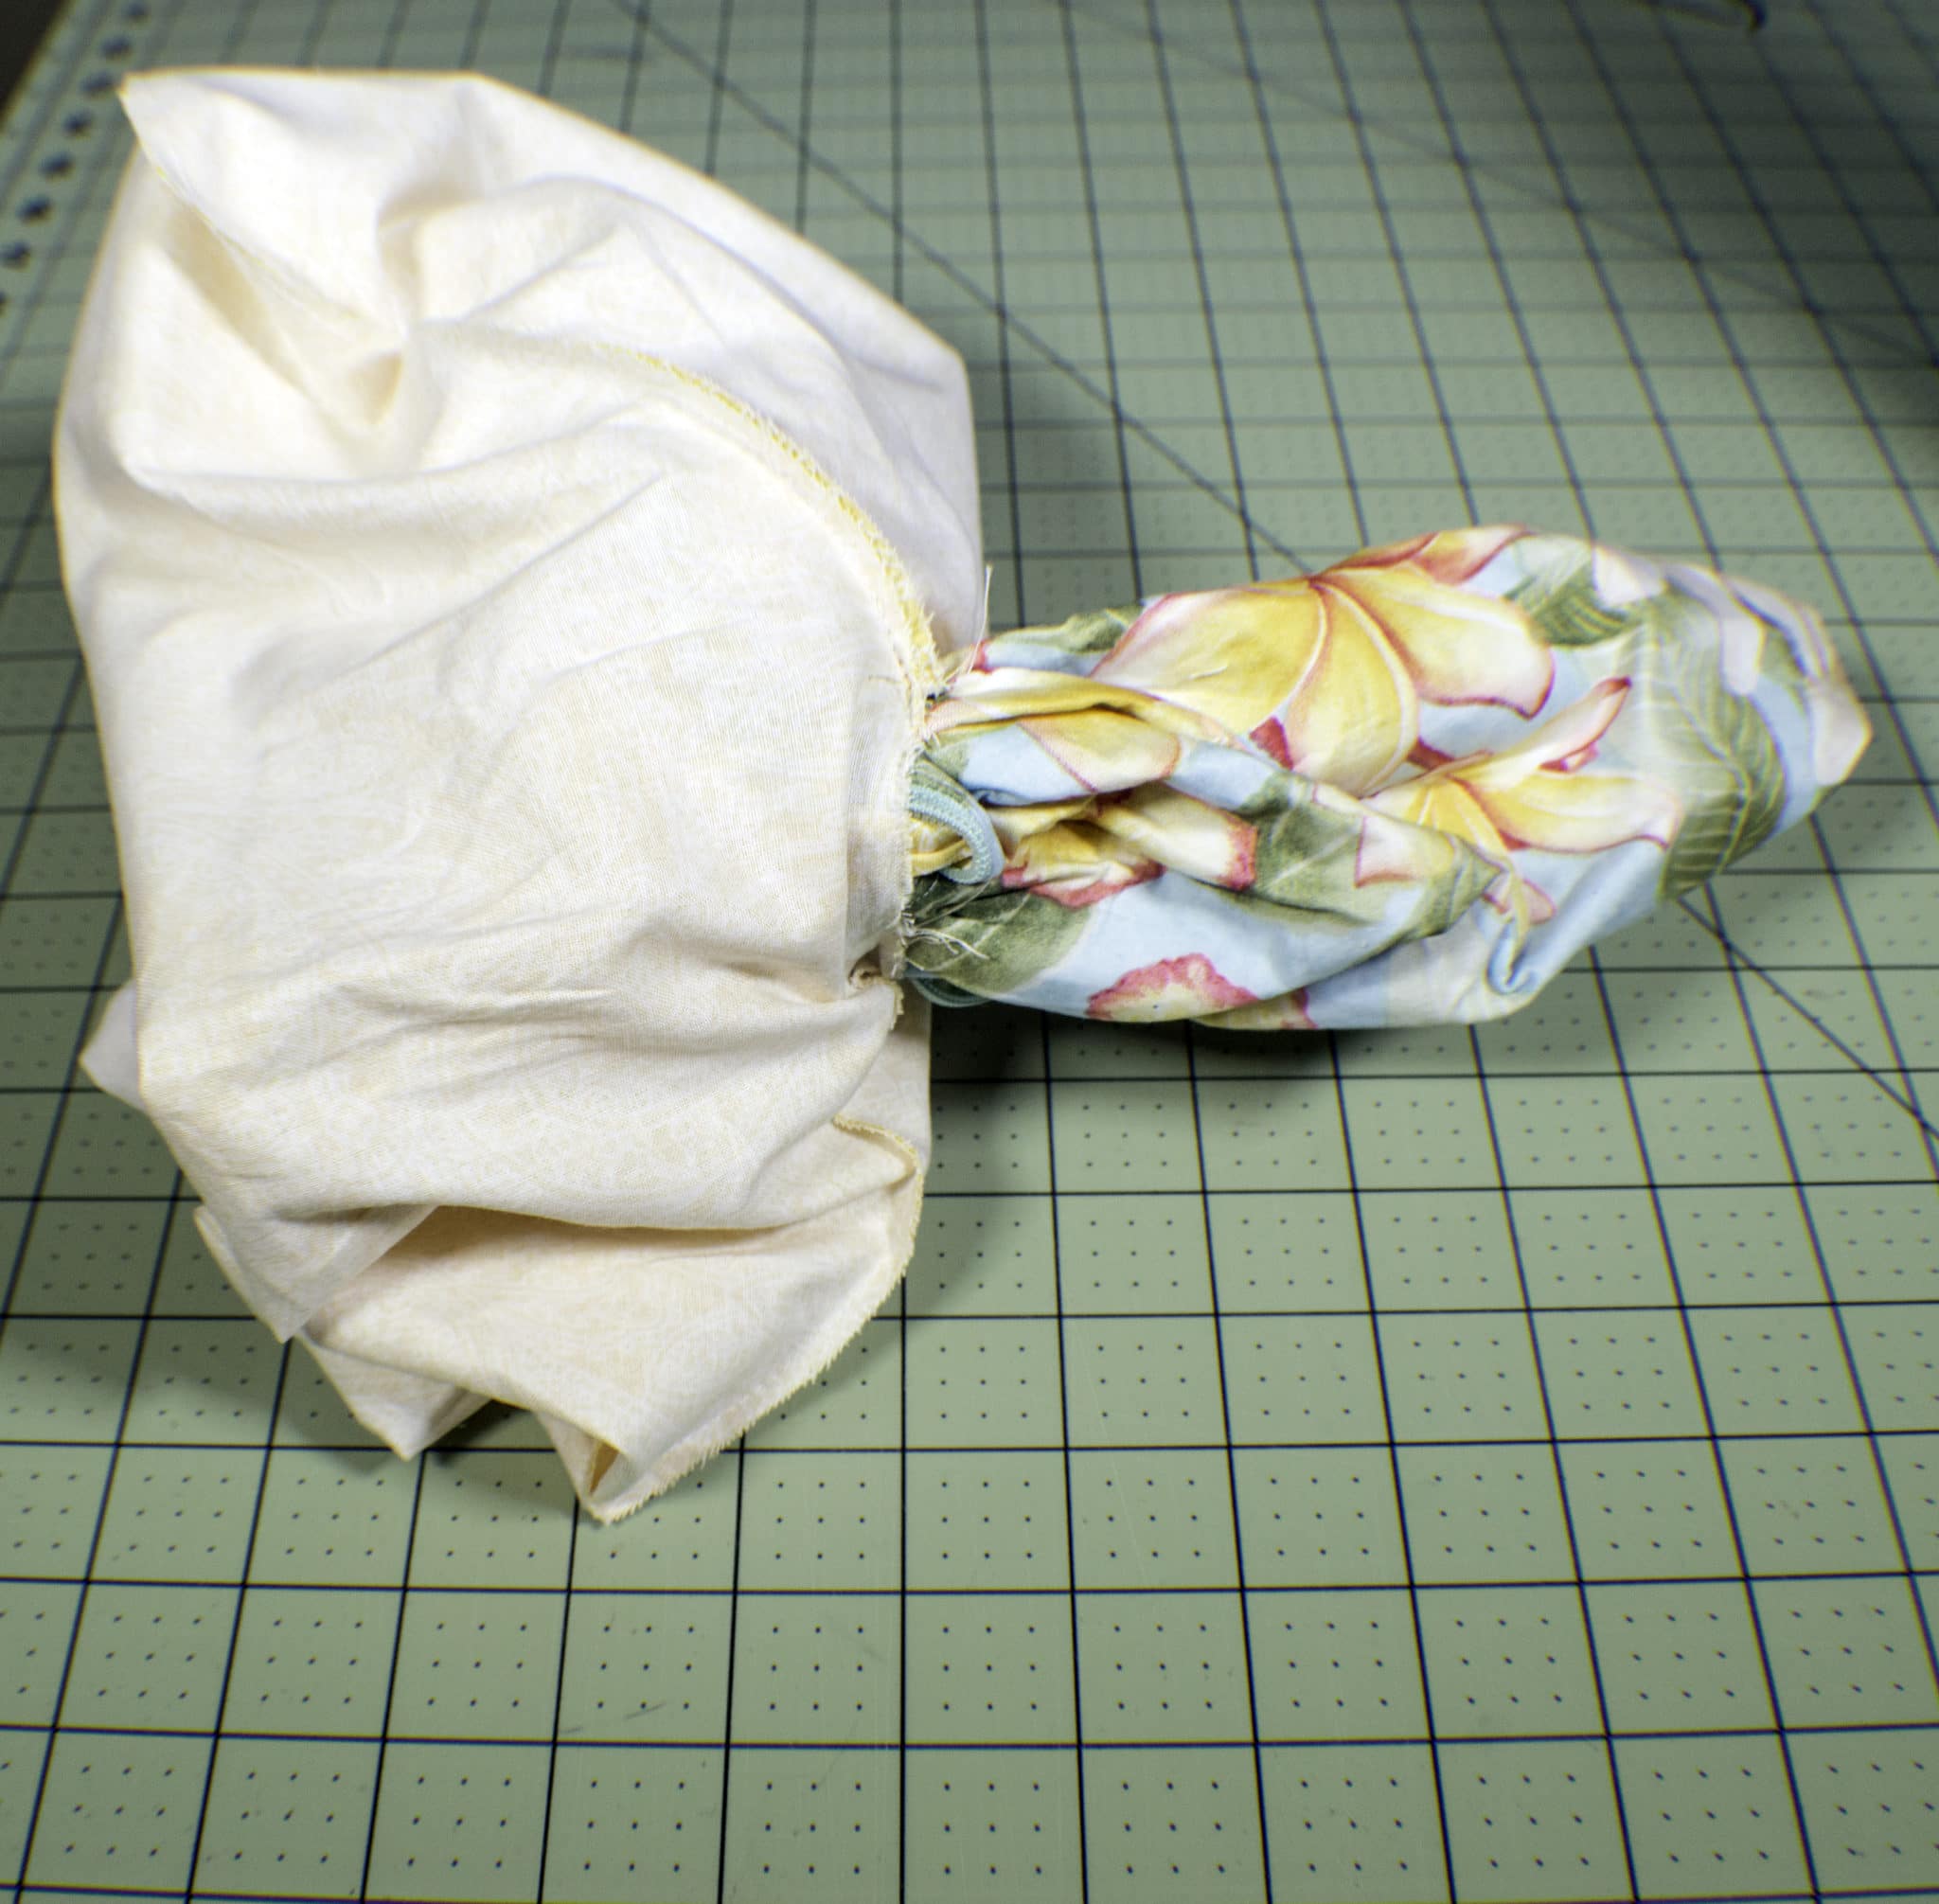
Step 11: turn the piece
Turn the safe through the open zipper and the opening in the lining. Push out all of the corners with a chopstick or knitting needle.
Step 12: close the top
Finish the top curve either with bias binding or turn the raw edges under and sew together using ladder stitch. I chose to fold the edges under and sew because the bias binding was a little too fidgity for this project but you could use bias binding if you choose.

Step 13: finish the Fabric Closet Safe
Press the entire safe and insert a hanger through the bottom zipper and up through the curved edge. Close the zipper and you have completed your fabric closet safe. You can hang it in your closet as is or under a piece of clothing to really conceal it. You can place items in the center pocket or through the bottom zipper.

I hope you have enjoyed this tutorial on how to make this hidden storage fabric closet safe. This is a fun and functional project that is easy to make. Feel free to let me know what you think of this terrific little project.
If you would like more sewing and crafting projects sign up for our newsletter and receive your free eBook of 15 handbag patterns and tutorials.


Love the safe wish I could print the pattern ?
You should be able to print the pattern by clicking on the pattern link. I just checked the link and it is working properly. There are 4 pieces that get taped together to make the pattern. If you are still having trouble please let me know and I will email the pattern to you. Thank you for your interest in this project. It is a terrific one.
Are you able to please send me the pattern as I am unable to get it to print out. Thanks Lesley email laffeysl@bigpond.com
I have sent it to you.
this is just what i was looking for… my oldest grandson is leaving home and country to work abroad. i will make him this to keep his documents safe….thanks so much for such an easy and practical idea….
You’re welcome. It is perfect for traveling. Good luck to your grandson
I’m giving these as presents, won’t be in the room when the fabric safes are open. Has anyone ever written a small poem or story about these, so the receiver will know what it is ??
Not that I am aware of but that would be a good idea. They make great gifts. This is one of my favorite projects
I would like a video tutorial. I can follow those more easily as reading the instructions can be confusing sometimes.
I will have to look into what is involved in making a video tutorial. I have never done one but it could be interesting.
I am a little confused about drawing the line on the pocket piece…the measurements are 3/8 by 14, I’m not sure how far from the top of the pocket piece to draw the first line. Can someone offer some help with this? Thanks in advance ?
Latanya, I understand your question and will add some additional instructions to the tutorial. But in answer to your question. I believe that I placed the first line 2″ down from the top of the pocket lining on the interfacing side. I will have a better answer for you when I get home when I can measure mine. Thank you for pointing out the deficiency on the instructions.
Latanya, I actually measured down 1″ from the top of the pocket lining on the interfacing side. to place the top of the 14″ box. I hope that makes sense. If not let me know.
I’m 65, and my grandmother began teaching me to sew by the time I was 6, and very seldom do I come across an idea that I haven’t at least tried or heard of. This idea is one of those light bulb moments. Genius!Thanks for sharing. I’m sewing as I type!
Thank you so much. I hope you like the project. I just love it. I was amazed that no one else thought of this as I was making it. It is so easy to do and hides everything beautifully.
This is a great project! I make shoulder dust covers for my closet. My next shoulder dust cover will include the safe. I think I’m going to place it on the underside of the dust cover, thus camouflaging the safe even more.
Sounds perfect. The more you can camouflage it the better. Thanks for trying out this project. I really appreciate it.
I can’t print the pattern. I have the directions and video but can’t save to Adobe to print later.
You need to download the pattern using the down arrow button and then save it. I will email it to the email address that I have if that will help.
I can’t find the pattern, sure would love to make some of these Thanks for the help
The pattern is in the link that says pattern. Just click on it and it should come up.
I found the pattern Wow can’t see or read LOL
No worries.
I bought 1/2 yard of fabric but did not have enough fabric for pocket after cutting 2 body pieces. How did you do this?
I apologize for the Mistake. I have updated the pattern. There should have been an additional 1/2 yd to accommodate for the pocket piece. That was my mistake. It has been resolved in the list of items needed for the project.
I am sorry to say that the amount for the Pellon 808 is also wrong. You need twice as much. It is only 20” wide so can only get one piece on 1/2 yard. Unless you only interfaced one outer piece?
Of course. My mistake again. I use Pellon 809 which is the wider version of 808 and didn’t adjust the instructions for 808. That is taken care of now.
Love the pattern but my bottom zipper is inside the fabric, what did I do wrong? Please help.
It sounds like you placed the zipper the wrong way down when you first attached it to the fabric. If you haven’t gone too far you should be able to rip it out and place the zipper the right way. I can’t think of any other reason that the zipper pull ended up in the inside of the fabric. I assume that is what you mean when you say the zipper is inside the fabric. The outer fabric should have been placed right side up on your surface with the zipper and the zipper pull facing down and the lining right sides down on the top of the zipper. This ensures that the zipper pull ends up on the outside. Let me know if this helps or if I can do anything else.
I placed the outer fabric right side up, zipper down and lining right side up, then did other side of zipper same way. I already sewed the whole thing together, but want to try again and make more but not if I can’t get zipper on correctly.
Pocket zipper perfect. Thank you for the help.
Hi again, the lining should have been right sides down and not right sides up. That way when you are matching the two halves you are matching both of the right outer sides and the right lining sides. Remember to unzip the zipper before matching the outer fabric and the lining or you will not be able to turn the piece. Once everything has been stitched you will turn the piece through the opening in the lining and the open zipper. If you can reach into the opening in the lining and unzip the zipper the zipper is on upside down. I hope this makes sense. Let me know if you have any further questions.
That’s much clearer. Thank you. I’m going to try again. I’ll let you know. Thank you for your time and kindness.
Anytime. Let me know if I can help further.
Still not correct. I don’t know what I’m doing wrong. I want to make this so badly. What could it be? Am I not turning something correctly?
I just can’t imagine what you are doing wrong. Are you turning it through the opening in the lining and through the open zipper? Is there any way that you can send me a photo? You can send it to diana@sewverycrafty.com. Thanks.
Julia, I am having trouble sending email from that account so I will be responding to you from a different account. I apologize.
I cannot print the pattern either
I apologize for that. I don’t know why you can’t print it out but I will send it directly to you. I am sorry for the inconvenience.
This is a great idea and you’ve done a wonderful job with the instructions. I’m one of those people who need an overview of the full project. If you had put a heading eg “Step 7 – insert the pocket zipper”, I would have found it easier to follow. Just a suggestion if you are doing something similar in the future. Thanks so much for sharing. I’m starting my Xmas gifts today.
Thanks for the suggestion. I will definitely do that.
I am unable to download the pattern. could you send me a copy via e-mail? Thank you!
Yes. I will send it now.
I am unable to download the pattern can you send ir to me via email. Thanks in advance
Yes. I have sent it to you.
This project looks perfect for our guild! One suggestion, it would be helpful to have a list of how many of what pieces to cut. i.e. Cut 1 front piece, 1 back piece, 2 interfacing pieces, 2 lining pieces, etc.
Thank you for your great tutorial!
Thank you. I will do that. I plan to do a video of this project soon. Hopefully that will help as well.
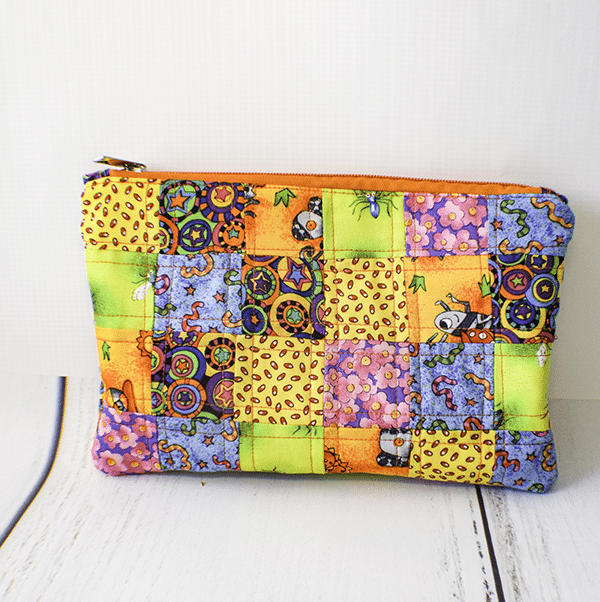
Thanks for your reply. I am figuring it out. I used 2-1/2″ strips for my front and will quilt them. Very cute, so far.
That sounds amazing. Post it when you are finished so that we can all see it!!
Finished! It was pretty easy and turned out oh so cute!
Excellent!!. So glad it was easy and that you enjoyed this project.
I love this idea and have read your directions and would love to make one. However, I can’t find the pattern for this project. Please help or maybe email me the patten. Thanks in advance. ~ Marlene
I have just sent it.
I like this idea. For those who couldn’t print the pattern – just draw your own. In the photo of the pieces on the cutting mat you can easily count the 1 inch squares – I came up with 17″ wide by 14″ deep. Measurements don’t have to be exact; and you need to make the width to fit the hanger you will use in your finished project. Also, one can make this as shallow or deep as you like.
Thanks for the great solution.
Why not use a zipper the proper length for the bottom instead adding tabs? Also it would be EXTREMELY helpful for a sewing tutorial video to actually SHOW the sewing, especially for the sewing levels you state this pattern is for. I am an experienced seamtress and I was confused in parts of your video.
You could definitely use a zipper that is the length of the bottom but I liked the tabs so I used them. I am new at the videos and will be showing the sewing from now on. It has taken me some time to figure out how to do it with where my machine is. I am sorry that you were confused by parts of the video. I am learning about videos slow but sure. Hopefully they will get better. Thank you for your input. I really appreciate it. I really want to improve in this area.
I cannot find the size to cut the pocket. The rest seems pretty well explained. Can’t wait to get started.
The pocket piece is 11 1/2″ x 17 1/4″ and will be folded up in a later step.
I have invisible zippers. Can I use those, or do I need to get regular zippers instead?
I think it would be difficult to use invisible zippers for this project. I would recommend that use regular zippers.
That’s what I thought. Thank you!
Grammy, I was thinking as I read that one should make several of these – only the rest would be “Dummy” covers so as not to draw attention to the important safe one!
Loved this idea! A couple of observations from an experienced sexist. I found attaching the second side of the zipper confusing as well as to how to complete the bag. You say to leave the zipper open And leave a space unsewn to turn. Should only need 1. You never say to go back and finish the lining left unstitched. I would think a larger top opening finished with a bias binding made from scraps would be nice (and what I’m going to try) especially if this is sewn on before the last bit of sewing.
Thanks for the comment. These are great ideas. I thought about putting bias on the top after I had drawn the pattern and realized it was too small. Making it larger is a good choice.
Sorry if i am duplicating, i left a message on YouTube. I would like to make this as a gift. Do i print the pattern at 100%? I am having trouble with my lines matching up. What is the measurements of the paper PATTERN? Is it roughly suppose to be 11” x 17 or 13 x 17. Or another measurement. Help! Thanks you.
No problem. I just printed out the pattern which I haven’t done in a while. The lines match up but the paper pieces do not. When I drafted the pattern I did it on a reg piece of shipping paper and transferred it to the 8 1/2″ x 11″ paper so the paper is wonky when you line up the lines. Keep in mind that the nick pipe overlaps and so do the side seam lines. My pattern measured 15 3/4″ x 11 1 /4″ when it was finished. Approximately. Remember that this is for a wire hanger. If you want to use a plastic hanger you will need to make the pattern a little bigger to accommodate the size.