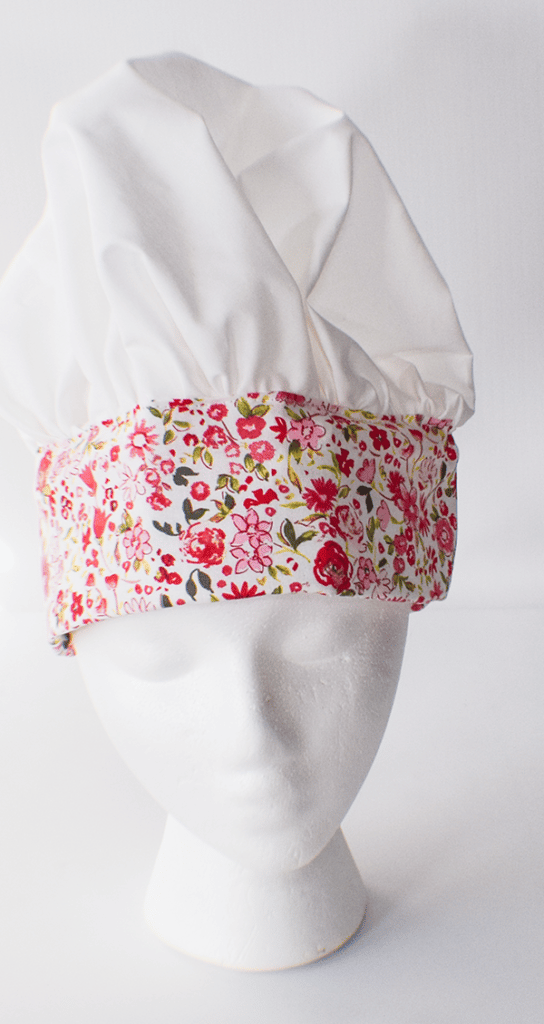
One of my readers asked me to create a DIY chef's hat. It was surprisingly simple to do. This tutorial will show you just how simple it is to make your own or your child's chef hat. It is great for that outdoor bar-b-que or for your child to help in the kitchen. I added a little patterned fabric to my chef's hat but you could make an all white one in the traditional way if you want. If you would like another hat project check out my simple sun hat.
I used basic cotton for my chef's hat but you could use a cotton blend for yours if you like. My fabrics were purchased at JOANN Fabric & Craft Stores![]() online and picked up in store but you could head to Amazon Fabrics or
online and picked up in store but you could head to Amazon Fabrics or
If you would like a vide tutorial of this project head over to YouTube and check out my video. While you are there subscribe to my free YouTube channel.

What you will Need: How to Make a DIY Chef's Hat
- Main fabric depending on the size of your hat
- Fabric for the band of the hat again depending on the size
- Strip of Pellon 808 interfacing
- Standard sewing supplies
Step 1: Measure your Head
Measure your head across the forehead. Add 1″. My head measured 22″ so I added 1″ and got 23″.
Step 2: Cut your Fabrics
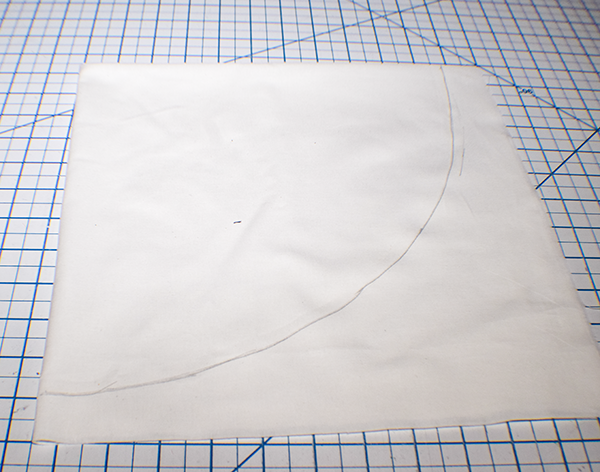
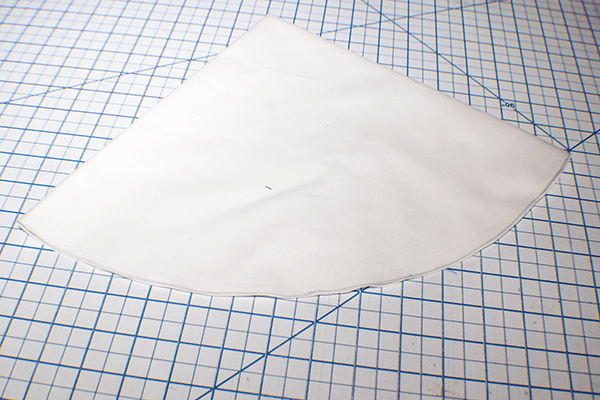
Cut the top of your hat by starting with a 24″ x 24″ square of fabric. I chose white Kona cotton for mine. Fold the square in half and then in half again. Draw a curve that starts 1″ from the top right corner and stops 1″ to the right of the bottom left hand corner.

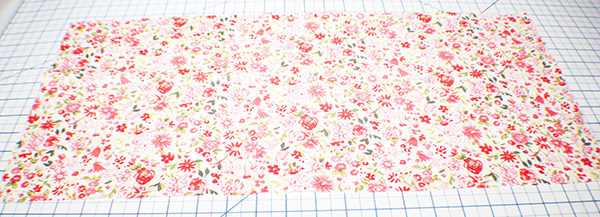
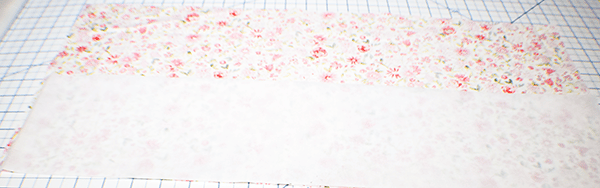
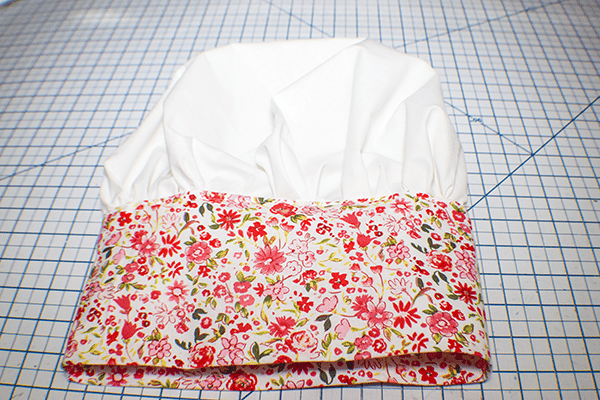
Cut the hat band by using the head measurement you took in step 1 which will be the length. Cut a strip the length of the measurement x 9″. In my case I cut a strip 23″ x 9″ and used a nice pink floral cotton.
Cut a strip of interfacing that is the length of the band and half the width.
Step 3: Fuse the Interfacing
Fuse the interfacing to one half of the hat band following the manufacturer's instructions and using a hot iron.
Step 4: Stitch the Chef's Hat Band
With right sides together stitch the short ends of the hat band together using a 1/4″ seam allowance.
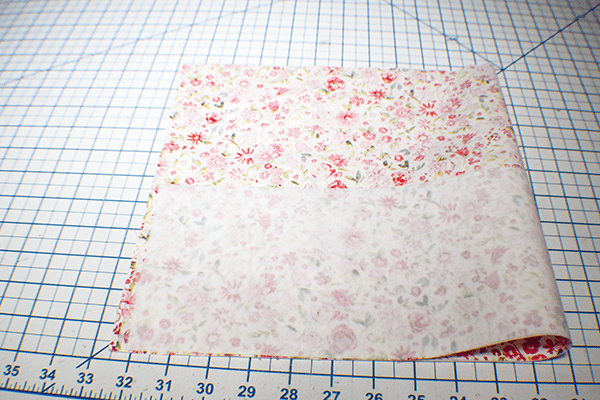
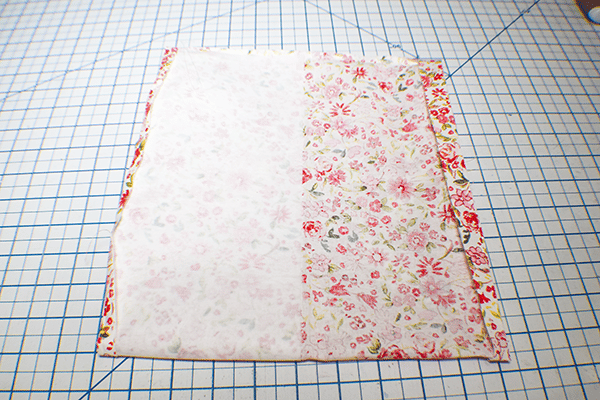
Step 5: Press your Chef's Hat Band
Fold under the top raw edges 1/4″ and press. Turn right sides out. Press. Fold the chef's hat band in half so that it is right sides together. Press.
Step 6: Prepare the Top
Take the circle you cut from the top and stitch two rows o basting stitches around the circumference of the circle. You can do this by hand or increasing your stitch length on your machine to 5. Pull the basting threads so that you create rules or pleats.
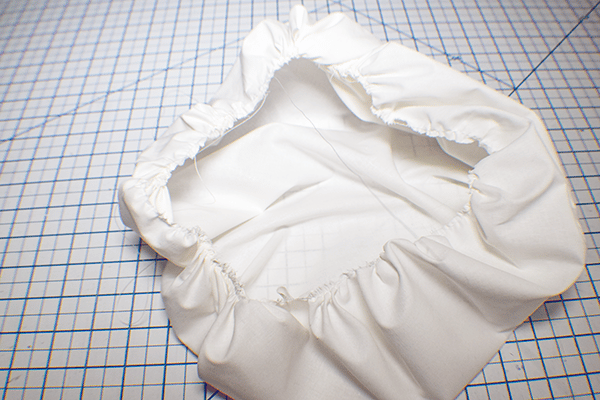
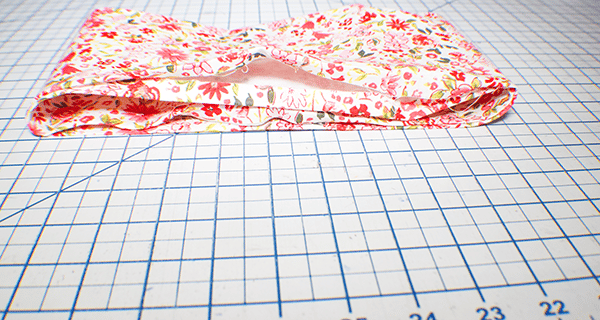
Step 7: Sew the Hat Band to the Hat Top
Place the ruffled raw edge in between the folded edges of the hat band and pin. Topstitch all the way around to secure the hatband to the hat top. You have now finished your Diy Chef's Hat.

I hope you enjoyed this Chef's Hat project. If you would like more sewing and crafting projects subscribe to our newsletter and get access to our free printables library.
If you would like video tutorials of some of Sew Very Carfty's most popular posts subscribe to our free YouTube channel here.