I saw this project on YouTube and really liked it. I thought it was such a cute way to upcycle an old man's shirt. The video that is linked here was short on instructions so I did my best to figure it out so that you could do it too. I am really pleased with how it came out. There are a lot of steps to this project but they are each very easy. I hope that you give this project a try. I think that you will enjoy it and get a really cute blouse out of it along the way. If you would like more upcycle projects check out my upcycle projects page.
Note: This post contains affiliate links that if you click on them and make a purchase I will receive a small commission at no extra cost to you. As an Amazon Associate I earn from qualifying purchases.
What you will Need: How to Upcycle a Man's Shirt into a Woman's Blouse
- An old man's shirt
- Standard Sewing Supplies
- Sewing Machine
What you should know
Choose a shirt that will fit you but is a little loose. The measurements included in this post will not necessarily be your own You may have to enlarge or reduce the measurements to fit you.
Step 1: Remove the Collar
Start this project by removing the collar. You just need to cut around the collar seam and take it off.


Step 2: Mark The Shirt
Measure from the back of the collar that is remaining down the front of the shirt the length you want your blouse to be and make a mark. I measured 23″ because I am long waisted. Your measurement will be different. Mark all the way around the bottom of the shirt. Start by lining up the button hole placard with the button placard and just follow the mark all the way around using tailor's chalk.

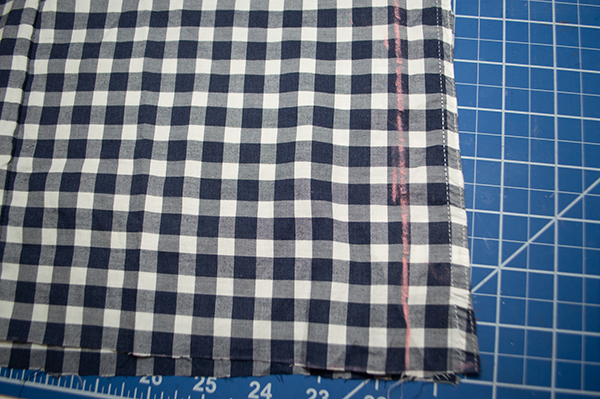
Step 3: Cut the Shirt Bottom
Using a sharp pair of scissors cut along the line you just drew.

Step 4: Mark the Sleeves
Place the sleeves together with the shirt folded in half. Measure down 7″ from the shoulder seam down the sleeve and mark. Draw a line across the sleeve at that mark. You cane make the sleeves however long you want. Just keep in mind that you will be adding a ruffle to the sleeve.


Step 5: Cut the Sleeves
Cut off the sleeves along the line you just drew.

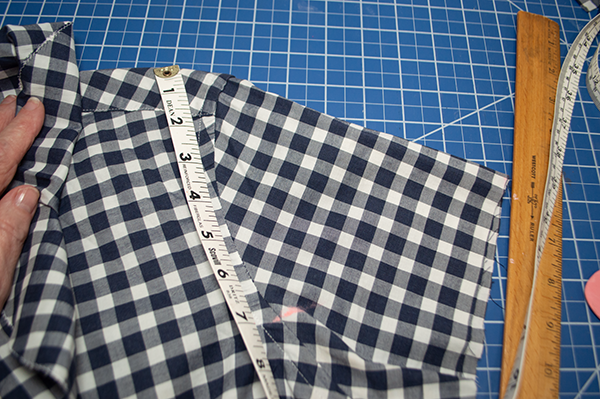
Step 6: Draw the Front
Place the shirt so that the button hole placard and button placard are side by side. Start by measuring 7/8″ from the top of the back of the shirt toward the sleeve side on both sides of the shirt and make a mark. Measure down 4 1/2″ from the front of the collar down the front of the shirt and make a mark. Draw a curved line from the first measurement to the second measurement. You may want to enlarge this opening or make it smaller. These measurements are pretty small so enlarging may be necessary. Try on the shirt to make sure it fits.


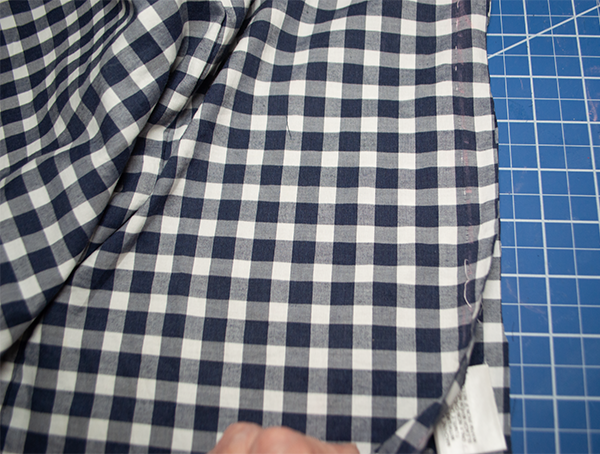
Step 7: Cut the Front of the Shirt
Fold the shirt in half lengthwise matching the shoulder seams. Extend the line you drew so that it reaches all the way across. Cut the shirt along that line through both layers. At this point the shirt starts to resemble a blouse.


Step 8: Cut the Added sleeves
Start by cutting off the cuffs right along the seam. Then cut down the sleeves long seam.


Step 9: Draw the new collar
Fold the sleeves in half right sides together. Measure 4″ from the top of the sleeve piece toward the bottom of the sleeve piece toward the wrist on the fold side. Make a mark at both locations. Measure 6 5/8″ from the top mark and make a mark. Measure over 2 1/2″ and make a second mark. Draw a curved line from the 4 ” mark to the 2 1/2″ mark. Draw a straight line from the 2 1/2″ mark to the other side of the sleeve piece. Next, measure 1 1/2″ from the end of the straight line toward the cuff area and make another mark. Mark a dashed line 4″ away from the first curved line that you drew all the way to the 1 1/2″ mark you made from the straight line.


Step 10: Cut out the Collar
Place the two sleeve pieces right sides together and cut along the solid and dashed line to create the collar piece.

Step 11: Cut the Placards
Cut along the seams of both placards to remove them. You want to make sure you are cutting the same width on both placards. Remove any excess fabric still stitched to the shirt using a seam ripper.

Step 12: Stitch the Blouse
Place the blouse right sides together matching the raw edges from the removed placards. Stitch using a 3/8″ seam allowance.

Stitch 13: Stitch the Collar
Place the collar pieces right sides together along one short end and stitch using a 3/8″ seam allowance. Stitch a stay stitch along the inner raw edge using a 3/8″ seam allowance. Zig zag or serge the other long raw edge. Hem the outer edge. Place the collar piece right sides together with the blouse and pin. Also pin the short serged ends. Stitch the short serged ends using a 3/8″ seam allowance. Then, stitch all the way around the collar again using a 3/8″ seam allowance. Clip the front curves.


Step 14: Create and Stitch the Binding
Use the remnants of the sleeves and draw 2″ diagonal lines. Cut those lines. Join the pieces by placing the ends right sides together in a cross. Stitch across diagonally. Make sure that when you open up the pieces you get a straight piece. Repeat this process for the other piece so that you have one long piece of bias binding. Trim off the excess at the seams.

Step 16: Add the Bias Binding
Starting at the front of the blouse place the bias binding right sides together matching the raw edges. and pin it all the way around the collar. Stitch the binding to the collar. Stitch the short ends together. Fold the binding twice and pin it to the wrong side of the collar. Stitch the binding to the blouse. Turn the blouse right sides out and trim off any excess in the front point. Press. Turn wrongsides out.


Step 17: Prepare the sides
Measure 1 1/8″ from the under arm seam up the seam toward the first mark and draw a line. Draw another line down the sides keeping 1 1/8″ from the seam the whole way. Cut 1/4″ from the side seam along the sides and the sleeve.
Step 18: Hem the blouse
Double fold the team to get the length you want and stitch.

Step 19: Cut out the rest of the sleeve
Using the rest of the fabric from the bottom of the shirt cut two rectangles that measure 4″ wide by the length of the left over fabric. Repeat for the second piece. Stitch the short ends of the rectangles using a 3/8″ seam allowance so that you have two long rectangles.

Step 20: Stitch the sleeve
Stitch a basting stitch along one long raw edge of each of the rectangles. Leave long thread tails on each. pull the thread to gather the rectangles. Hem the rectangles on the ungathered sides as you did for the bottom. Attach the gathered side to the short sleeve so that they are right sides together. Stitch the gathered sides to the sleeves.


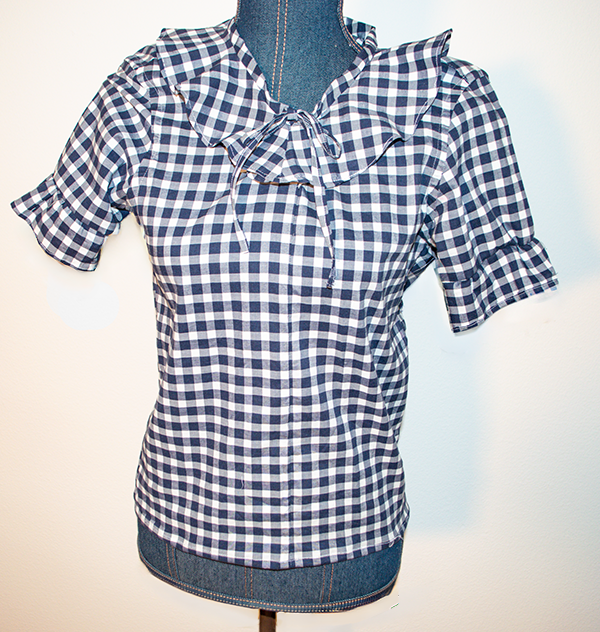
Step 21: Create and add the Bow
From the remaining fabric cut a long rectangle 1″ wide. Fold the short raw edges to the wrong side and press. Fold the long raw edges to the center and then fold the rectangle in half lengthwise. Press. Stitch along both sides. Fold the ribbon piece you just created in half and stitch the center of the ribbon to the center of the front of the blouse and tie into a bow. Once you have added the bow you have turned your man's shirt into a woman's blouse.


I hope you enjoyed this fun upcycling project. If you would like more sewing and crafting projects subscribe to our free newsletter and receive access to our free Printables library.
If you would like video tutorials of some of Sew Very Crafty's most popular posts subscribe to our free YouTube channel here.
Join our Sew Very Crafty Fans Facebook group
If you want to ask questions and share your projects join our Facebook group here. The community will help to achieve your sewing and crafting dreams.