How to Make a Boxy Key Chain Zipper Pouch
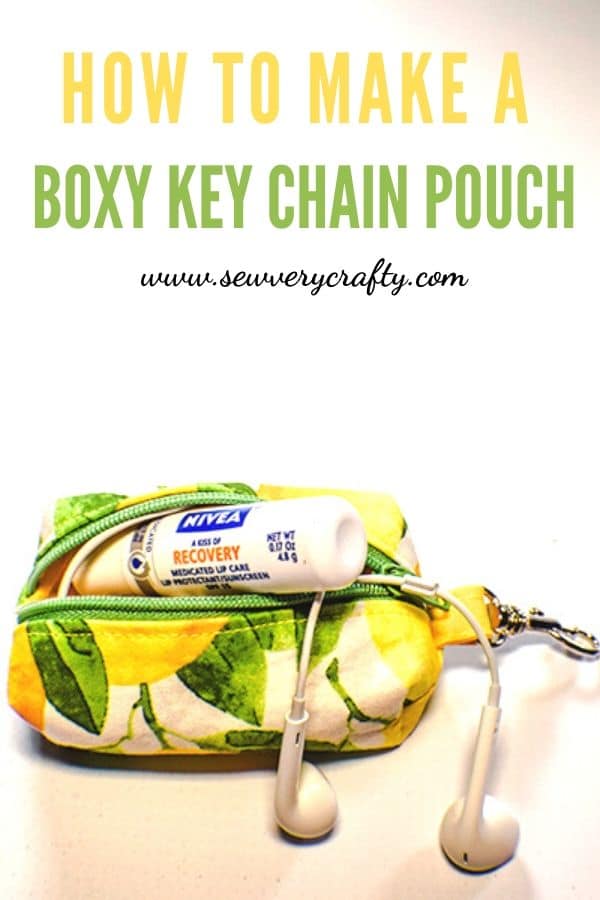
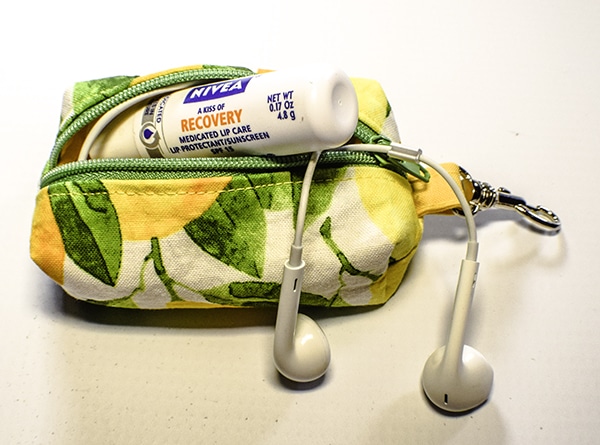
I really needed a place to put my chap-stick and headphones so I decided to a smaller version of my boxy zipper pouch to add to my keys so I would always have them available. This boxy key chain zipper pouch is perfect for the job. Although there are a lot of steps to this project it is fairly straight forward even with the zipper. Like I said it is just a smaller version of a larger pouch. It really doesn't take that long to complete so long as you follow all of the instructions step-by-step. This is a fun and functional little pouch making project so lets get started.
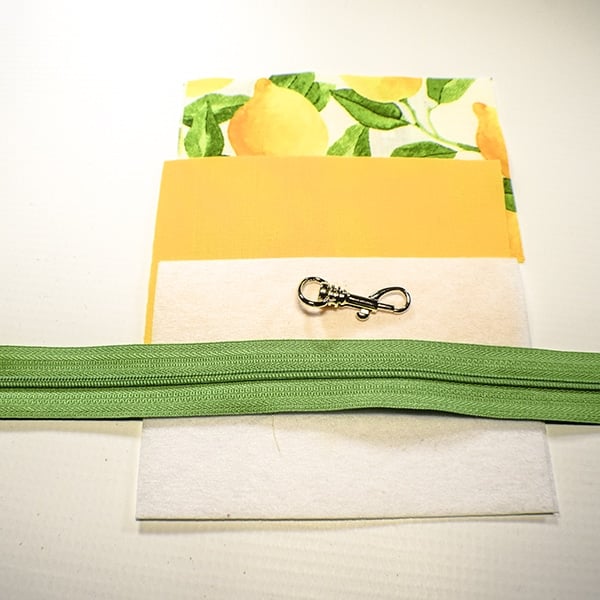
I used fabric scraps that I had on hand for this project and scrap interfacing as well. I would definitely delve into your stash for this project and pick some scrap cotton fabrics to complete this little pouch. It is so small that scraps are all you need. If you have to purchase fabrics for this project try to get remnants for 50% off. Otherwise JOANN Fabric & Craft Stores![]() , Hobby Lobby or Fabric.com are all good options. This post contains affiliate links that if you click on them I may receive a small commission at no extra cost to you. As an Amazon Associate I earn form qualifying purchases.
, Hobby Lobby or Fabric.com are all good options. This post contains affiliate links that if you click on them I may receive a small commission at no extra cost to you. As an Amazon Associate I earn form qualifying purchases.
What you will Need: How to Make a Key Chain Zipper Pouch
- Scraps of outer fabric and lining fabric
- Scrap of Pellon 808 interfacing
- 7″ zipper or longer
- 1/2″ Swivel Clip
- Standard sewing supplies
Step 1: Cut Your Fabrics
Cut two outer, two lining and two interfacing pieces that measure 5″ x 3.5″ and one tab piece that measures 2″ x 2″
Step 2: Fuse your Interfacing
Fuse the interfacing to the wrong side of the outer two pieces following the manufacturers instructions.
Step 3: Add the zipper to your key chain pouch
Place your lining fabric right sides up on your work surface. Place the zipper right sides up on the lining and the outer fabric right sides down on the zipper making a zipper sandwich. Clip or Pin the layers together. Stitch the layers together using a zipper foot. Repeat for the other side of the zipper using the remaining outer and lining fabrics. Top stitch along both sides of the zipper so that the lining does not get caught in the zipper.


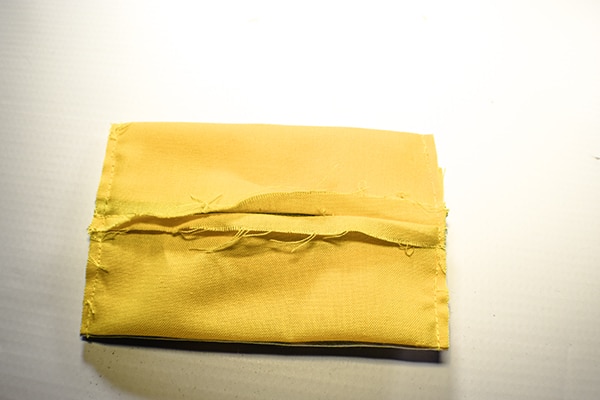
Step 4: Stitch the long sides
Place the two outer fabrics right sides together and the two lining fabrics right sides together. Stitch along both long edges, Leave an opening in the lining for turning the bag in a later step.
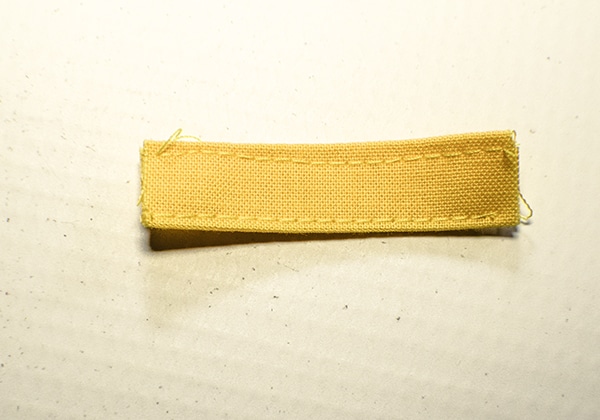
Step 5: Create the Tab
Fold the raw edges into the center and press. Fold in half again enclosing the raw edges and press. Top stitch on both sides of the tab. Insert the tab into the swivel clip.

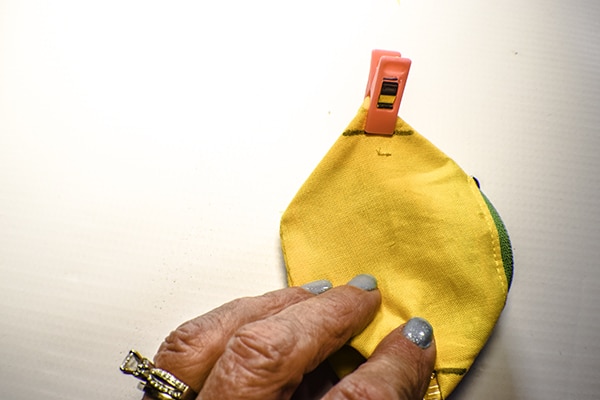
Step 6: Add the tab to your key chain pouch
Open the zipper at least half way. Line up the bottom seam of the outer fabric and the lining fabric with the zipper teeth. Add the tab on top of the zipper so that the swivel clip is facing toward the inside of the bag. Stitch across all layers on both ends using a 1/4″ seam allowance. Clip off any excess zipper and seam to 1/8″ seam allowance.

Step 7: Box the Corners
Turn the bag through the lining so that only the lining is facing outwards and the outer bag is inside the lining. Stitch the opening closed using ladder stitch. If you are unfamiliar with ladder stitch check out this video. Press the bag flat making sure that all of the corners have been poked out. I like using That Purple Thang for this process which you can get here. Pinch the corners so the side is against the bottom and draw a line diagonally across all four corners that measures 1″. Stitch along this line to box the corners.

Step 8: Finish the bag
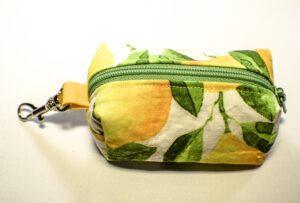
Turn the bag right sides out through the zipper and press if necessary. You are now finished with your key chain zipper pouch.
I hope you enjoyed this post. If you would like more sewing and crafting posts sign up for our news letter and receive your free eBook of 15 handbag patterns and tutorials.
If you would like video tutorials of some of Sew Very Crafty's most popular posts subscribe to our free youtube channel here.