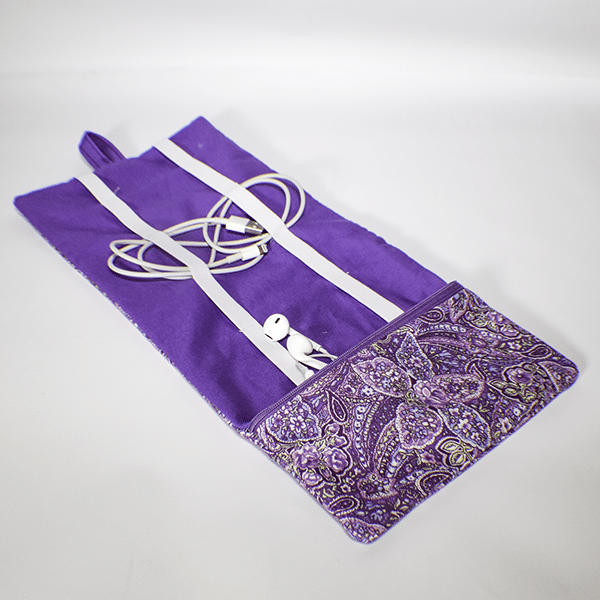
This charging cord travel case is perfect travel companion. You can put all of your device cords neatly and orderly in this case when you travel. I use mine all the time. I have my phone cord, my kindle cord, my husband's phone cord and my USB plug and they fit perfectly in this little rollup travel case. This is a beginner sewing project that anyone with basic sewing skills can make in no time. For more travel related projects check out these.
I used cotton remnants that I had in my stash for this project. I love remnants because they are always 50% off. If you look out for the ones that are close to a yard you can really get good use from them. These remnant were purchased at JOANN Fabric & Craft Stores![]() but you could head to
but you could head to
What you will Need: How to Make a Charging Cord Travel Case
- Pattern you can get by clicking on this link
- 1/4 yd outer fabric
- 1/4 yd lining fabric
- 1/8 yd fusible fleece like Pellon 987F
- 31″ of 1/2″ elastic
- 9″ zipper
- 1 button
- Standard sewing supplies
Step 1: Cut out the Fabrics
Take the two pattern pieces and tape them together at the arrows. Cut out one outer piece, lining piece and fleece piece from the long pattern piece. Cut two outer, two lining and one fleece piece from the bottom of the pattern where it says “tech storage bottom”. Finally cut a 2″ x 5″ piece of lining fabric for the closure.
Step 2: Create the Zipper Pouch
Place one of the outer pieces right sides up on your work station. Place the zipper right sides down on the outer piece. Lay a lining piece right sides down on the zipper creating a zipper sandwich. using a zipper foot stitch the zipper through all layers. Open the Fabrics and press. Topstitch along the zipper. Repeat for the other side of the zipper.
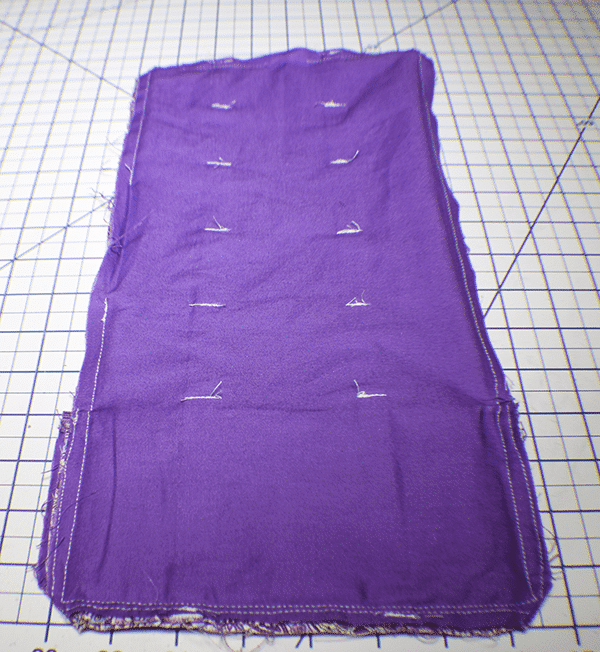
Step 3: Add the Elastic
Cut the Elastic in half so that you have two pieces that measure 15 1/2″. Stitch the elastic at the top and every 2 1/4″ across the elastic pieces and at the bottom to create the cord compartments
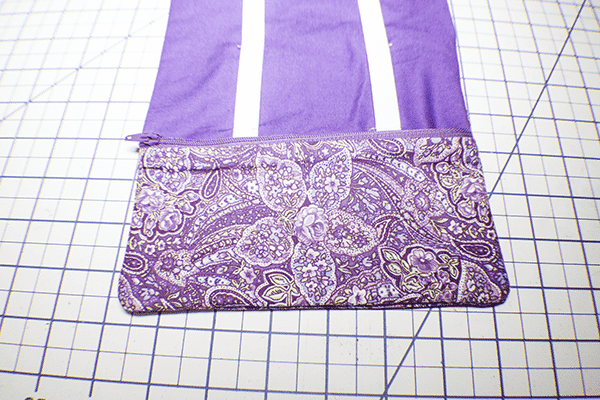
Step 4: Add the Zipper Pocket
Place the zipper pocket at the bottom of the lining piece with the zipper facing toward the top, the zipper pull in the center and matching the three raw edges. Stitch the zipper pocket along the sides and bottom using a 1/8″ seam allowance to secure.
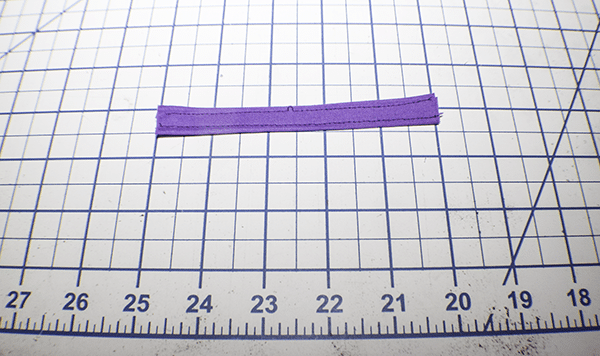
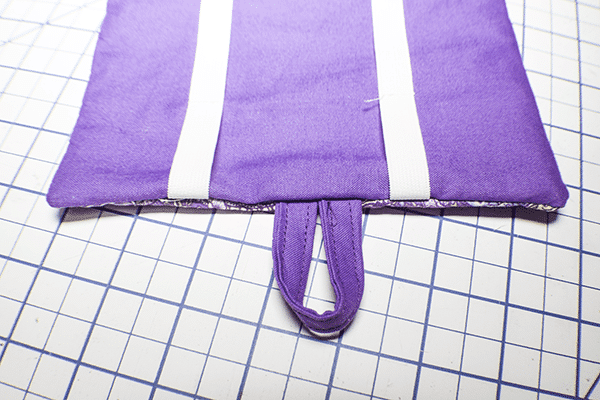
Step 5: Create the Closure
Take the 2″ x 5″ piece of lining fabric and fold the long raw edges to the center. Fold it in half lengthwise to enclose the raw edges. Stitch down both sides to secure.
Step 6: Add the Closure
Find the center of the top of the lining piece and mark. Fold the closure piece in half. Place the closure piece on the center mark and clip. Stitch the closure piece in place using a 1/8″ seam allowance to secure.
Step 7: Add the Outer Fabric
Place the outer fabric piece right sides together with the lining piece that contains the elastic and zipper pocket. Stitch all the way around the charging cord travel case leaving an opening on the side for turning.
Turn the case right sides out and press. Add the button to the outer fabric piece opposite from the closure by measuring down about 5″ and center. Close the opening using ladder stitch so that it is invisible to the eye. If you are unfamiliar with ladder stitch check out the video below.


I hope you enjoyed this charging cord travel case. if you would like more sewing and crafting tutorials subscribe to our newsletter and receive access to our free Printables Library
If you would like video tutorials of some of Sew Very Crafty's most popular posts subscribe to our free YouTube channel here.