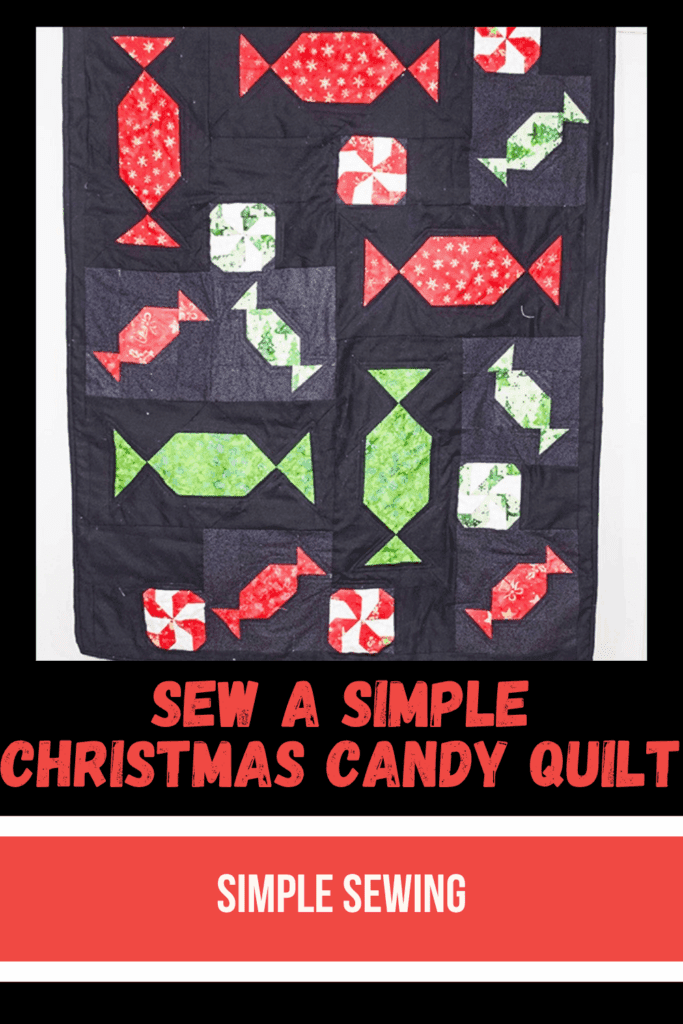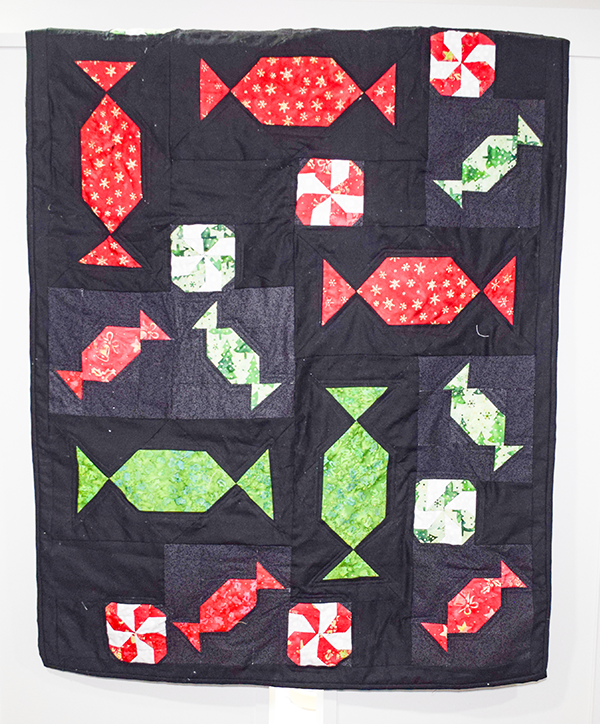
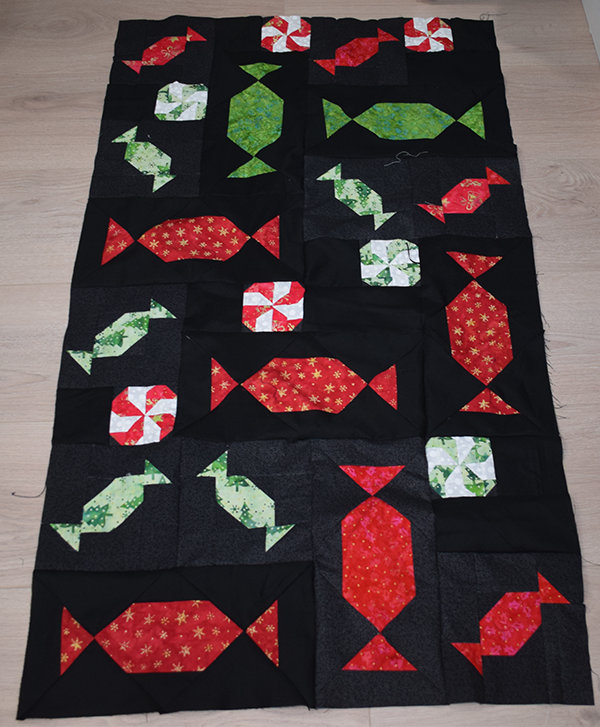
I love this quilt pattern. This is a Riley Blake designed Halloween candy mini-quilt called Sweet Treats. It is a free pattern on the Riley Blake website. Riley Blake Designs are a great way to start quilting. Many of the patterns are beginner friendly. In addition, there are loads of fun fabrics that can be purchased from the website. I thought this was a fun pattern and decided to share my version of it with you. I turned this into a Christmas candy mini quilt. If you would like more quilting projects head over to my quilting page. For more holiday sewing and crafting projects check out my holiday project vault.
What you will Need: How to Make a Christmas Candy Mini Quilt
- Pattern you can get by clicking on this link
- A variety of green and red Christmas fat quarters
- 1 yd Black cotton
- 1 yd Black on black patterned cotton
- 2 yd backing fabric
- 1 2/3 yd quilt batting
- Standard sewing supplies
Stop 1 Cut the Fabrics
I cut each candy type using different green and red fabrics that I had in my stash. Fortunately I had a bunch of Christmas fat quarters and remnants that I could use for this little quilt. I decided to keep the black background because I really liked the way the red and green fabrics popped. You can use any color combination you like. You could even lighten up the background rather than use the black.
Small round candies
I made red and white, green and white and green and red round candies. They are all made the same just using different colors. The pattern has the swirls of the candies going in different directions. You can follow the pattern or make them all the same. There are seven round candies.
- Cut the black background fabric into one 2″ x Width of Fabric (WOF) then subcut the strip into 14 2″ x 2″ squares
- Cut one of the red fabrics 1 3/8″ x WOF then subcut into 12 1 3/8″ x 1 3/8″ squares. Cut the rest of the strip into a 1″ wide strip and then subcut into 12 1″ squares.
Step 1: Create the Round Candies
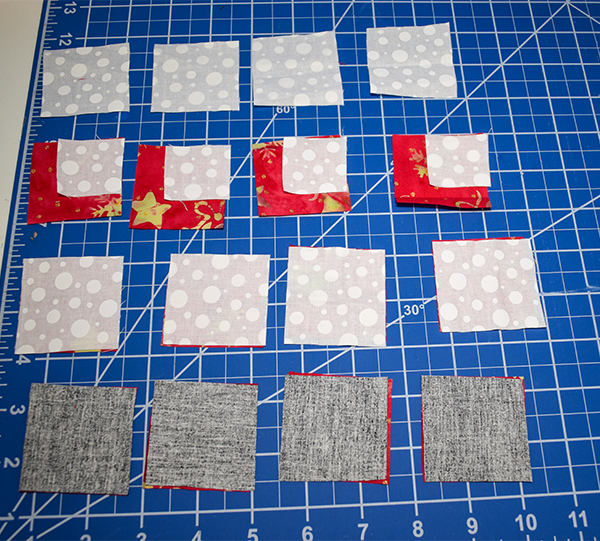
- Start with the half square triangles (HST). For each candy create 8 half square triangles. Four of the HSTs will be red and black while four of the half square triangles will be red and white. The half square triangles will be made by cutting eight 2″ x 2″ red squares and four 2″ x 2″ white squares and four 2″ x 2″ black squares. Cut four 1 3/8″ x 1 3/8″ white squares. Finally, cut the corner squares which include four 1 3/8″ x 1 3/8″ red squares and four 1 3/8″ x 1 3/8″ white squares.
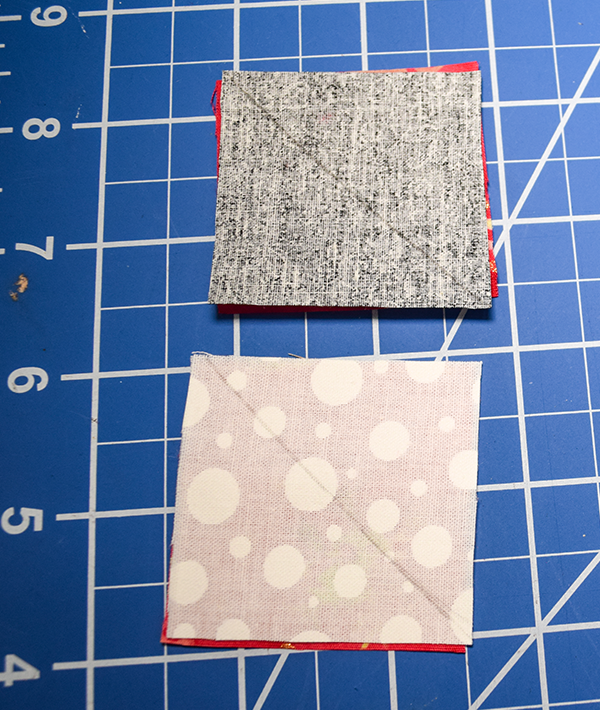
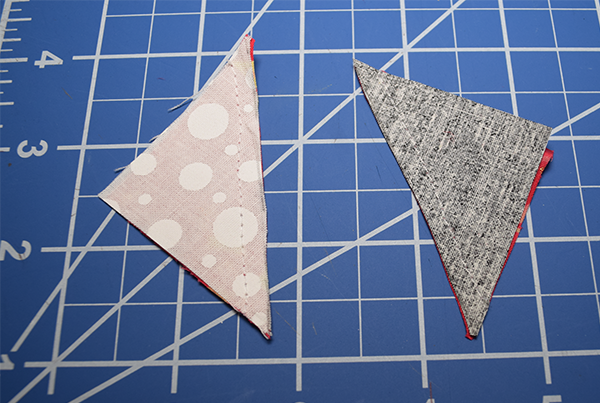
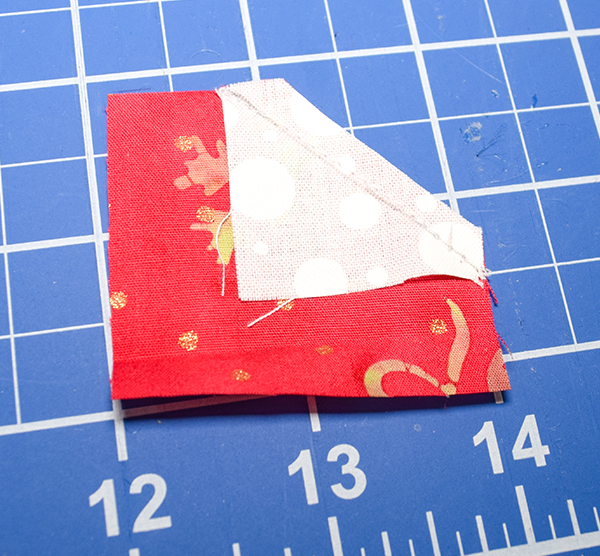
2. To create the half square triangles place two squares right sides together. Draw a line from corner to corner. Stitch a scant 1/4″ line on either side of the line you drew. Cut the drawn line. Open and press. This method creates two half square triangles.
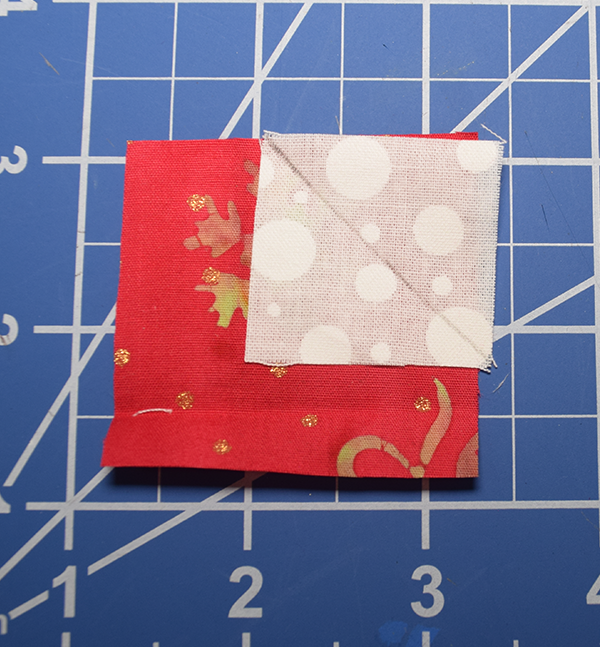
3. To create the corner squares place the 1″ square in the corner of the 1 3/8″ square right sides together matching the raw edges. Draw a line diagonally on the wrong side of the 1″ triangle. Stitch along the drawn line. Cut off the excess leaving a 1/4″ and press. This is the stitch n flip (SNF) method. Trim all pieces to 1 3/8″ square.
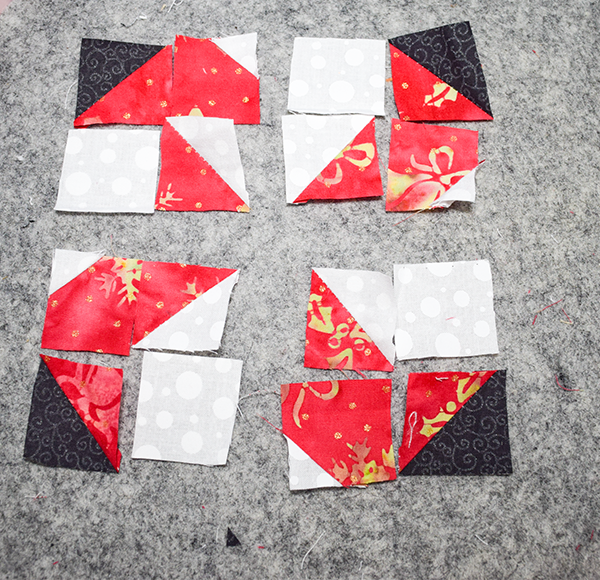
4. Assemble the round candy block. Place the black and red HST in the corner then place the red and white corner piece next to it. Place them right sides together with the red raw edges mathing and stitch using a 1/4″ seam allowance. Press. Next, place a 1 3/8″ square on your work surface. Then place a red and whir HST with the white raw edges matching. Place the pieces right sides together and stitch using a 1/4″ seam allowance. Press. Place the two pieces right sides together and stitch using a 1/4″ seam allowance and press. Create the next three small blocks in the same way as shown in the photos.
5. Stitch the top two blocks with right sides together and the bottom two blocks with right sides together. Press. Stitch the top to the bottom with right sides together. Press. You have now completed the first round candy. Trip so that the block measures 4″ x 4″.
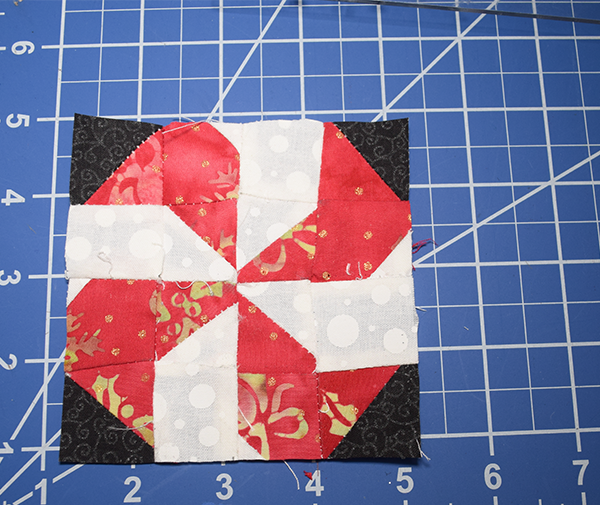
6. Create six more candies in red and white, green and white and red and green, Any combination you like.
Step 2: Make the Small Wrapped Candies
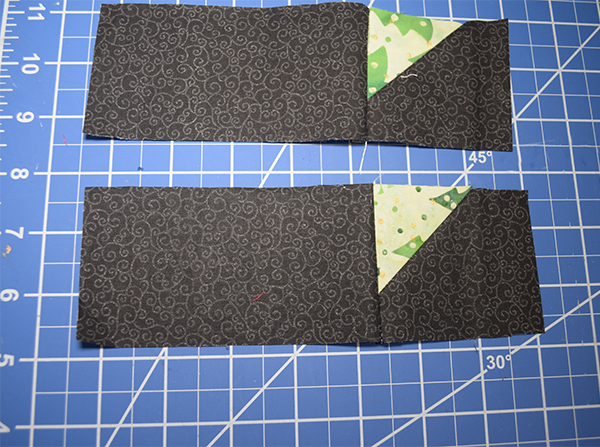
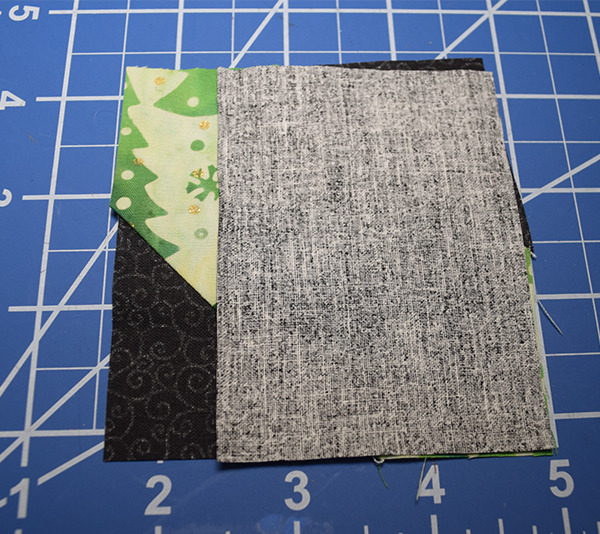
- Create two corner pieces using the SNF method described above. Take a 2″ red square and a 2 1/2″ x 3″ black rectangle. Place the small red square right sides together in the corner of the black rectangle. Draw a diagonal line on the wrong side of the red square. Stitch on that line. Open and press.
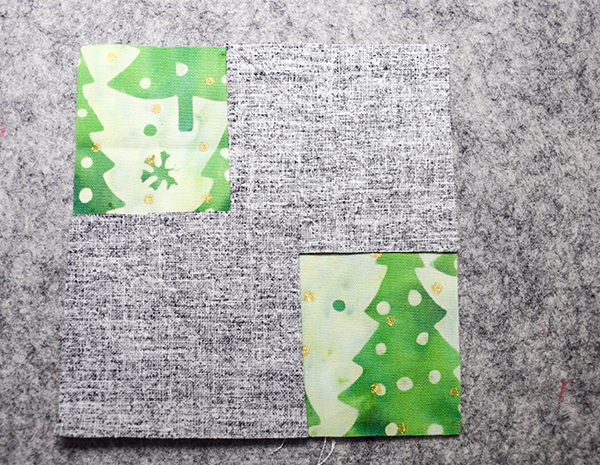
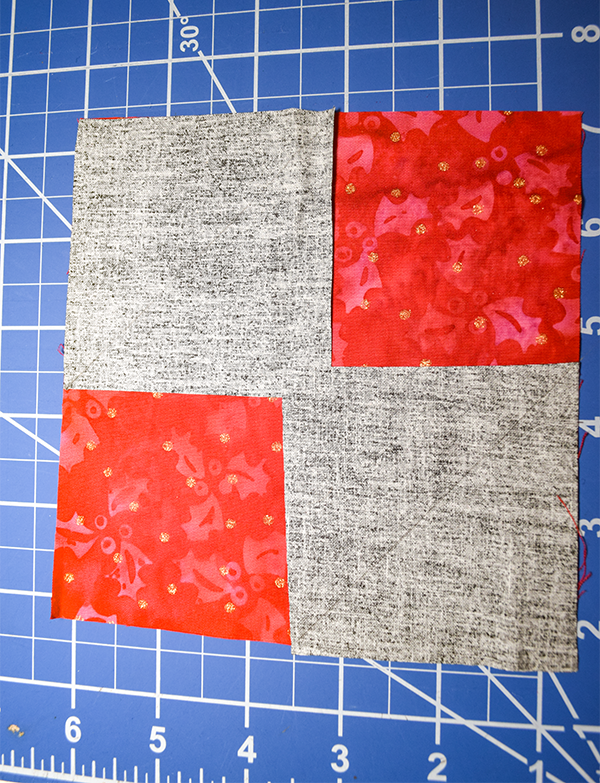
2. Create the center of the candy by placing a 3 1/2″ x 3 1/2″ red square on your work surface. Place a 2″ x 2″ square in the top right and bottom left corners. Again draw a diagonal line on the wrong side of the of the 2″ squares and stitch along the line. Open and press.
3. Assemble the small wrapped candy. Start with the top left corner. Place it right sides together with a black rectangle that measures 2 1/2″ x 5″. Stitch using a 1/4″ seam allowance. Stitch the middle part of the candy by placing a 2 1/2″ x 3 1/2″ rectangle vertically on your work surface. Place that piece right sides together with the middle candy piece and stitch. Place another 2 1/2″ x 3 1/2″ rectangle on the other side of the center candy piece and stitch. Open and press. Create the other end of the wrapped candy in the same way as the first.
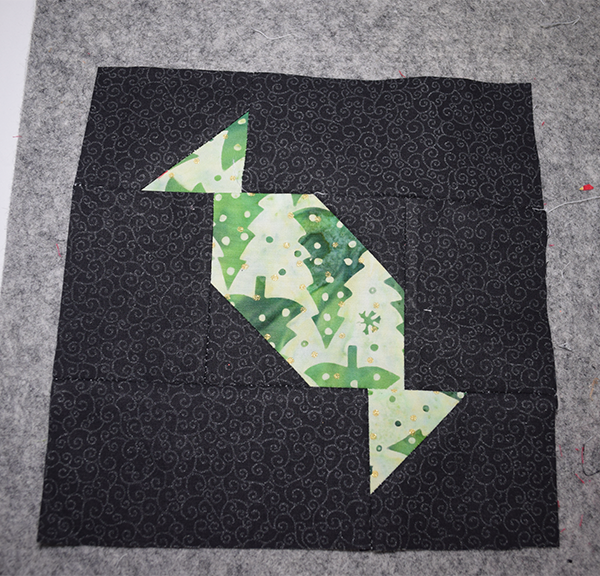
4. Stitch the three pieces together by stitching each right sides together and using a 1/4″ seam allowance. This block should measure 7 1/2″ x 7 1/2″.
5. Create 6 of these candies using different red and green fabrics.
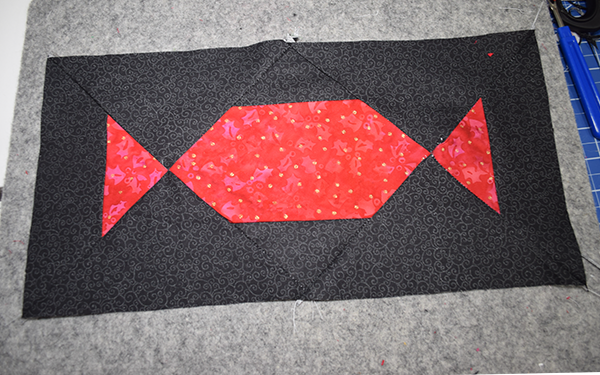
Step 3: stitch the Large wrapped candies
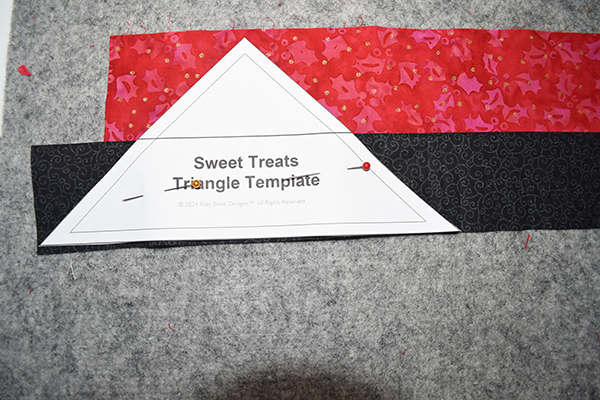
For the large wrapped candies you will need to use the triangle piece that is at the bottom of the pattern.
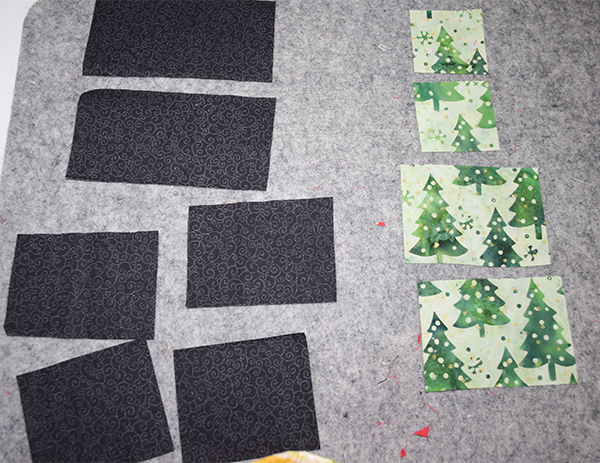
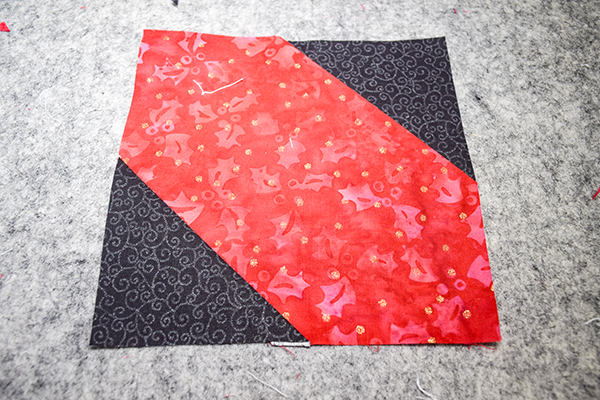
- Create the center of the candy using the SNF method. Take two 3″ x 3″ black squares and place them on the top right and bottom left of a red square that measures 5 1/2″ x 5 1/2″. Draw the diagonal line on the wrong side of the black squares and stitch on the lines. Cut off the excess, open and press.
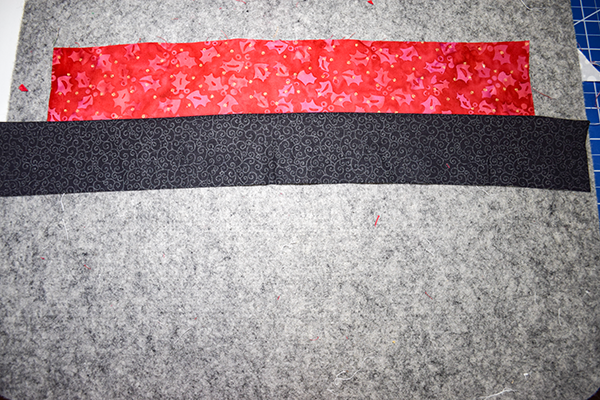
2. Take a red strip that measures 2 1/2″ x 14″ and a black strip that measures 2 1/4″ x 17″ and place them right sides together so that they are centered. Stitch them together. Open and press.
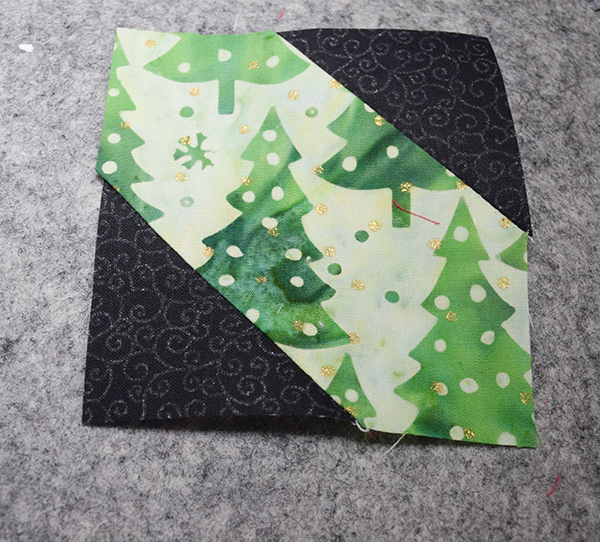
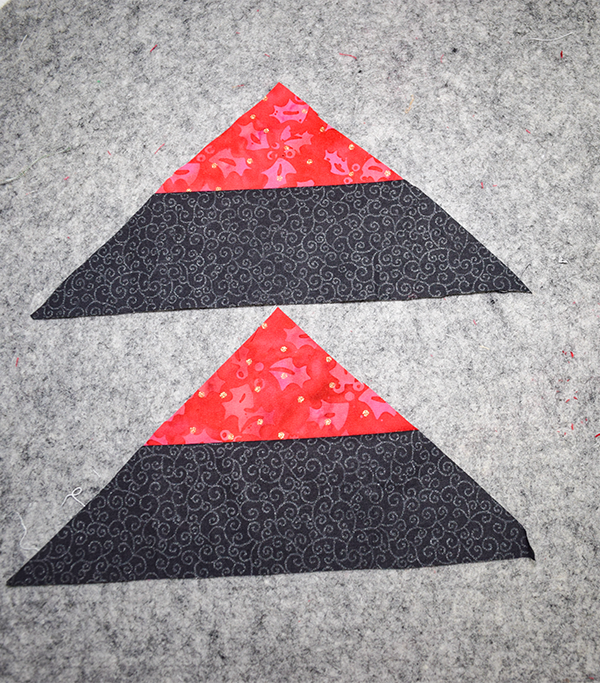
3. Take the triangle template and cut two triangles with the red at the top and the black at the bottom.
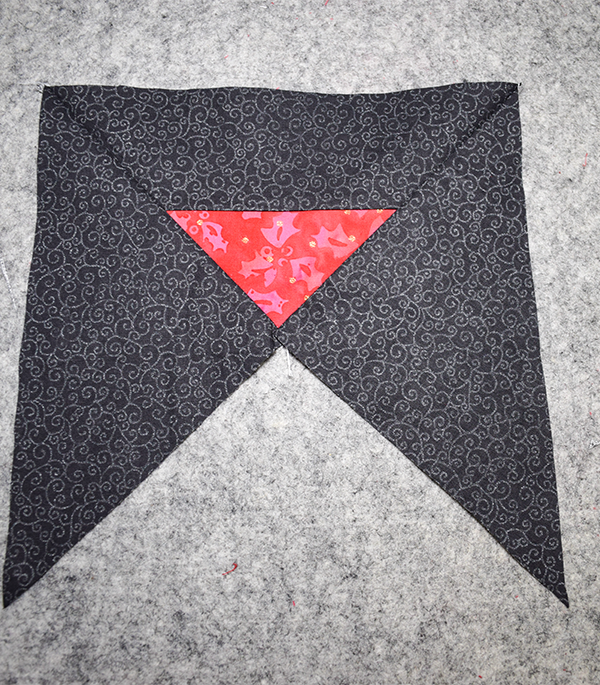
Cut four black triangles by taking two 8 1/4″ squares and cut them in half diagonally.
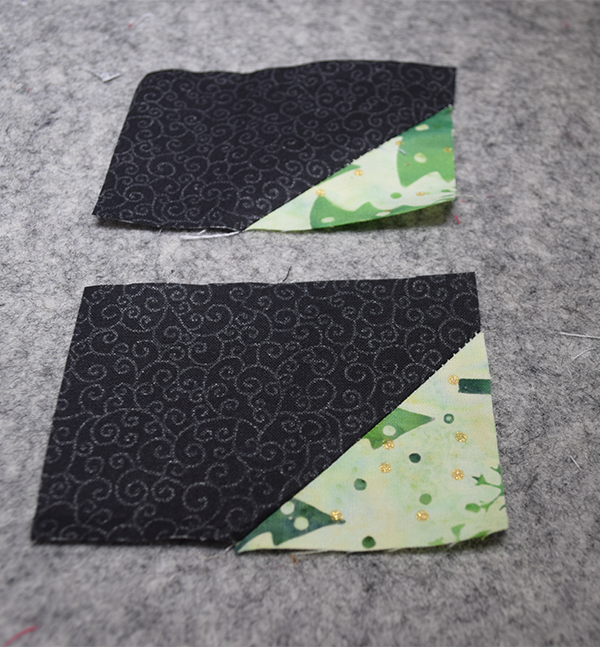
5. Assemble the large candies. Take the end triangle and stitch it right sides together with one of the black triangles. Open and press. Add another black triangle to the other side of the end in the same way. Create the other end of the large wrapped candy the same way. Place the middle square right sides together with the pieces you just created and stitch, open and press. That completes the large wrapped candy. This block should measure 7 1/2″ x 14 1/2″.
6. Create six candies in different colors.
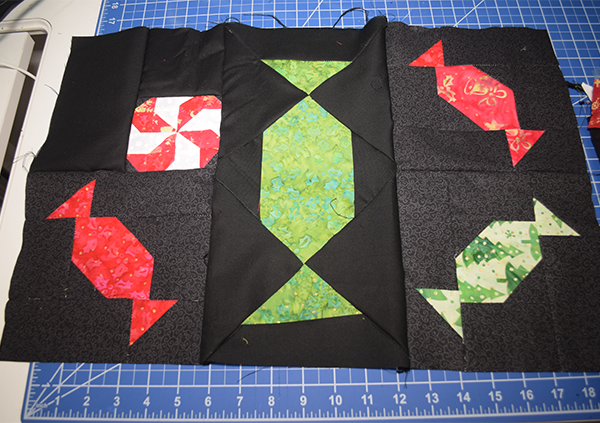
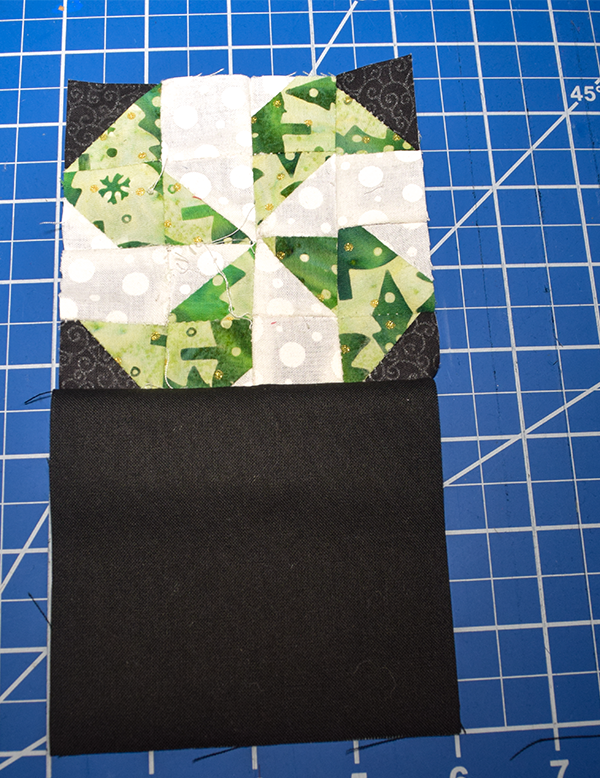
Step 4: Assemble the Blocks
Section 1:
For section 1 take a black square that measures 4″ x 4″ and place it right sides together with one of the round candy pieces with the black piece on top of the candy. Stitch, open and press. Take a black rectangle that measures 4″ x 7 1/2″ and place it right sides together with the two pieces you just stitched. Stitch, open and press.
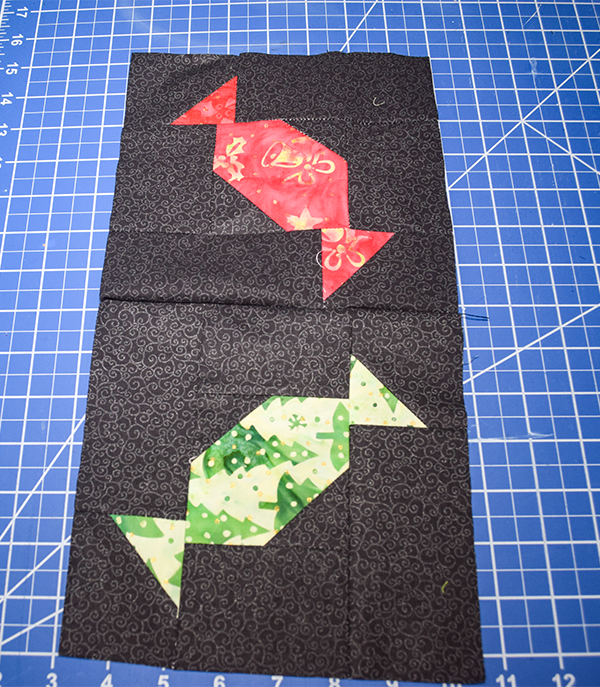
Take two small wrapped candies and place them right sides together so that they are facing opposite directions. Stitch them bottom to top. Open and press.
Place the first block right sides together with a large wrapped candy. Stitch, open and press. Place the two small wrapped candy blocks right sides together with the other side of the large wrapped candy. Stitch, open and press.
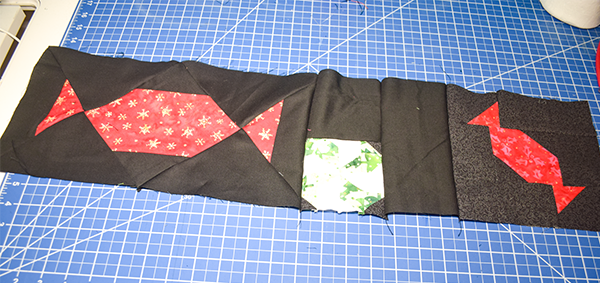
Section 2:
For section 2 stitch a small wrapped candy with a 4″ x 4″ black square with the black square above the candy. Stitch that piece right sides together with a horizontal large wrapped candy. Again, stitch, open and press. Add a 4″ x 7 1/2″ black rectangle to the small candy side then add a small wrapped candy piece to that. Stitch, open and press.
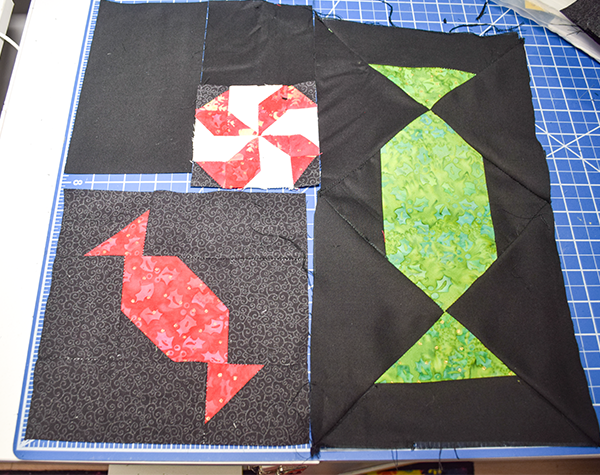
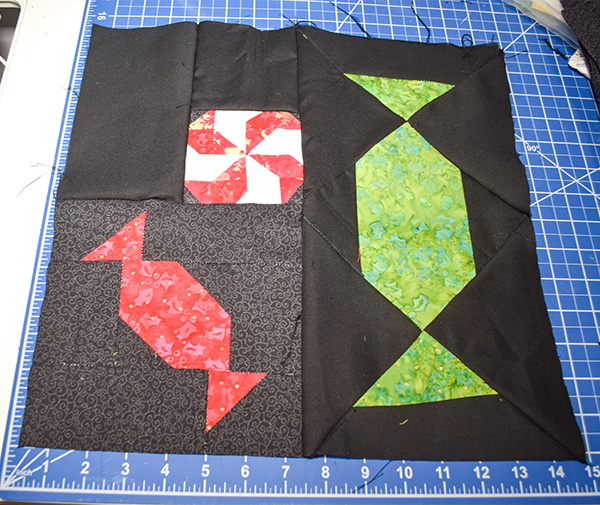
Section 3:
For section 3 take the small round candy and black square combination. Add that to a large wrapped candy which is placed horizontally right sides together. Stitch, open and press. Next, take a small wrapped candy and combine it with the round candy combination and then add a small wrapped candy to the other side facing the opposite way. Stitch, open and press. Stitch the first set to the second set right sides together. Open and press. Once those are stitched add a large wrapped candy to the side vertically in the same manner.
Section 4:
For section 4 follow the following pattern and stitch them in the same way you did for previous blocks.
- 4″ x 7 1/2″ black rectangle, small round candy and 4″ x 4″ black square stitched vertically.
- Add a large wrapped candy to the right side.
- Stitch a small wrapped candy to a small round candy combination. Add that to the bottom of the previous block.
- Stitch two small wrapped candies facing in opposite directions. Add a large wrapped candy to the right side. Then add a large wrapped candy to the top of that block. Finally, add that block to the first.
Section 5:
For section 5 follow the following pattern and stitch them in the same way you did for previous blocks.
- Stitch a round candy combination
- Add a large wrapped candy to the right side
- Take a small wrapped candy and add it to a round candy combination. Stitch the first two blocks the second vertically.
- Stitch two small wrapped candies together vertically in different directions. Add a large wrapped candy to the right. Then add a large wrapped candy to the top.
- Stitch that block to the first.
Create a small round candy combination. Stitch it to the top right of section 5 using only a partial seam.
Stitch section 2 to the top of the section 5 combination you just created again using a partial seam.
Add section 1 to the left of the section you just created using a partial seam.
Add section 4 to the bottom left using a partial seam.
Sew all of the partial seams
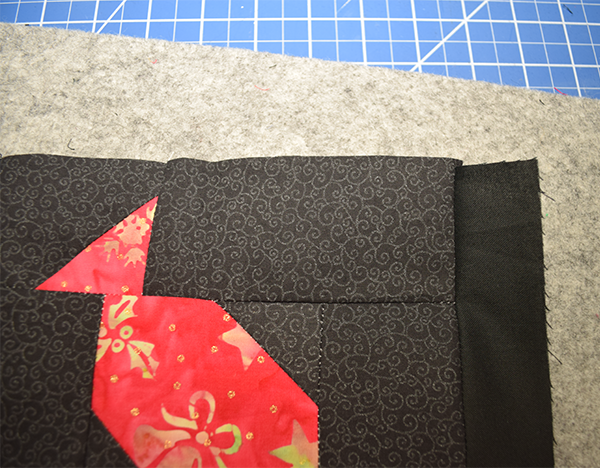
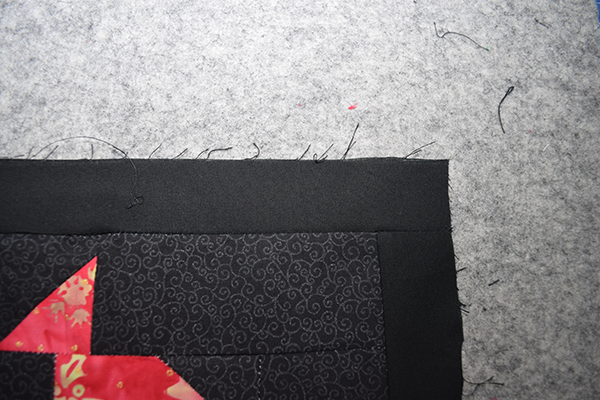
Add the borders starting with the bottom strips then adding the side strips. They measure 1 1/2″ x 49 1/2″ for the top and bottom and 1 1/2″ x 30 1/2″ for the sides.
Step 5: Sandwich the Quilt
Lay the backing fabric right sides down. Spray quilting spray on the wrong side. Add the quilt batting on top. Spray the quilting spray. Then, place the quilt top right sides up on top of the batting. You can pin using safety pins if you. like.

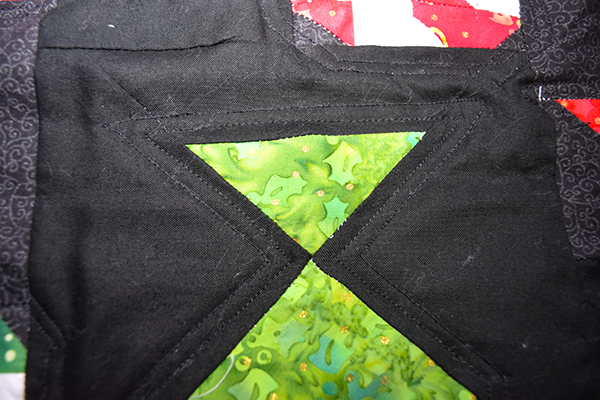
Step 6: Quilt
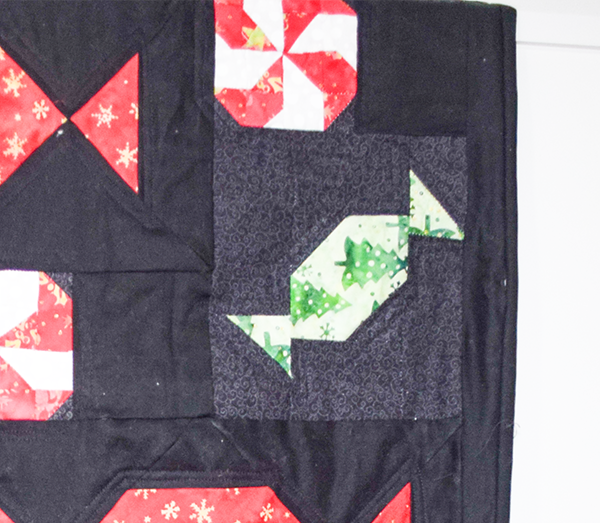
Stitch through all layers using any pattern you like. Square up the quilt and cut off the excess. I chose to employ echo quilting for my quilt. In other words I simply quilted around the large candy pieces twice to enhance the candies and give dimension to the quilt.
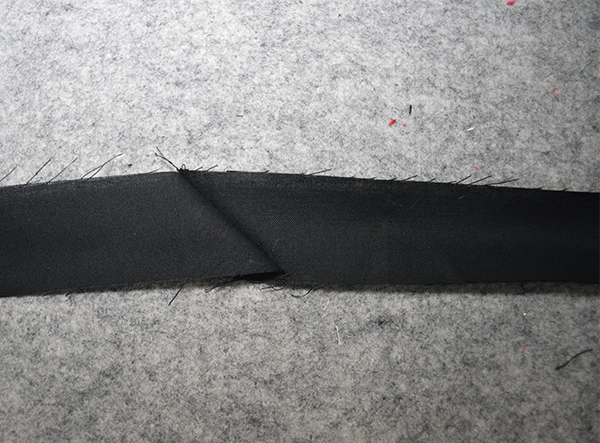
Step 7: Bind the quilt
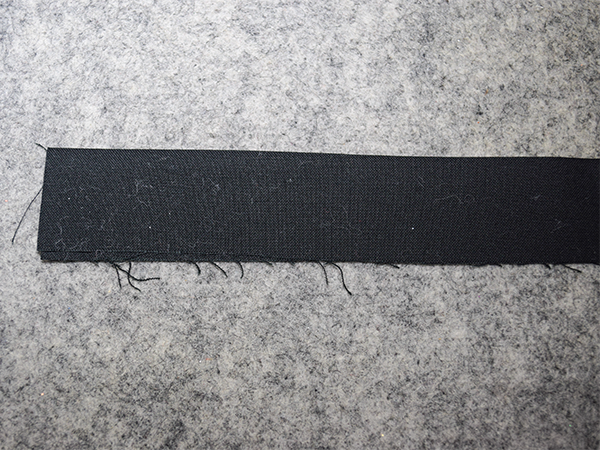
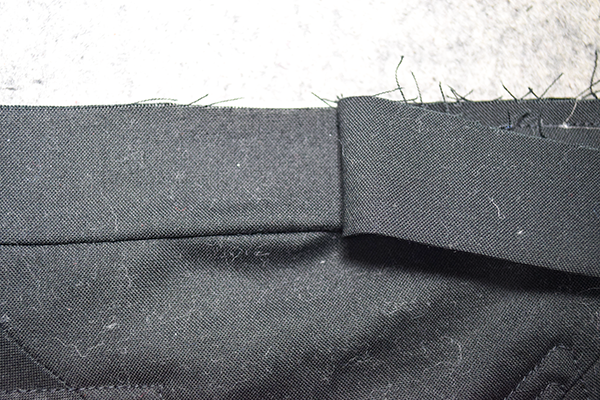
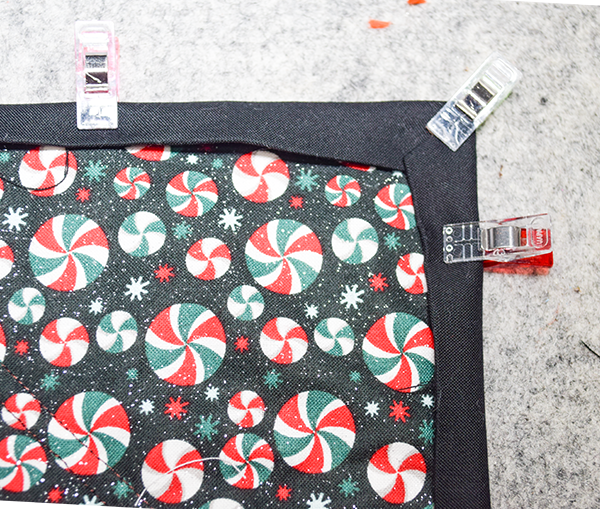
Cut five 2 1/2″ x WOF pieces for the binding. I used black fabric for mine. Stitch the pieces together by placing the ends right sides together in a cross. Stitch diagonally. Trim off the excess. Open and press. Fold the binding wrong sides together lengthwise. Place the binding right sides together with the quilt leaving a lead piece. Stitch the binding to the quilt. When you reach each corner fold the binding so that the raw edges continue to match as shown. Overlap the start of the binding by 2 1/2″ and cut. Place the ends in a cross and stitch diagonally the same way when you joined the pieces. Cut off the excess. Pull taught. Fold the binding over the raw edges and either hand stitch or use. your machine. You have now finished your Christmas candy mini quilt.
I hope you enjoyed this simple quilt project. If you would like more sewing and crafting projects subscribe to our free newsletter and receive access to our free printables library.
If you would like video tutorials of some of Sew Very Crafty's most popular posts subscribe to our free YouTube channel here.
Join our Sew Very Crafty Fans Facebook group
If you want to ask questions and share your projects join our Facebook group here. The community will help to achieve your sewing and crafting dreams.