I made a dog walking bag a while back but I thought I would make something smaller to attach to a dogs collar for storing waste bags. This dog waster bag holder is a super simple sewing project for any intermediate sewist. You will need a few specialty items to complete this project but they are easily obtained. I saw this project on the Bernina website We All Sew and wanted to share it with you. With that in mind let's get started.
I used a faux leather sheet that I purchased on Etsy for this project. The post contains affiliate inks that if you click on them and make a purchase I may receive a small commission at no extra cost to you. As an Amazon Associate I earn from qualifying purchases.
What you will Need; How to Sew a Dog Waste Bag Holder
- Faux leather sheet
- 6″ zipper — I used a continuous zipper for my project
- 1/2″ grommet
- 1″ Swivel Clip
- Sewing Machine
- Leather Needle
- Wonder Clips
- Standard sewing supplies

Step 1: Cut your Faux Leather
Cut four pieces of the faux leather. One piece that measures 4″ x 5″, two the measure 2″ x 5″ and one that measures 1″ x 3″.

Step 2: Add the Grommet
Using the grommet setter of your choice place a grommet in the center of the 4″ x 5″ piece of faux leather. Set aside.


Step 3: Add the Zipper to the Dog Waste Bag Holder
Since faux leather does not fray, simply place one of the 2 x 5″ strips close to the zipper teeth and stitch in place increasing your stitch length from 2.5 to 3.5. Repeat for the second strip, making sure that the strips are lined up. Stitch across both ends. Measure the entire zipper placket and make sure that it is 4″ x 5″. Trim using a rotary cutter if necessary making sure thee zipper remains in the center.

Step 4: Attach the Swivel Clip
Using the 1″ x 3″ piece of faux leather insert I into the swivel clip. Place the raw edges in the center of one end of the zipper and baste in place.

Step 5: Stitch the Pieces Together
Open the zipper half way!!!!!! Place the two pieces right sides together matching the raw edges. Stitch all the way around using a 1/2″ seam allowance. Do not pin. Use wonder clips if necessary. Trim the seam allowances to 1/4″.

Step 6: Box the Corners
Measure a 1/2 square starting at the seam allowance on each corner and draw. Cut out the squares. Since the side and bottom together matching the seams on each corner. Stitch across each corner using a 1/4 seam allowance.


Step 7: Turn Right Sides Out
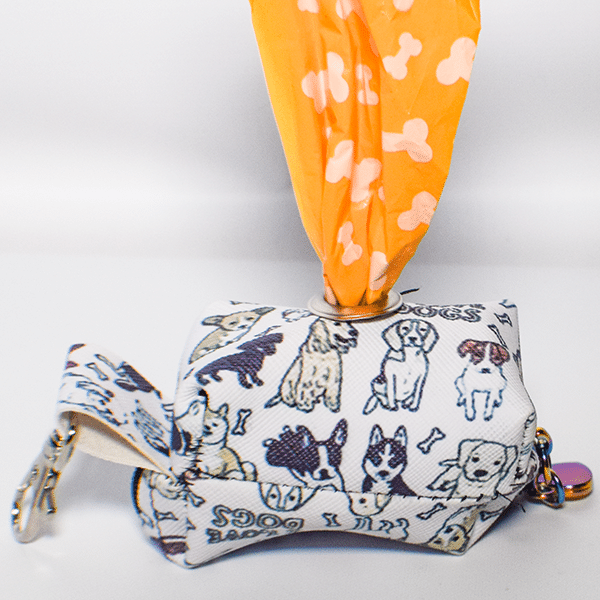
Turn the pouch right sides out through the open zipper. Poke out the corners using a poking tool like That Purple Thang. You have now finished your dog waste bag holder. Just insert the bags, poke the first one through the grommet and attach to the dog's cola and be on your way.

I hope you enjoyed this Dog Waste Bag Holder Project. If you would like more sewing and crafting projects subscribe to our newsletter and receive access to our free Printables library
If you would like video tutorials of some of Sew Very Crafty's most popular posts subscribe to our free YouTube channel here.