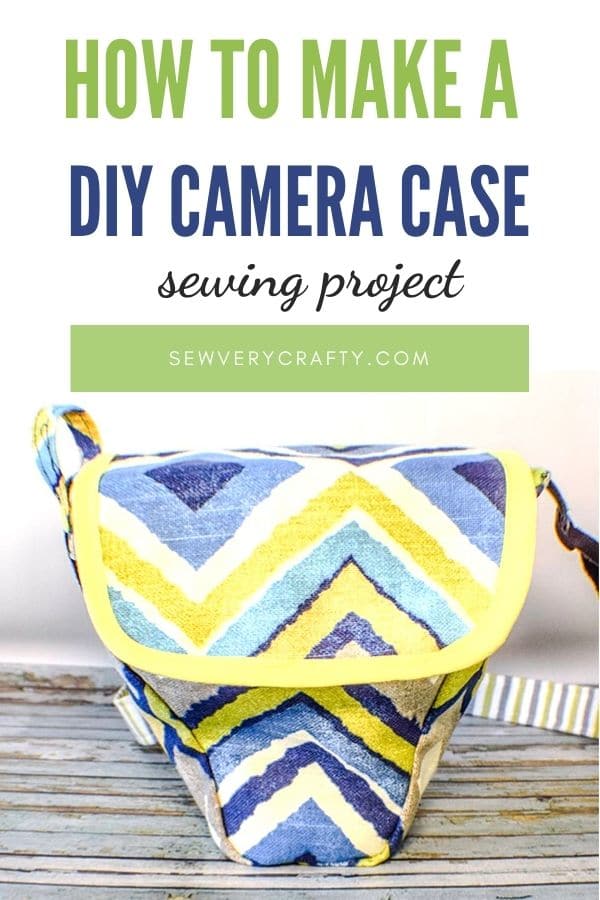
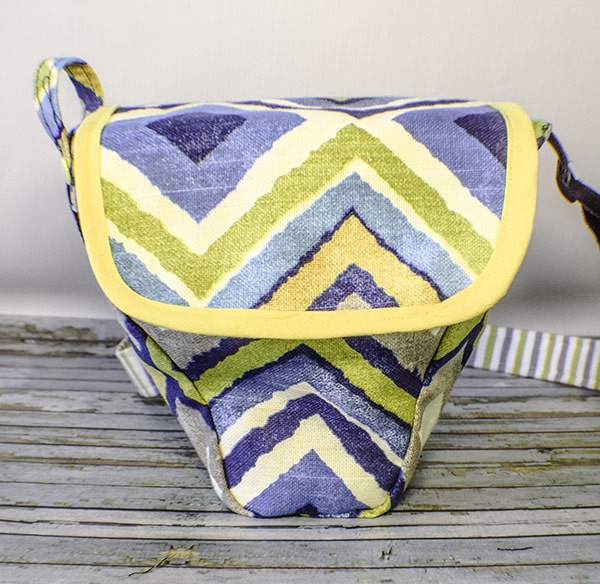
How to Make a DIY Camera Case
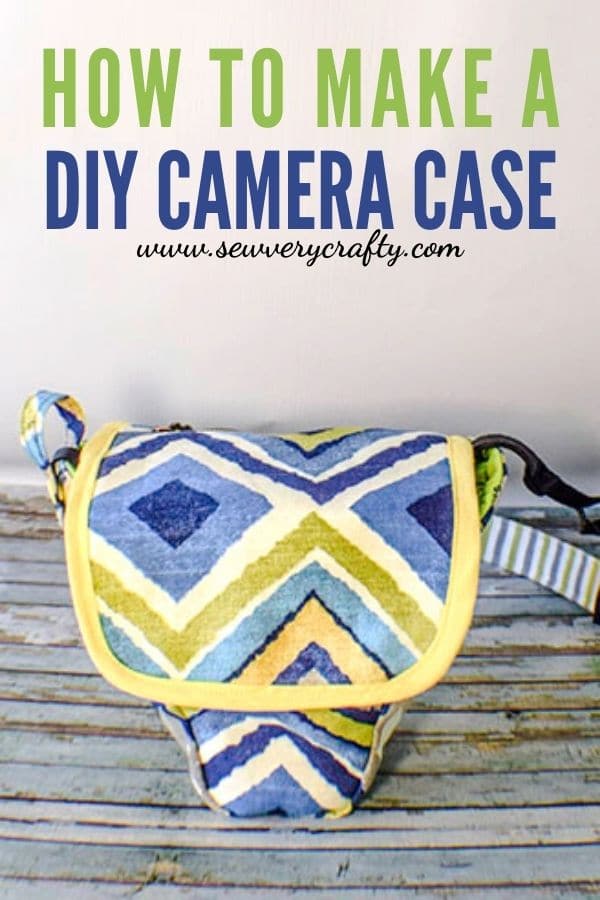
Do you need a fitted DIY camera case for your DSLR camera. This is a terrific little sewing project that will result in just that. This DIY camera case is a snap to make and allows your camera to fit snugly inside. There is a small zipper compartment to store your lens cap and a strap to hold in your camera. It is a fun and functional project that you can make with a little patience and this step-step-tutorial. If you have a pocket digital camera check out my tutorial on how to make a small case for that. Otherwise your DSLR will feel right at home with this one.
I used home decorator weight fabric for the exterior of my DIY Camera Case and standard cotton for the lining but you could use standard cotton for both if you like. I had this fabric in my stash and thought it would work well for this project. The fabric was purchased at JOANN Fabric & Craft Stores![]() but you could head to Hobby Lobby, Fabric.com, or onlinefabricstore.net to get the perfect fabric for your project. This post contains affiliate links that if you click on them and make a purchase I may receive a small commission at no extra cost to you. As an Amazon Associate I earn from qualifying purchases.
but you could head to Hobby Lobby, Fabric.com, or onlinefabricstore.net to get the perfect fabric for your project. This post contains affiliate links that if you click on them and make a purchase I may receive a small commission at no extra cost to you. As an Amazon Associate I earn from qualifying purchases.
What you will Need: How to Make a DIY Camera case
- Pattern piece you can get by clicking on this link
- 1/2 yd outer fabric
- 1/2 yd lining fabric
- 1 6″ zipper
- 1/2 yd fusible fleece like Pellon TP971F
- 5/8″ x 18 1/2″ contrast fabric bias strip or pre-made bias binding-
- 1 KamSnap
- 1 magnetic snap
- Standard sewing supplies
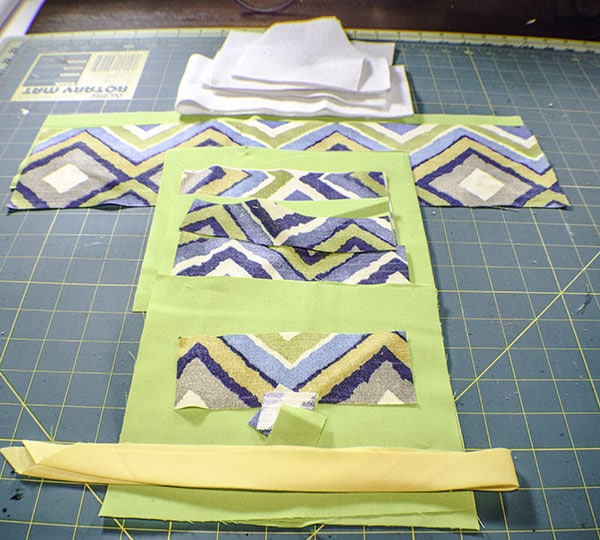
Step 1: Cut your fabrics
Two outer and two lining fabrics that measure 7 3/4″ x 7 3/4″. One outer and one lining strip that measure 4 3/4″ x 18 1/4“. One outer strip that measures 1 3/8″ x 6 1/2″. Next, one square of outer that measure 6 1/2″ x 6 1/2″ and one lining that measures 6 1/2″ x 7 1/2″. For the pocket, a rectangle of lining fabric that measures 6 1/2″ x 7 1/8″, one outer fabric strip that measures 5 3/4″ x 2″, and four zipper tabs. The zipper tabs should be two outer and two lining pieces that measure 1 1/4″ x 1″. From the fusible fleece cut a rectangle that measures 6 1/2″ x 7 1/8″ and a rectangle that measures 4″ x 17 1/2”. Finally two fleece pieces using the pattern piece.
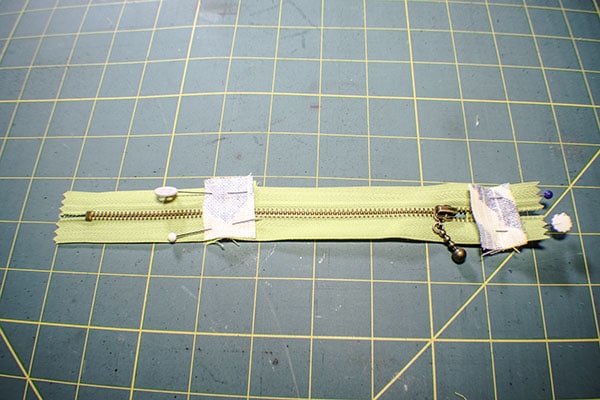
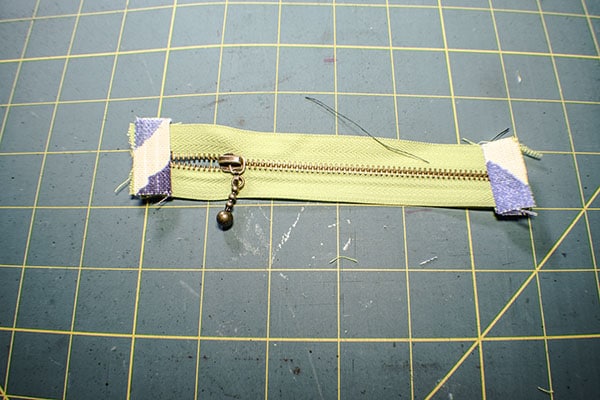
Step 2: Add the zipper tabs
Place the zipper tabs so that the zipper is sandwiched between an outer and lining tab on each end. Stitch using a 3/8″ seam allowance. Open the zipper tab and press. I used an 8″ zipper that I shortened because I did not have a 6″ zipper on hand. You could do the same if you choose.
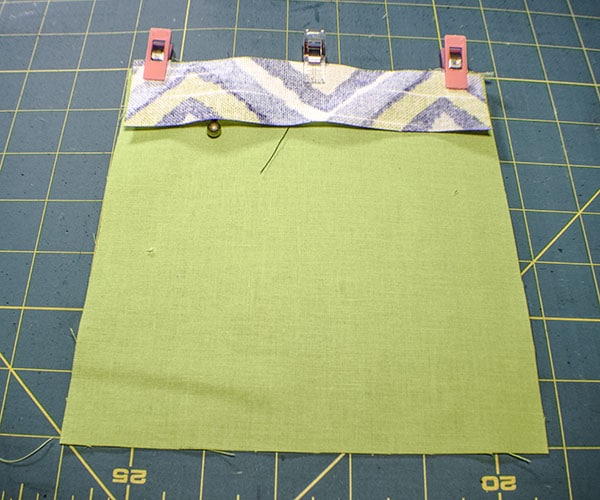
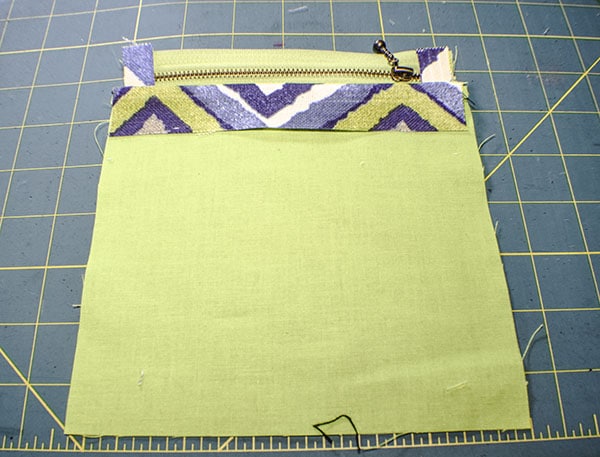
Step 3: Add the zipper to the flap
Place the zipper right sides up on your work surface. Lay the outer strip that measures 6 1/2″ x 1 3/8″ right sides down on the zipper. Place the zipper wrong sides down on the lining pocket piece that measures 6 1/2″ x 7 1/8″. Clip all three pieces together. Stitch through all layers using a 3/8″ seam allowance. Fold the Lining piece up so that it matches the other side of the zipper. Place the zipper right sides down on the outer piece that measures 6 1/2″ x 6 1/2″ and stitch the layers together using a 3/8″ seam allowance.
Step 4: Fuse the Fleece
Take the 6 1/2″ x 7 1/8″ piece of fusible fleece and round the bottom corners as shown. Fuse the fleece to the lining piece that measures 6 1/2″ x 7 1/2″ so that there is fleece on the bottom edge and the top edge is free of fleece. Trim the corners to match.
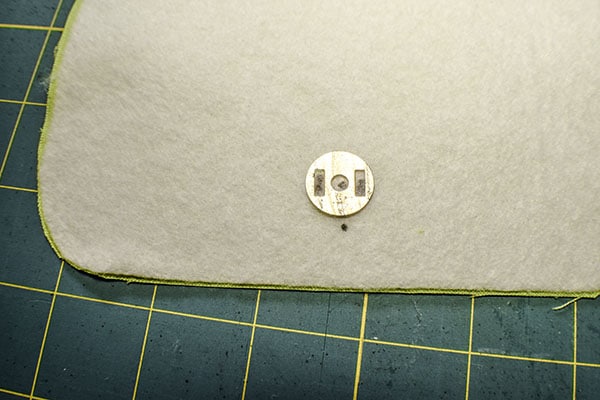
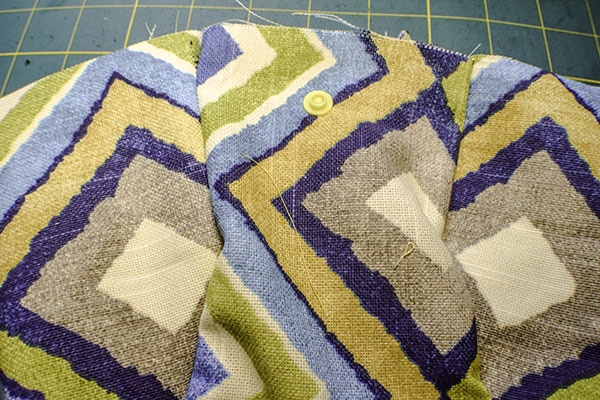
Step 5: add half of the magnetic snap
Measure up 1″ from the bottom and center of the fused lining piece and place one side of the magnetic snap. Do this by marking the slits using the grommet piece. Using a small pair of scissors or a seam ripper open the slits. Insert the prongs of the snap into the slits. Place the grommet onto the slits and fold over the prongs to secure.
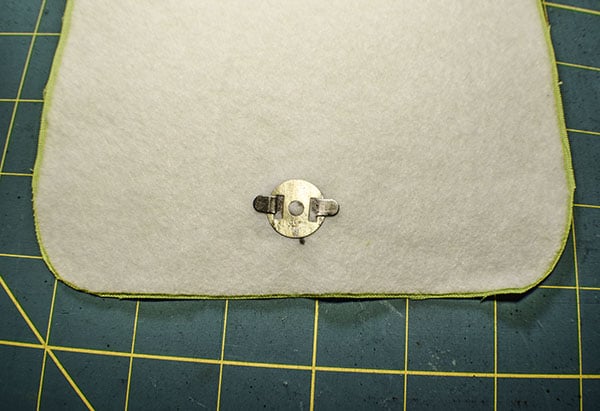

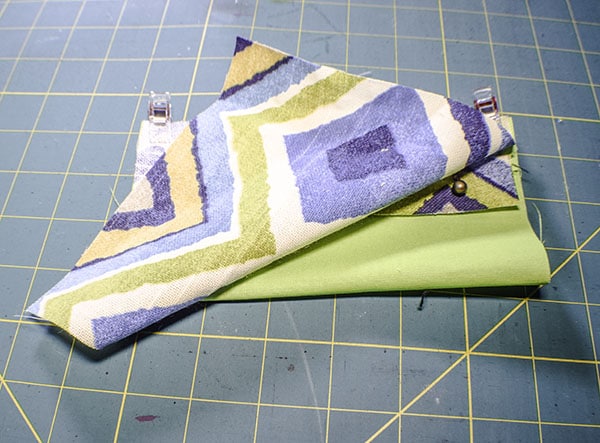
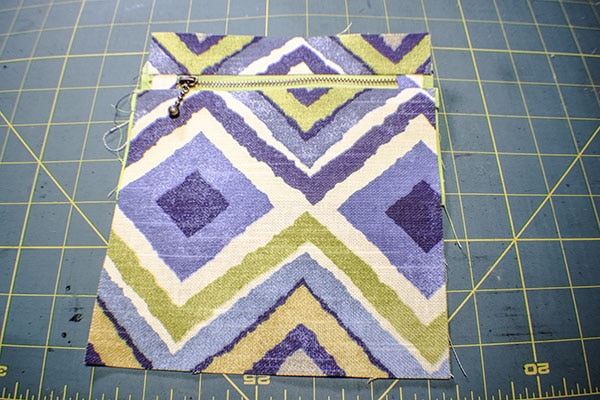
Step 6: create the flap
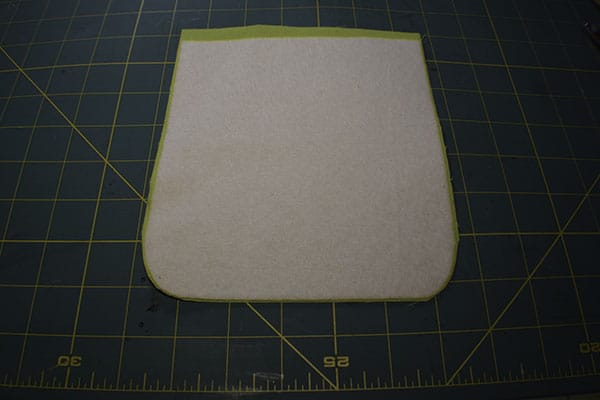
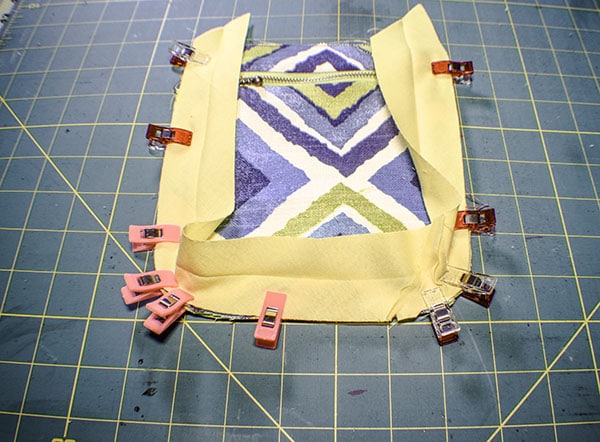
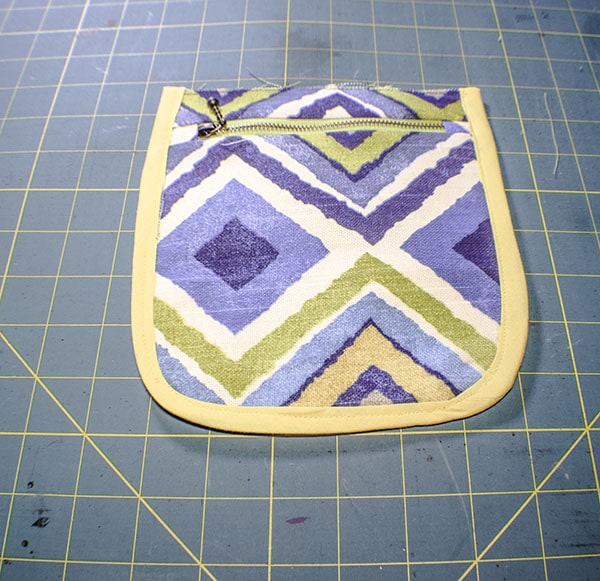
Place the flap piece with the zipper and the fused lining piece that you just created wrong sides together and clip or pin. Trim the outer flap pieces to match the curved lining piece. Secure the two pieces together by stitching a 1/8″ seam allowance all the way around the piece. Cut off the excess zipper tabs. Place the bias binding strip all the way around the outside of the slap pining carefully around the curves.Stitch using a 3/8″ seam allowance. Fold the binding over to the lining side and fold under the raw edge. Pin or clip. Stitch all the way around to secure.
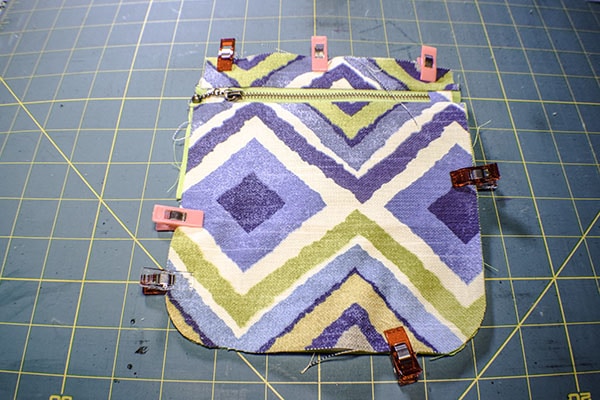
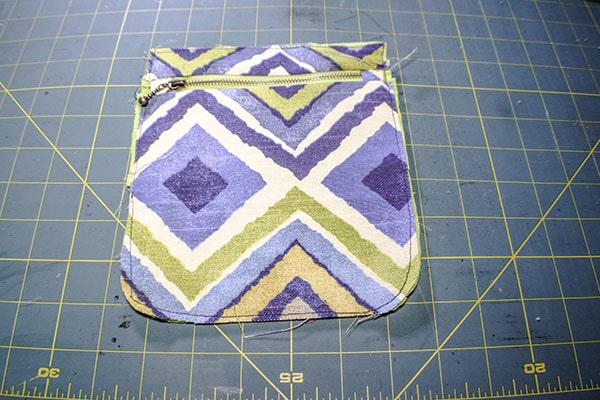
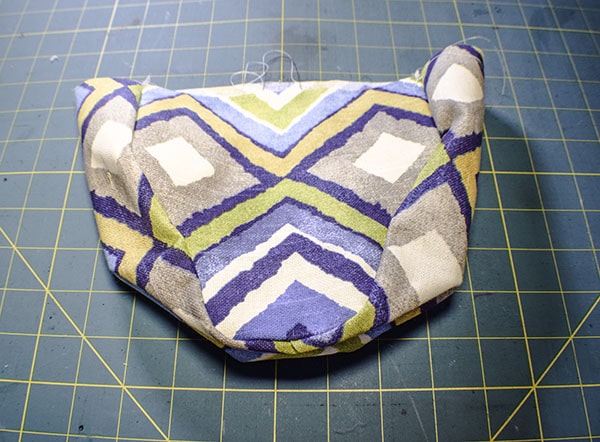
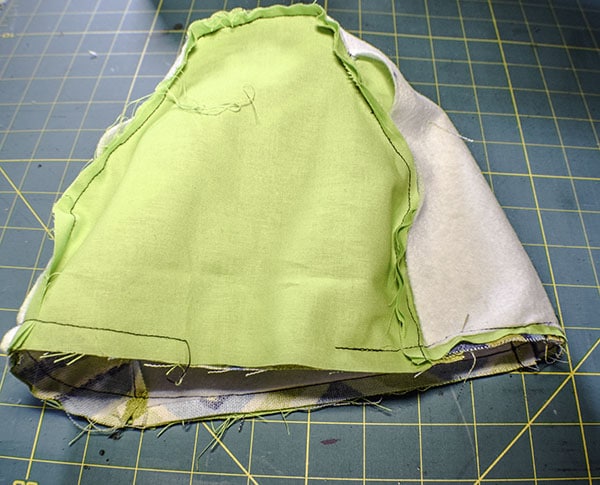
Step 7: Make the body of the DIY Camera Case
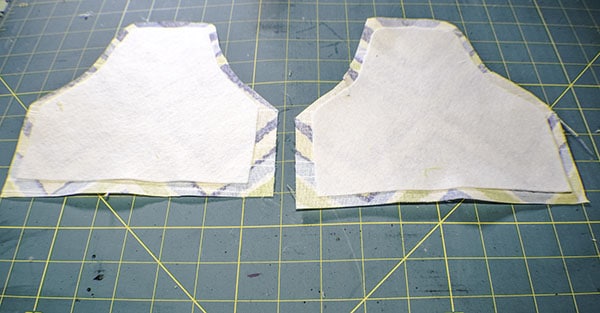
Fuse the fleece pieces that were cut using the pattern piece to the outer fabric pieces that measure 7 3/4″ x 7 3/4″. Place the fused pieces to their corresponding lining pieces right sides together. Trim around the sides of the fleece keeping the 3/8″ seam allowance as shown. Fuse the 4″ x 17 1/2″ fleece piece to the 4 3/4″ x 18 1/4″ outer piece.
Step 7: Create the body of the DIY Camera Case
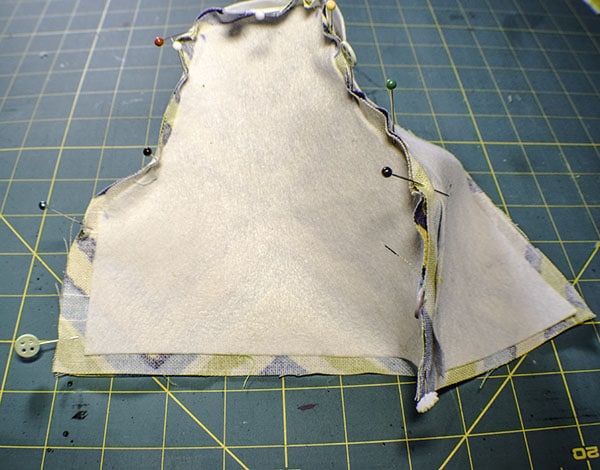
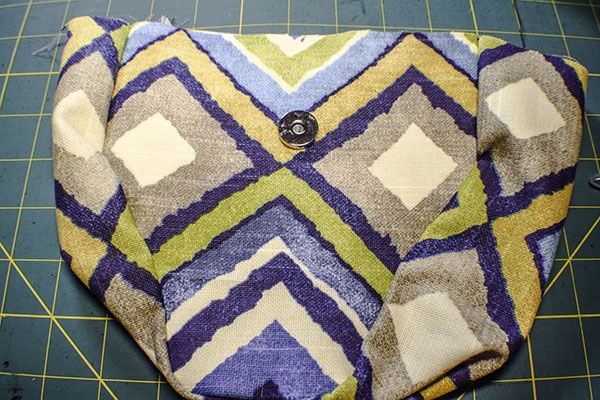
Take the outer body piece and place it right sides together with the outer fused strip. Starting at the pointed center pin the center of the strip to the body piece and pin the strip along both sides of the body. Stitch the pieces together using a 3/8″ seam allowance. Repeat for the other side. Turn right side out. Add the other half of the magnetic snap. Measure down from the top and center 2 3/8″ and add the other half of the snap in the same way you added the first half.
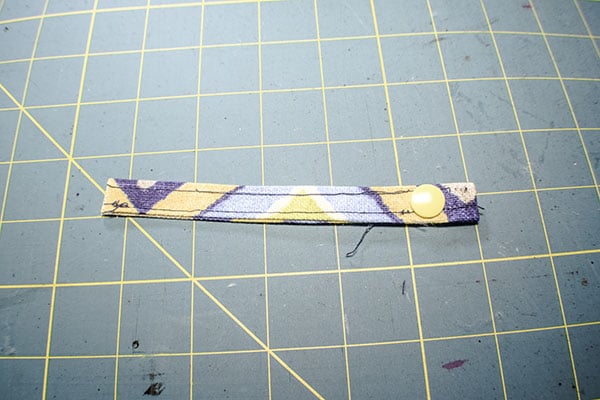
Step 8: Create the strap
Take the 1 3/8″ x 6 1/2″ outer piece and fold one of the sort edges down 1/4″ and press. Fold the long edges in toward the center and press. Fold in half again and press. Top stitch along both long edges. Add the strap end with the raw edge to one side of the DIY Camera Bag body in the center. Stitch using a 1/8″ seam allowance. Add half of the KamSnap to the end of the strap. Place the other half of the KamSnap about 1″ down the side of the body in the center.

Step 9: Create the lining
Create the lining the same way you created the outer body.
Step 10: Finish the Bag
Place flap on the back of the body of the DIY camera case and clip or pin. Insert the body of the bag including the flap into the lining so that the pieces are right sides together. Make sure that the flap and the strap are inside the lining. Stitch around the top of the case using a 3/8″ seam allowance leaving an opening at the front of the case for turning. Turn the entire case right sides out through the opening. Push the lining into the bag and press. Top stitch all the way around the top of the case making sure to close the opening. You have now finished your DIY camera case.


I hope you enjoyed this project. If you would like more sewing and crafting projects sign up for our newsletter and receive access to our free printables library.
If you would like video tutorials of some of Sew Very Crafty's most popular posts subscribe to our free YouTube channel here.