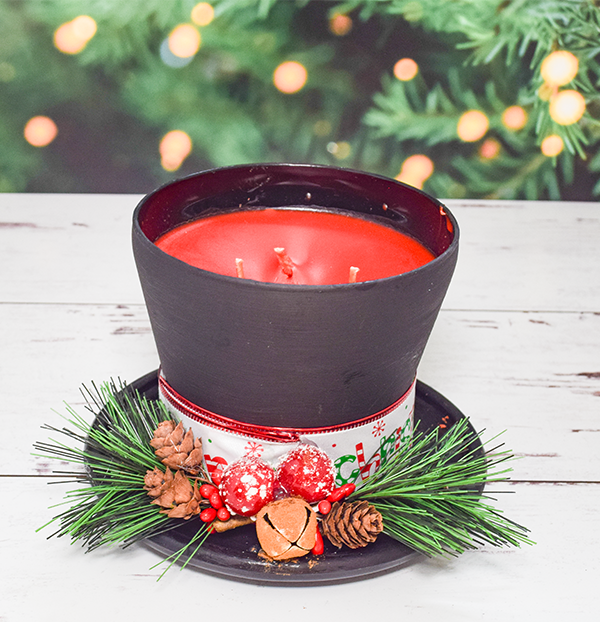
Really want a quick and easy decorative Christmas candle? Check out this Dollar Tree Snowman Hat Candle. It is so easy to make and is perfect for the Christmas season. You can even make this into a scarecrow hat or an Uncle Sam hat using the same technique with different colors and embellishments. It is all up to you. I decided a snowman hat would be perfect since Christmas is right around the corner. if you would like more Dollar Tree crafts head over to my Dollar Tree page. For more holiday sewing and crafting projects check out my holiday project vault.
Note: This post contains affiliate links that if you click on them and make a purchase I will receive a small commission at no extra cost to you. As an Amazon Associate I earn from qualifying purchases.
What you will Need: How to Make a Dollar Tree Snowman Hat Candle
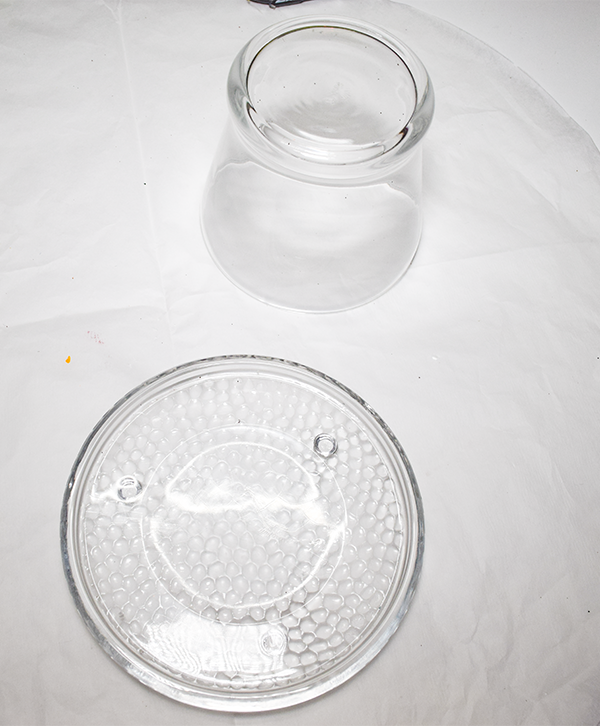
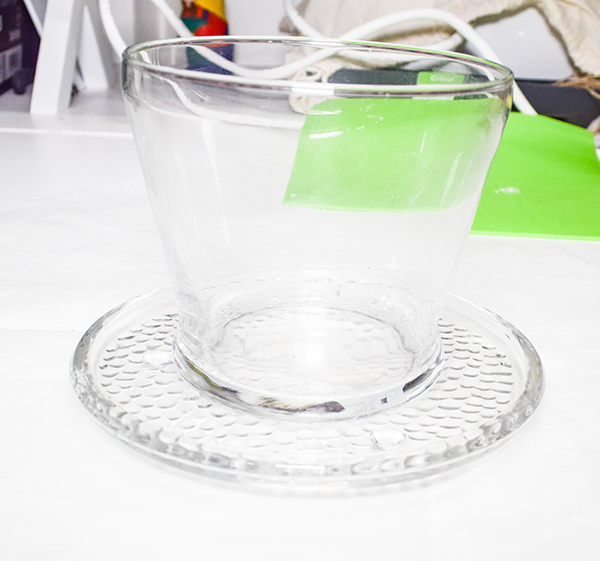
- Roman Urn Glass Container
- Glass Plate Candle Holder
- Black Acrylic Paint
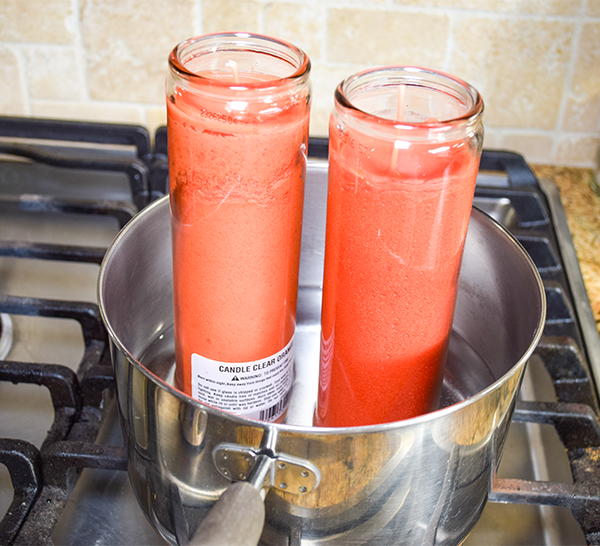
- 2 Dollar Tree Glass Jar Candles
- Christmas Ribbon
- Christmas Greenary
- Christmas Candle Scents
- Candle Wicks
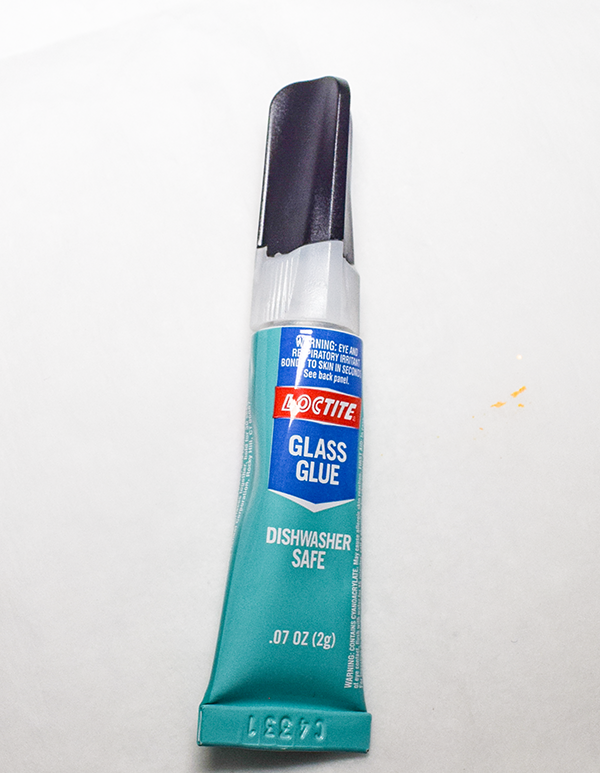
- Glass Glue
- Hot Glue
Step 1: Glue the Glass Pieces
Add glass glue to the bottom rim of the Roman urn glass container. Then add hot glue to the center. Place the Roman urn container to the center of the top of the glass plate candle holder. Let dry completely.
Step 2: Paint the two glass Pieces
Using the black acrylic paint cover the urn and the plate. You may need two or three coats for nice overall coverage. I used a multisurface satin for this project. Spray paint would work great for this as well.

Step 3: Add the Wicks
Place three wicks to the bottom of the urn glass. If you have adhesive wicks just place them on the bottom. Otherwise add a bit of glue to hold them down. The wicks will be long for the container. Hold them up by placing two pencils on the top and lean the wicks against them.
Step 4: Melt the Wax
I used two Dollar Tree glass candles for this proeject. Place the candles in a pan of water. Heat up the water and watch carefully until the wax melts. Once the wax in the two glass containers has melted add a few drops of the Christmas scent.
Step 5: Pour the Wax into the Urn glass
Very carefully and using an oven mit pour the wax into the urn container. You will need two Dollar Tree glass candles for this. Make sure that the wicks are still upright. Let cool completely before moving on to the next step.
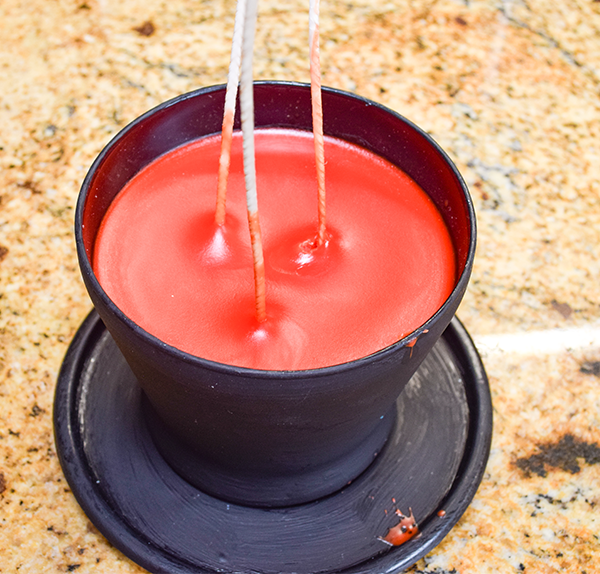
Step 6: Cut down the Wicks
Trim the Wicks to about 1/2″ above the wax.
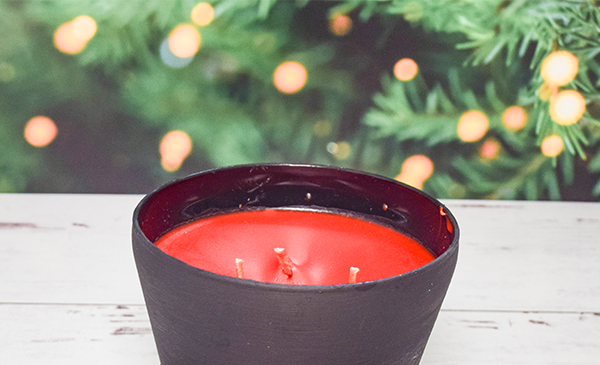
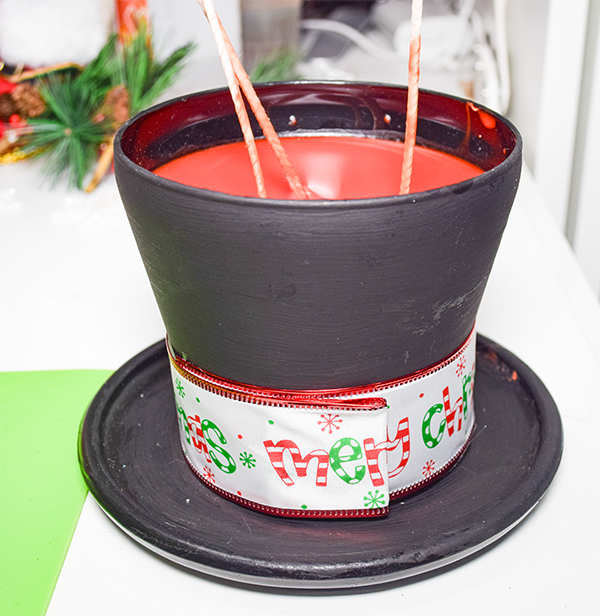
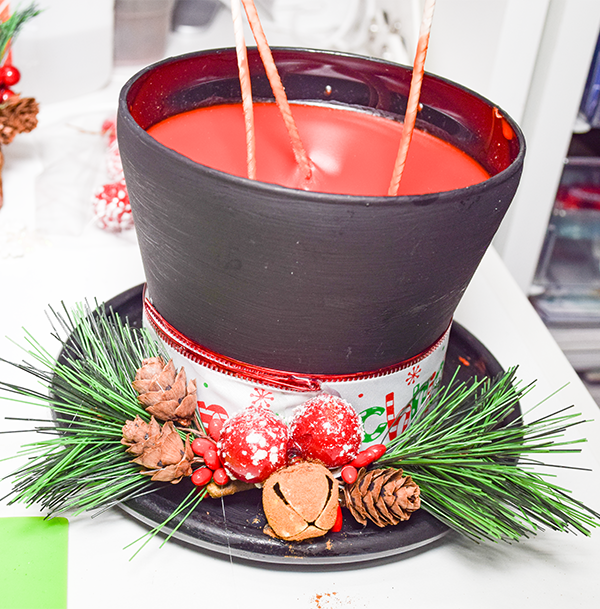
Step 7: Embellish the Candle
Wrap a piece of Christmas ribbon around the bottom of the urn glass. Glue the ends together to secure. Add some Christmas greenary to the ribbon. I used Dollar Tree Christmas picks for this. Once you have added the greenary you have finished your Dollar Tree Snowman Hat Candle.
I hope you enjoyed this simple Dollar Tree craft. if you would like more sewing and crafting projects subscribe to our free newsletter and receive your free Dollar Tree Holiday eBook.
If you would like video tutorials of some of Sew Very Crafty's most popular posts subscribe to our free YouTube channel here.
Join our Sew Very Crafty Fans Facebook group
If you want to ask questions and share your projects join our Facebook group here. The community will help to achieve your sewing and crafting dreams.