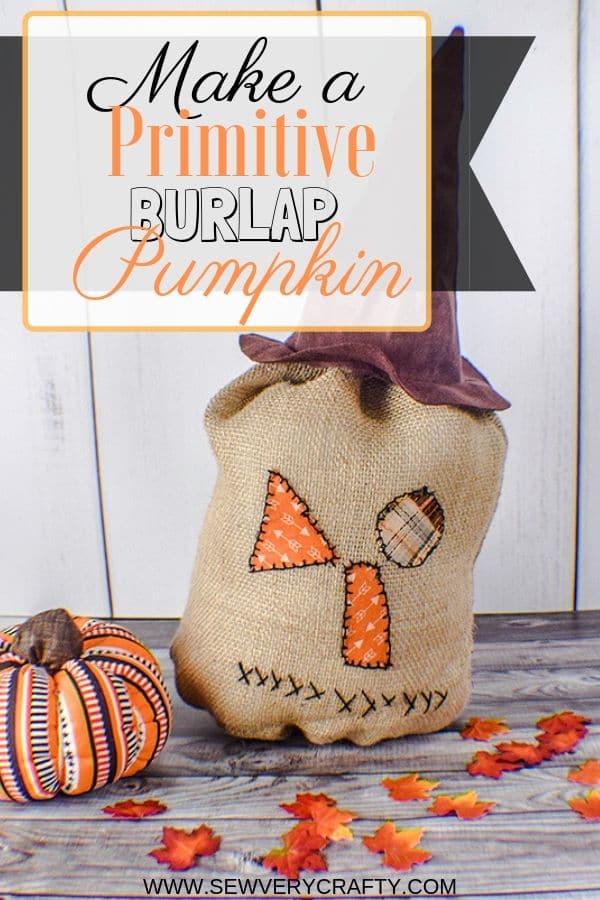
How to Make a Primitive Burlap Pumpkin
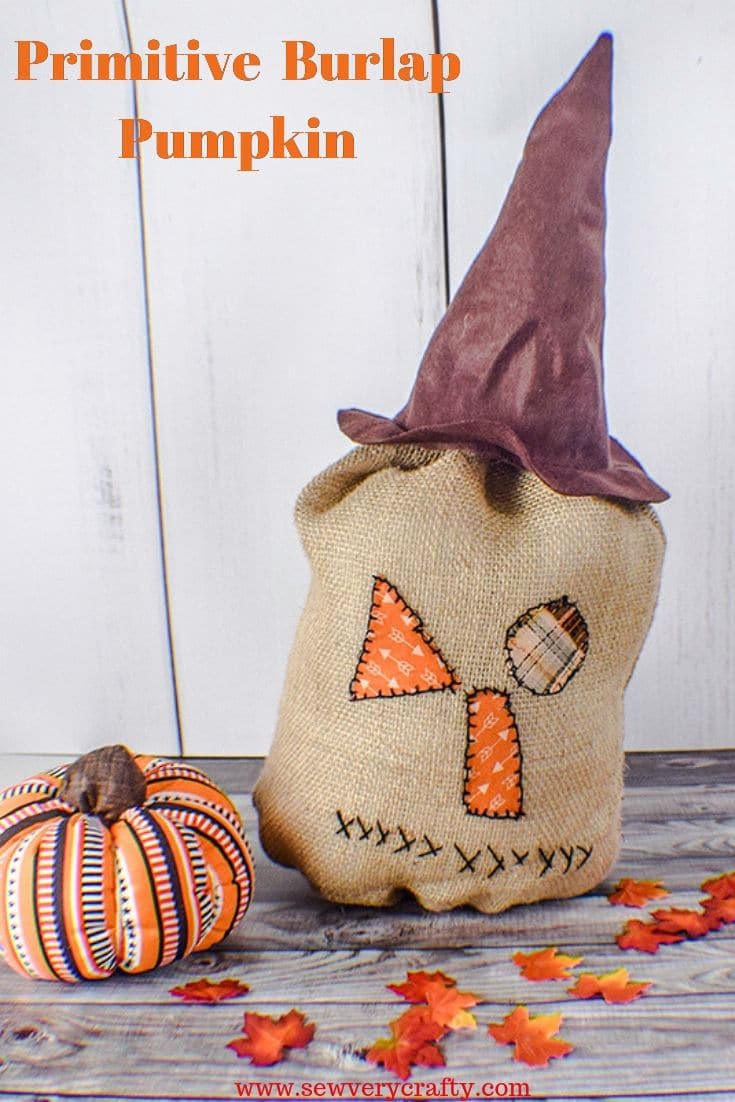
Halloween is just around the corner and there is nothing like a primitive burlap pumpkin to really capture the season. I decided to create this primitive pumpkin so that anyone with basic sewing skills could recreate it. It's primitive face and witch's hat make for a fun machine and hand sewing project. You can make this pumpkin as scary as you like or not scary at all. It is completely up to you. It is really the primitiveness of this pumpkin that makes it perfect for Halloween.
I used burlap that I purchased at JOANN Fabric & Craft Stores![]() as the main fabric for my pumpkin but you could use another fabric if you like. I liked the color and texture of the burlap for this project. Of course I had some Halloween fabrics in my stash that I used for the face. I decided to tea stain them to give them an old, primitive look. I then used black embroidery floss to hand sew all of the face pieces to my primitive pumpkin. For the hat I used felt. You can also get these fabrics and materials at Hobby Lobby and Fabric.com without ever leaving your home. This post contains affiliate links that if you click on them and make a purchase I may receive a small commission at no extra cost to you.
as the main fabric for my pumpkin but you could use another fabric if you like. I liked the color and texture of the burlap for this project. Of course I had some Halloween fabrics in my stash that I used for the face. I decided to tea stain them to give them an old, primitive look. I then used black embroidery floss to hand sew all of the face pieces to my primitive pumpkin. For the hat I used felt. You can also get these fabrics and materials at Hobby Lobby and Fabric.com without ever leaving your home. This post contains affiliate links that if you click on them and make a purchase I may receive a small commission at no extra cost to you.
What you will Need: How to Make a Primitive Burlap Pumpkin
- Hat Pattern you can get Here
- 1/2 yd Burlap or other base fabric
- 1/4 yd brown felt for Hat
- Scraps of Halloween Fabric
- Polyester Fiber fill
- Black Embroidery Floss
- Cup of Hot Black Tea
Step 1: Cut your Fabrics
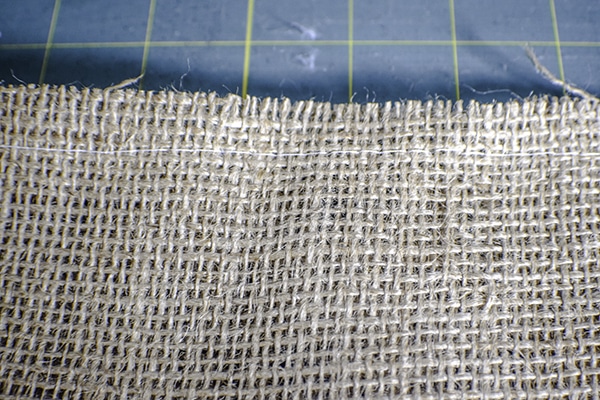
Cut a rectangle of burlap or other base fabric that measures 20″ x 25″.
Step 2: Create the tube
Fold the fabric right sides together and sew the long edge using a 1/2″ seam allowance. You will create a tube of fabric.
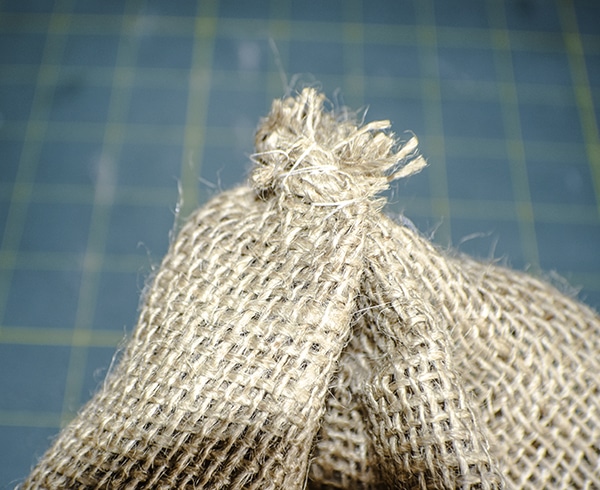
Step 3: Baste the short end
Baste one of the short edges using a long basting stitch about 1/2″ from the raw edge. Leave a 4″ long tail.
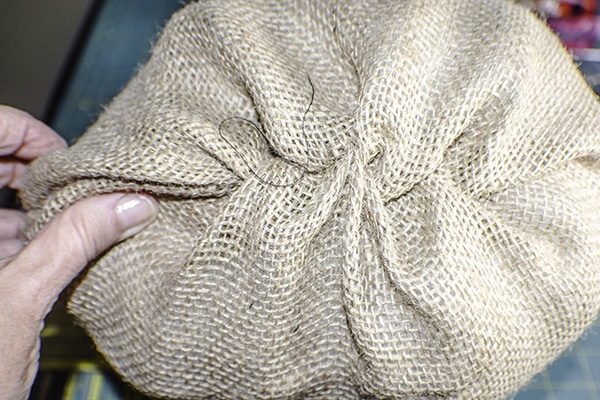
Step 4: gather the bottom
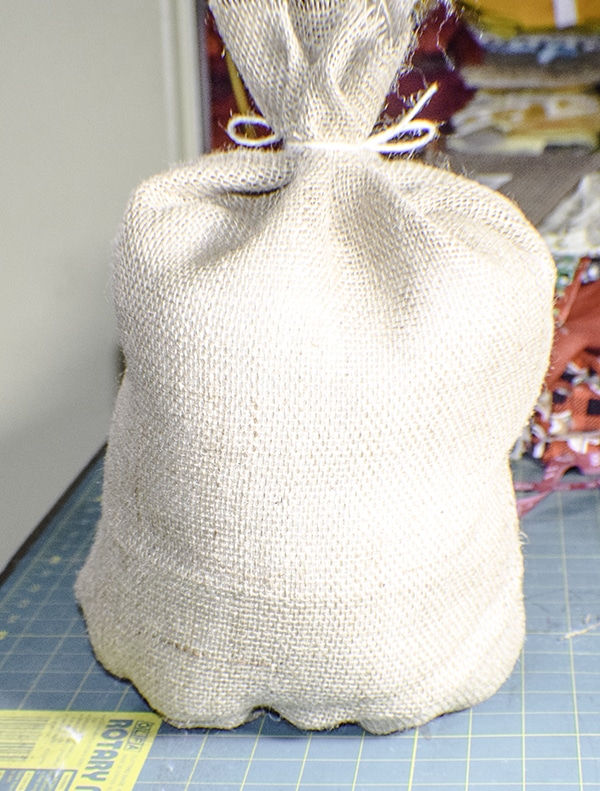
Pull the threads from both ends to gather the fabric. When the fabric is totally gathered, tie off the thread. This will be the bottom of your pumpkin. Stitch through the gathers and knot the fabric to keep it taut and sturdy. Trim the thread ends
Step 5: Fill the pumpkin
Fill the pumpkin with a few cups of rice or beans for weight and then 3/4 full with fiber fill and gather the remaining fabric at the top. Using some twine tie off the top. Leave the extra fabric there. Do not cut it off.
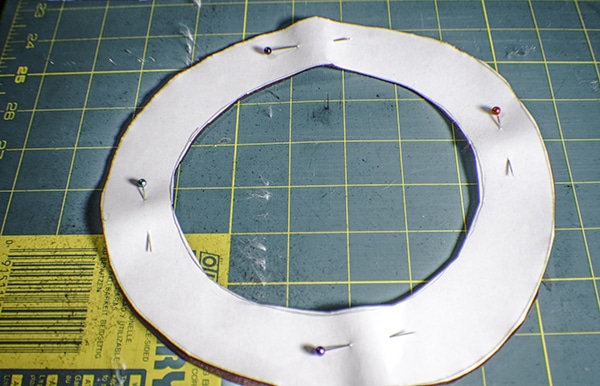
Step 6: Create the Hat Pattern
Print out the hat pattern and tape it together by abutting the edges of the paper. Cut out the pattern on the fold from the felt. You should have a cone shaped piece for the crown of the hat and a round piece for the brim. Cut out the center of the circle that is the brim. It will look like a donut shape.
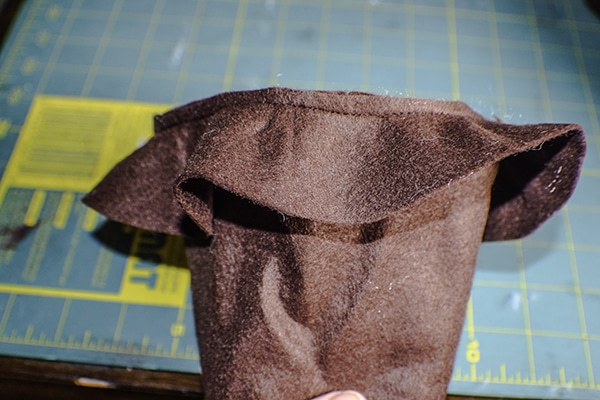
Step 7: Stitch the Crown
Sew the long edges of the cone together using a 1/4″ seam allowance. Turn the cone right sides out. Use a poking tool to push out the point. For this I used That Purple Thing that you can get in my Amazon shop.
Step 8: Add the Brim
With right sides together pin the brim center to the open side of the cone and stitch using a 1/4″ seam allowance. Fold the brim down. Place the hat on top of the pumpkin and tack it on. I added a little bit of fiber fill to keep the hat straight but you don't have to if you don't want.
Step 9: Add the face
It is time to add the face. You can make the face any way you want. I chose to use some tea stained fabric and embroidery floss to keep the primitive look. I also chose to use an asymmetrical look to my face as well. You can copy my face or create one of your own. Normally I would add the face before stuffing the pumpkin but I knew I was going to hand sew the face and I wasn't sure where to put it without having the hat on so I waited until after I completed the hat and stuffed the pumpkin.
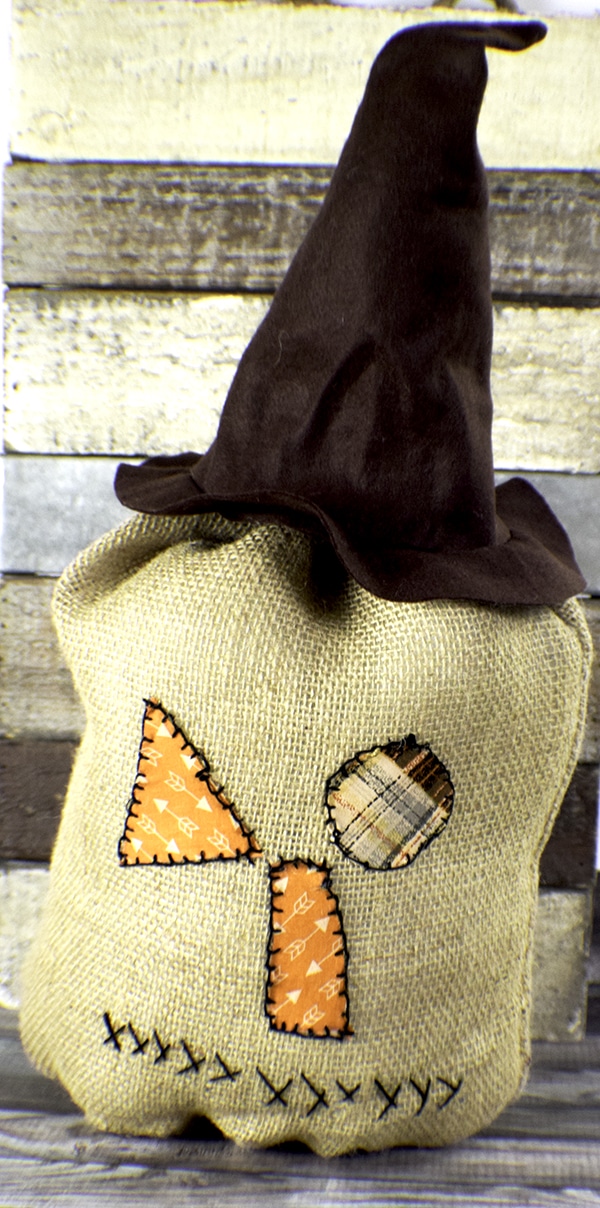
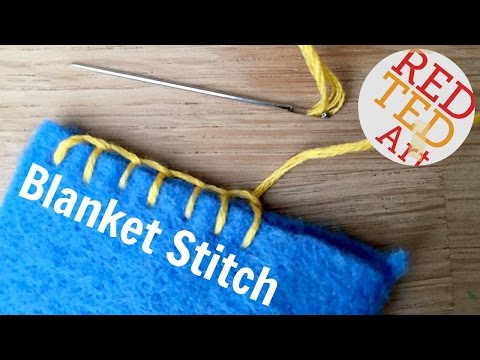
I stitched the eyes and nose of my pumpkin using blanket stitch. If you are unfamiliar with how to do blanket stitch take a look at this video.
I hope you enjoyed this project. if you would like more sewing and crafting projects sign up for our newsletter and receive access to our free printables library.
If you would like more Halloween Projects check out our tutorial on How to Make Fabric Pumpkins or How to Make a pumpkin Treat Bag.