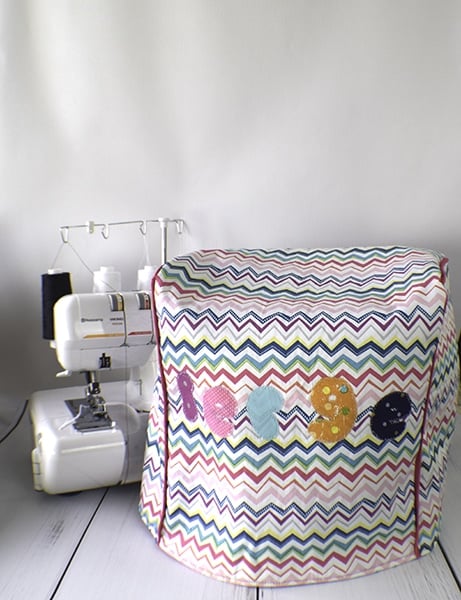
How to Make a Serger Cover

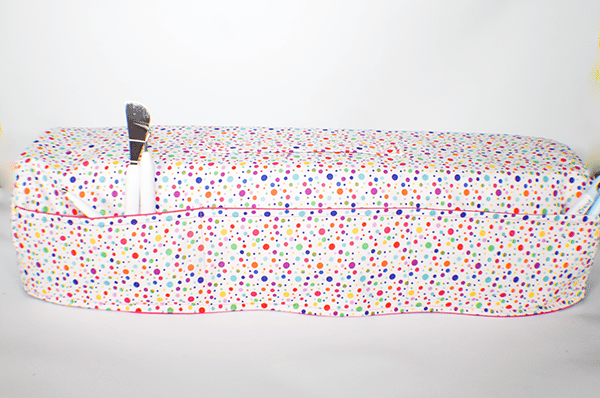
I really needed to make a serger cover for my serger. I have a little plastic one that came with it but it really doesn't work very well and it has no personality. It was time to change that. I was inspired to create this cover by So Sew Easy but modified the standard pattern to fit my needs. I chose to line my cover for a more finished look but you do not need to line yours if you don't want. This serger cover has a little padding and structure with some fusible fleece. This cover fits a Husquvarna Viking 200S but I believe that it will fit most any serger. If you would like a simple sewing machine pattern check out my padded sewing machine cover tutorial here.
I used fabrics that I purchased at JOANN Fabric & Craft Stores![]() but you could get some really cute fabrics at Hobby Lobby or Fabric.com. I used remnants for the applique letters. This is a super simple sewing project that anyone with basic sewing skills can make in no time at all. This post contains affiliate links that if you click on them and make a purchase I may receive a small commission at no extra cost to you. As an Amazon Associate I earn from qualifying purchases.
but you could get some really cute fabrics at Hobby Lobby or Fabric.com. I used remnants for the applique letters. This is a super simple sewing project that anyone with basic sewing skills can make in no time at all. This post contains affiliate links that if you click on them and make a purchase I may receive a small commission at no extra cost to you. As an Amazon Associate I earn from qualifying purchases.
If you would like a video tutorial head over to YouTube and watch the step-by-step video tutorial of this project. While you are there subscribe to my free YouTube Channel and give me a thumbs up.

What you will Need: How to Make a Serger Cover
- Serger Cover Pattern you can Get Here
- Letter Pattern Pieces you can Get Here
- 3/4 yd outer fabric, lining fabric and fusible fleece
- 1/4 yd Wonder Under
- Remnants or scraps of fabric for applique
- Piping (Optional)
- Standard Sewing Supplies
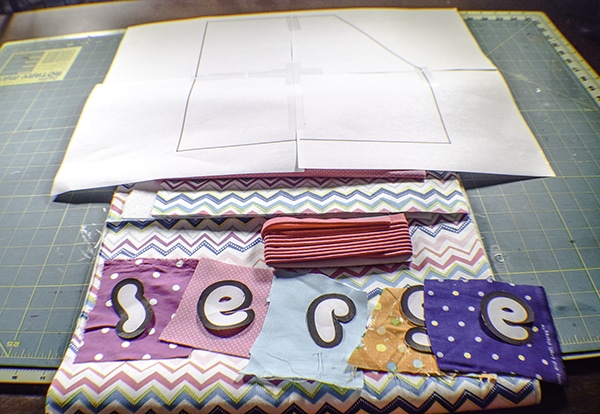
Step 1: Create Your Pattern
Create a pattern that looks like this or print out the pattern pieces:

Step 2: Cut your Fabrics
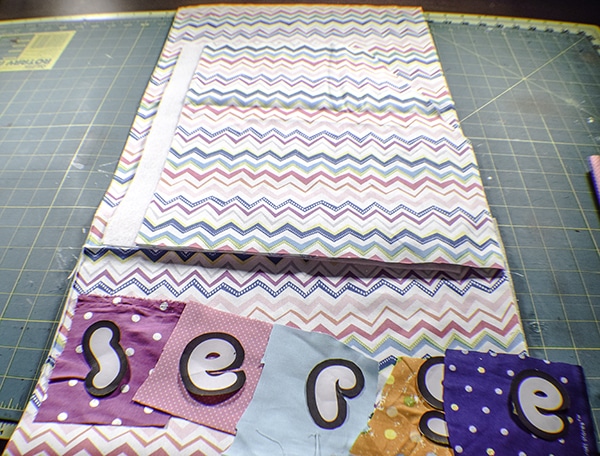
Print out the serger cover pattern piece and tape it together. Cut Two Mirror images of the pattern piece in the outer fabric, lining fabric, and fusible fleece. Cut two pieces of outer and lining fabric and one fusible fleece that measure 14″ x 37″. Print out the letters from the pattern pieces.
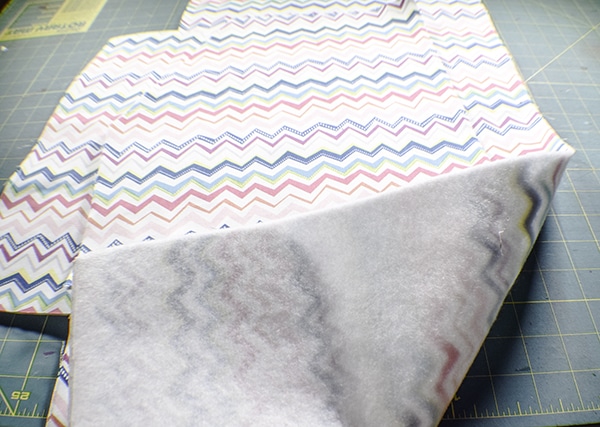
Step 3: Fuse the fleece
Fuse the fleece to the outer fabrics following the manufacturers instructions.
Step 4: Cut out the Applique letters
Wonder Under has a Glue side and a paper side. Determine how much fabric you need for each letter and cut out a square. Place the bumpy or glue side of the Wonder under onto the wrong side of the fabric and press with a hot iron and a damp press cloth until it is fused. If you have any questions follow the manufacturers instructions. Place your pattern piece on the paper side of the Wonder Under reversed. It is important that the letter be reversed or else it will be reversed in the final product. Trace the letter onto the paper side of the Wonder Under. Cut out the letter. Repeat for all of the letters.
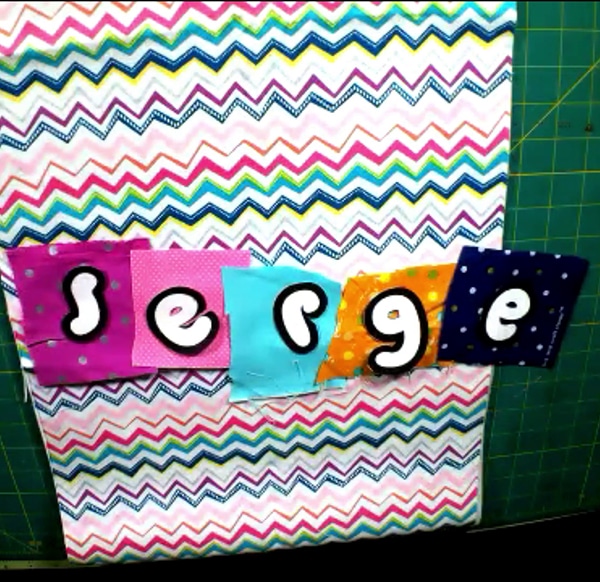
Step 5: Applique the letters
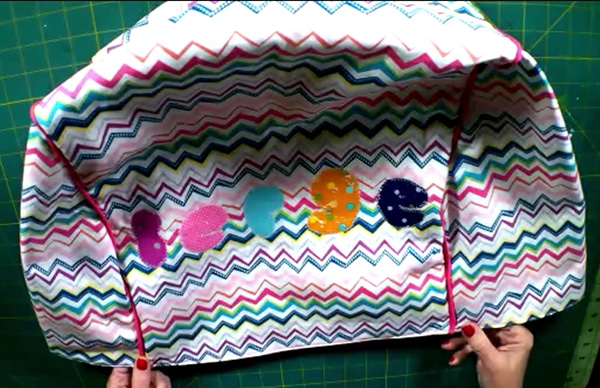
Remove the paper backing from the letters and place them 6″ from the bottom of the 14″ x 37″ piece of outer fabric and centered. Stitch around the letters using zig zag stitch, straight stitch or blanket stitch. You have completed your applique.

Step 6: Add the Piping (Optional)
If you are going to add piping now is the time. Pin your piping to the edges of your pattern pieces with raw edges together and stitch. You can now treat the pattern pieces and piping as one.

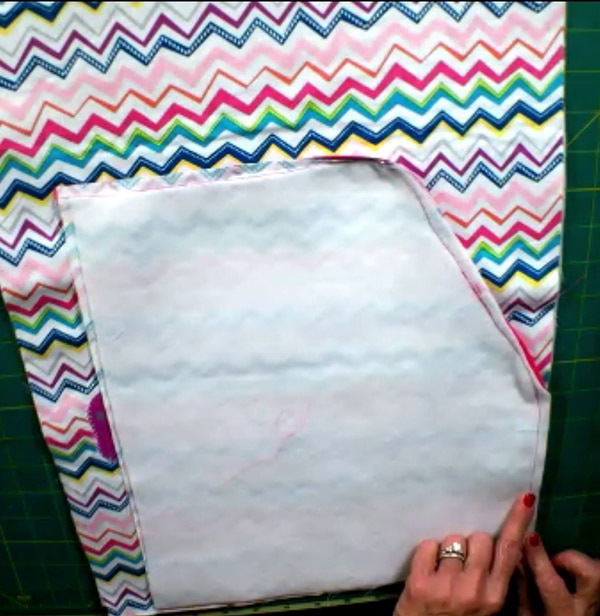
Step 6: Stitch the Sides to the Center
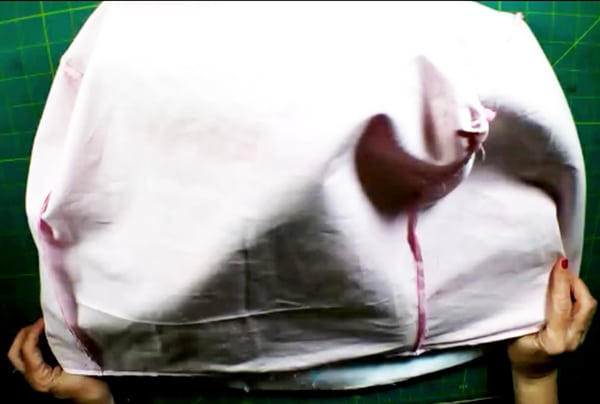
Place the side pattern piece right sides together with the 14″ x 37″ piece and pin. Stitch together using a 1/4″ seam allowance. Repeat for the other side. Turn right sides out. Create the lining in the same way but leave a 3″ opening in one of the side seams for turning. If there is a little extra fabric left over at the bottom just trim it off.
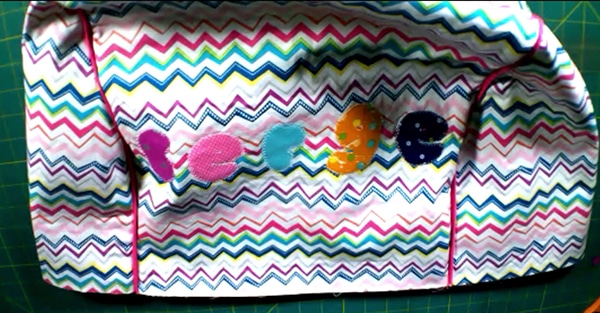
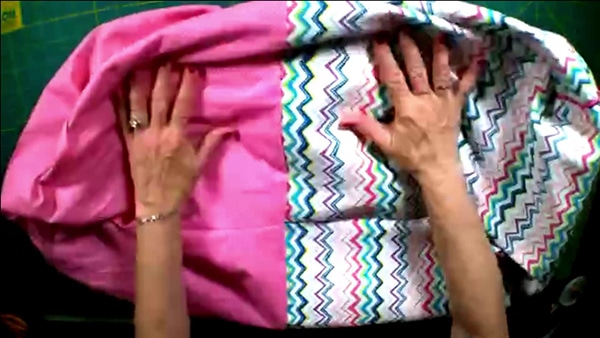
Step 7: Add the lining
Place the outer cover inside the lining cover right sides together and stitch all the way around the bottom. Turn the cover right sides out through the opening you left in the lining. Close the opening using ladder stitch. If you are unfamiliar with ladder stitch check out this video. Top stitch along the bottom for a more professional look.

I hope you enjoyed this project. If you would like more sewing and crafting projects sign up for our newsletter and receive access to our free printables library
If you would like more Video Tutorials subscribe to my Free YouTube Channel Here for more Free simple sewing videos.