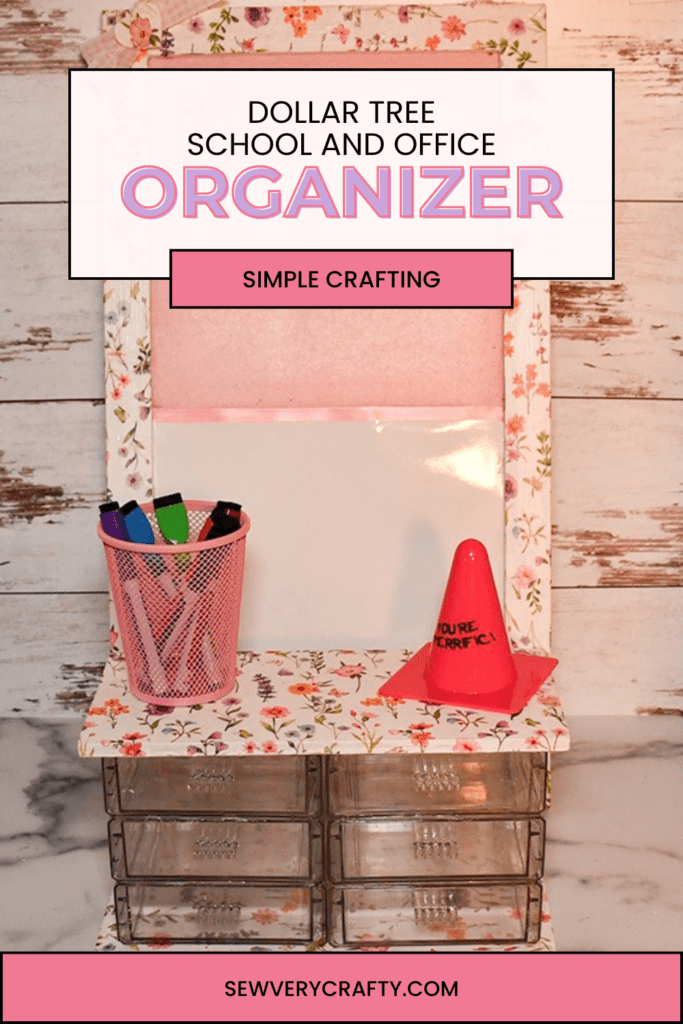
Once again I am inspired by my friend's daughter, She will be back in school sooner than she thinks so I came up with these projects to keep her organized for the upcoming school year. These Dollar Tree office and school organizers are perfect to keep your room or office attractively organized on a dime so to speak. Both projects are super simple to make and require basic crafting skills and a few Dollar Tree items. There is a frame that I used for the second project that I purchased from Amazon but head to Dollar Tree for everything else. If you would like more Dollar Tree crafts head over to my Dollar Tree page for more.
Note: This post contains affiliate links that if you click on them and make a purchase I will receive a small commission at no extra cost to you. As an Amazon Associate I earn from qualifying purchases.
What you will Need: How to Make Dollar Tree Office and School Organizers
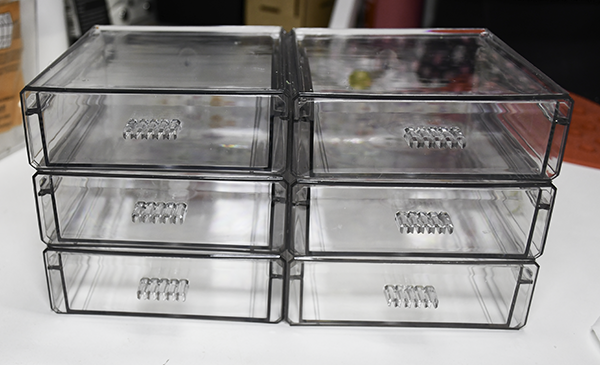
- 6 Dollar Tree Acrylic Stackable Drawers
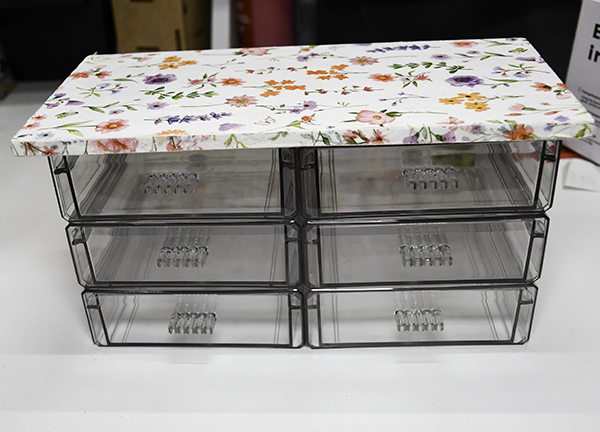
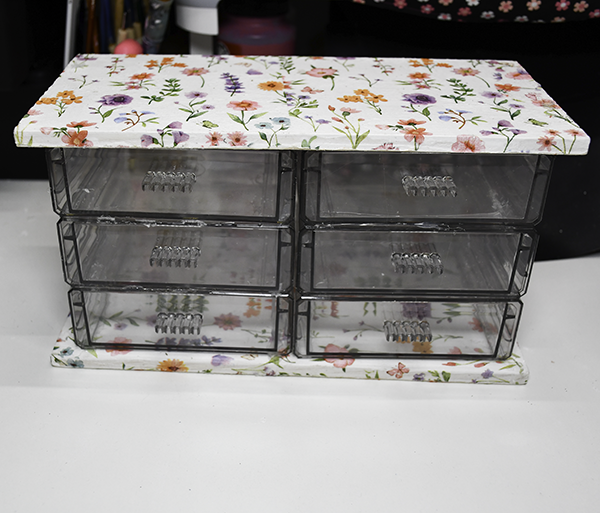
- 2 Dollar Tree wood planks – 11″ x 5 1/2″
- Napkins
- Mod Podge
- Hot Glue
- 1 Dollar Tree 10″ x 10″ Felt Bulletin Board
- 1 Dollar Tree 10″ x 10″ canvas
- Wood for the back of the canvas. I used one of the smaller bamboo cutting boards
- White Board or chalk board panel — I used the white board
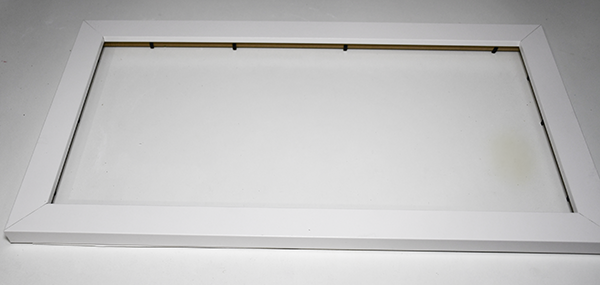
- Frame that measures 10″ x 20″
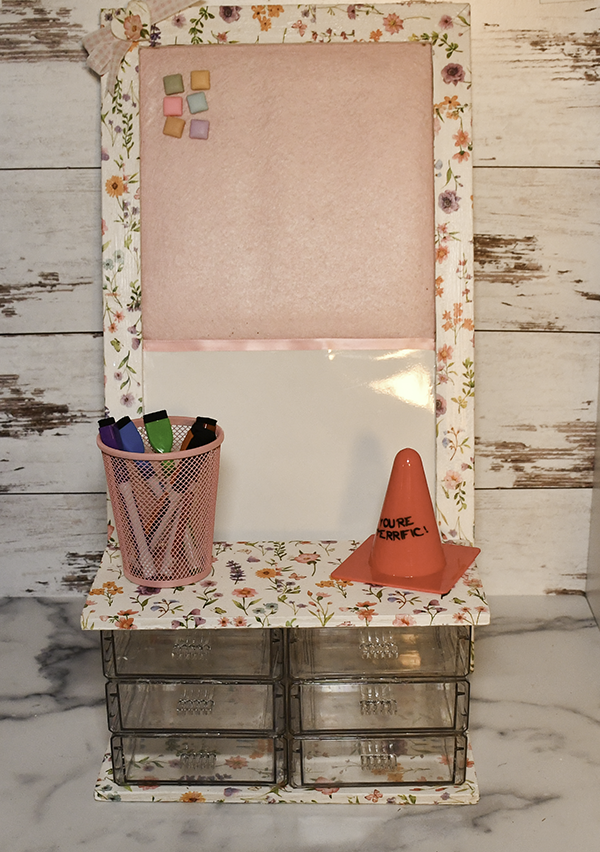
Stackable Drawers
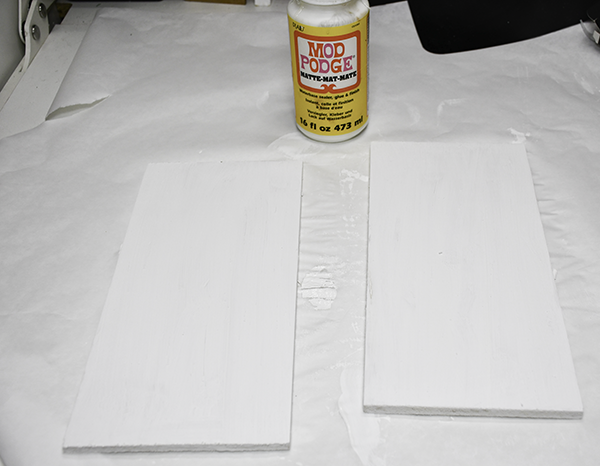
Step 1: Paint the Wood
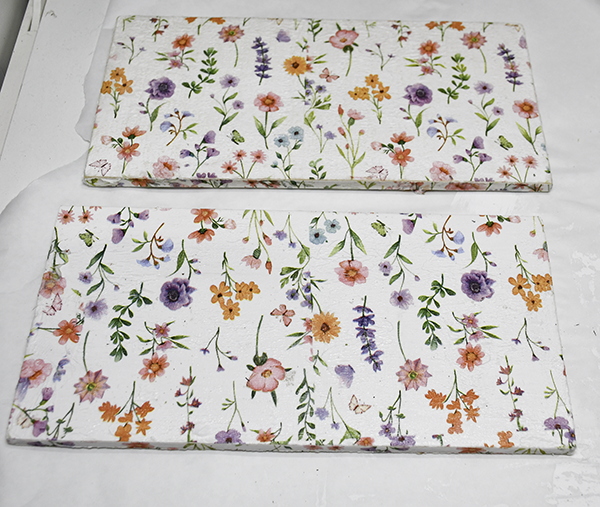
For the stackable drawers project you need two Dollar Tree wood boards that measure 11″ x 5 1/2″. Start this project by waiting the boards white. You want a nice white background if you are using light colored napkins as I am for the decoupage. Laet the Paint dry or using a heating tool to dry it faster.

Step 2: Add the Mod Podge
Spread Mod Podge on the top sides and bottom of the painted wood boards. Let the Mod Podge dry. The underside of the boards are very rough. you will need to put two or more coats of Mod Podge for the napkin to adhere properly.
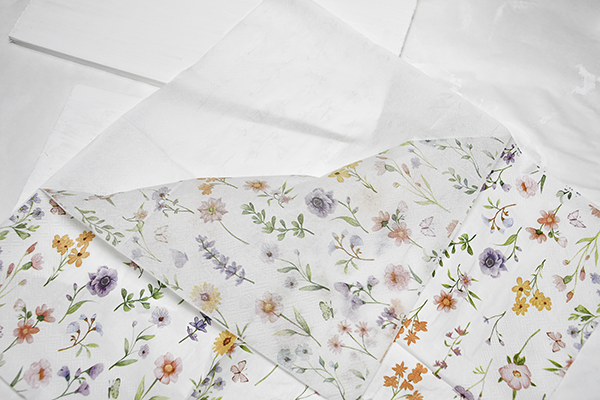
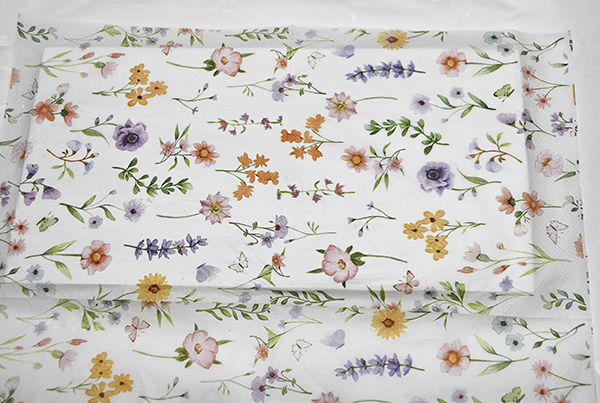
Step 3: Add the Napkin
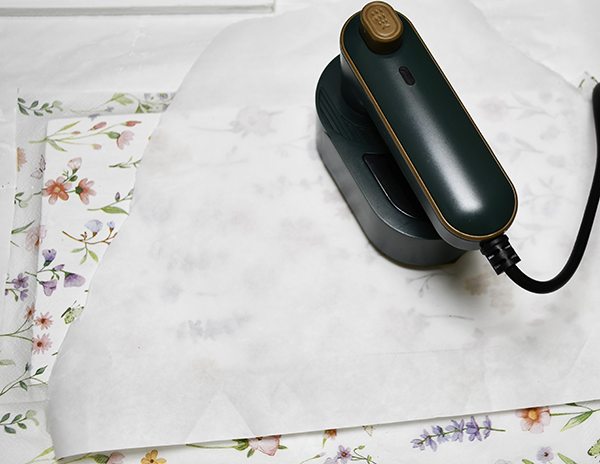
Separate the layers of the napkin so you just have the top printed layer. Place the top layer onto the top of the board. Place a piece of parchment paper on top if the napkin and iron it using a small iron. I have a travel iron for this purpose. Smooth out any wrinkles with the iron. Let cool and do the same thing for all sides of the board. Once the napkins have cooled and are properly adhered to the board add another coat of Mod Podge. Let dry.
Step 4: Attach the wood Boards
Start by placing hot glue to the top of the drawer unit. Add one board to the top of the drawers. Let that piece dry. Turn the stack upside down and add the second board. Once the second drawer has been added you have finished your stackable drawer organizer.
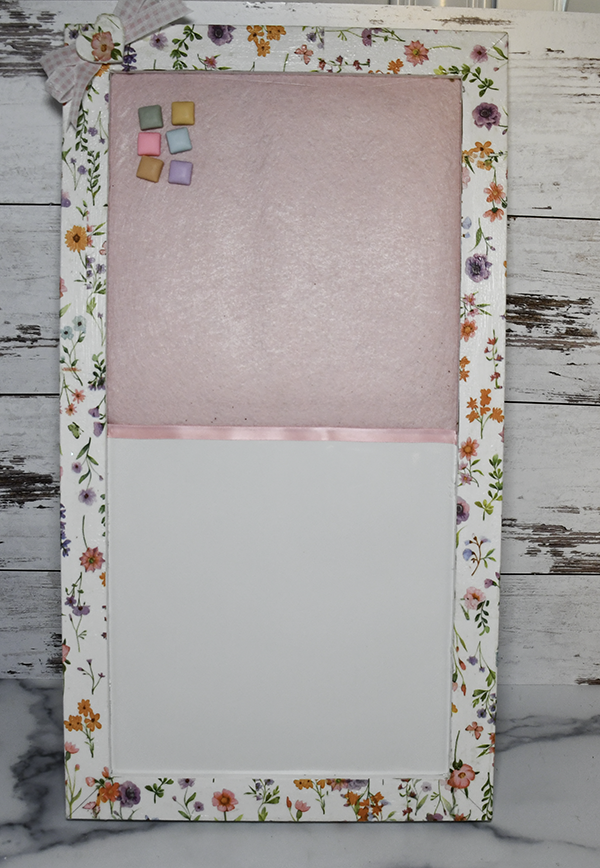
Bulletin Board and White Board
Step 1: Remove the Insides
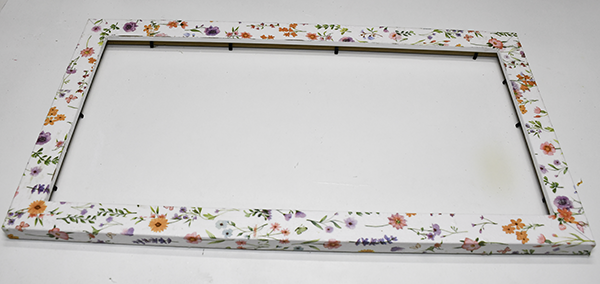
Remove the glass, paper and cardboard backing of the frame.
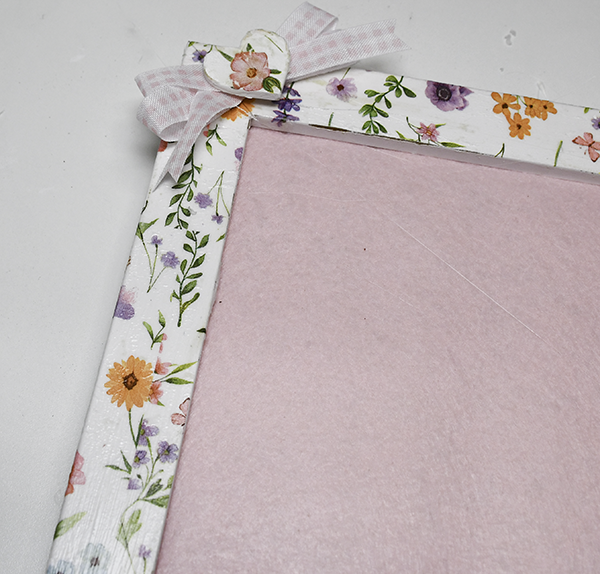
Step 2: Decoupage the Frame
I started by decoupaging the frame in the same way that I decoupaged the boards. I ordered the frame in white so there was no need to paint it. Just add the Mod Podge. Let it dry and add the napkins in the same way. Iron the napkin to secure and add another coat of Mod Podge.
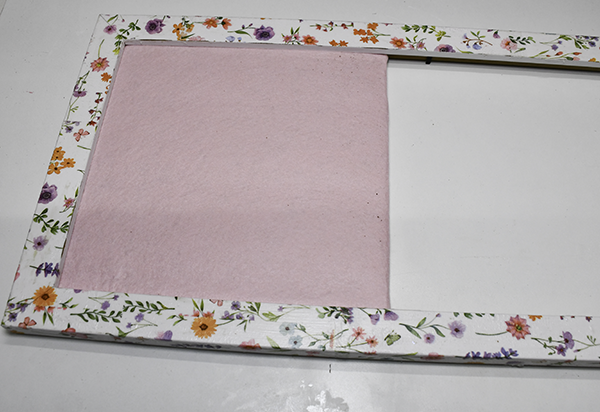
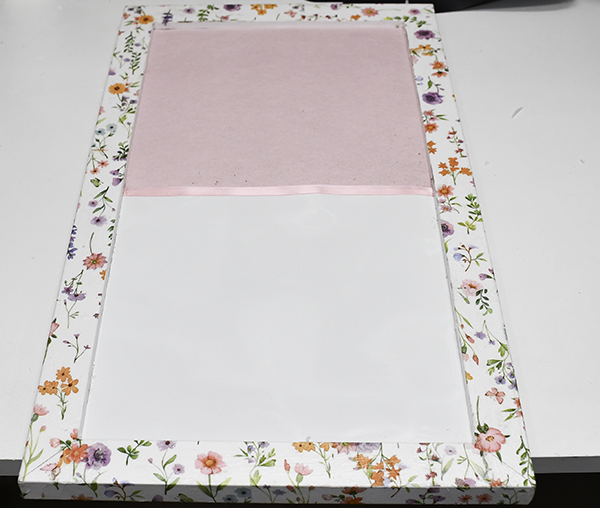
Step 3: Add the Bulletin Board
Place the bulletin board inside the back of the Fram so that the felt is facing the front. You can secure the bulletin Board using hot glue.
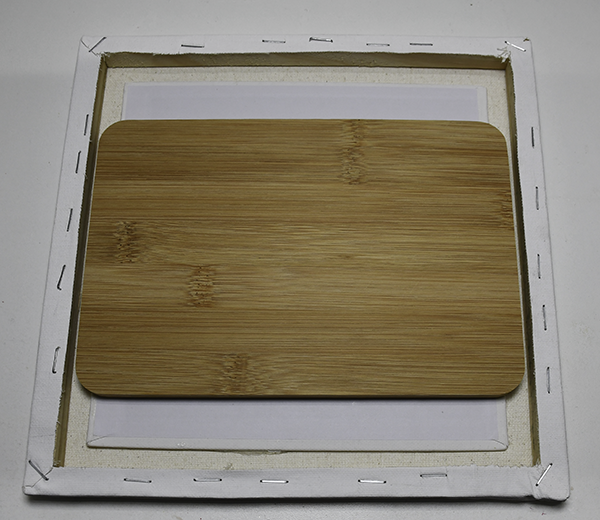
Step 4: Secure the Canvas
Since this part of the project will be used for writing and notes it really needed to be secured on the back. I used the smaller version of the Dollar Tree Bamboo cutting board. You can use whatever you like. I used hot glue and wood glue to secure the wood to the back of the canvas.
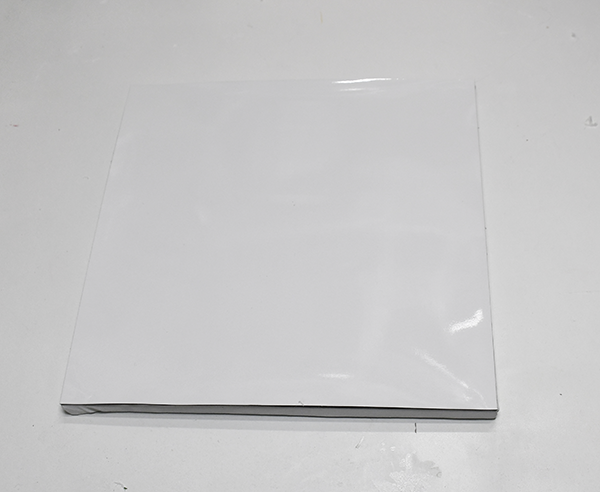
Step 5: Add the White Board Panel
I found these dry erase board panels on Amazon that were the perfect size for this project. Attach the white board panel to the front of the canvas. Secure the panel with hot glue and Aileens tacky glue.
Step 6: Add the White Board to the Frame
Add the White Board to the Bottom of the Frame. You can also use this horizontally if you like.
Step 7: Add the Bow
Create a small bow. Hot glue the bow to the corner. I added a decoupaged heart to the center of the bow.
I hope you enjoyed this simple Dollar Tree Project. For more sewing and crafting projects subscribe to our free newsletter and receive your free Dollar Tree Holiday eBook.
Subscribe to our Free YouTube Channel!
Join our Sew Very Crafty Fans Facebook group
If you want to ask questions and share your projects join our Facebook group here. The community will help to achieve your sewing and crafting dreams.