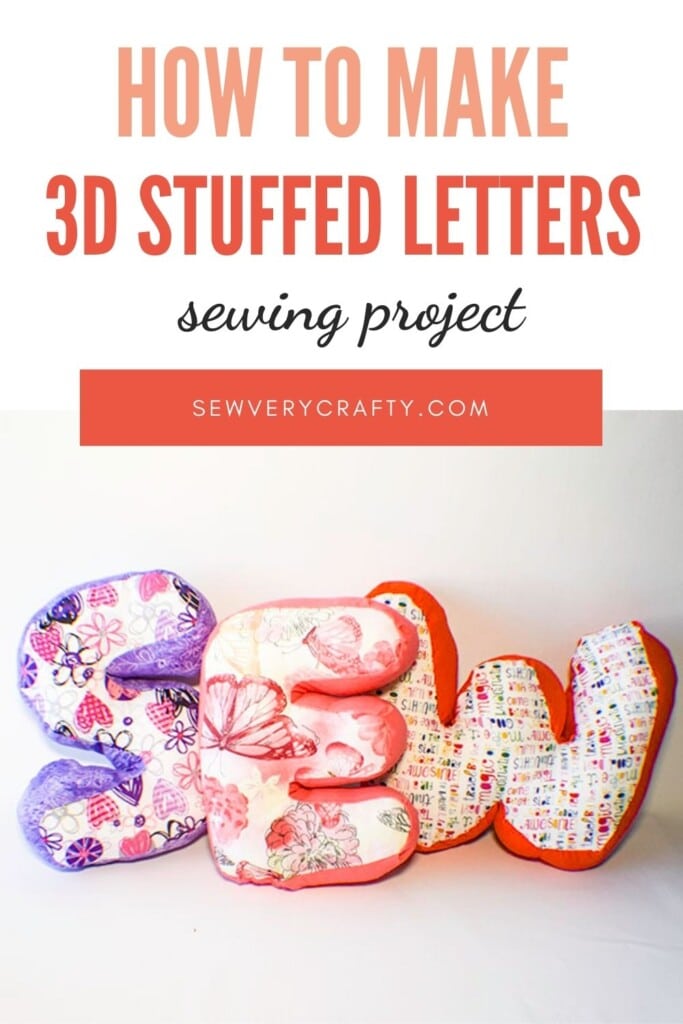
I recently did a simple project on how to make a fabric alphabet. This project is a little more difficult but looks so much nicer. I really wanted to show you how to make stuffed fabric letters because they are perfect to decorate with. They are great for baby's rooms, offices, sewing rooms or other home decor areas. Sew a word, your name or an emoji. Anything can be made using this technique. Though it is more difficult than the fabric alphabet it is still a simple project to make and it looks fantastic when it is done. The beauty of making your own stuffed fabric letters is that you can use any fabrics you like to go with your home's decor.
I chose basic cotton fabrics for my stuffed fabric letters that I got from stash of fabrics. My stash of fabrics was purchased at one of several places. I either purchased these fabrics from JOANN Fabric & Craft Stores![]() , Fabric.com, Hobby Lobby or onlinefabricstore.net. I am not sure exactly where these specific fabrics came from but they are all quilting type cotton fabrics. A variety of different colors and patterns of fabrics was used to really give my letters pizzazz but you can use whatever you like to match the room your letters will be decorating. This post contains affiliate links that if you click on them and make a purchase I may receive a small commission at no extra cost to you. As an Amazon Associate I earn from qualifying purchases.
, Fabric.com, Hobby Lobby or onlinefabricstore.net. I am not sure exactly where these specific fabrics came from but they are all quilting type cotton fabrics. A variety of different colors and patterns of fabrics was used to really give my letters pizzazz but you can use whatever you like to match the room your letters will be decorating. This post contains affiliate links that if you click on them and make a purchase I may receive a small commission at no extra cost to you. As an Amazon Associate I earn from qualifying purchases.
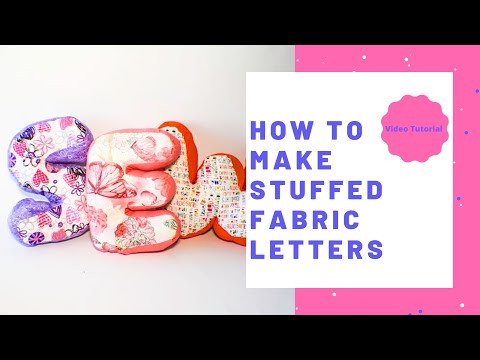
If you would like a video tutorial of how to make this project head over to YouTube and check out my video. While you are there subscribe to my free YouTube channel.
What you will Need: How to Make Stuffed Fabric Letters
- Printer to print out the letters
- Main Fabric
- Contrast Fabric
- Polyester Fiberfil
- Standard Sewing Supplies
Step 1: Print out your Letters
Choose a Font among the fonts on your computer. Make sure that the font is relatively easy to read or you will have trouble sewing the letters. A nice block print with curved edges works best. Make the front large. I chose a 1000 point Baloo font for my letters. Cut out the letters.
Step 2: Cut out the Main Letters
Place the letters onto the wrong side of your piece of main fabric. Trace all the way around the letter shape adding a 3/8″ seam allowance. Now turn the paper letter over and repeat the process, drawing around it onto the wrong side of another piece of main fabric. It is important that the paper pattern be turned over or the letters will not match when you go to sew them together.
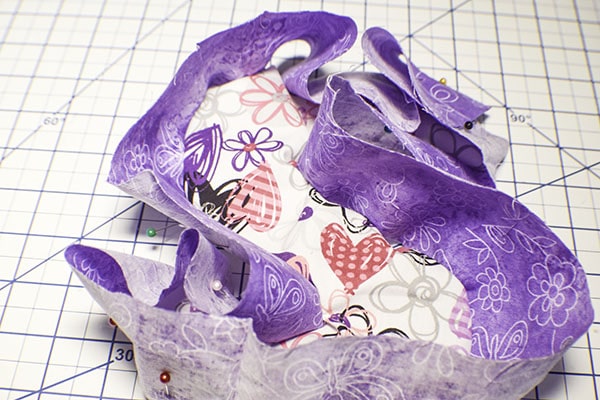
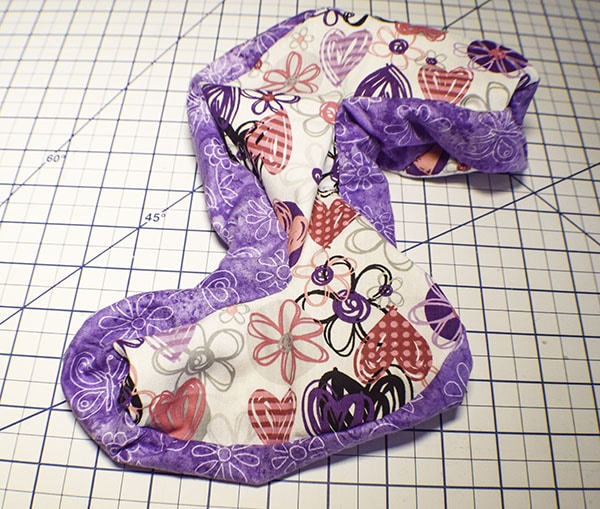
Step 3: Create the Gusset
Each letter will need a gusset to give it depth. The gusset is a long rectangular piece of fabric that measures 3″ x the total length of the letter plus 2″.
Step 4: Add the Gusset
Add the gusset to one of the letter pieces. To do this, fold under one short edge by about 1 1/2″. Place the gusset piece right sides together with one of the letter pieces and pin until the gusset follows the entire letter. Fold under the excess gusset piece. Stitch using a 3/8″ seam allowance. Take care with the stitching as it can be a little fidgety. So long as you go slow you should have no problems.
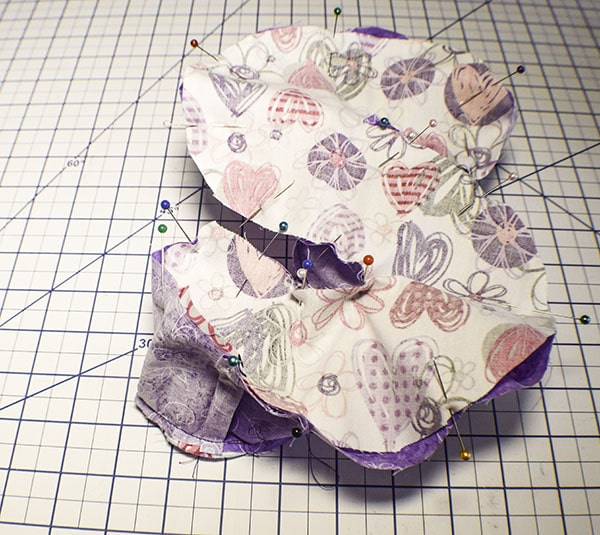
Step 5: Add the other Half of the Letter
Once you have added the gusset you will net to attach the other half of the letter. Place the letter right sides together with the gusset making sure that the letter is properly lined up and the gusset is not twisted. Pin the gusset to the letter and stitch using a 3/8″ seam allowance.
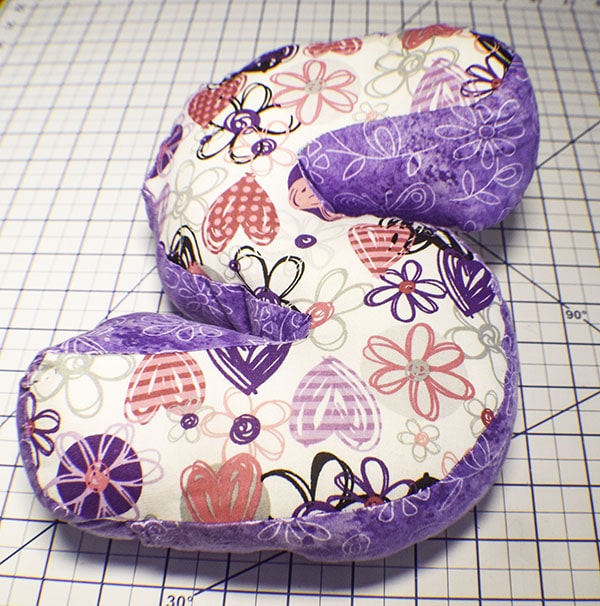
Step 6: Stuff the Letter
You will notice that there is an opening where you turned under the short end of the gusset. Turn the letter right sides out through this opening. Add the polyester fiberfill to the letter using this opening as well. When you have stuffed the letter full. Stitch the opening closed using ladder stitch or slip stitch. You have now finished your stuffed fabric letters.
I hope you enjoyed this stuffed letter project. If you would like more sewing and crafting projects sign up for our newsletter and receive access to our free sewing printables libary
If you would like video tutorial of some of Sew Very Crafty's most popular posts subscribe to our free YouTube channel here.