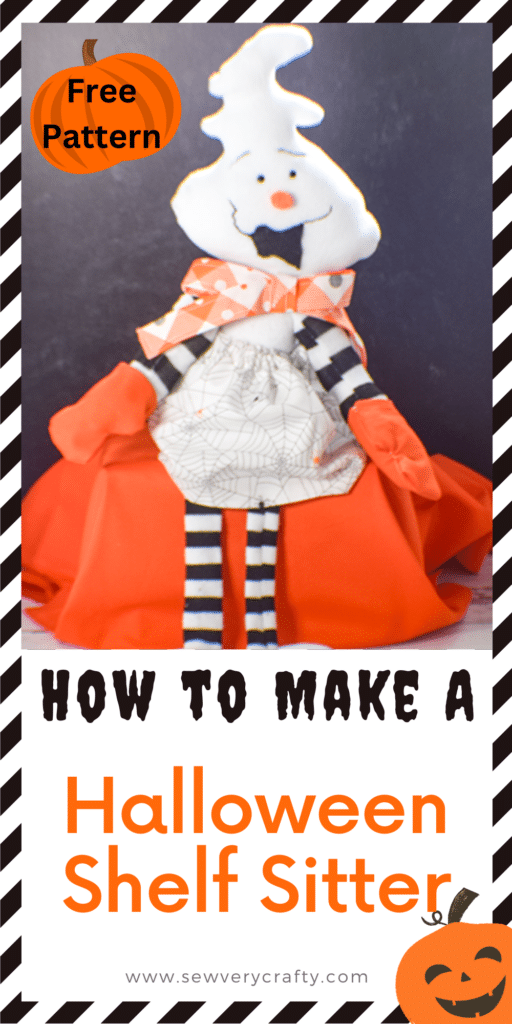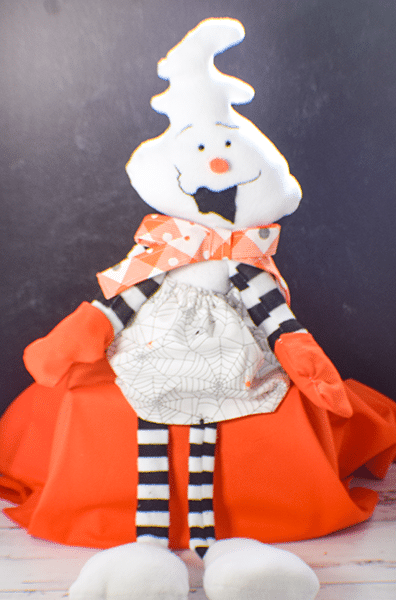
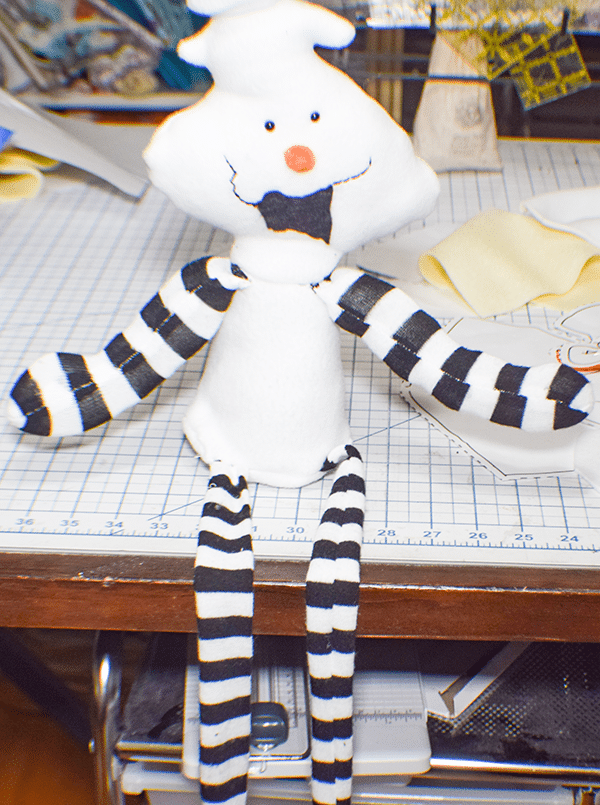
I saw this project on Pinterest and went to the site but could not find it anymore. I really thought it was cute so I created my own pattern for how to create my version of this adorable ghost shelf sitter for this upcoming Halloween. It took a little while for me to figure this out because I do not make a lot of plushies. Nevertheless, This is what I came up with. I hope you enjoy creating this terrific ghost shelf sitter. If you would like more holiday sewing and crafting projects head over to my holiday project vault and check them all out.
This post contains affiliate links that if you click on them and make a purchase I will receive a small commission at no extra cost to you. As an Amazon Associate I earn from qualifying purchases.
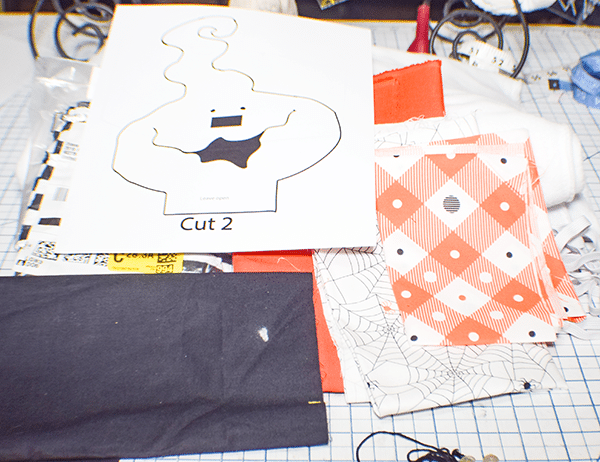
What you will Need: How to Sew a Halloween Ghost Shelf Sitter
- Pattern you can get by clicking on this link
- 1/4 yd plush fabric in white
- Pair of Striped Long socks
- 1/8 yd of orange fabric
- 1 orange pom pom for nose
- Scrap of black fabric
- Black embroidery thread
- 1/8 yd Halloween patterned fabric for tie
- 2 Safety eyes
- 1/4 yd fabric for skirt
- 8″ of 3/8″ elastic
- Sewing machine
- Standard sewing supplies
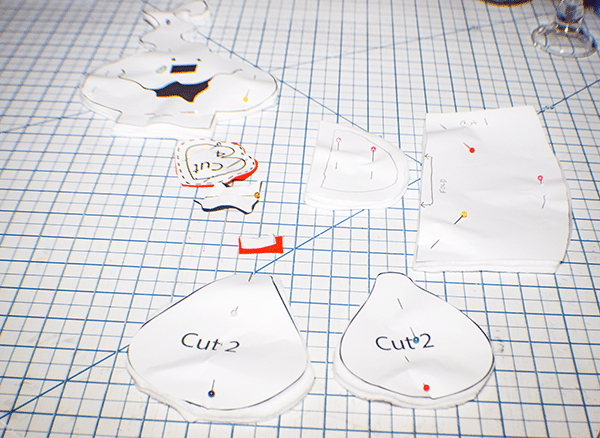
Step 1: Cut out the Pieces
Print the pattern. Tape the body pieces together. Using the pattern cut out the pieces in the colors that you like. This is a ghost so I used white with a few splashes of orange and black.
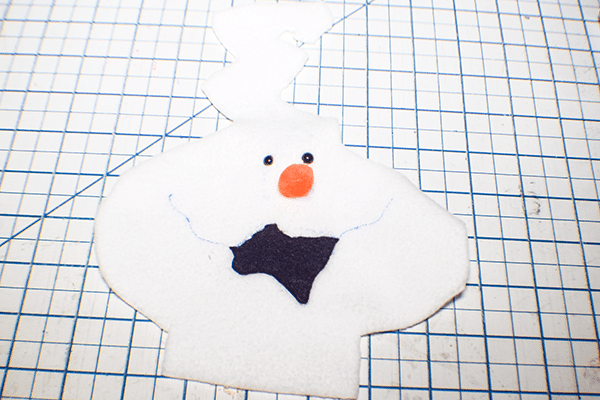
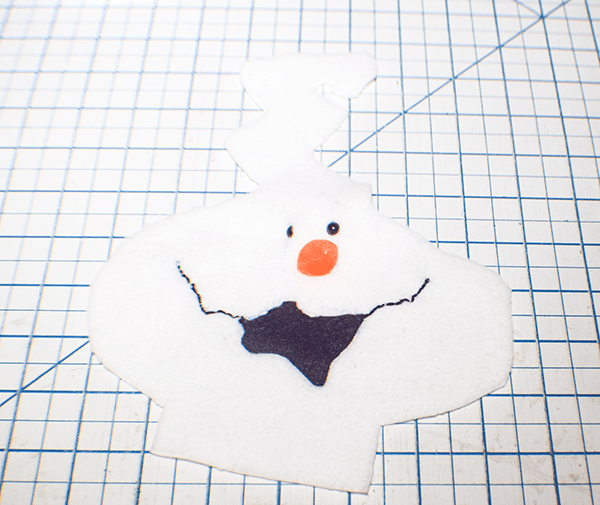
Step 2: Add the Eyes
You will have two head pieces. Place the safety eyes in the center near the top of the head. There will be two pieces to the safety eye. Using an awl poke holes in one of the head pieces where you would like the eyes to be. Insert the safety eye. On the reverse side of the fabric add the grommet to secure the eyes.
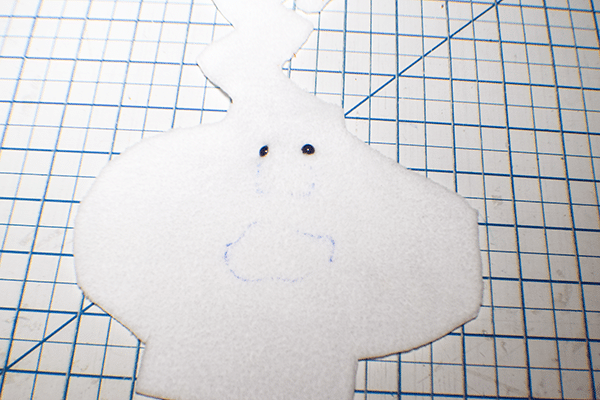
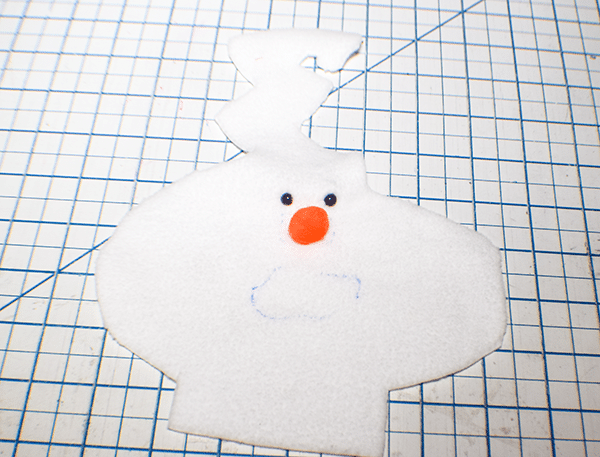
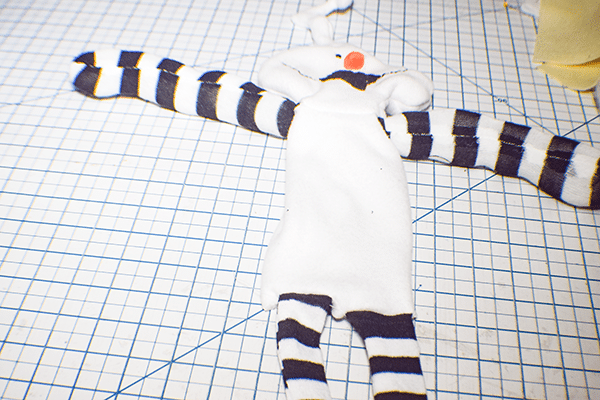
Step 3: Add the Nose
The nose of the ghost is just an orange pompom. You can stitch or glue it in place. I chose to stitch mine.
Step 4: Create and Add the Mouth
I divided the mouth into three sections. Cut one of the mouth openings from black felt. Using embroidery back stitch, stitch the right and left sides of the mouth. While you are embroidering the mouth. Add some eyebrows in the same way.
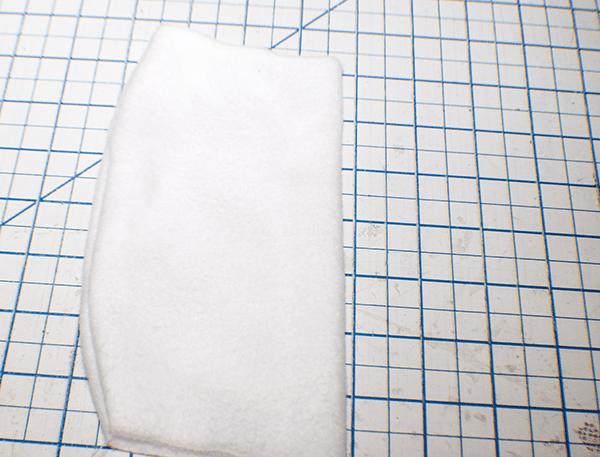
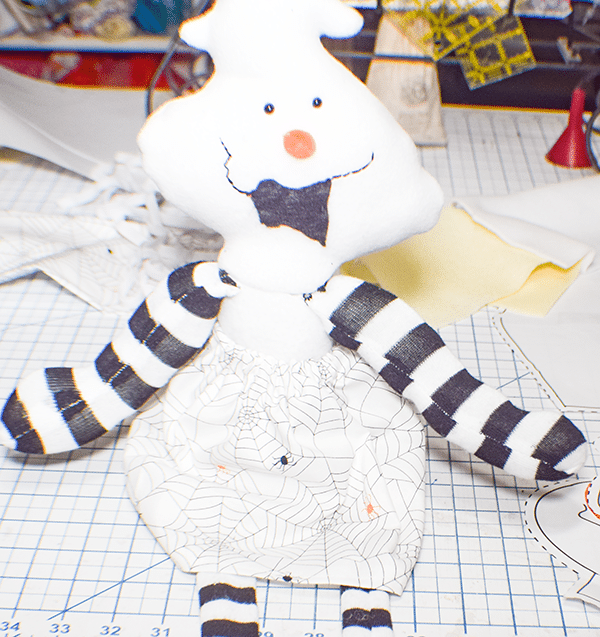
Step 5: Create the Ghost Body
You will have one body piece. Fold it in half lengthwise and stitch the ends together using a 1/4″ seam allowance. You will have something similar to a tube.
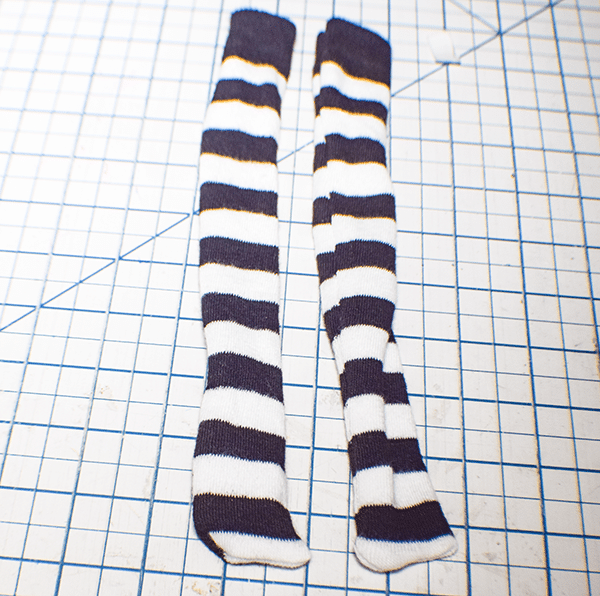
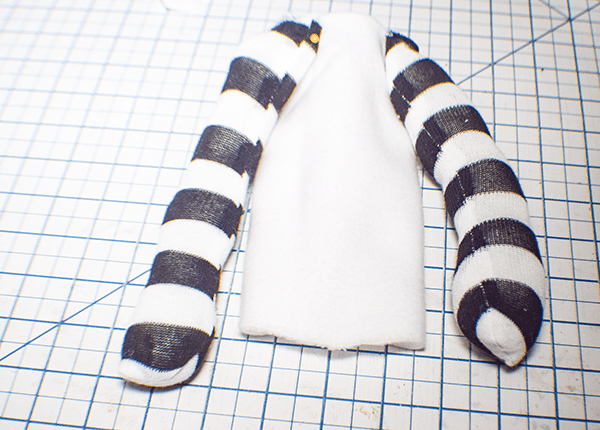
Step 6: Create the Ghost Arms
I used some Halloween socks for my arms and legs. Cut the socks lengthwise so that you have two pieces that measure 1 1/2″ wide. Cut the length to 10″ Stitch the two pieces right sides together along the length and one short end. Lightly stuff the arms with fiberfill. Baste the arms on either side of the body matching the raw edges.
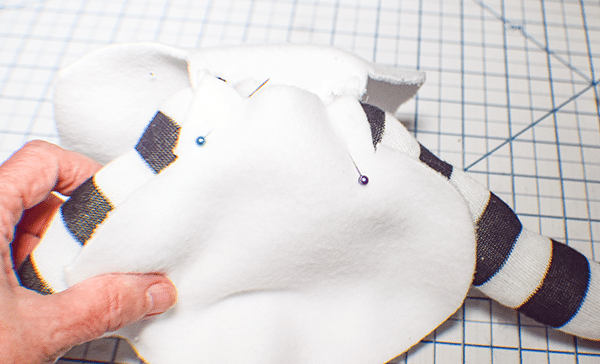
Step 7: Add the Ghost Head
Place the face piece to the body front right sides together. The body front is the side with the fold. Baste the head to the body. Repeat for the seam side of the body. Turn the entire piece wrong sides out. Place the head pieces right sides together and stitch using a 1/4″ seam allowance.
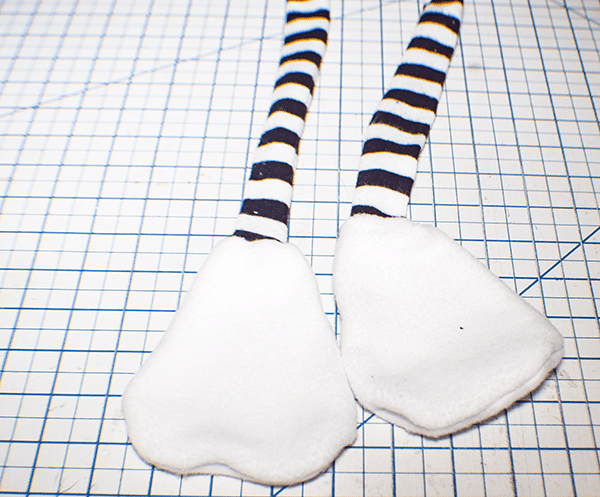
Step 8: Create the Ghost Feet
Stitch the feet by Placing them right sides together and stitching all the way around leaving the top open. and an opening on one side. You will notice that the two pieces are different sizes. That is correct. We want the feet to have volume. Turn right sides out.

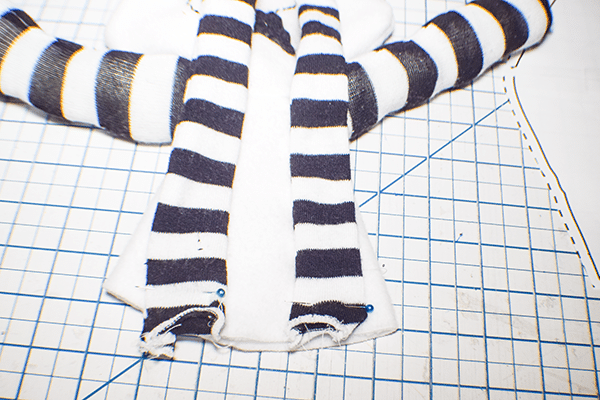
Step 9: Create and Add the Ghost Legs
Using the socks, cut the fabric so that they are 1 1/2″ wide and 13″ inches long. Stitch along the long edge only creating a tube. Turn the legs wrong sides out. Place the feet so that they are right sides together. Stitch all the way around securing the feet to the unstuffed legs. Stuff the feet compactly using the fiberfill. Place the top of the legs right sides together with the front of the body and baste
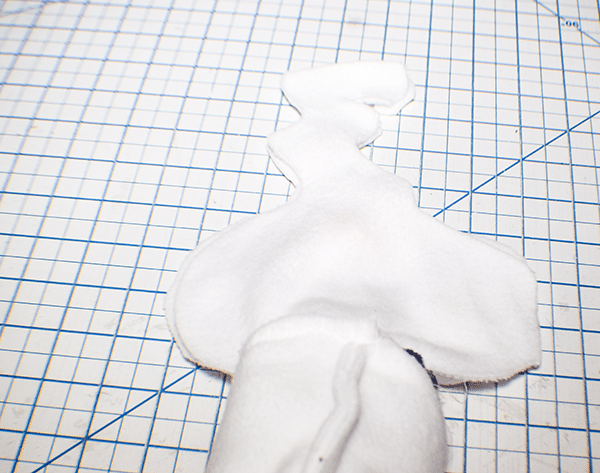
Step 10: Add the Bottom of the Body
With the piece wrong sides out add the bottom of the body. Make sure that the arms and legs are inside the body when you stitch the bottom. This is a fidgety process so take your time. Leave an opening for turning. Turn the entire piece right sides out. Stiff the head and body. Stitch the opening closed using ladder stitch.
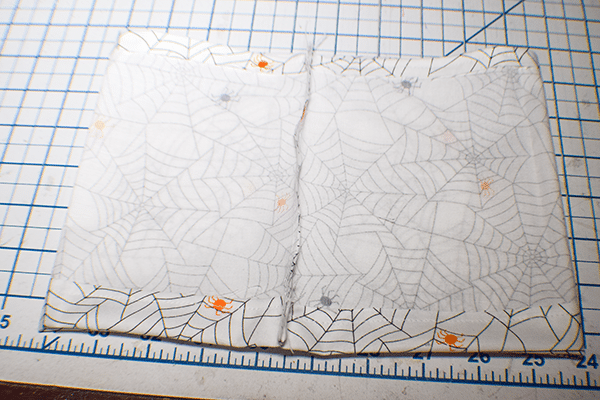
Step 11: Create and Add the Skirt
Cut a piece of halloween fabric 21″ wide and 8″ long. Hem the skirt along both long edges. Fold the top edge so that there is an opening of 1/2″ wide to insert the elastic. Leave a bit of an opening to insert the elastic. With right sides together stitch the two raw ends together using a 1/4″ seam allowance. Insert the elastic using a bodkin or a safety pin. Place the skirt around the waist of the ghost.
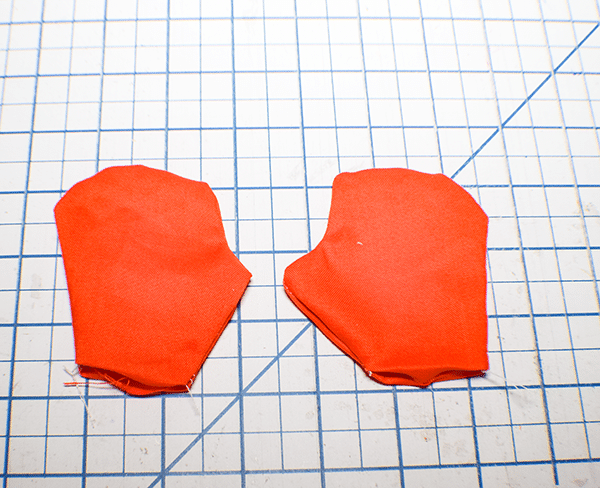
Step 12: Create and Add the Gloves
Using the pattern piece cut four gloves. Place two of them right sides together and stitch all the way around leaving the top open. Repeat for the other glove. Hem the raw edges. Insert the arms into the gloves and tack in place.
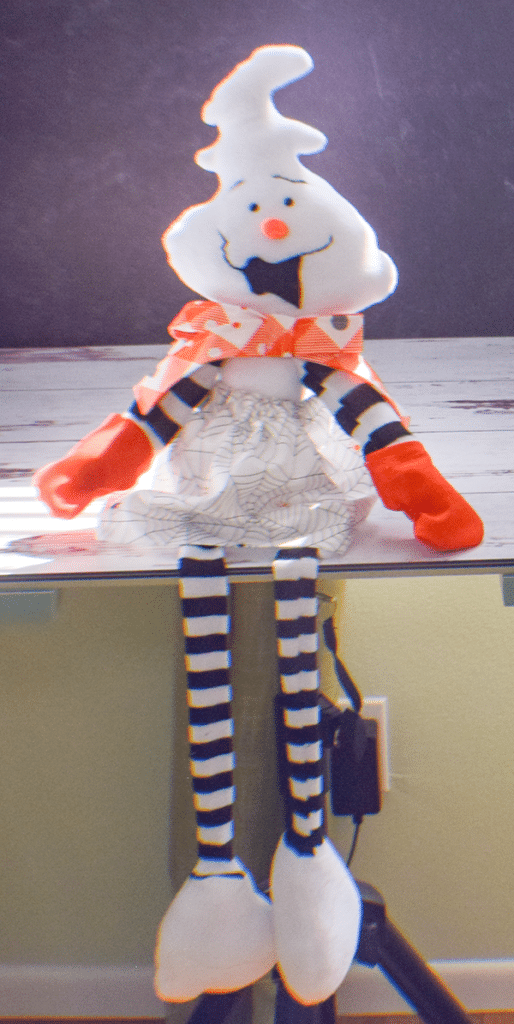
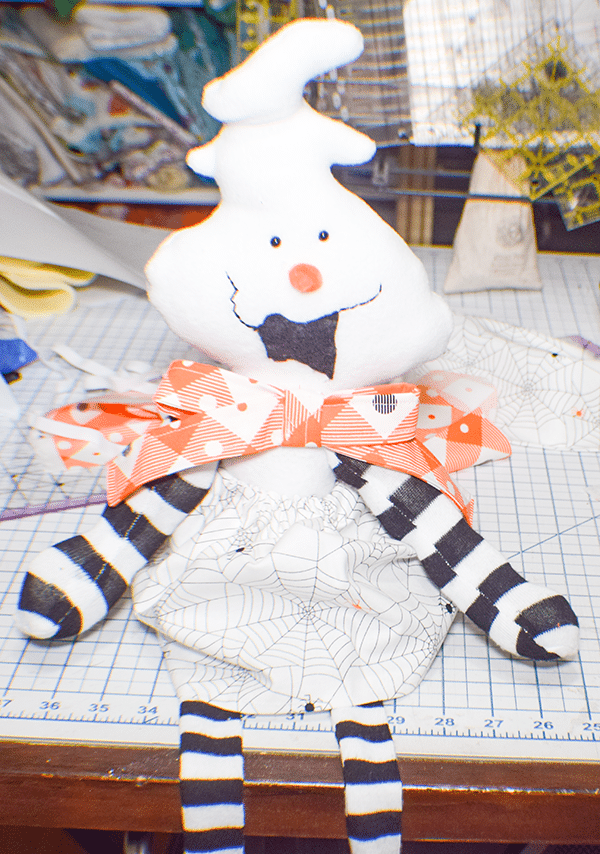
Step 13: Create and Add the Bow
Cut a two pieces of Halloween fabric that measures 21″ long and 2″ wide. Angle the ends. Stitch the piece right sides together leaving an opening for turning. Turn right sides out. Topstitch all the way around making sure to close the opening. Using the same method create a smaller piece to use as the center of the bow. Fold the long piece into a bow shape. Wrap the short piece around the center and stitch. Stitch the bow on the neck of the Ghost. You have now finished your Halloween Ghost Shelf Sitter.
I hope you enjoyed this cute Halloween Shelf Sitter. If you would like more sewing and crafting projects subscribe to our free Newsletter and receive access to our free printables library
If you would like video tutorials of some of Sew Very Crafty's most popular posts subscribe to our free YouTube channel here