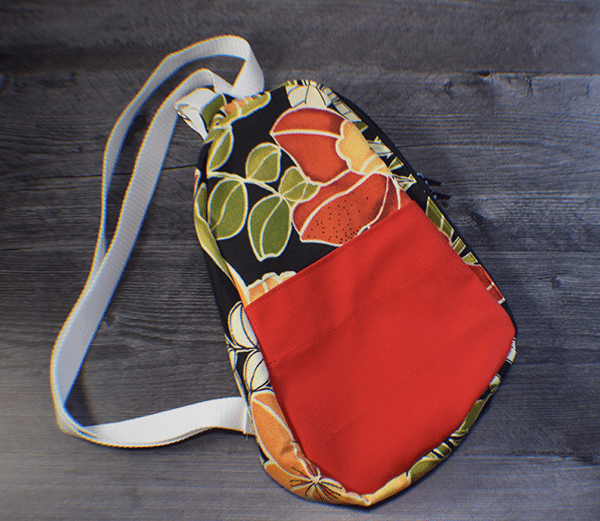
I came across this project ton Youtube and wanted to share it with you. This is a very easy shoulder bag that takes no time to make. You will have to create your own pattern for this one but I will walk you through it step by step. It really is very easy to do. I chose some yellow fabric to make this bag perfect for summer. You can use canvas, cotton with interfacing or epicycle some jeans for this simple sewing project. I hope you like this project. If you would like more handbag projects head over to my handbag page for many more.
Note: This post contains affiliate links that if you click on them and make a purchase I will receive a small commission at no extra cost to you. As an Amazon Associate I earn from qualifying purchases.
What you will Need: How to Sew an Easy Shoulder Bag
- Large piece of paper – I used craft paper
- 1 Yd main body fabric
- 1/2 yd fabric for the bottom
- 1 yd lining fabric
- 1 yd Pellon 808
- 1 Magnetic snap
- Sewing Machine
- Standard Sewing Supplies
Step 1: Create the Pattern
Take your craft or pattern making paper and cut two pieces that measure 17″ x 20.5″. Fold each piece in half. Stack the two folded pieces on top of each other. On the raw edge side not the fold side on the bottom draw a 2 1/2″ x 2 1/2″ square. Measure 2 1/2″ from the top raw edge side and make a mark. Using a long ruler draw a line from that mark to the top outside corner of the square you drew on the bottom. Measure 1 1/2″ from the top mark you previously made and make another mark. Then measure down the fold side of the paper 8″ and make another mark. Draw an arced line from the top mark to the fold side mark. Cut out the pattern along the lines you just drew through all layers. Set aside one of the pieces.


Take the other piece and measure 5″ up from the bottom on each side and make two marks. Draw a line joining the marks all the way across. Cut the line creating two pieces.

Take a piece of paper that measures 1 1/2″ x 2 1/2″. Round one corner on one shot end. Cut the rounded corner. Fold the piece in half lengthwise and cut the other corner so that it matches the first.

Step 2: Cut the Fabrics
From the main outer fabric place the pattern onto the fabric. Add 1/4″ seam allowance to the bottom and cut the fabric. From the bottom fabric place the pattern piece onto the fabric and add a 1/4″ seam allowance to the top of the piece and cut out the fabric. Cut four 2 1/2: x 3″ pieces from the outer fabric and two from the interfacing. Using the pattern for the lining cut two pieces of lining fabric and two pieces of Pellon 808. Cut the strap fabric to measure 4″ x 16″. Cut a rectangle of fabric that measure 8 1/4″ x 11 1/2″ from the lining fabric for the slip pocket.
Step 3: Stitch the Bottom to the Top
Place the bottom right sides together with the top matching the long raw edges. Stitch using a 1/4″ seam allowance. Repeat for the other top and bottom pieces. Topstitch along the seam.


Step 3: Fuse the Interfacing
Place the outer bag interfacing so that the glue side is down onto the wrong side of the main outer pieces. Fuse the interfacing using a hot iron and following the manufacturer's instructions. Fuse the two small interfacing pieces to two of the small fabric pieces.

Step 5: Create the Snap Closure
Take the two small pieces that you fused the interfacing to. On the interfacing side trace the rounded pattern piece onto the pieces. Measure down 1/2″ from the rounded end and add one side of the magnetic snap. Repeat for the other side of the snap and the other fired piece. Place the fused pieces right sides together with the fabric pieces and stitch along the pattern you drew onto the interfacing sides. Trim around the stitching. Notch the corners and then turn right sides out.


Step 6: Add the Snap Closures to the Main Bag pieces
Place one of the snap closures so that it is snap side up onto the center of the curved part of one the outer bag pieces. Place the other snap closure snap side down onto the center curve of the other bag piece. Stitch using a 1/8″ seam allowance.

Step 7: Stitch the Outer Bag
Place the outer bag pieces right sides together. Stitch along the sides and bottom using a 1/4: seam allowance. Box the corners by matching the corner raw edges right sides together so that the bottom seam and the sides seam lineup. Stitch using a 1/4″ seam allowance. Turn right sides out.


Step 8: Create the lining
Start by creating the slip pocket. Fold the slip pocket fabric right sides together matching the short raw edges. Stitch along the sides and bottom leaving an opening on the bottom for turning. Clip the corners. Turn right sides out and press. Topstitch along the folded edge. Fold one of the bag lining pieces half lengthwise to find the center and mark. Fold the pocket piece in half to find the center. Measure down 2 1/2″ from the center of the curved edge and place the center of the of the pocket piece. Stitch along the sides and bottom making sure to close the opening in the bottom as you go. Place the two lining bag pieces right sides together and stitch in the same way you did the main outer bag but leave an opening in the bottom for turning.


Step 9: Add the Lining to the Outer Bag
Place the outer bag inside the lining bag so that they are right sides together. Stitch all the way around the top. Clip the curves. Turn the bag right sides out using the opening you left in the bottom of the lining. Stitch the opening closed and insert the lining into the main bag. Fold the snap tabs to the center of the bag and pin or clip. Topstitch all the way around the top.


Step 10: Create the Strap
Take the strap fabric and fold the down the short raw edges about 1/4″. Fold the long raw edges to the center and press. Fold the strap in half lengthwise to enclose the raw edges and press. Topstitch along the long edges.

Step 11: Add the straps to the bag
Place the strap ends onto the lining side of the of the sides of the bag. Fold the sides of the bag around the strap and pin or clip. Repeat for the other side. Stitch a box with an X around the outer bag and strap to secure the strap to the bag. Once the strap has been added you have finished your easy shoulder bag.


I hope you enjoyed this simple handbag project
I hope you enjoyed this simple shoulder bag project. If you would like more sewing and crafting projects subscribe to our newsletter and receive your free handbag eBook.
Subscribe to our Free YouTube Channel!