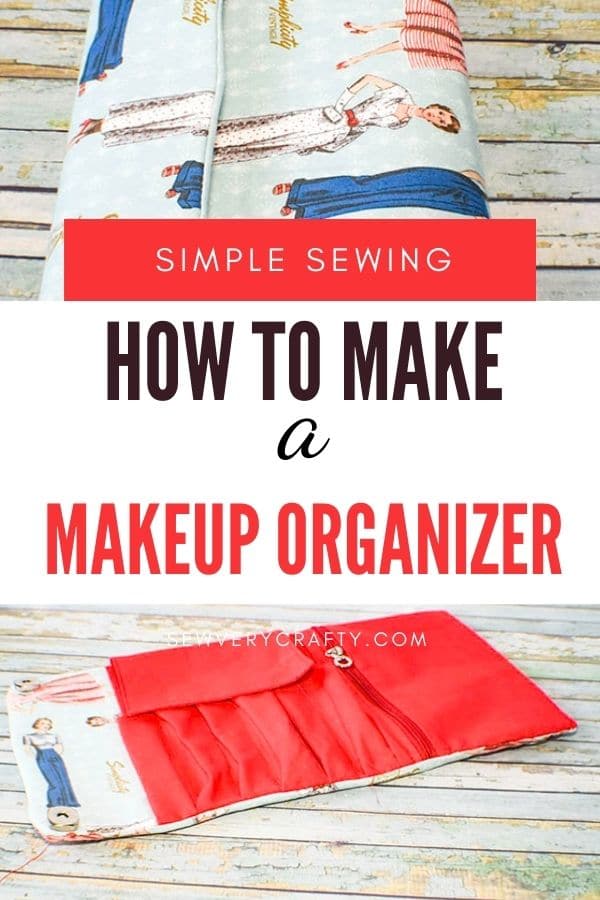
Learn to Sew a Makeup Organizer
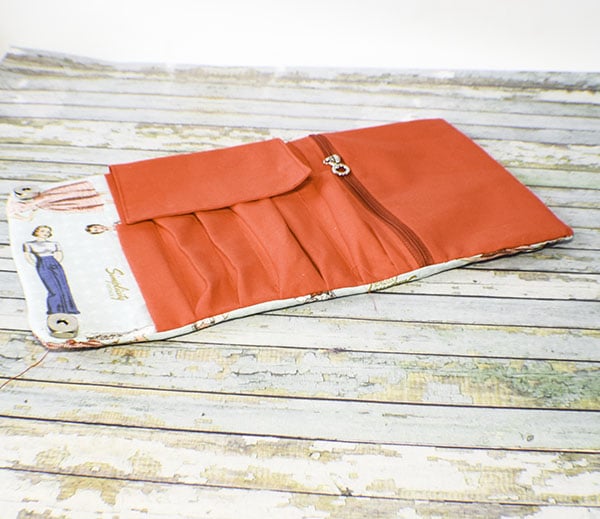
Keeping makeup and brushes together in one place is always challenging. This makeup organizer will help you do exactly that. Follow this step-by-step tutorial and you can learn to sew a makeup organizer in no time. In fact, this organizer is easier than it looks. It is large enough for all of your makeup and brushes. It also closes up neatly for storage and travel. I rally enjoyed making and sharing this project with you. I know you will enjoy making it too. There are a lot of pieces to this project but it is still relatively simple. I would say that an intermediate sewist could create this with no problem and a very strong beginner could give it a try.
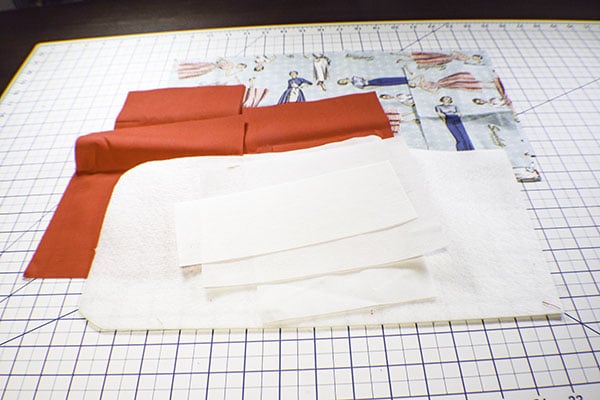
A nice cotton fabric is ll you need for this project. I chose a Simplicity retro pattern design fabric that I purchased at JOANN Fabric & Craft Stores![]() for my organizer along with some plain red Kona cotton. Of course you could choose any woven cotton fabric at Hobby Lobby, Fabric.com or onlinefabricstore.net to get exactly what you would like for your project. This post contains affiliate links that if you click them and make a purchase I may receive a small commission at no extra cost to you.
for my organizer along with some plain red Kona cotton. Of course you could choose any woven cotton fabric at Hobby Lobby, Fabric.com or onlinefabricstore.net to get exactly what you would like for your project. This post contains affiliate links that if you click them and make a purchase I may receive a small commission at no extra cost to you.
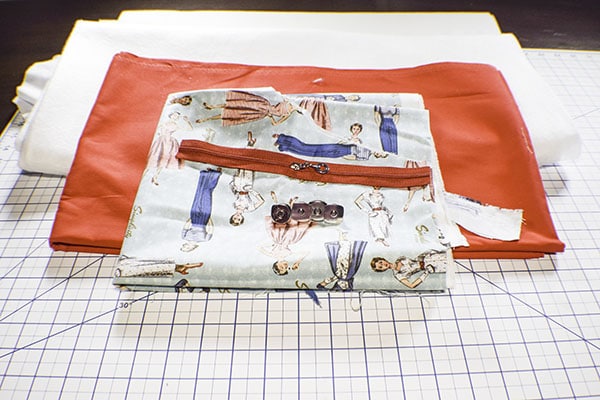
What you will Need: Learn to Sew a Makeup Organizer
- 1/4 yd fusible fleece like Pellon TP971F
- 1/4 yd of Pellon SF101 interfacing and 808 interfacing
- 1/2 yd main outer fabric
- 1/2 yd contrasting lining fabric
- 8 3/4″ zipper
- 2 magnetic snaps
Step 1: Cut your Fabrics
- Cut a piece of fusible fleece that measures 7 7/8″ x 15″ and round the corners at one end.
- Pellon SF101 interfacing that measures 7 7/8″ x 5 1/2″ and Pellon 808 interfacing that measures 5 7/8″ x 7 7/8″ and 3″ x 7 7/8″
- Main outer Fabric that measures 8 3/4″ x 15 3/4″, 4″ x 8 3/4″
- Lining fabric that measures 8 3/4″ x 6 3/8″, 8 3/4″ x 1 1/4″, and two pieces that measure 8 3/4″ x 5 7/8″ (for the makeup pouch)
- Lining fabric that measures 6 3/4″ x 8 3/4″, two pieces that measure 6 3/8″ x 4 3/4″, two pieces that measure 10 1/4″ x 5 1/2″
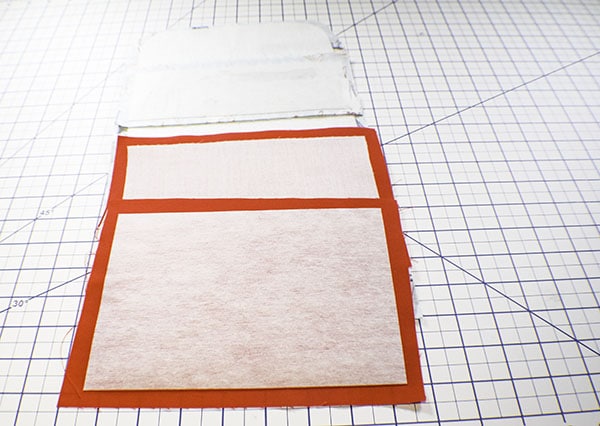
Step 2: Fuse the fleece and interfacing
Fuse the fleece onto the outer main fabric. Round the corners keeping the seam allowance. Fuse the SF101 to the lining piece that measures 8 3/4″ x 6 3/8″. Fuse the Pellon 808 that measures 5 7/8″ x 7 7/8″ the lining piece that measures 6 3/4″ x 8 3/4″. Then fuse the Pellon 808 that measures 3″ x 7 7/8″ to the outer closure piece that measures 4″ x 8 3/4″.
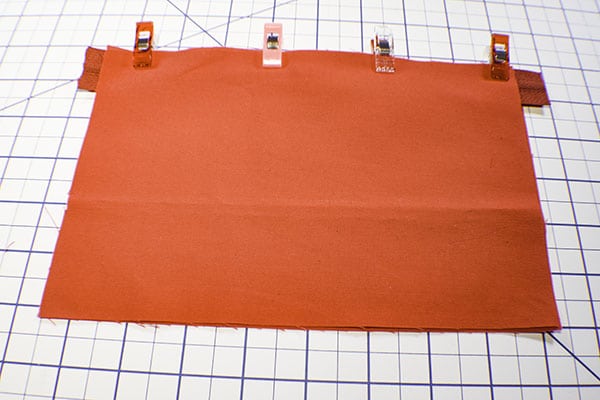
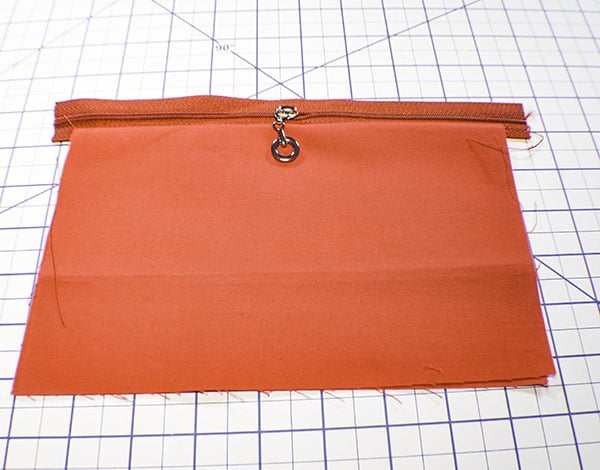
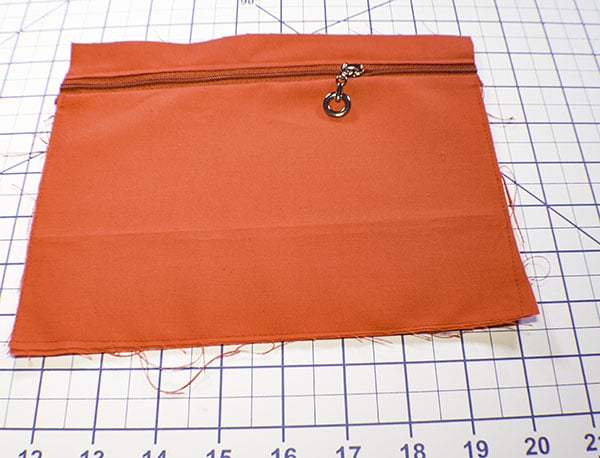
Step 3: add the zipper
Place one piece of lining fabric that measures 8 3/4″ x 5 7/8″ right sides up. Place the zipper wrong sides down and the corresponding lining piece right sides down on the zipper making a zipper sandwich. Stitch the zipper using a zipper foot. Turn right sides out and press. Place the zipper piece right sides up on the 8 3/4″ x 6 3/8″piece so that the raw edges match. Lay the 8 3/4″ x 1 1/4″ piece right sides down on top of the zipper. Stitch the zipper. Topstitch along the top side of the zipper. Stitch along the sides and bottom of the rest of the piece. Trim off any excess zipper.

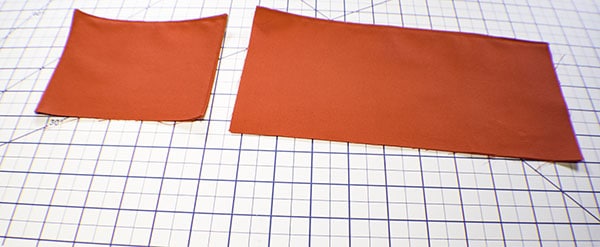
Step 4: Create the lining Pieces
Place the two pieces that measure 6 3/8″ x 4 3/4″ right sides together and stitch along the bottom and sides using a 3/8″ seam allowance. Place the two pieces that measure 10 1/4″ x 5 1/2″ right sides together and stitch along the top using a 3/8″ seam allowance. Turn both pieces right sides out and press. Topstitch along all seams.
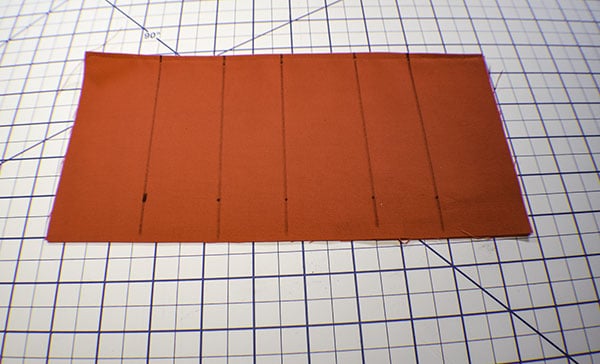
Step 5: Create the brush pouches
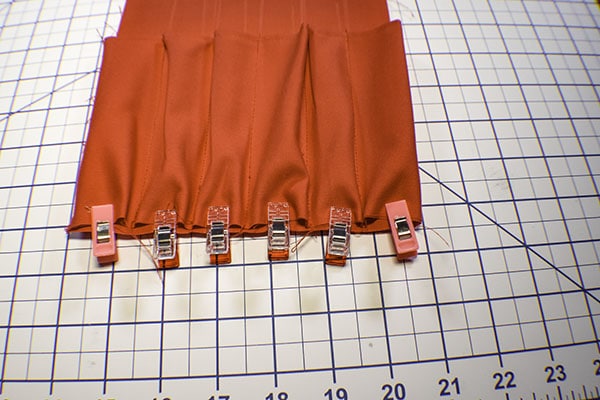
Take the 10 1/4″ x 5 1/2″ piece and measure 2″ from the left side and make a mark. Measure 1 5/8″ and mark again. Then measure another 1 5/8″ and again and agin until there is 2″ left at the end as shown. Draw lines where the marks are. Take the 6 3/4″ x 8 3/4″ piece and measure in 1 3/8″ from the left side and mark then mark 1″ again and again until there is 1 3/8″ left at the end. Draw lines where the marks are.
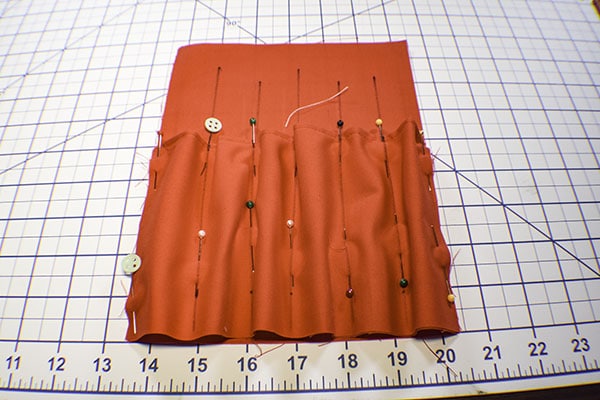
Place the 10 1/4″ x 5 1/2″ piece on top of the 6 3/4″ x 8 3/4″ piece with left and bottom edges matching. You will notice that the lines are offset. Move the fabric so that the lines are lined up and pin as shown. Stitch along the outer edges and on each line. Flatten the pouches at the bottom and stitch using a 1/4″ seam allowance.

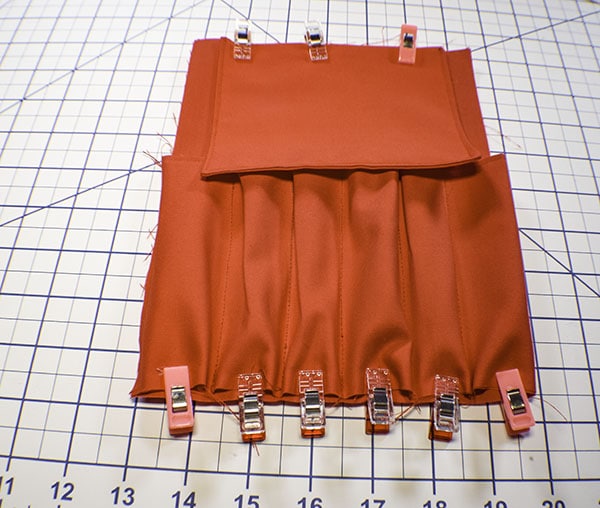
Step 6: add the flap
Place the flap piece at the top of the brush pouch piece and center it. Pin or clip. Stitch along the top using a 1/4″ seam allowance.
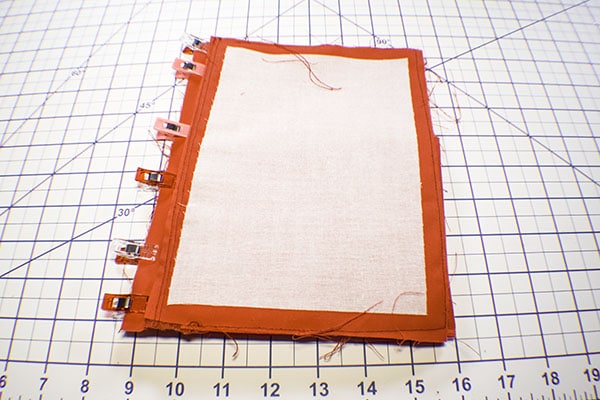
Step 7: Finish the lining
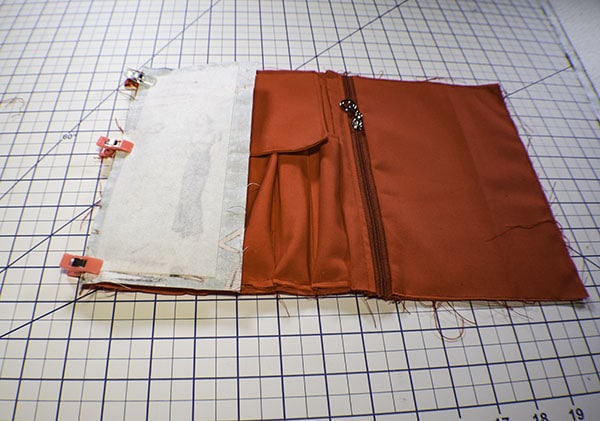
Place the pouch piece and the zipper piece right sides together and clip. Stitch along the left side using a 3/8″ seam allowance.
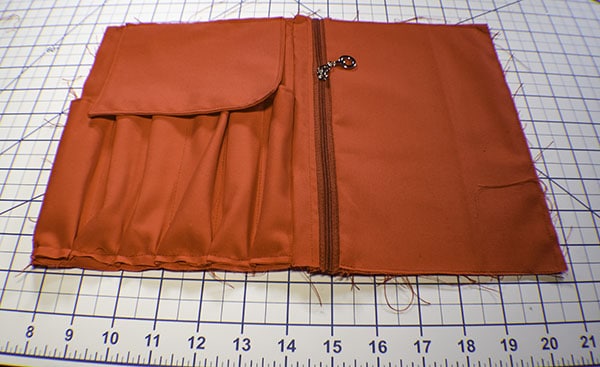
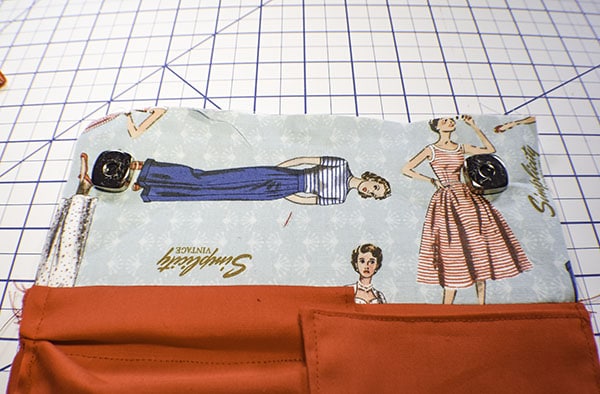
Step 8: Create the closure
Take the outer fabric that measures 4″ x 8 3/4″ and place it right sides together on top of the brush pouch piece on the left side. Stitch using a 3/8″ seam allowance. Add one half of the two magnetic snaps to each side of the closure piece as shown. Measure 1 1/2″ down from the top and 1 3/4″ in from each side and place the snap.
Step 9: finish the bag
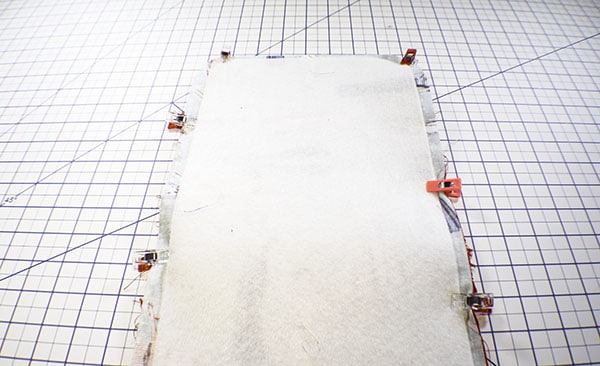
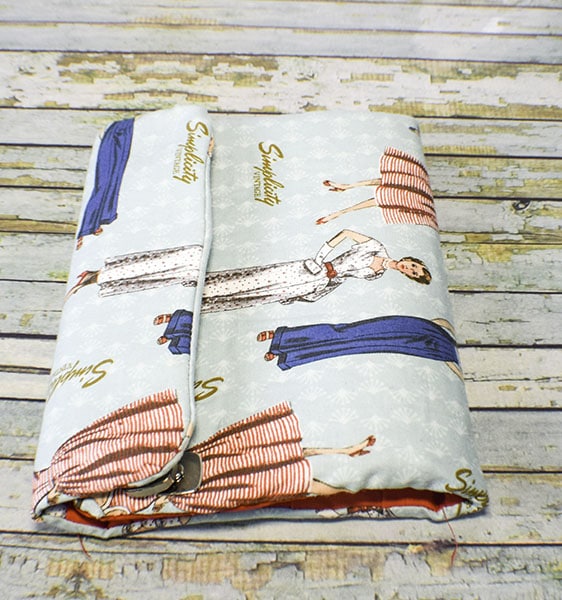
Place the main outer piece on the wrong side of the brush pouch piece to mark the curved edges. Cut the curves to correspond to the curves on the outer piece. Place the main outer piece right sides together with the brush pouch piece and clip. Stitch all the way around the piece leaving a large opening on the bottom by the zipper pouch for turning. Clip the corners and turn right sides out through the opening. Add the other half of the magnetic snaps. You will have to measure for the snaps on the outer part of the organizer and cut the slits for the snaps. You will have to reach inside the opening to place the grommet and fold back the tines. Close the opening using ladder stitch. Press thoroughly. You have finished your makeup organizer.
I hope you enjoyed this project. If you would like more sewing and crafting projects sign up for our newsletter and receive your free eBook of 15 handbag patterns and tutorials taken from the blog.
If you would like video tutorials of some of Sew Very Crafty's most popular posts subscribe to our Youtube Channel here.