How to Make a Padded Laptop Case
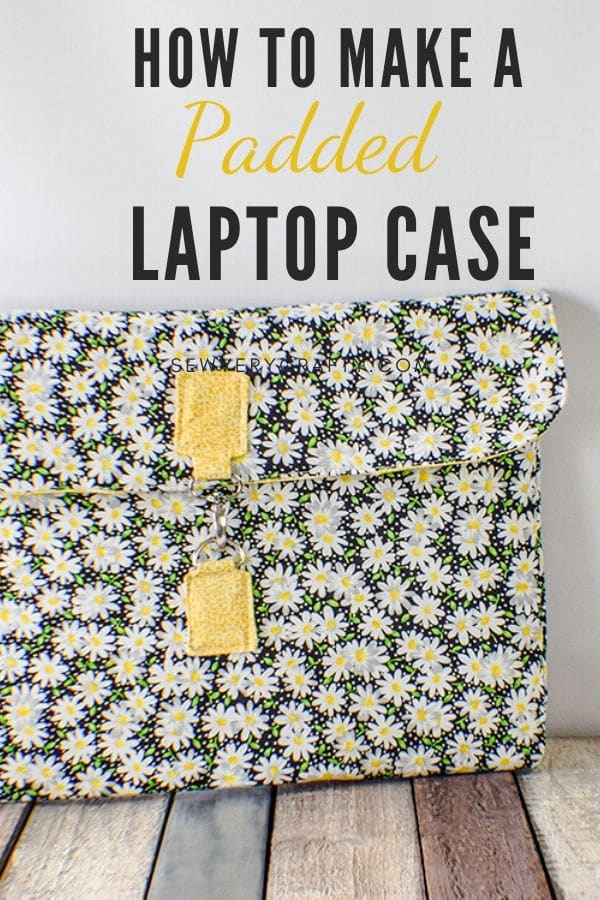
I received a new laptop for Christmas this year and had to make a case for it. Of course I could have purchased a nice black vinyl case but that is just not me. I decided to make a padded laptop case that was a little more what I was looking for so I decided on this terrific project. I got this project from Pattern Pile and Arts and Crafts for you which provides free patterns. My laptop case had to be padded to protect it from any damage. I also wanted it to have a strap to carry it with so I incorporated that into the pattern. This laptop case has a zippered pocket for the laptop and an extra pocket for the cord or anything else you want to include. You may have to adjust the measurements to fit your laptop.
I used three different fabrics that I purchased from JOANN Fabric & Craft Stores![]() to complete my case. You, of course, could go to Hobby Lobby or Fabric.com to get the perfect fabrics for your project. The pattern requires a D-ring and swivel clip closure but you could use Velcro or snaps if you like. This post contains affiliate links that if you click on them and make a purchase I may receive a small commission at no extra cost to you. As an Amazon Associate I earn from qualifying purchases.
to complete my case. You, of course, could go to Hobby Lobby or Fabric.com to get the perfect fabrics for your project. The pattern requires a D-ring and swivel clip closure but you could use Velcro or snaps if you like. This post contains affiliate links that if you click on them and make a purchase I may receive a small commission at no extra cost to you. As an Amazon Associate I earn from qualifying purchases.
What you will Need: How to Make a Padded Laptop Case
- Pattern Piece that you can get here
- 1/2 yd outer fabric and lining fabric
- 1/4 yd pocket fabric
- 3 1″ D-Rings
- 1 1″ swivel clip
- 1/2 yd fusible foam interfacing. I used Pellon.
- 1/2 yd fusible fleece. I used Pellon.
- 1 20″ or longer zipper. The zipper will be shortened.
- 1 Purse strap with swivel clips

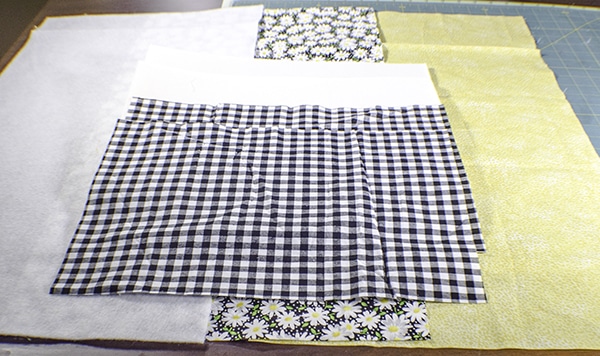
Step 1: Measure and cut your fabrics and interfacings
I decided to cut one each of my outer fabric, lining and fleece which includes the flap to measure 16″ wide x 29″ long per the instructions. Cut two pocket pieces and fusible foam 16″ x 11 1/2″. Cut four pattern pieces from contrasting fabric. For the strap tabs cut two 4″ x 4″ squares of outer fabric and fleece.
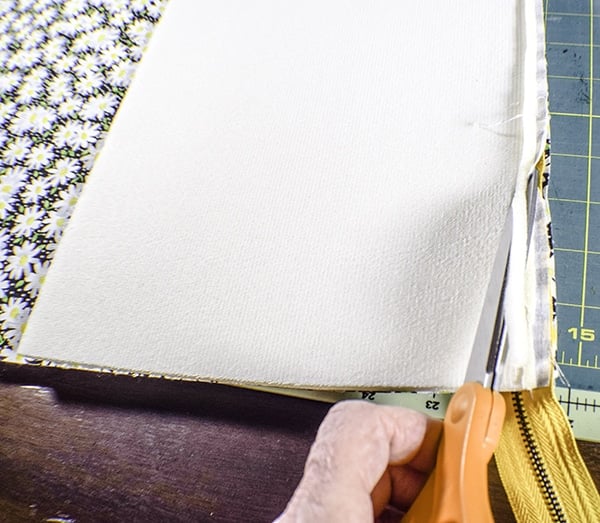
Step 2: Fuse the interfacings
Fuse the fleece to the outer fabrics on the wrong side following the manufacturers instructions. Fuse the foam to the pocket pieces following the manufacturers instructions.
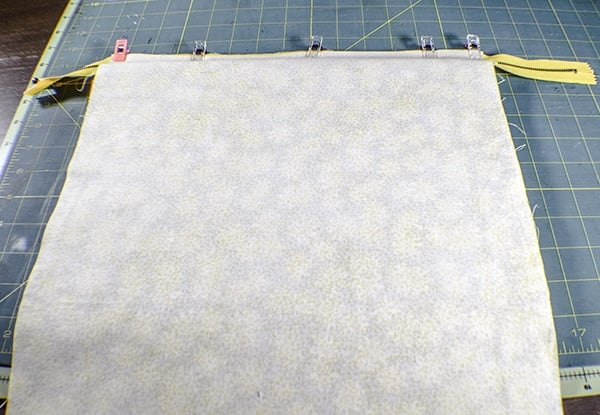
Step 3: Add the zipper
Place the outer piece of fabric right sides up on your work space. Lay the zipper wrong side down on the short side of the piece. Place one of the of the pocket pieces right side down on top of the zipper to create your zipper sandwich. Stitch along the zipper teeth using a zipper foot. Try to stitch on the foam side to prevent the fabric from stretching. Trim the fusible foam only from the zipper. Keep in mind that the foam is fused so you will have to pull it apart. Turn right sides out and press.
Place the lining piece right sides down on the other side of the zipper. Turn the piece over and pin the other pocket piece right sides together with the lining sandwiching the zipper. Stitch along the teeth. Trim the foam. Open to the right side and press. Topstitch along both sides of the zipper.

Step 4: Create the D-Ring Tab
Take two of the tab pattern pieces and sew them right sides together leaving the short top edge open. Clip the corners and turn right sides out. Poke out the corners using a poking tool like That Purple Thang and press. Repeat for the other set of tab pieces.
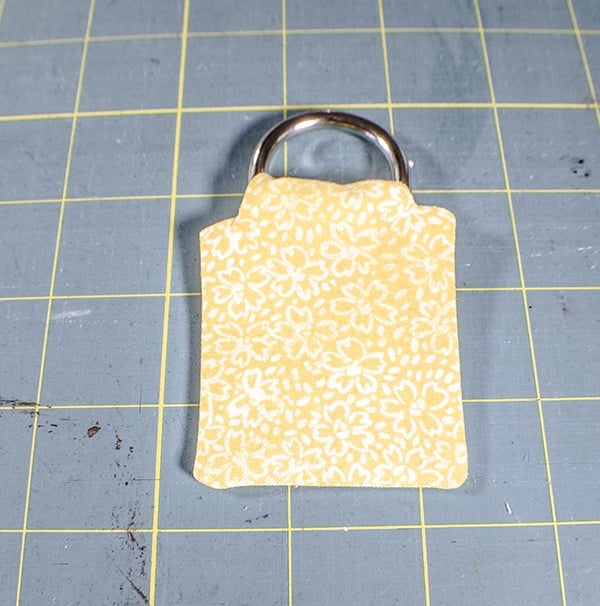
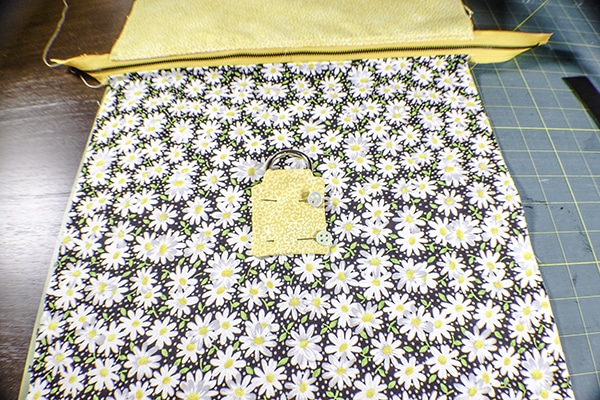
Step 5: Add the D-Ring to the front of the bag
Place the D-Ring on the short end of the tab and fold the tab under. Measure 6″ down from the zipper on the main outer fabric and centered. Mark with a marker or pin. Place the D-RIng and tab on the mark so that it is even with the curve of the tab as shown. Stitch around the fat part of the tab.
Step 6: Stitch the pocket bottom
Stitch the bottom seam of the pocket piece right sides together using a 1/2″ seam allowance.
Step 7: Prepare to stitch
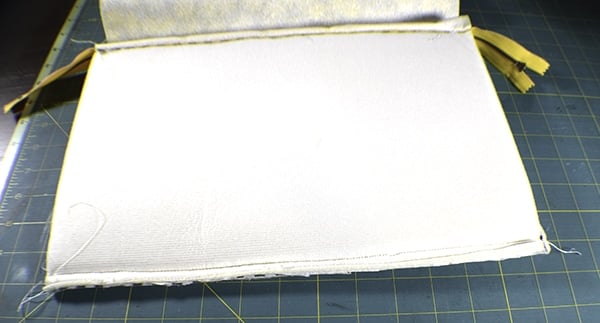
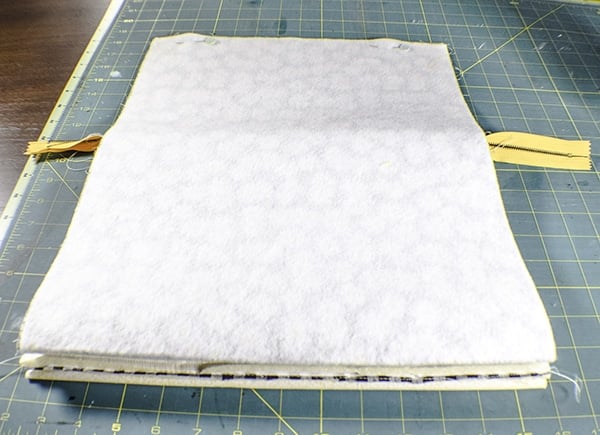
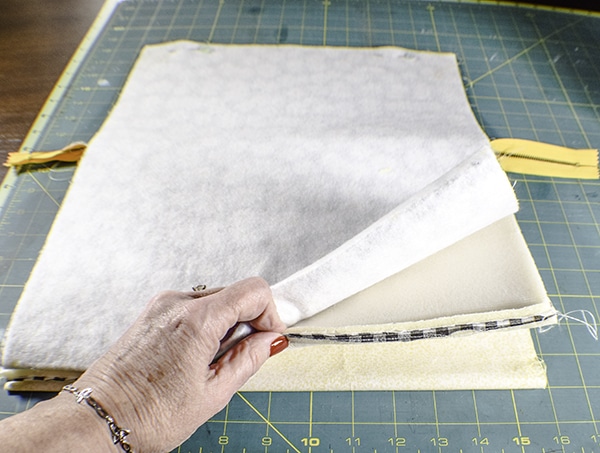
Open the lining out from the rest of the bag so it looks like you have a long piece of fabric with a zipper in the center. Move the zipper up along the lining until the bottom of the pocket, the fold in the lining are even. Fold the outer piece so that the fold is even with the lining fold and the pocket piece and it is right sides together with those pieces. The top of the lining and the outer piece are even as well. Open the zipper half way. Round the top corners.
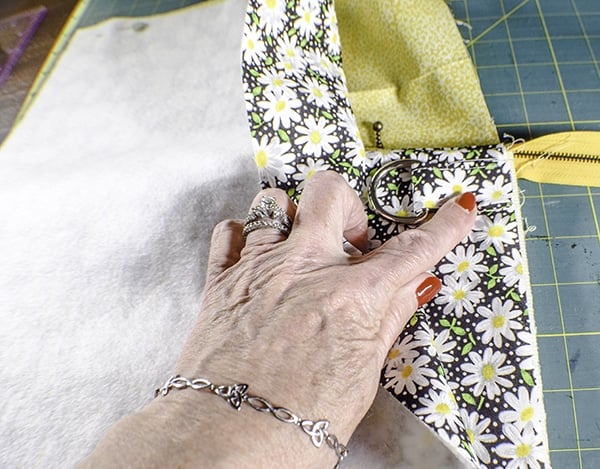
Step 8: add the strap tabs
Create the tabs by folding the raw edges of the tabs to the center and pressing. Fold in half to conceal the raw edges. Stitch up both sides of the tab. Place the tab around a D-ring. Place the D-RIng and tab so that the D-RIng and tab are facing the inside of the outer bag just below the zipper. Put one tab on each side of the bag.
Step 9: Stitch the bag
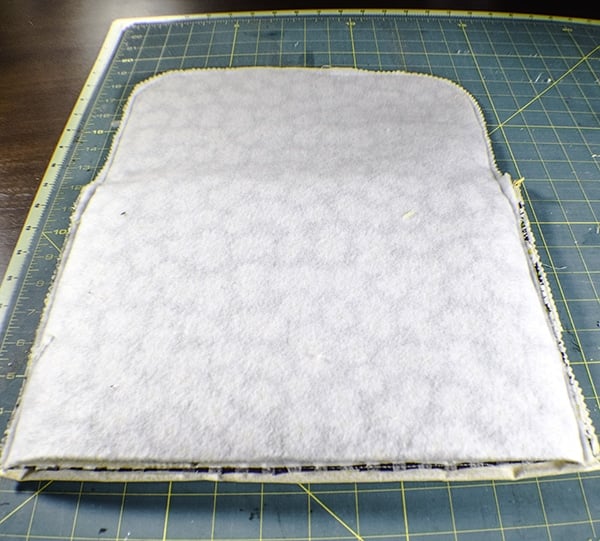
Stitch the sides and the top of the bag trough all layers leaving a 4″ opening in the top for turning. Trim the seam allowances using pinking shears. Do not trim the opening. Cut off the excess zipper. Clip the corners. Turn the bag right sides out and press. Top stitch around the flap.
Step 10: Add the Swivel clip
Take the second tab pattern piece and wrap it around the swivel clip. Center the tab on the flap part of the bag and eyeball where you need to put it so that it meets with the D-Ring. Sew around the fat part of the tab. You have now completed your padded laptop case.

Gina from Arts and Crafts for you has done a complete video of this project. You can take a look at it here:

I hope you enjoyed this project. If you would like more sewing and crafting projects sign up for our newsletter and receive your free eBook of 15 handbag patterns and tutorials.
If you would like a simpler Tablet Carrying case check out my Tablet Carrying case tutorial.