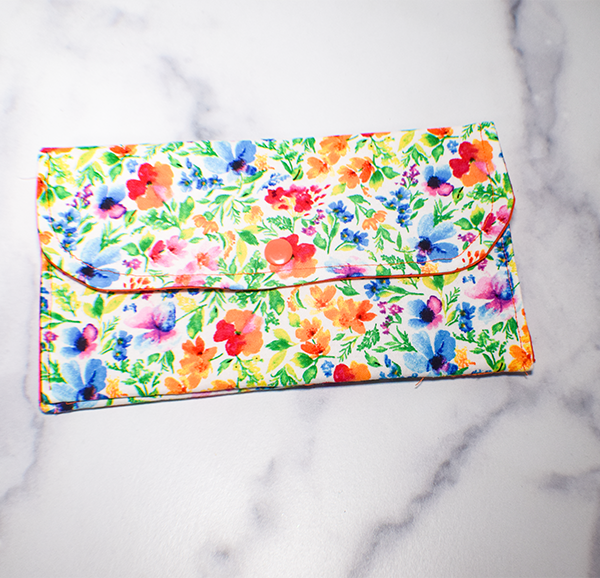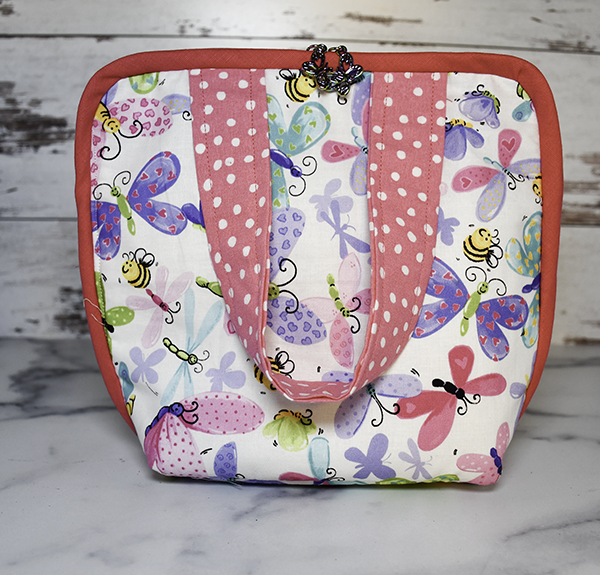
I came across this project on YouTube and thought it would be a fun one to make. I really like the design of this even though it was not my design. It should be useful in my travels but you can use it to store a lot of different things. Like a lot of sewing projects the fabrics can make or break the look. I have a large stash of fabric to choose from so I hope I chose right. Let's use your basic sewing skills for this one so let's get going.
Note: This post contains affiliate links that if you click on them and make a purchase I will receive a small commission at no extra cost to you. As an Amazon Associate I earn from qualifying purchases.
What you will Need: How to Sew a DIY Organizer
- Pattern you can get by clicking on this link.
- 1 /2 yd outer, lining and fusible fleece
- 1/4 yd for the bias binding or use premade
- 1/4″ elastic
- 27″ continuous zipper — I used a #3 zipper
- 2 zipper sliders — the continuous zippers should come with sliders but for different shaped ones try this link.
- Sewing Machine
- Standard sewing supplies
Step 1: Print the Pattern
Print the pattern using a standard printer. Tap the pattern together and cut out the pattern.


Step 2: Cut out the Fabrics
Cut rectangles that measure 12″ x 24″. To do this, cut a 12″ x 12″ square on the fold so that the fabric becomes 12″ x 24″ when unfolded. Leaving the fabrics folded cut out the patten. For the pockets cut rectangles from the outer, lining, and fleece that measure 12″ x 6″. Cut additional rectangles that measure 16″ x 6″ Cut two pieces of binding that measure 12″ x 2 1/2″ and one piece of binding that measures 16″ x 2 1/5″. Measure two more rectangles that measure 16″ x 6″ for the handles.


Step 3: Fuse the fleece
Place the glue side of the fleece onto the wrong side of the outer fabric and fuse using a hot iron and following the manufacturer's instructions.

Step 4: Sandwich the Main Fabrics
Place the lining fabric wrong side up on your work station. Layer the outer fabric so that the fleece is between the outer and lining fabrics and the outer fabric is right sides up.

Step 5: Stitch the Outer Organizer
Using a 1/4″ seam allowance stitch all the way around the fabrics through all layers. Trim the seam allowances.
Step 6: Create the flat Pocket
Take an outer, lining and fleece piece that measures 12″ x 6″. Fuse the fleece to the outer piece and layer in the same way that you did for the main organizer. Pin. Attach the binding. Fold the binding in half lengthwise and press. Place the binding along the long raw edge of the outer fabric and clip. Stitch the binding to the fabrics through all layers using a 1/4″ seam allowance. Do this for both long edges. Fold the binding over the raw edges and clip. Stitch through all layers to secure. You can use your machine or hand stitch as I prefer to do.


Step 7: Add the Flat Pocket
Place the flat pocket onto the main organizer on the lining side. Align the bottom of the pocket piece so that it lines up with the top of the cut out at the center of the organizer. Stitch the pocket along the long bottom edge and both sides. Trim off the excess.

Step 8: Create the elastic Pocket
Take the outer lining and fleece piece that measure 16″ x 6″. Fuse the fleece to the wrong side of the outer fabric. Place the lining fabric sight sides together with the outer fabric and stitch using a 1/4″ seam allowance. Turn the lining to the other side and press. Topstitch along the seam. Stitch a straight line 3/8″ from the topstitch line to create the casing for the elastic.


Take a piece of binding and fold it in half lengthwise and press. Align the long raw edge with the bottom raw edge and stitch. Fold the binding over the raw edges and stitch again. Using a bodkin or safety pin insert the 1/4″ elastic through the casing you made. Start and stop the elastic 3/8″ from each end and add a button to secure.

Using a needle and thread stitch a basting stitch to the bottom through the binding and all layers. Pull the thread to create a ruffled effect that matches the top elastic.

Step 9: Add the Elastic Pocket
Place the bottom of the elastic pocket at the top of the main organizer cutout and stitch along the bottom and sides.

Step 10: Add the Zipper
Separate the zipper. Starting at the bottom of the binding on the elastic pocket, place one side of the zipper to the end of the organizer with the elastic pocket. You will need to clip the zipper a bit to go around the curve. Pin or clip the zipper in place. Pin all the way around the curved end until you reach the other side of the organizer at the bottom of the binding. Stitch the zipper to the organizer through all layers. Repeat for the other end using the other side of the zipper.

Step 11: Create the Handles
Fold the two handle pieces in half wrong sides together and press. open up the fold and place the outer raw edges so that they meet the center crease and press again. Fold the pieces in half lengthwise to enclose the raw edges and press. Topstitch on both long edges.


Step 12: Add the Handles
Fold the main organizer in half lengthwise to find the center. Make a mark. Place the raw edges of each handle 1 1/2″ to each side of the center mark on the outer side of the organizer and pin. Do this for both ends of the organizer.

Step 13: Create the Bias Binding
You can use premade bias binding for this project or make your own. if you don not know how to make your own bias binding check out my post on exactly how to do it here.
Step 14: Add the Binding
Take a piece of binding that measures 2 1/2″ x 27″ and place the long raw edge so that it meets the main bag raw edge. Starting at the top of the cutout in the center of the organizer pin the binding all the way around the curved edge and over the handles. Stitch. Double fold the binding over the raw edge and stitch again.


Step 15: Add the Zipper Sliders
Fold the organizer in half so that the zipper ends match. Add the zipper sliders to each end of the zipper so that the zipper sides have been rejoined. This can be a bit fidgety but just take your time.

Step 16: Box the Corners
Turn the organizer so that it is wrong sides out. Fold over the bottoms of the bottom part of the zipper to the binding side. Pinch the openings in the corners so that they create a straight line. Stitch along that line. Repeat for the other corner. Add some additional binding to cover the raw edges.


You have now finished your DIY Organizer.
I hope you enjoyed this project. For more sewing and crafting projects subscribe to ur free newsletter and receive your free handbag eBook.
Subscribe to our Free YouTube Channel!