

Ever since I created the Memi's Lemon table runner I have been on a lemon kick. They are just so fun and summery. I decided to make another lemony project with this lemon potholder. Potholders are a great beginner sewing project. This lemon potholder is super simple. There is a free sewing pattern to help you along with this sewing tutorial. If you would like other potholder projects check out my potholder post here.
I used remnants from my other lemony projects for this lemon potholder. The fabrics were purchased from Joann's but you could head to fabric.com or onlinefabricstore.net to get exactly what you need for your lemon potholder. This post contains affiliate links that if you click on them and make a purchase I may receive a small commission at no extra cost to you. As an Amazon Associate I earn from qualifying purchases.
What you will Need: How to Make a Lemon Potholder
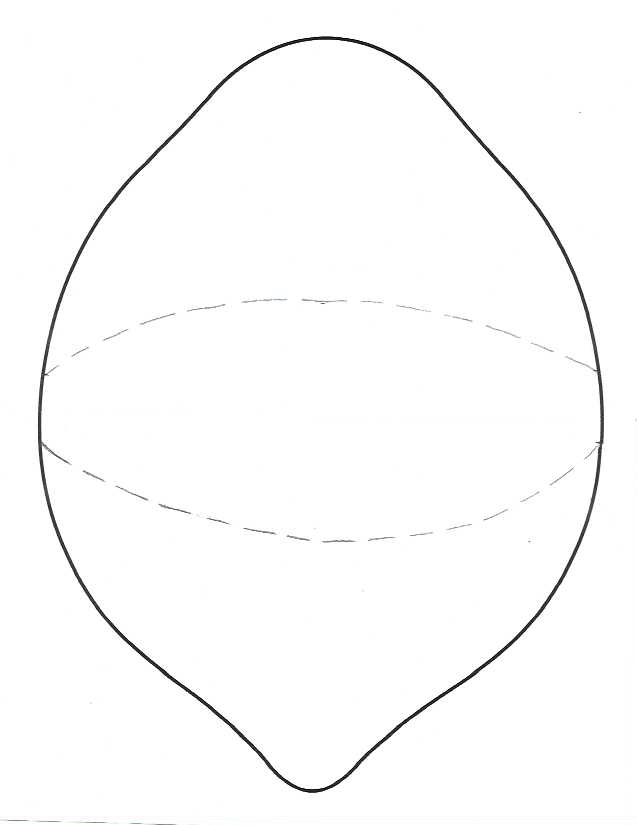
- Pattern you can get by clicking on this link
- 1/4 yd outer fabric
- 1/8 yd lining fabric
- 1/4 yd Insul-Bright
- 1/8 yd cotton batting
- Standard sewing supplies
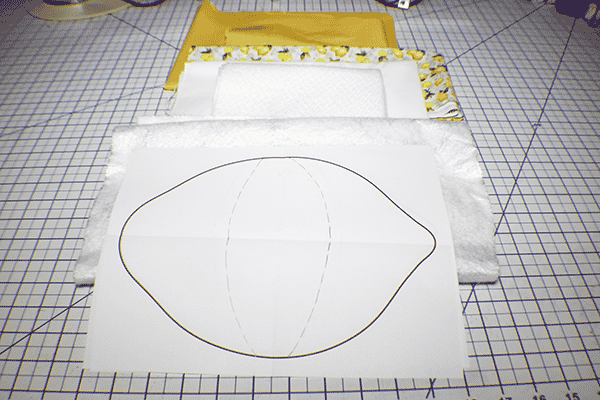
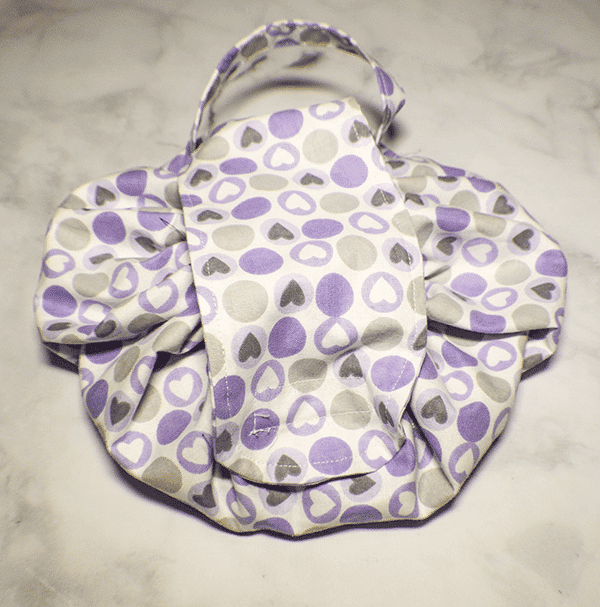
Step 1: Cut Your Fabrics
Cut out one lemon piece for the back of the pot holder and the one for the inside of the pot holder. I used a tossed lemon fabric for the back and white for the interior. Cut two of one side of the the half lemon pieces and two of the other side of the half lemon pieces because they are different. I used yellow Kona cotton for this. Cut strips of fabric that measure 2 1/2″ wide x ____” long for the binding or use ____” of pre-made bias binding. Cut one full lemon of insul-bright and cotton batting. Also, cut 2 half hearts of insul-bright and cotton batting. Cut a 4″ x 2″ piece of fabric for the hanger.
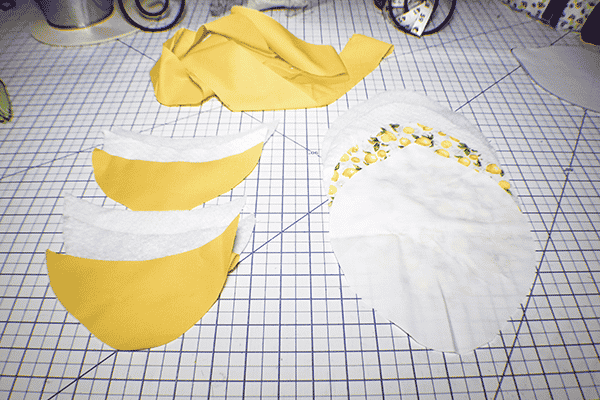
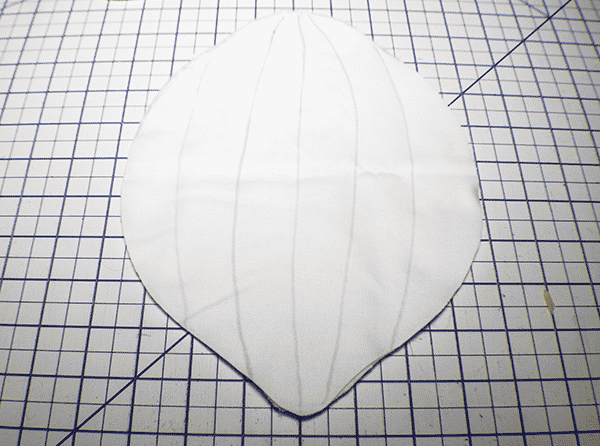
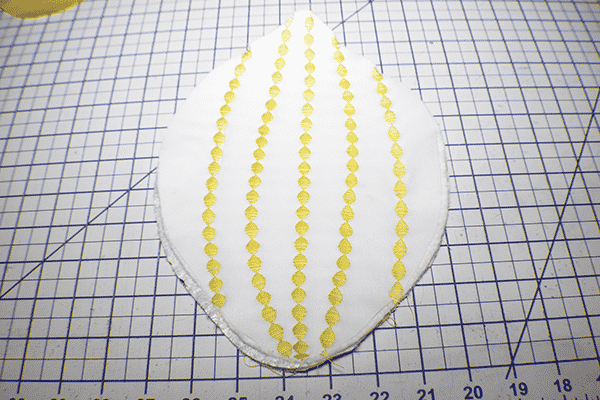
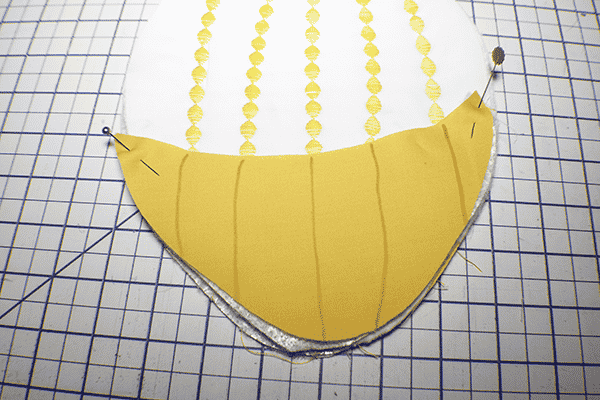
Step 2: Create the Back
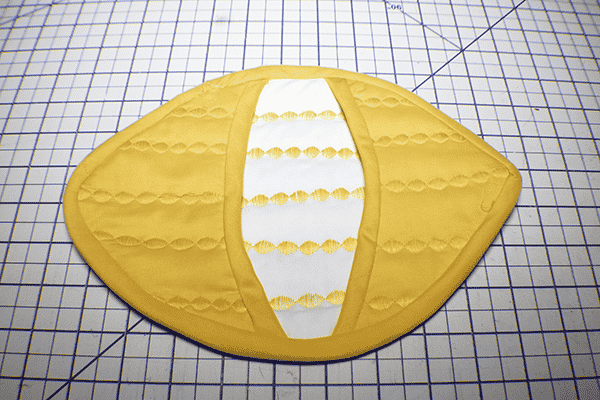
Lay your outer lemon right side down on your work surface. Place the insul-bright on top of that piece of fabric and the batting on top of that then the inner fabric piece. Pin around the edges. Turn over and mark quilting lines onto the right side of the fabric using an erasable pen or tailor's chalk. I chose to do lines using a decorative stitch. Stitch over the lines that have drawn through all layers. This is the quilting.
Step 3: Create the Front of the Potholder
Layer the front half lemons. Lay a half lemon right side down then the insul-bright, the batting and then another half lemon. Repeat for the other side. Add quilting lines to the top pieces. I simply used lines to mimic the shape of the lemon. Quilt the lines.
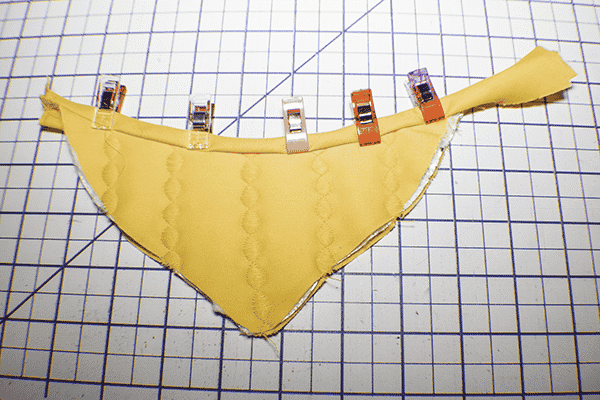
Step 4: Add the Binding to the Potholder
First you will need to create the binding if you are not going to use pre-made bias binding. I like to make my own using my how to make bias binding tutorial. I could have used a bias tape maker but there was just a small amount to make so I made it by hand. Add the binding to the inner edges of each of the half lemons. If you are unfamiliar with how to sew on bias binding check out my bias binding tutorial. For this project I simply sewed the raw edges together. I then folded over the binding and stitched along edge. Cut the binding so that it is even with the top raw edges. Repeat for the other side.

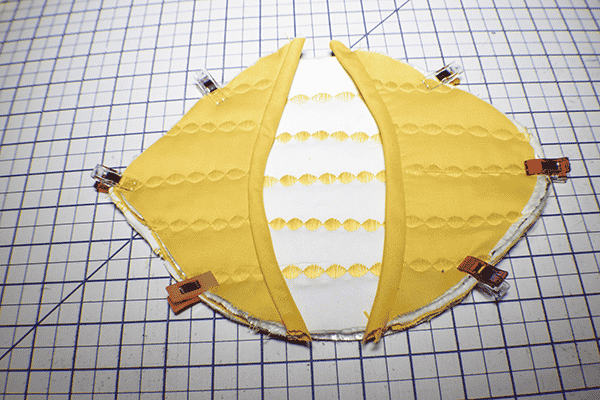
Step 4: Baste the Front to the Back of the Potholder
Lay the inner side of the back face up on your work surface. Place the bound lemon halves on top of the back piece and baste the pieces together using a 1/8″ seam allowance.
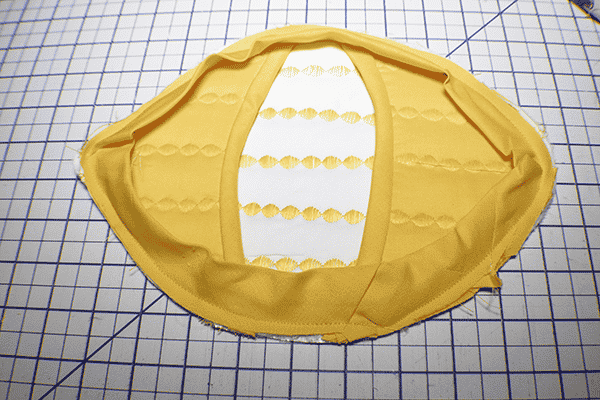
Step 5: Add the Bias Binding
Enclose the raw edges with more bias binding. If you are unfamiliar with how to add bias biding to your project check out the video below.
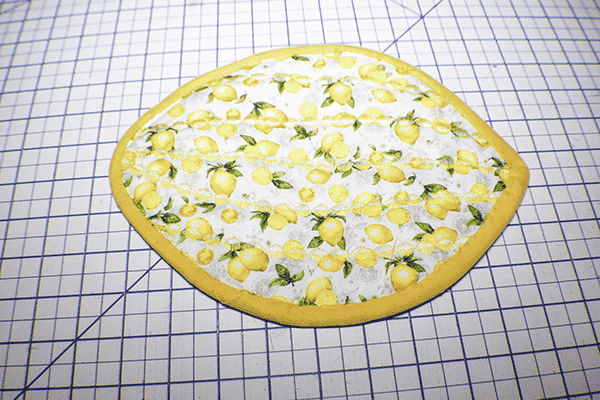

I hope you enjoyed this citrus inspired potholder. If you would like more sewing and crafting tutorials subscribe to ur newsletter and receive access to our free printables library
If you would like video tutorials of some of Sew Very Crafty's most popular posts subscribe to our free YouTube channel here.


