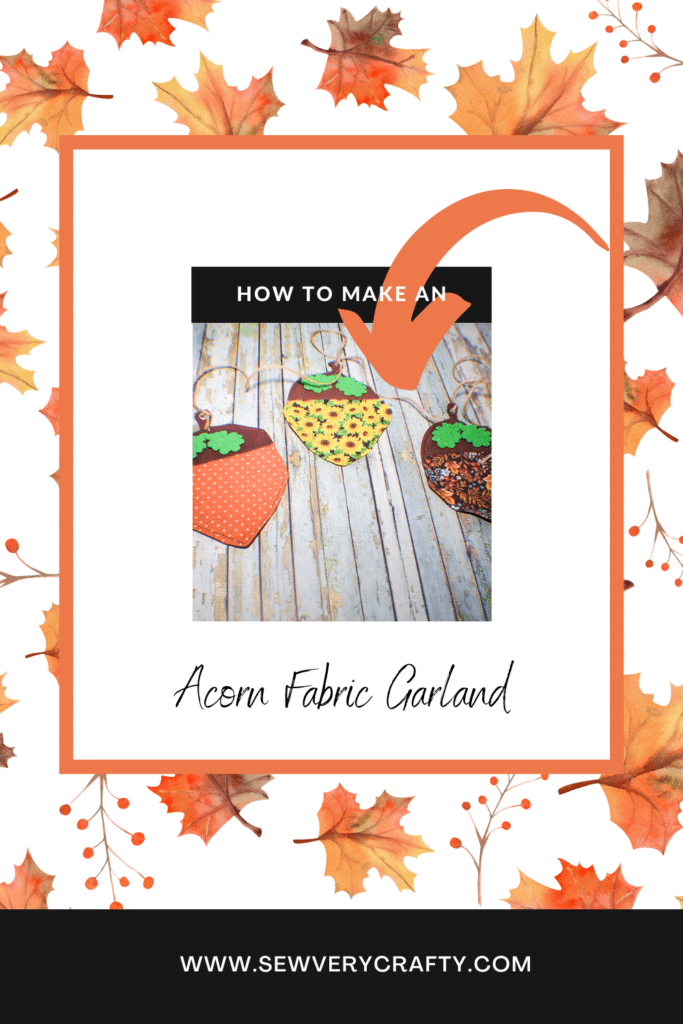
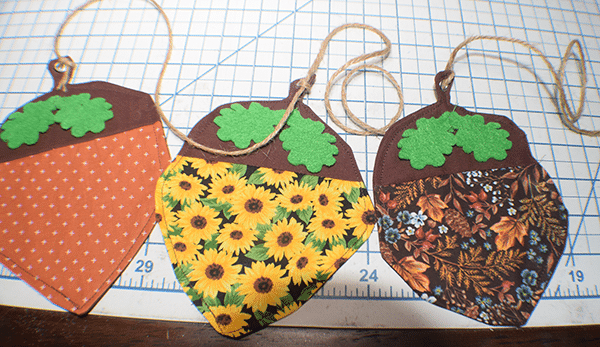
Autumn is just around the corner and I thought to create this acorn fabric garland to decorate my mantle piece. I created the pattern for this project on my computer so that if you are a Cricut user you can cut everything out using your Cricut cutting machine. If you do not have a Cricut you can cut it out by hand. I have included a PDF pattern and an SVG for whichever way you want to create this project. Either way this is a simple sewing project for the beginner sewist. If you would like to create a beginner pumpkin garland check this one out. If you would like a no sew version of this project head over to Paper Daisy and check out my felt acorn garland using Cricut.
I used quilting cotton for the acorn and felt for the leaves to make this a super simple sewing project. I purchased all of my fabrics and let at Joann's but you could head to Amazon fabrics or onlinefabricstore.net to get exactly what you need for your fabric acorn garland. This post contains affiliate links that if you click on them and make a purchase I may receive a small commission at no extra cost to you. As an Amazon Associate I earn from qualifying purchases.
What you will Need: How to Make an Acorn Fabric Garland
- Pattern you can get by clicking on this link
- 1/2 yd total of a variety of cotton fabrics for the bottom of the acorns
- 1/4 yd brown cotton fabric for the top of the acorns
- 1/2 yd brown fabric or felt for the back of the acorns
- 1/2 yd of Pellon 808 interfacing if you do not use felt for the backing
- 1/4 yd green felt for the leaves
- 8 eyelets
- cording or twine
- Cricut Maker (Optional)
- Rotary blade if using Cricut
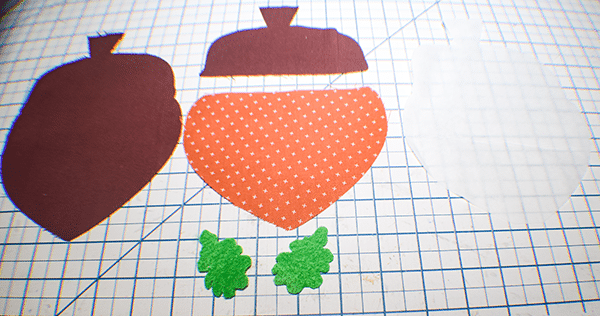
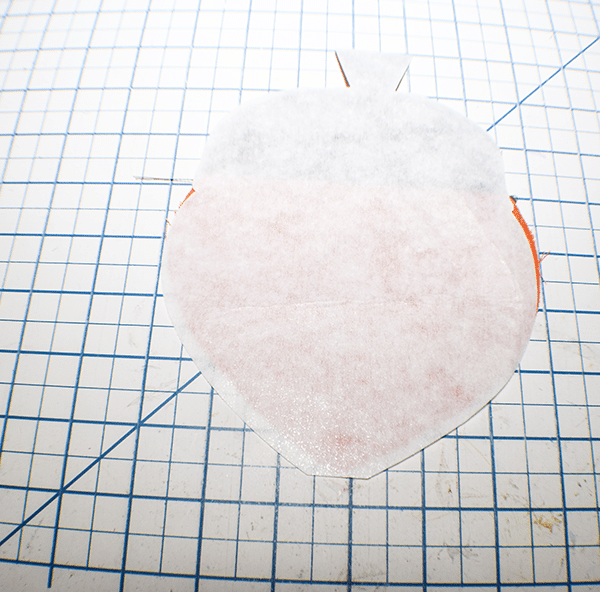
Step 1: Cut out the Fabrics
Choose whether you would like to cut out the pattern pieces by hand or on your Cricut. If you would like to use your Cricut upload the SVG file following the below video and cut out in the usual way making sure to choose the right material in the cut screen and the pink cutting mat. You will also need a rotary cutting blade. Make sure that you chose the rotary blade for all cutting even the felt. It will tell you to use the fine point blade for felt but it didn't work for me.

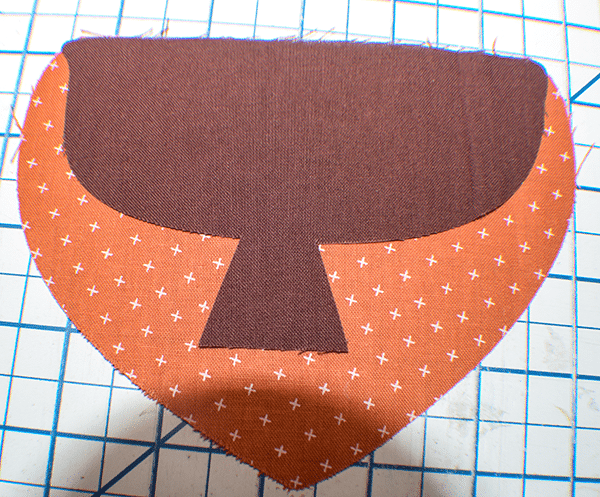
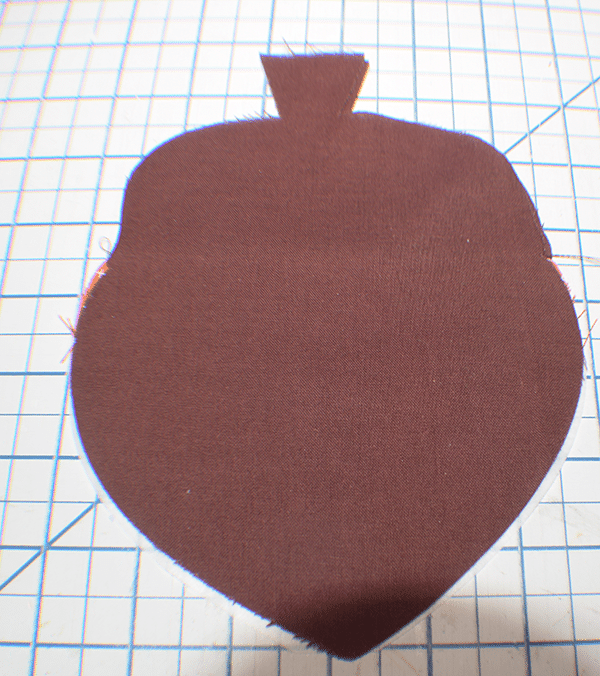
Step 2: Stitch the Top to the Bottom
Using a 1/4″ seam allowance stitch the cap of the acorn to the bottom of the acorn.
Step 3: Fuse the Interfacing
Fuse the interfacing to the back of the fabric if needed.
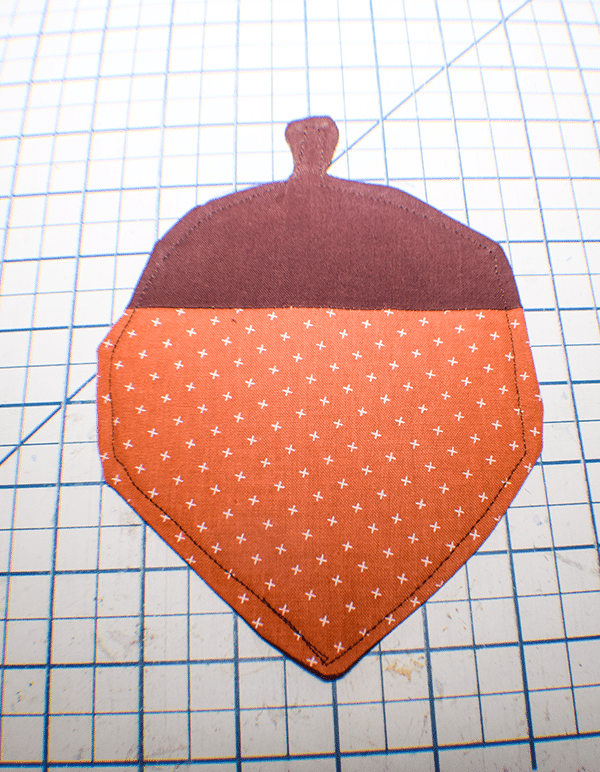
Step 4: Add the Back
Place the back of the acorn right sides together with the front of the acorn lining up the raw edges. Stitch all the way around using a scant 1/4″ seam allowance leaving an opening on one side for turning.
Step 5: Turn Right Sides Out
Turn the Acorn right sides out and press. The stem is a bit fiddly but can be done if you use the scant 1/4″ or a bit smaller seam allowance. Topstitch all the way around the acorn closing the opening as you go.
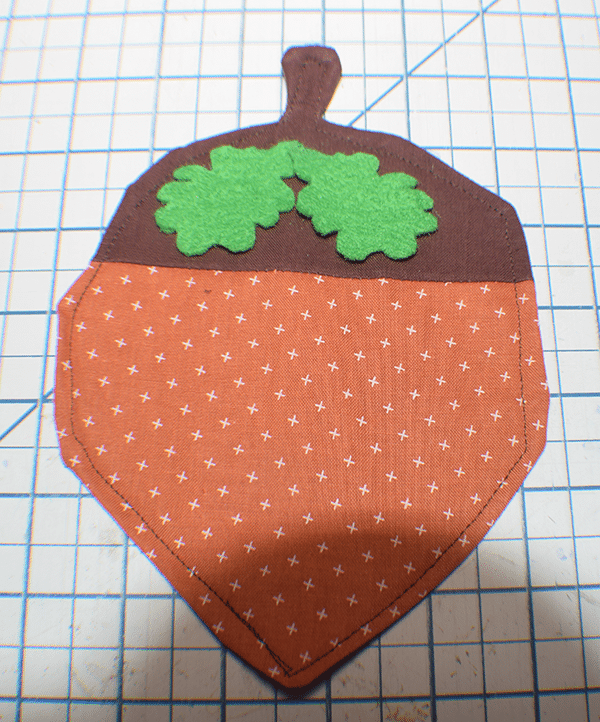
Step 6: Add the Leaves
Hand stitch the leaves to the acorn just at the tops.
Step 7: Add the Eyelets
In the center of the stem create a hole and add the eyelet using an eyelet press or pliers. You can use a hole punch for this or a small pair of scissors. Remember not to make the hole too big.
Step 8: Add the Twine
Once you have created eight Acorns string them together with cording or twine wrapping the cording or twine around the eyelet and knotting it before moving onto the next acorn. Attach your garland and you are finished with your acorn fabric garland.
I hope you enjoyed this Autumn Garland project. If you would like more sewing and crafting projects subscribe to our newsletter and receive access to our free printables library
If you would like video tutorials of some of Sew Very Crafty's most popular posts subscribe to our free YouTube channel here.