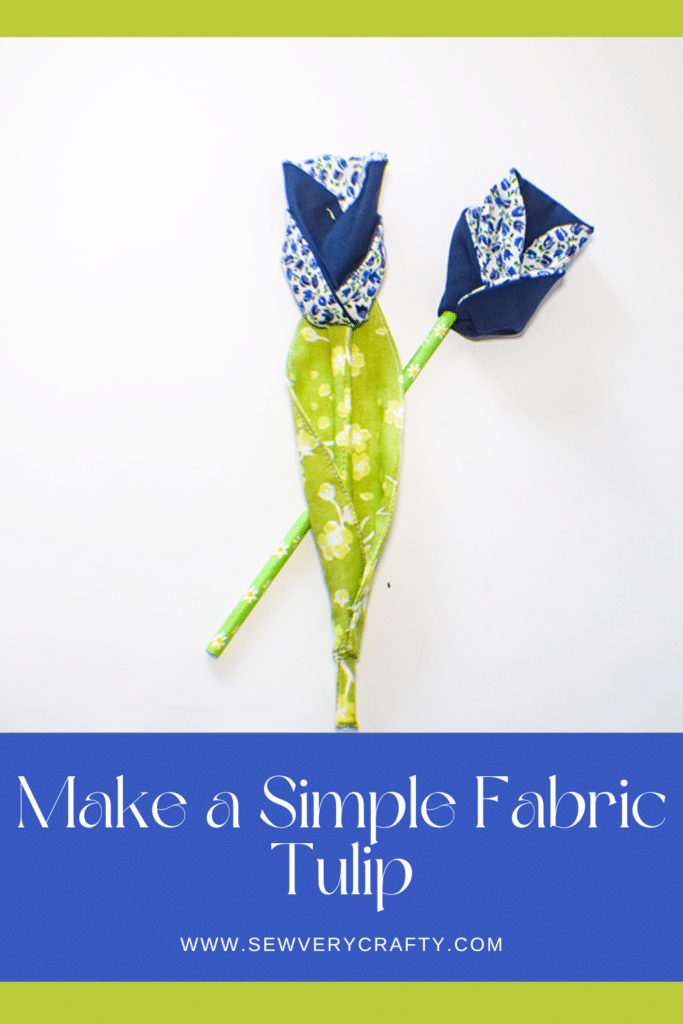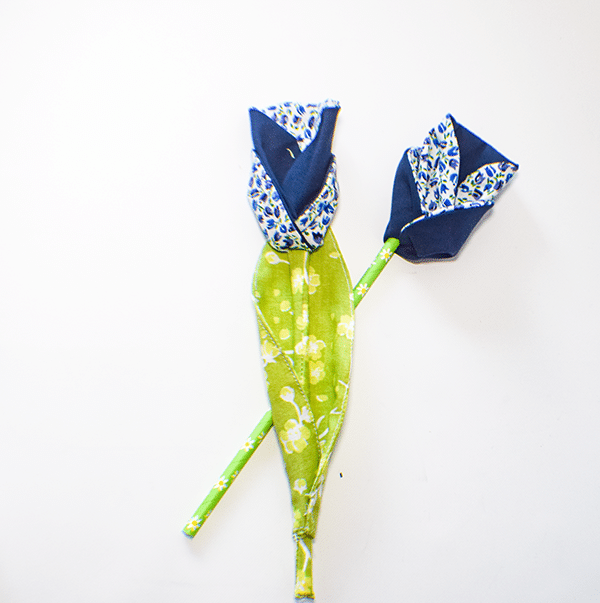
It's spring!! With this in mind I decided to create these fun fabric tulips that anyone can sew. These tulips are not only pretty they last forever. You can make them any color you like using basic quilting cotton. I have always loved tulips so this seemed to be the perfect project for a sewing pattern and tutorial to decorate my home this spring. These tulips are very easy to make using beginner sewing skills. So, let's get started. If you would like another fabric flower project check out these.
For this project I used quilting cotton, Pellon 808 interfacing for structure and a straw for the stem. This post contains affiliate links that if you click on them and make a purchase I will receive a small commission at no extra cost to you. As an Amazon Associate I earn from qualifying purchases.
What you will Need: How to Sew Simple Fabric Tulips
- Pattern you can get by clicking on this link
- 1/2 yd of petal fabric
- 1/4 yd of center fabric
- 1/4 yd leaf fabric
- 1 Straw
- Sewing machine
- Standard sewing supplies
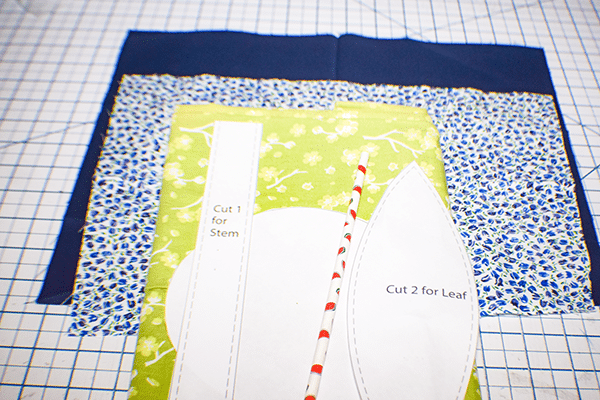
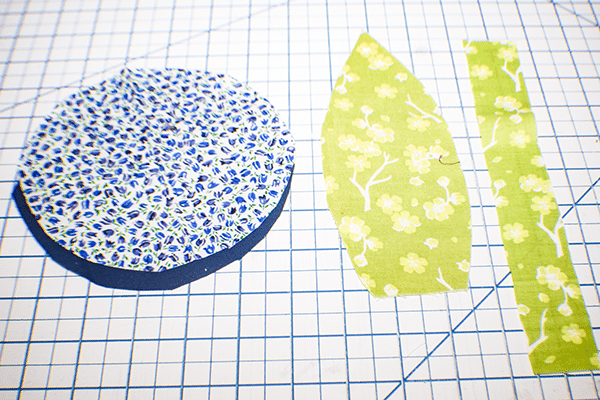
Step 1: Cut out the Fabrics
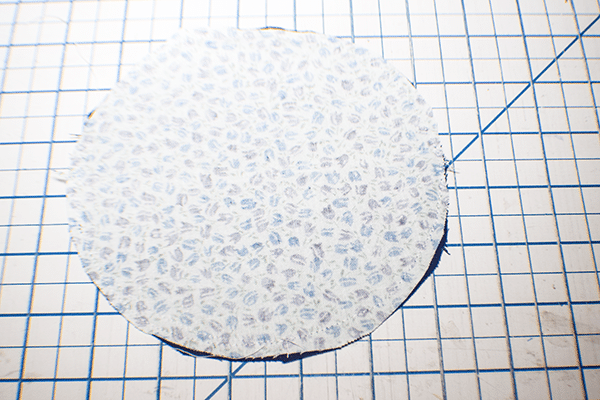
Using the pattern pieces cut out 1 piece of outer and inner fabric using the circle pattern
Step 2: Stitch Each Piece
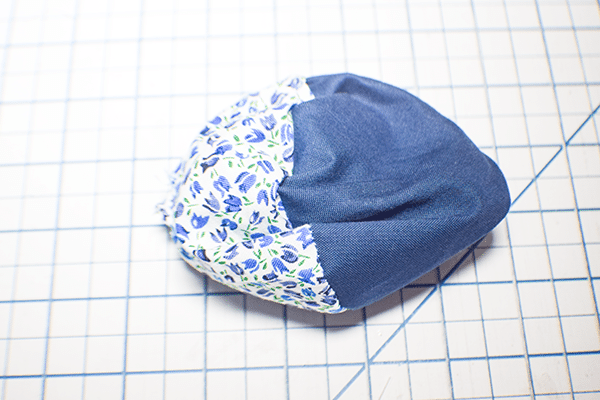
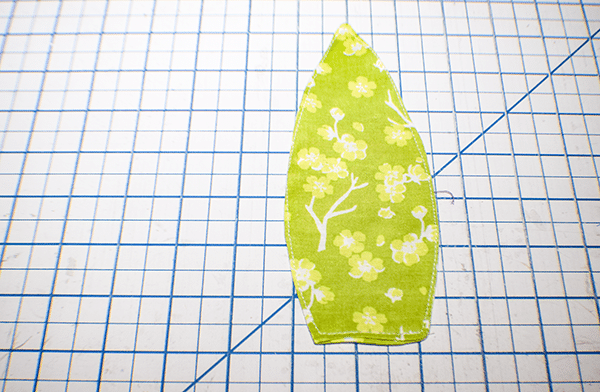
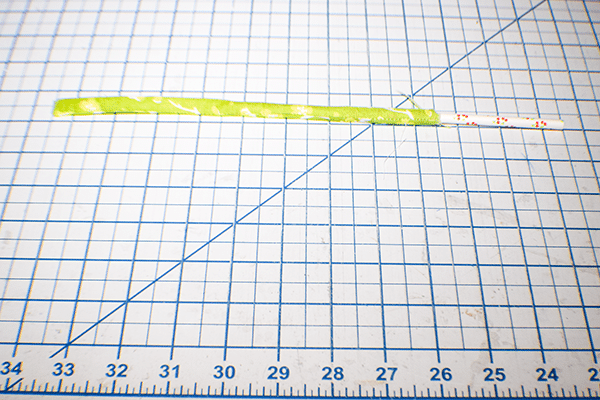
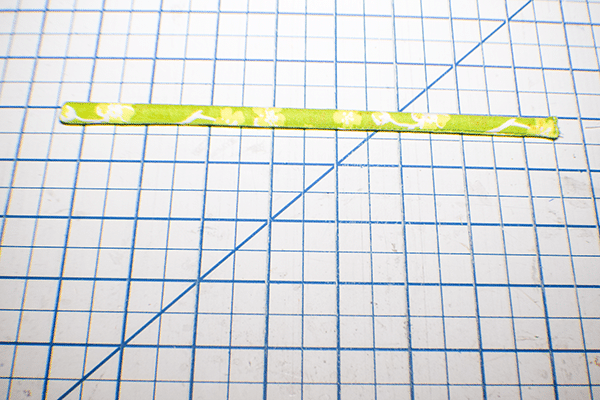
With right sides together stitch the the circle pieces together all the way around. Clip a hole in the center of one side of the circles you just stitched. Turn right sides out through the hole. For the leaf pieces stitch them right sides together leaving an opening for turning. Turn right sides out and topstitch along the edge to close the opening. Fold the stem piece in half lengthwise with right sides together and stitch along the long side and one short side. Turn right sides out.
Step 3: Insert the Straw
Insert the straw into the stem piece. Stuff the the short raw end into the open end of the straw.
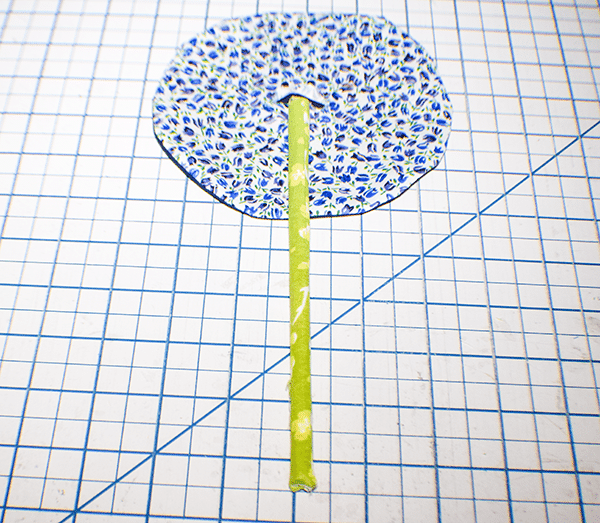
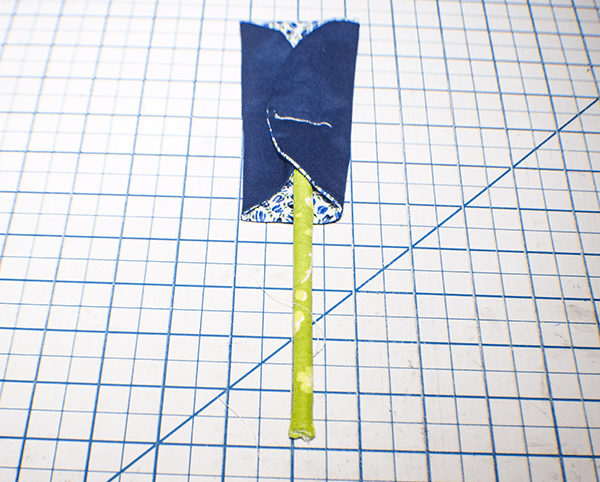
Step 4: Add the Circle to the Stem
Place the stem piece in the center of the circle on the side with the hole. Fold the sides to the center so that they overlap. Stitch through the straw and the fabric layers. Take care with this and go slow as the straw is thick.
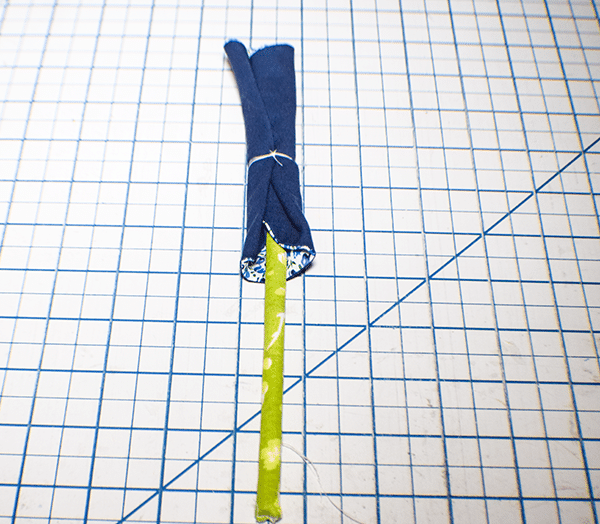
Step 5: Stitch the Petals together
Fold the sides to the center and stitch them together by hand and wrap the thread around the center and knot.
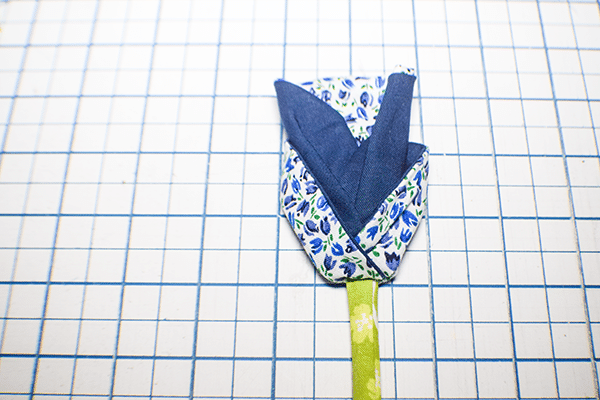
Step 6: Fold up the Flower
Pull the bottom of the flower up toward the top of the flower to create to petals.
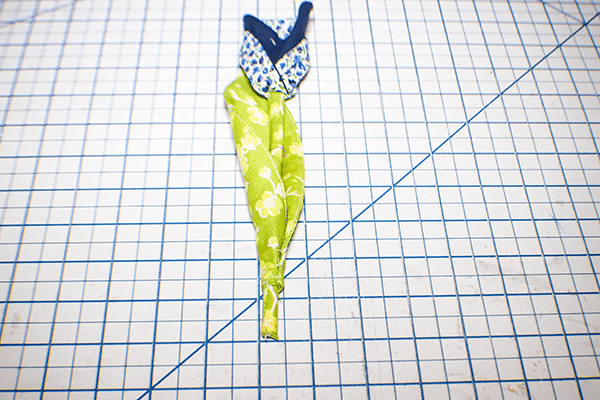
Step 7: Add the Leaf to the Stem
Wrap the bottom of the leaf around the straw. Stitch just the lower portion of the leaf together and through the stem fabric using ladder stitch. Once you have added the leaf you have finished this simple fabric tulip. Make several for a bouquet to put into a nice vase. Enjoy.
I hope you enjoyed this simple fabric tulip project. If you would like more sewing and crafting projets subscribe to our free newsletter and receive access to our free Printables library.
If you would like video tutorials of some of Sew Very Crafty's most popular posts subscribe to our free YouTube channel here.