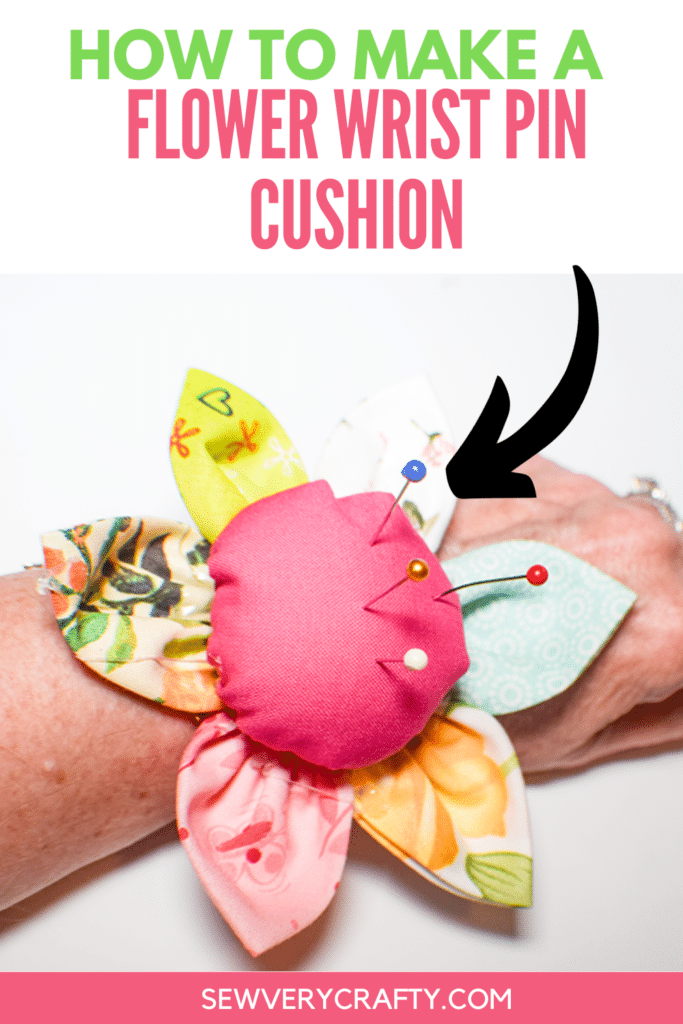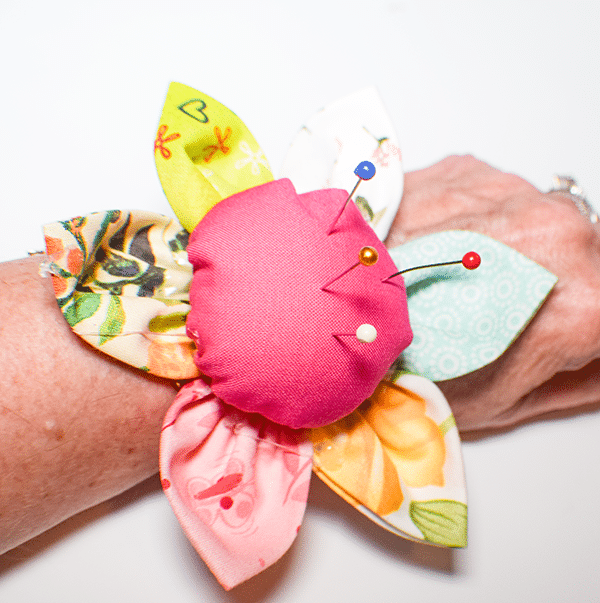
I love wrist pin cushions so I thought I would show you how to make this flower wrist pin cushion using a little sewing and a little hot glue. This is so simple to make and yet so useful in the sewing room. I just love the simplicity of this design and how well it came out. This was a fun little project to do so I hop you like it. If you would like another simple wrist pin cushion check out this one.
I used a variety of fat quarters and some pink Kona cotton for this project that I purchased at JOANN Fabric & Craft Stores![]() but you could head to Amazon fabrics or
but you could head to Amazon fabrics or
What you will Need: How to Make a Flower Wrist in Cushion
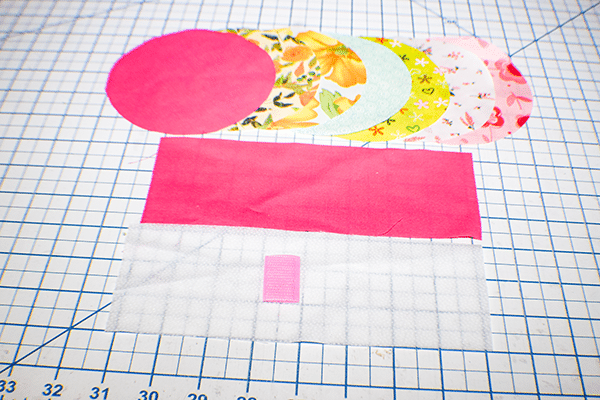
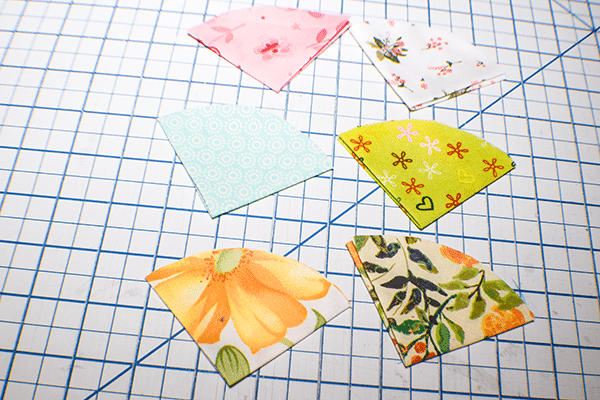
- 6 different 5″ diameter circles of fabric for the petals
- 1 solid 5″ diameter piece of fabric for the center
- 1 rectangle of solid colored fabric 3 1/8″ x wrist measurement + 2 3/8″
- 1″ piece of Velcro
- Piece of Pellon SF 101 the same size as the rectangle
- 1 yard of upholstery thread or twine
- Hot glue and hot glue gun
- Polyester fiberfill
- Sewing Machine
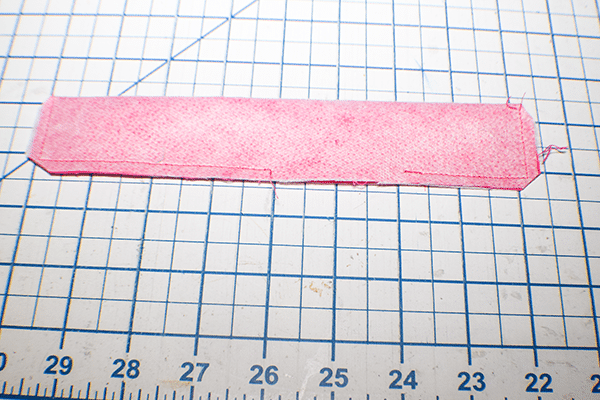
Step 1: Fuse the Interfacing
Fuse the interfacing to the wrong side of the rectangle you will be using as the wristband using a hot iron and allowing the manufacturer's instructions.

Step 2: Create the Strap
Fold the rectangle in half lengthwise right sides together. Stitch around the raw edges using a 1/4″ seam allowance but leaving an opening in the long side for turning. Clip the corners. Turn right sides out and press. Topstitch all the way around closing the opening as you go.
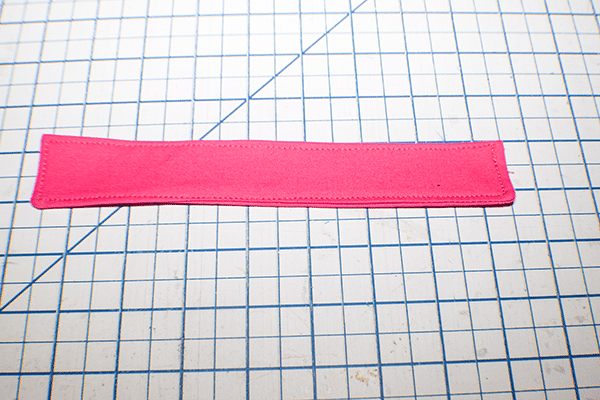
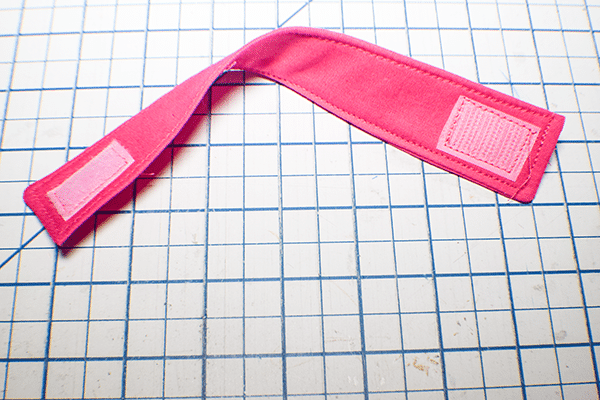
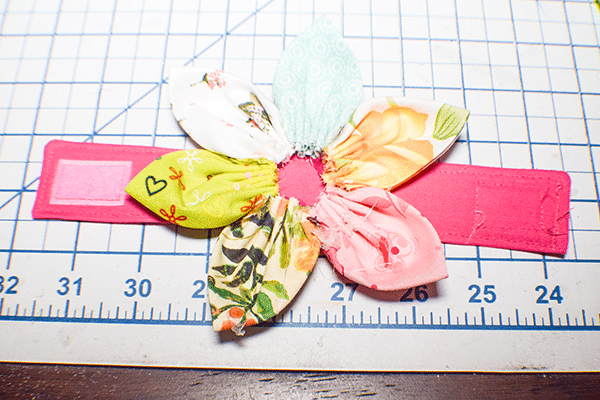
Step 3: Add the Velcro
Place a piece of Velcro at each end on opposite sides of the strap stitching the Velcro to the strap.
Step 4: Create the Petals
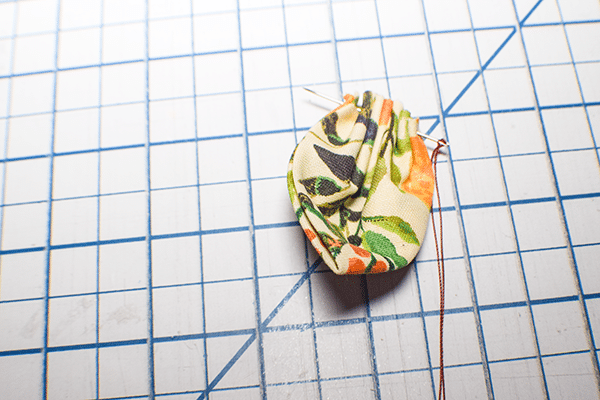
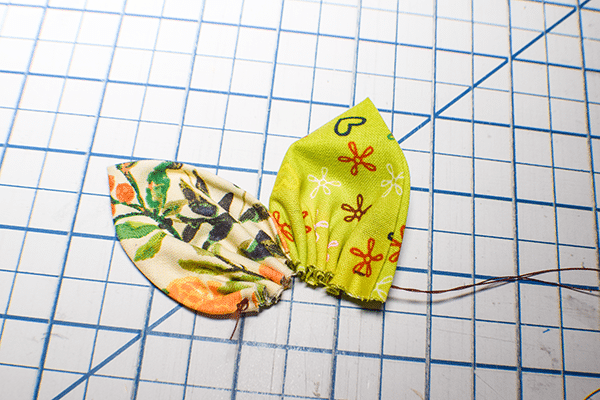
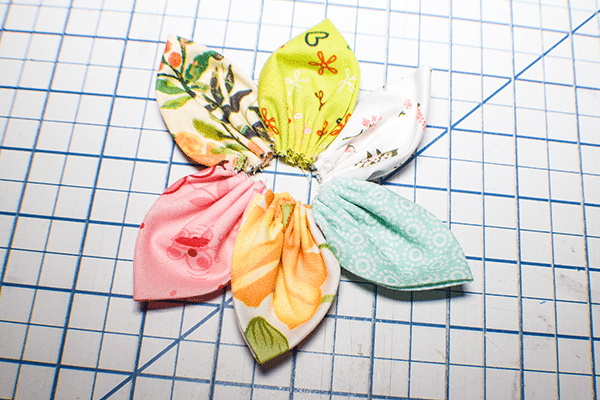
Take each of the 5″ circles except the solid colored one and fold them in quarters so they create a triangle. Make sure the right side is facing out. Thread a piece of upholstery thread, double and knot it. Stitch a running stitch on the curved edge of one of the triangles about a 1/4″ from the edge making sure the stitches are even. Add each triangle to the thread in the same way so that they are all on the same piece of thread. Pull the thread taut so the petals form a circle. Tie them together and clip off the excess thread.
Step 5: Hot Glue the Petals
Using your hot glue gun, glue the bottom sides of the petals to each other so that they are secure.
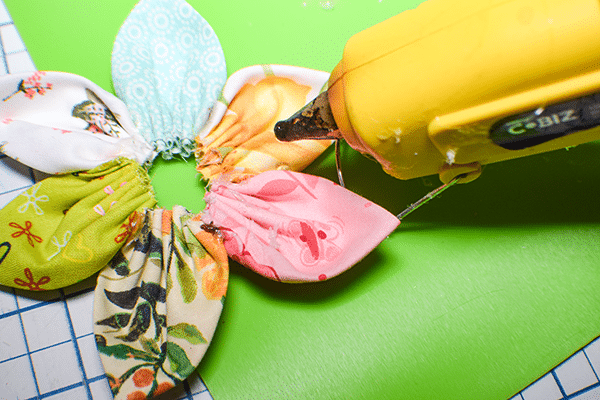
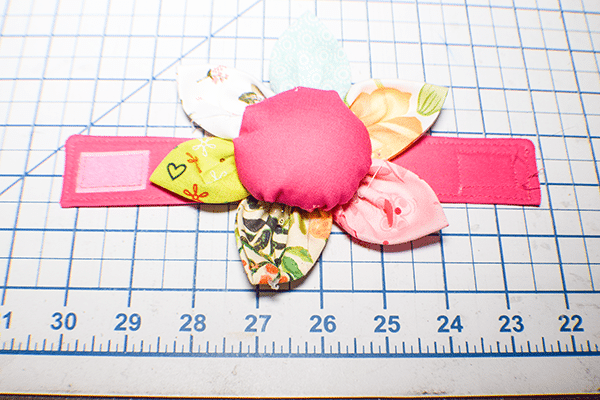
Step 6: Add the Petals to the Wrist Band
Again, using your hot glue gun, glue the petals to the center of the wrist band. Make sure that you use a lot of glue to secure. Once the petals are on glue around the bottom of the petals to further secure.
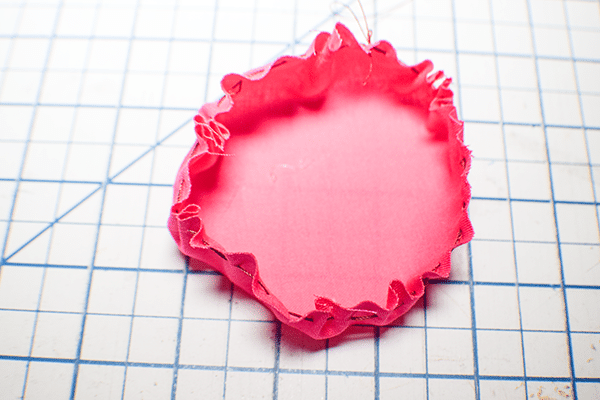
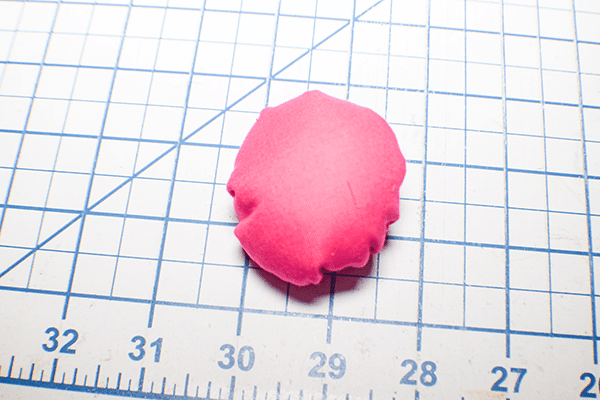
Step 7: Create the Pin Cushion
Take your needle and thread and again double and knot it. Stitch a running stitch around the circumference of the solid colored circle about 1/4″ from the edge. Pull it partially taut. Fill the circle with polyester fiberfill until it is full. Pull the thread really taut to secure formatting the cushion for the pins. make sure that it is evenly rounded. Tie the threads and clip off the excess.
Step 8: Add the Pin Cushion to the Wrist Band
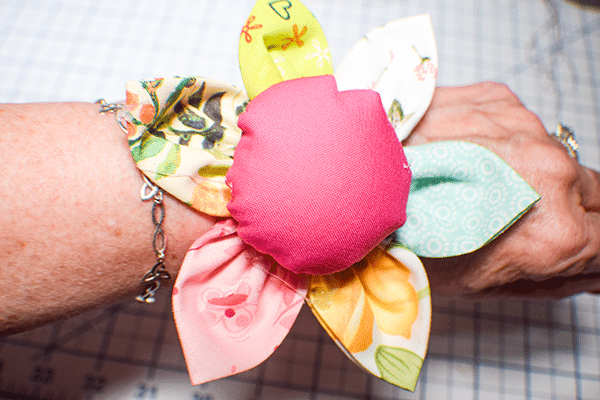
Using your hot glue gun place a lot of hot glue to the bottom of the pin cushion and some on the top of the petals. Place the cushion onto the petals and press. Once it is on add a little hot gluer around the bottom to further secure. You have now finished your flower first pin cushion.
I hope you enjoyed this simple pin cushion project. If you would like more sewing and crafting tutorials subscribe to our newsletter and receive access to our free printables library.
If you would like video tutorials of some of Sew Very Crafty's most popular posts subscribe to our free YouTube channel here.