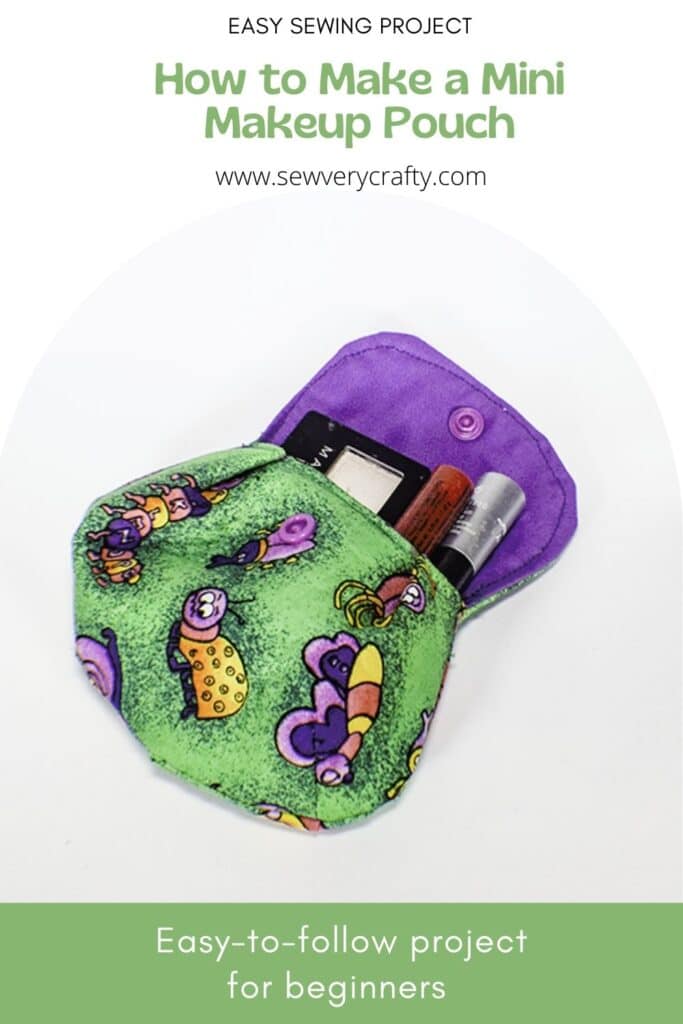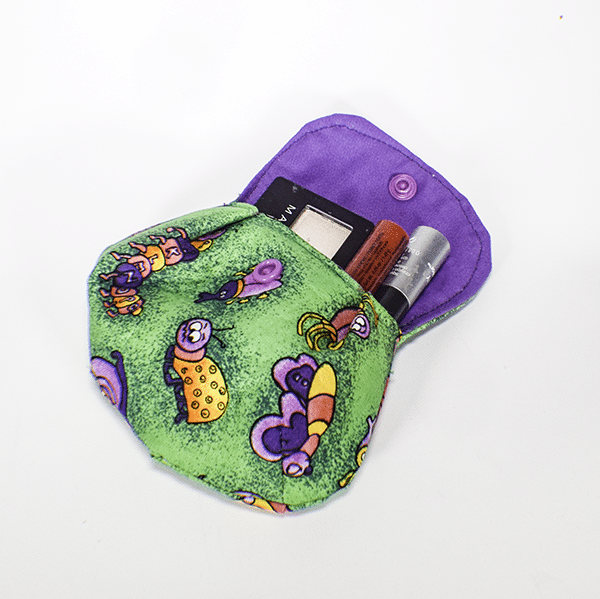
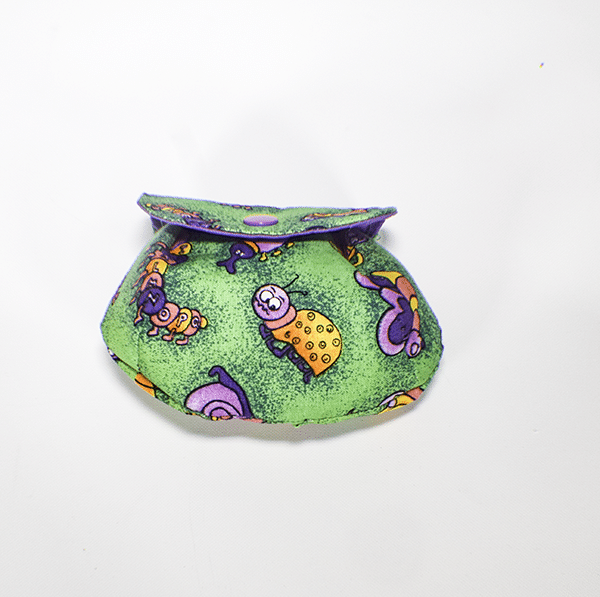
This is a fun mini makeup pouch that anyone with basic sewing skills can make. This project comes with a free pattern that will make sewing this pouch easy. There is no zipper in this project because you just don't need it. I really like this project. It came from Tendersmile Handmade on YouTube. It is a beginner sewing project that takes about twenty minutes to make so lets get started. If you would like other makeup pouch projects check out my drawstring makeup pouch
I used remnants from my stash for this project that I purchased from JOANN Fabric & Craft Stores![]() but you could use fat quarters or other fabric by heading over to
but you could use fat quarters or other fabric by heading over to
What you will Need: How to Make a Purse Sized Makeup Pouch
- Pattern you can get by clicking on this link.56
- 1/4 yd outer fabric and lining fabric
- 1/8th yd Fusible Fleece like Pellon 987F
- 1 Kam Snap
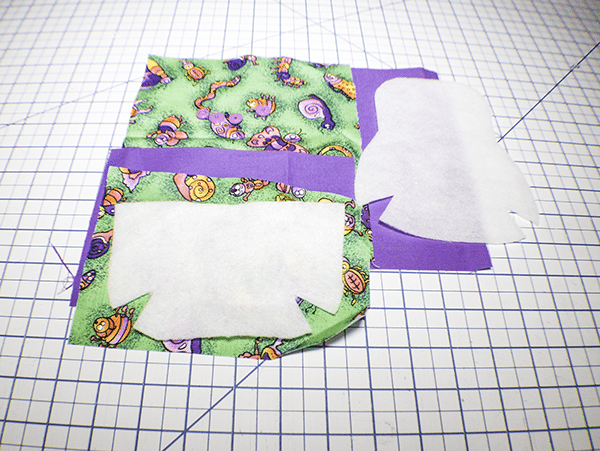
Step 1: Cut the Fleece and Fabric
Using the pattern piece cut out each piece from the fleece on the fold. Cut an outer piece and lining piece that measure 7″ x 8″ and an outer and lining piece that measures 7″ x 5″.
Step 2: Fuse the Fleece
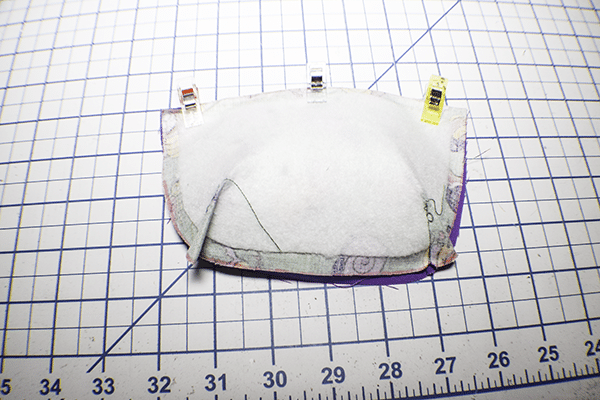
Fuse the two pieces to their respective outer pieces using a hot iron and following the manufacturer's instructions. Place the outer pieces and lining pieces right sides together. Trim around the fleece leaving a 3/8″ seam allowance as shown. Draw the pleats on the lining pieces using an erasable pen.

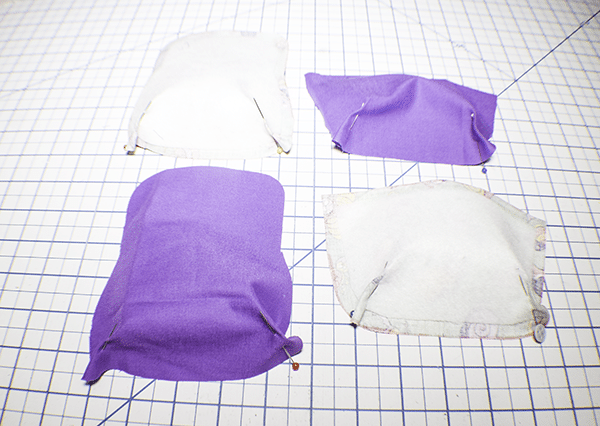
Step 3: Create the Pleats
Fold the pleats so that the sides of the fleece match and the fabric is in the center and pin. Do this for all eight pleats on the outer fabric and lining. Stitch the pleats along the lines created when you pinned them. Start from the bottom and and stitch off the point.
Step 4: Stitch the Small Pieces Together
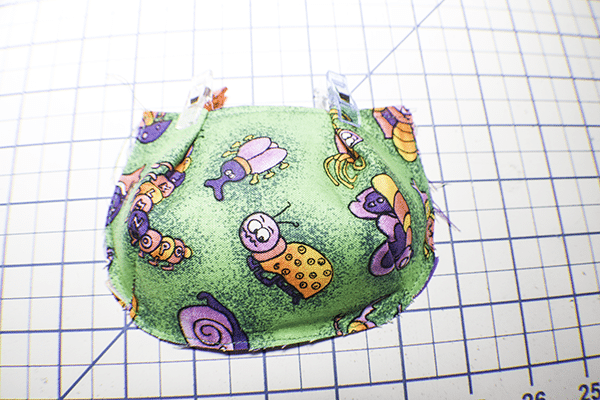
Place the small outer and lining pieces right sides together. Stitch along the top using a 3/8″ seam allowance. Open the seam and turn right sides out. Nest the pleats by turning them in opposite directions and pin. Topstitch all the way around.
Step 5: Create the Upper Pleats
Measure in from the side of the small piece 1 5/8″ and make a mark. From there, measure 7/8″ and make another mark. Do the same for the other side. Fold the first line to the second line and clip. Stitch the pleats along the top to secure.
Step 6: Add the Small Piece to the Large Lining Piece
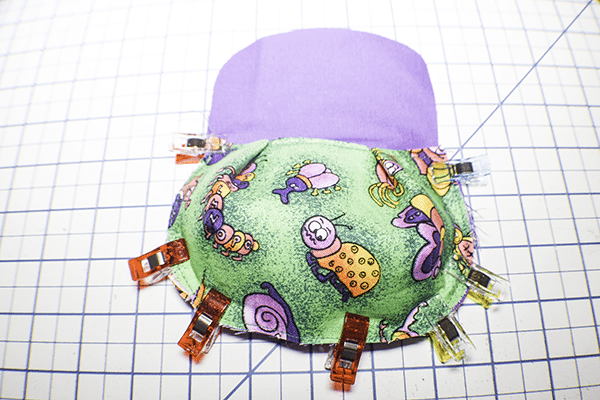
Place the small piece on top of the bottom part of the large lining piece. Clip together and stitch.
Step 7: Add the Large Outer Piece
Place the large outer piece right sides together with other pieces. Clip together. Stitch all the way around using a 3/8″ seam allowance but leaving an opening at the bottom for turning. Trim the seams and clip the curves. Turn right sides out. Press. Close the opening using ladder stitch. Topstitch around the flap.

Step 8: Add the Kam Snap
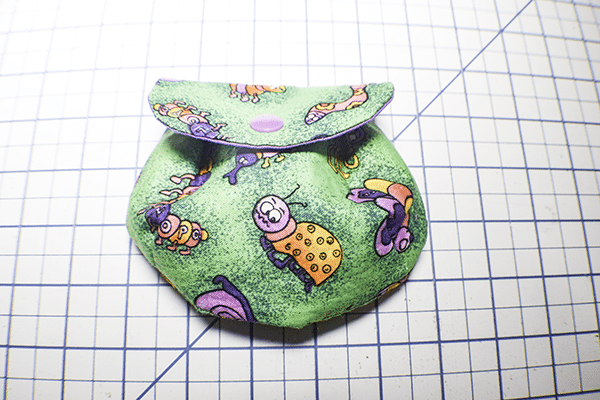
Place one half of the Kam Snap on the top flap of the pouch in the center near the bottom. Fold the flap over to find the location for the second half of the Kam Snap and insert it into the body of the pouch. If you don't know how to install Kam snaps check out my video.

I hope you enjoyed this mini makeup pouch, If you would like more sewing and crafting projects subscribe to our newsletter and receive access to our free printables library
If you would like video tutorials of some of Sew Very Crafty's most popular posts subscribe to our free YouTube channel here