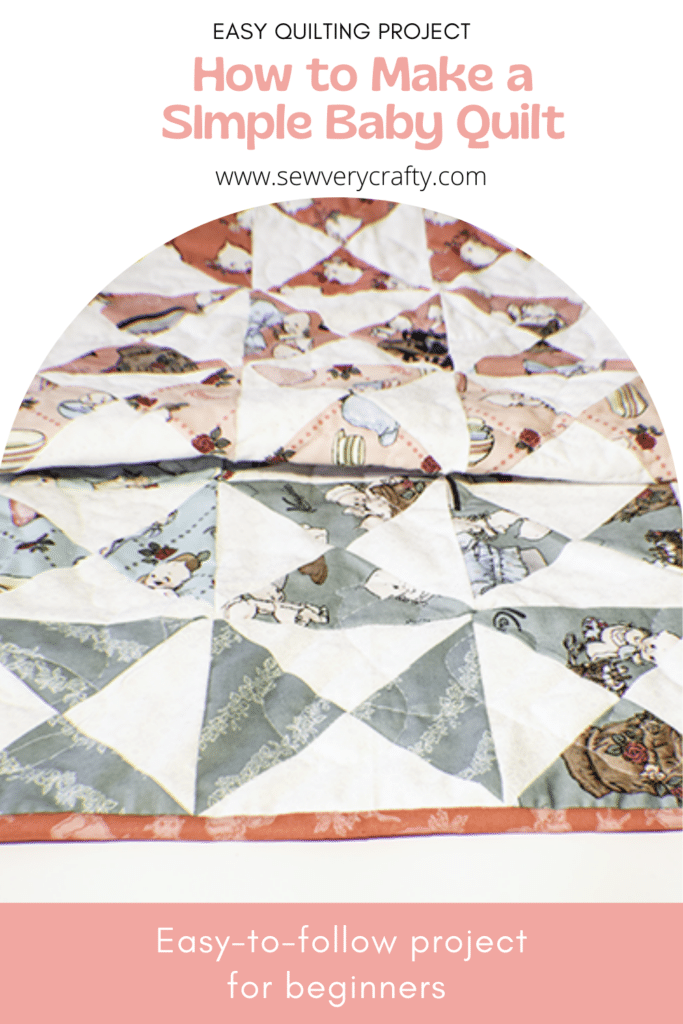
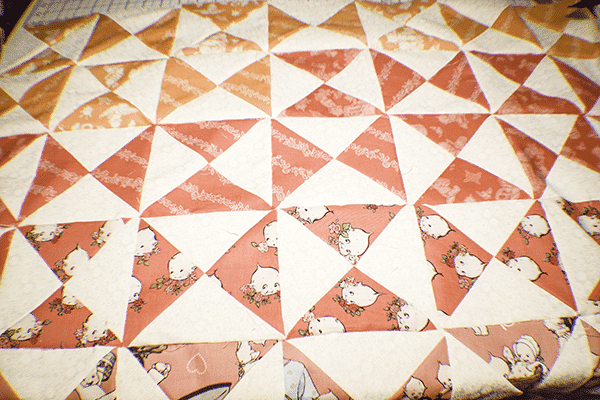
 After making my quilted sewing machine cover I had loads of fabric left over. I decided to expand my quilting skills to make this simple baby quilt from Cluck Cluck Sew. I used the skills I learned to create the quarter square triangle pillow cover but expanded them to make this quilt. The Sew Kewpie fabrics I purchased for the sewing machine cover really came in handy for this project. They are just so cute. I know that I have done a series of quilting projects here at Sew Very Crafty but I am just learning and want to share my new skills with you.
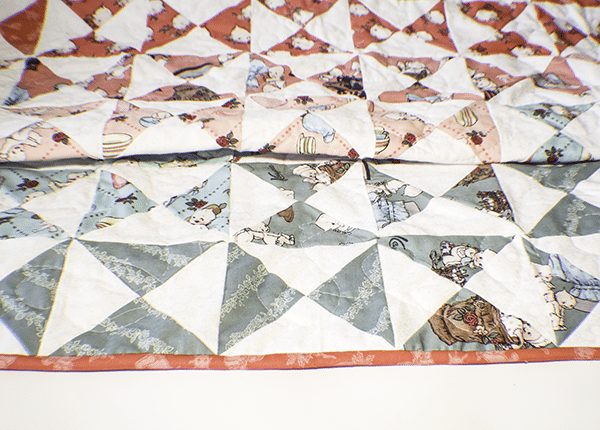
This is only a small quilt to use up the fabrics that I had on hand. The finished size of the quilt is 32″ x 41″. The perfect size for a baby. I purchased the fabrics from Fabric.com. They are a Riley Blake design called Sew Kewpie. Of course you could head to your local quilt or fabric store, JOANN Fabric & Craft Stores![]() or onlinefabricstore.net to get exactly what you need for your small quilt. This post contains affiliate links that If you click on them and make a purchase I may receive a small commission at no extra cost to you.
or onlinefabricstore.net to get exactly what you need for your small quilt. This post contains affiliate links that If you click on them and make a purchase I may receive a small commission at no extra cost to you.
What you will Need: How to Make a Simple Baby Quilt
- 1 yd of white fabric or 32 6″ x 6″ squares
- 32 6″ x 6″ print squares. I used a fat quarter bundle that contained 10 different colored prints
- 41″ x 51″ piece of quilt batting
- 41″ x 51″ piece of backing fabric
- 4 2 1/2″ x WOF (Width of Fabric) strips for binding
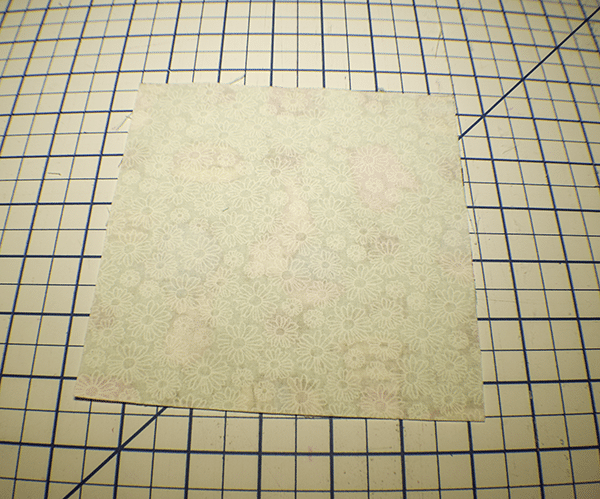
Step 1: Cut your Fabrics
Cut your 64 6″x 6″ squares; 32 from the white and 32 from the print fabrics. Cut the 41″ x 51″ pieces of batting and backing fabrics and the binding strips. This is all that you need for this quilt.
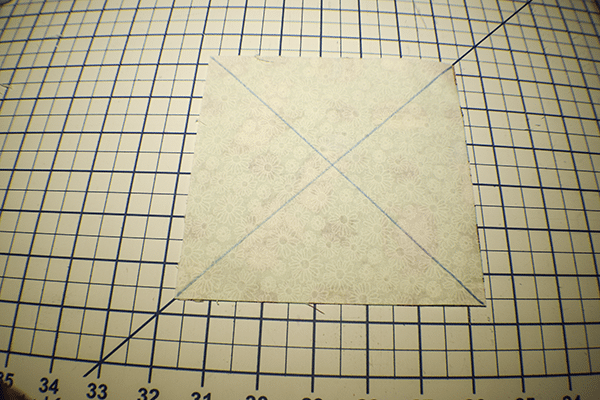
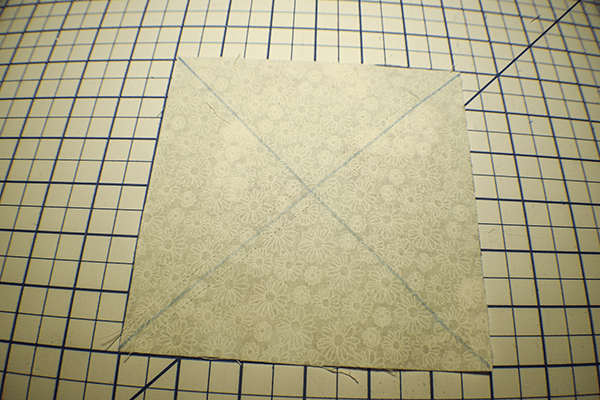
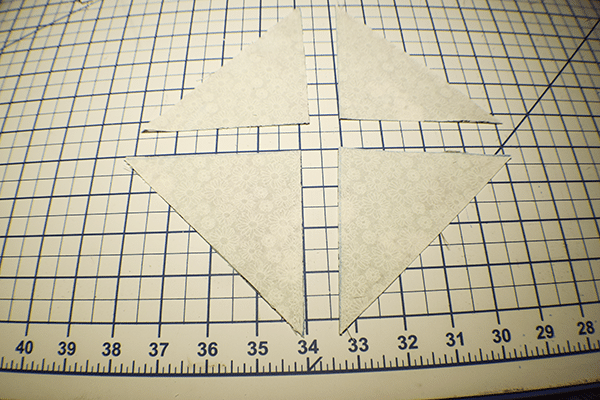
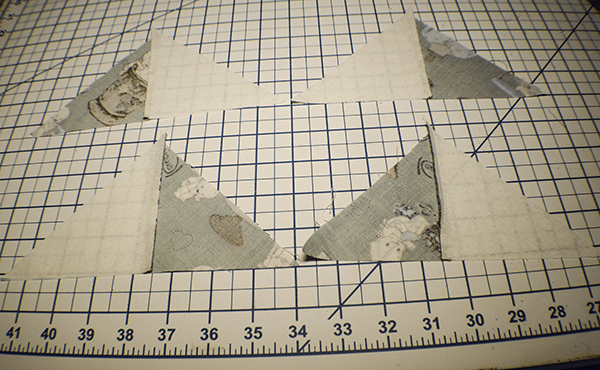
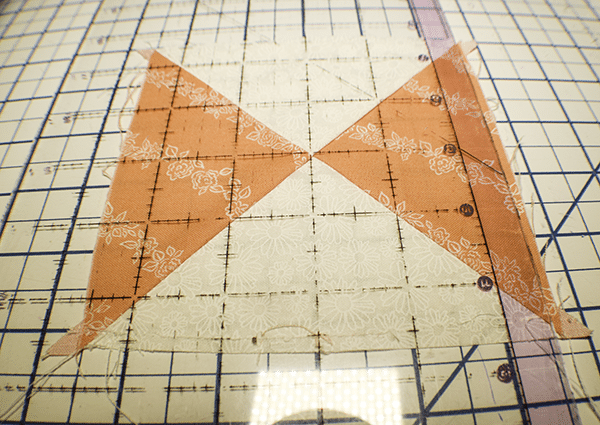
Step 2: Create Half Square Triangles
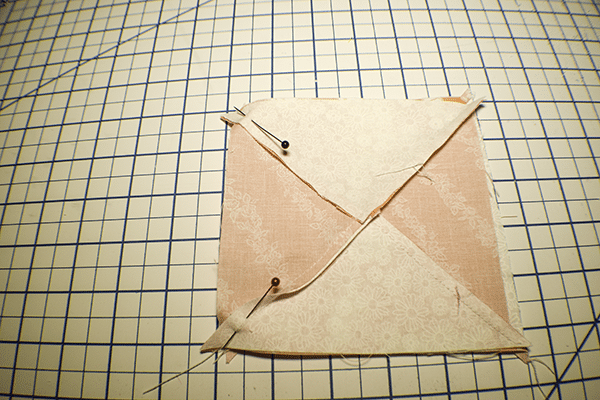
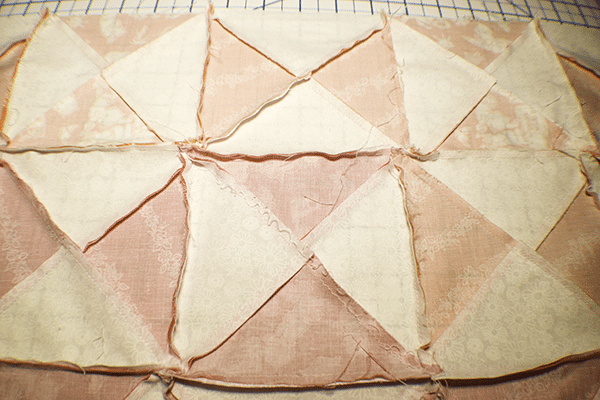
Take a white square and a print square of fabric and place them right sides together. Draw diagonal lines from each corner to the other as shown. Stitch 1/4″ on either side of one of the drawn lines through both layers. Using your rotary cutter and mat cut the pieces along the diagonal line that is not cut between the sewn lines. Abut the pieces together and cut along the diagonal line between the stitching lines. You will now have four half square triangles of alternating fabric. Press the pieces open so that the seams are pressed toward the print side.
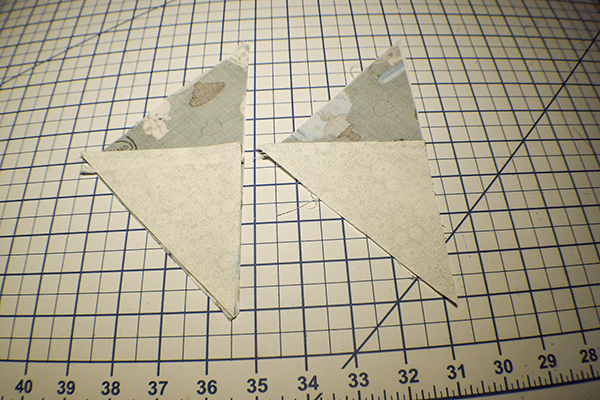
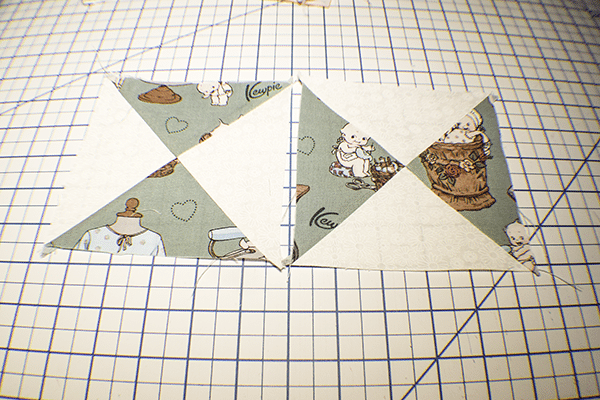
Step 3: Trim the Blocks
Trim the blocks so that they are 5″ square. To do this place your quilters ruler on the center point so that the ruler measures 2 1/2″ to one side of the block. Trim off the excess. Repeat this process for all four sides. Do this for all of your blocks.
Step 5: Create the Quilt Front
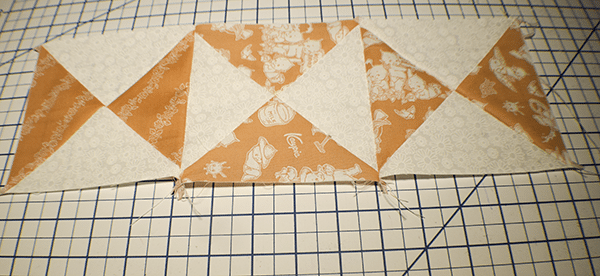
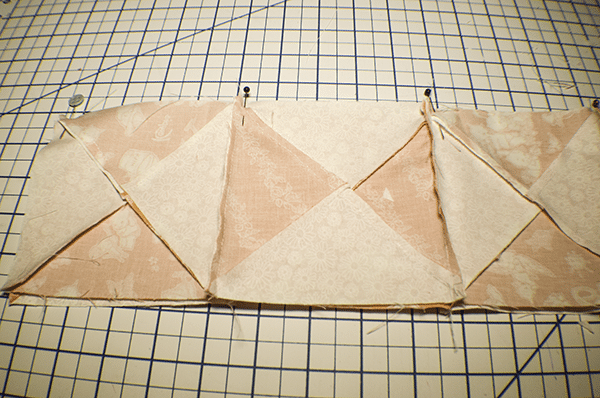
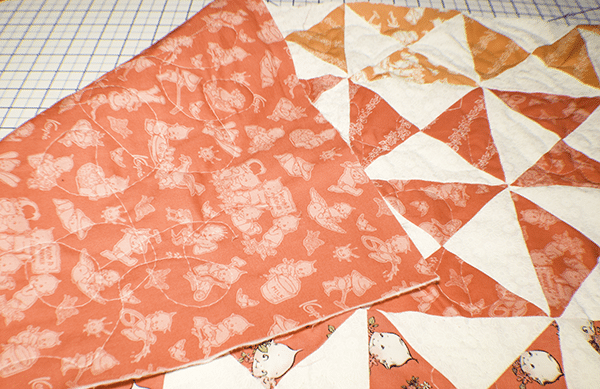
Stitch the blocks together in rows. Start by stitching two blocks right sides together using a 1/4″ seam allowance. Continue adding blocks until you have seven in a row. Create 9 Rows. Press the seams in the opposite direction so that they will nest with the next row. Once the rows have been completed stitch the rows right sides together also using a 1/4″ seam allowance making sure that the seams nest together for a nice finish. If you are unfamiliar with nesting it is the process where the seams that match up are facing in opposite directions. Stitch all the way around the pieced cover to stabilize.
Step 6: Quilt the Baby Quilt
Place the backing wrong sides up on your work surface. Lay the batting on top of the backing then lay the pieced cover onto the batting either by spray basting or pinning. Quilt the pieced cover to the batting any way you like. I just followed the lines of the stitching to make it easier since I am a beginner. Remember the quilting is not the piecing but the stitching to the batting and backing. I stitched 1/4″ lines along both sides of all the seam lines for my quilting. Trim off the excess batting and backing and square up the quilt.
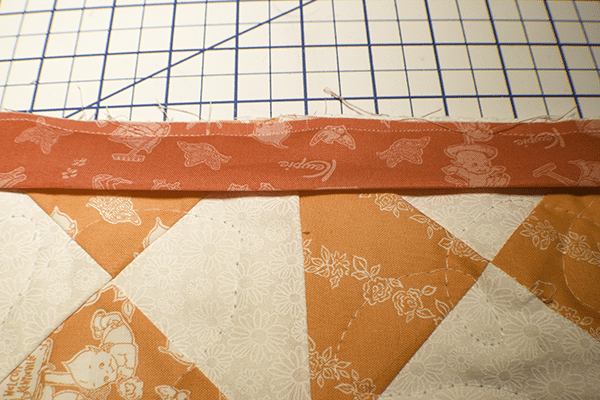
Step 7: Create the Binding
Press the strips in half long ways. Open the strips and stitch the 2 1/2″ strips of fabric together on the bias or on the diagonal. You are going to do this by placing the ends right sides together like a plus sign as shown. Then you will stitch a diagonal from corner to corner to give you a diagonal seam. This prevents bulk in your binding.
Step 8: Add the Binding
I am not going to attempt to describe how to add the binding but am just going to attach this video which demonstrates the process.

I hope you enjoyed this simple baby quilt project. If you would like more sewing and crafting projects sign up for our newsletter and receive access to our free printables library
If you would like videos of some of Sew Very Crafty's most popular posts subscribe to our free YouTube channel here.